APPENDIX 4 – INSTRUCTOR TRAINING · PDF fileCandidates for a coastal instructor...
54
ISAF Learn to Sail Training Programme - Dinghy Appendix 4 53 APPENDIX 4 – INSTRUCTOR TRAINING COURSES RYA Dinghy Coaching G14/05 - Pages 46 to 98 inclusive are detailed on the following pages. IMPORTANT NOTICE Copyright in all the RYA publications referred to is owned by the RYA. No part of the publications may be transmitted, stored in a retrieval system or transmitted in any form or by any means, electronic, mechanical, photocopying or otherwise without the prior written permission of the RYA Further examples of information relating to Instructor Training is available from the Fédération Français de Voile entitled “Handbook Enseigner la voile” and “Le Guide du Formateur” See Appendix 7 – Source Reference Data for details.
Transcript of APPENDIX 4 – INSTRUCTOR TRAINING · PDF fileCandidates for a coastal instructor...

ISAF Learn to Sail Training Programme - Dinghy Appendix 4
53
APPENDIX 4 – INSTRUCTOR TRAINING COURSES RYA Dinghy Coaching G14/05 - Pages 46 to 98 inclusive are detailed on the following pages. IMPORTANT NOTICE Copyright in all the RYA publications referred to is owned by the RYA. No part of the publications may be transmitted, stored in a retrieval system or transmitted in any form or by any means, electronic, mechanical, photocopying or otherwise without the prior written permission of the RYA Further examples of information relating to Instructor Training is available from the Fédération Français de Voile entitled “Handbook Enseigner la voile” and “Le Guide du Formateur” See Appendix 7 – Source Reference Data for details.

46
INSTRUCTOR TRAINING COURSES
ASSISTANT INSTRUCTOR TRAINING The role of the Assistant Instructor is to assist qualifiedinstructors to teach beginners up to the standard ofthe National Sailing Certificate, Level 2 Basic Skills, andthe Youth Sailing Scheme. It follows that the traininggiven should cover the teaching points related toteaching beginners, in the sections starting on pages50 and 67 of this book.
This training may either be given on a specific AssistantInstructor course over about 20 hours, or may beprovided on a one-to-one basis over a longer period ason-the-job training. A suggested programme for aweekend course is given below, the majority of thetime being spent afloat covering how to put across thevarious teaching points for each of the methodsessions.
As this training is related directly to the work of a singletraining centre, it follows that the emphasis is likely tobe predominantly either on double handed or singlehanded dinghies. In providing this training, the Principal or Chief Instructor will have in hismind the role of the Assistant Instructor - helping qualified RYA Instructors. In double handedboats, the Assistant Instructor may act as helmsman in the very early stages of training, andthen encourage the students to take over as soon as possible.
When teaching in single handers the Assistant Instructor's role is often that of helper, rigger,catcher, etc. The training given will reflect this.
Following training, candidates will be assessed on their practical teaching ability withbeginners, according to the criteria given under Instructor Assessment in this Handbook.
Sample programme for Assistant Instructor course
Friday evening Welcome, Introductions, role of the Assistant InstructorOutline of courseBasic principles of instructor technique
Saturday morning Teaching method sessions 1-4 afternoon Teaching method sessions 5-7evening Teaching capsize recovery and man overboard (theory)
Sunday morning Teaching method sessions 8-11afternoon Teaching method session 12
Teaching capsize recovery and man overboard (practical)Debrief
di_001-140_P46 5/6/05 14:42 Page 46

47
THE INSTRUCTOR PRE-ENTRY SAILINGASSESSMENTIn order to be accepted for training at instructor level all candidates have to pass a practicaltest conducted by an RYA Coach/Assessor, not more than one year before instructortraining. The test serves as a filter, because there is no time during the instructor course forcandidates to be taught how to sail well.
It is recommended that, prior to taking the assessment, candidates satisfy themselves thatthey can sail a dinghy confidently to the standard detailed below and have the appropriatebackground knowledge.
During the assessment, which will normally be conducted in a minimum wind speed of 11knots by an RYA Coach/Assessor, the candidate will be judged on his preparation for andexecution of each of the tasks, including awareness of others. The assessment will be madein a boat of the candidate's choice with a Portsmouth Yardstick of less than 1230. If theassessment is conducted in a keelboat or multihull the rudderless sailing section should beomitted.
The assessment may be undertaken during a skills course run by an RYA Coach/Assessor.Candidates for a coastal instructor certificate should undertake the sailing assessment oncoastal waters.
The candidate should be able to complete the following tasks, sailing at all times with anawareness of 'the Five Essentials' i.e. sail setting, balance, trim, centreboard and coursesailed. The Assessor will be seeking to confirm that you can sail competently and confidently,by completing the following exercises.
You will always be asked to complete the following
1 Sail around a triangular course• Each leg of the course will be a minimum of 100 metres
• Use the five essentials
• Close mark rounding
• Allow for tide if appropriate
• Use all the boat's equipment to best advantage including spinnaker if carried.
2 Sail a tight circular course
• Circle less than three boat lengths' radius around a stationary (free floating) boat
• Make only one tack and one gybe
• Sail trim and boat balance/trim suited to the manoeuvre.
The circle should be as small as you can safely make it,but the Assessor will accept that, in doing, this, you might have to leave the centreboard inone position.
3 Sail a follow-my-leader course
The course may include all points of sailing and may be behind another sailing dinghy orbehind a powered boat. The Assessor will be looking for a small, constantly maintaineddistance between you and the boat ahead on all points of sailing. A boat length or less is usual.
4 Pick up a man overboard dummy
• Boat must be stopped dead in the water when you pick up the dummy
sectionFOUR
di_001-140_P47 5/6/05 14:43 Page 47

48
• Pick up at the windward shroud
• Do not tack while you pull it aboard
• More than one attempt should not be needed
You may also be asked to complete some of the following:
1.Sail without a rudder, or with the tiller on a loose elastic
This exercise highlights your appreciation of the five essentials and demonstrates whetheryou understand the effects of variations in sail trim and boat balance/trim.
The Assessor may ask you to sail around a triangular course with the tiller loosely securedusing an elastic loop, or with the rudder raised or removed. You will be expected to makegood progress around the course in a seamanlike manner.
He will expect you to make any modifications to sail area, sheeting arrangements andcentreboard position before you start, so that the whole exercise proceeds smoothly. You willnot be penalised for reefing the dinghy, if conditions are such that it would be seamanlike todo so. In the unlikely event of there being several boats sailing rudderless in any area, theAssessor would expect you to maintain good awareness of the other boats and takeavoiding action early if necessary.
2 Lee shore landing and departure
• Use correct sail plan (jib only if necessary)
• Land in a controlled fashion
• On departure clear the shore successfully in a controlled way on the first attempt
3 Anchor or pick up a mooring - wind against tide (if appropriate)
• Correct sail plan
• Boat should be stopped dead next to the buoy
• Pick up buoy first time
• When mooring buoy is on board, the boat should remain under your control
• Anchoring to take place in the area designated by the Assessor
• Anchoring should be successful on the first attempt
• After the anchor has held, the boat should remain under your control
4 Come alongside a moored boat, wind against tide (if appropriate)
• Approach under control
• Stop alongside on the first attempt
• Remain in control thereafter
di_001-140_P48 5/6/05 14:43 Page 48

49
The choice of exercises above allows for pre-entry assessments being carried out in differentlocations and different conditions. The decision as to which ones are used will be made bythe Assessor, who will be judging your preparation and execution of the task, including thefact that you have an escape route planned.
Throughout this section the phrase 'on the first attempt' should not be taken to mean thatyou cannot make a seamanlike decision to break off at a reasonably early stage and try again.It merely means that once you have become committed to a task, it should be successfullycompleted.
5 Recover a capsized dinghy and sail away
You should successfully right your boat, without external help, in a calm and controlledfashion. Except in the case of gear failure you should need only one attempt. Do be preparedfor this task by checking the boat (loose gear, buoyancy etc) and yourself (clothing, personalbuoyancy) before the event.
Throughout the pre-entry sailing assessment, the Assessor will try to obtain an overallimpression of your sailing ability. As a result, you might technically fail one task and still passthe assessment if he feels you are up to the overall standard required of an RYA Instructor,
Just as you would not approach the driving test in a strange car without having practisedreversing into a narrow opening etc, so you should not attempt the pre-entry assessmentwithout practising all the tasks in the boat in which you intend to take the test.
Finally, please remember that although the pre-entry is likely to be conducted in a double-handed dinghy, the instructor course will include practical work in single handlers. Allinstructors are therefore expected to be capable of sailing the single-handers commonlyused within training centres such as Optimists, Picos, Toppers and Lasers. Any Instructorcandidate unfamiliar with these boats is recommended to gain some experience of thembefore the Instructor training course.
sectionFOUR
di_001-140_P49 5/6/05 14:43 Page 49

50
THE INSTRUCTOR TRAINING COURSEThroughout your training it is important to remember that the RYA teaching methods usedhave been developed successfully over many years. You will be introduced to sometechniques which have become standardised because it is important that RYA instructionshould follow broadly the same pattern in every training centre.
It is equally important, however, that you should not follow certain drills slavishly withoutconsidering in more general terms the task which you are trying to accomplish. Withoutscope for minor variations, there would be no room for development and improvement.
TEACHING BEGINNERS - LEVELS 1 AND 2Whilst there are agreed methods for teaching virtually every aspect of our sport, the part ofteaching which has become widely known as 'The Method' covers the practical techniquesof basic boat handling in the Start Sailing course, Level 1.
Although this course is used on its own as a short 'taster' by many training centres, it alsoforms the first two days of the conventional four or five day beginners' course leading to theaward of the Basic Skills certificate, Level 2. This is the backbone of training provided byalmost every centre.
The standardised teaching techniques enable Instructors to move from one centre to anotherand teach any part of the appropriate RYA course. Students can follow a course at onecentre with a higher level course elsewhere, and the Instructors will know exactly what hasbeen covered and what needs to be taught next.
The Method analyses the various elements that make up the activity of sailing a small boat,splitting each element into simple stages. Emphasis is placed on revision and testing toensure that each stage has been successfully learnt.
It is important for motivation that students succeed at each stage, so the pace of learningand the complexity of the task are adapted to the individual. Students are encouraged towork out solutions from basic premises supplied by the instructor. In educational terms, it isa student-centred method based on experiential learning. When teaching beginners, differentcentres may use slightly different variations of the Method but all retain the basic philosophy.Thus the RYA Instructor should find no difficulty in adapting to local differences or 'houserules' within the basic framework.
The instructor course concentrates on the detail of the Method but you must never forget theoverall aim - to get students sailing safely on their own as soon as possible. Each skill isbroken down into easy steps for learning but, once learnt, those steps should disappearagain as the manoeuvre becomes a continuous flowing action.
A student who, having mastered a technique, then adapts what he has been taught to suithimself should never be criticised because he has departed from the Method for thattechnique. He should be encouraged to move on and learn more.
The following outline of the Teaching Method provides the sequence of sessions and theimportant teaching points. Your course will expand on this framework. When actually usingthe Method to teach beginners, some sessions may well be run together, but it is worthestablishing the principle that after only 20 minutes or so the average student's ability toabsorb information falls off considerably. A short break, followed by revision and informaltesting, makes for much more efficient learning.
Early in your own training you will realise that the Method avoids technical terminology.‘Ropes, seats, push and pull’ are preferable to instructions which are complicated byunfamiliar terms. Your students will be having enough trouble working out what is going onwithout being told to 'sheet out and bear away’. Some nautical terms in common use comeso naturally, however, that they will almost certainly be learnt in the first sessions.
di_001-140_P50 5/6/05 14:43 Page 50

51
FLOW DIAGRAM FOR TEACHING METHOD
PLUS
= Session ashore
= Session afloat
ClothingBuoyancy
aidsGear
Land DrillGoingAbout
TheFive
Essentials
LandDrill For
Gybe
▲
ShoreCapsize
Preparation
sectionFOUR
FamiliarisationJoyride
RigLaunch
Practise Going About
Going ToWindward
OrientationBasic
controls
PractiseFive
Essentials
Down WindPractiseGybing
TriangularCourse First
Solo
FurtherSessions
CapsizeRecovery Drill
▲▲
▼
▲▲
▲ ▲
▼
▼
▼
▲
▲
▲
di_001-140_P51 5/6/05 14:44 Page 51

52
Session 1 AshoreClothing/Footwear/Buoyancy aids/Gear collection
• Warm clothing: wetsuit, dry suit, waterproofs
• Footwear: Wellies, trainers or sailing shoes
• Buoyancy aid: 50 Newtons, correct size, securely fastened, 150 Newtons life jackets fornon-swimmers
• Gear collection: identify each item briefly
Session 2 Ashore or AfloatRigging/Launching
Rigging
• Rig boat quickly
• Involve students
• Explain briefly
• Reef if necessary
Launching and underway
• Don't waste time
• Hoist main
• Ask students and indicate wind direction
Session 3 AfloatFamiliarisation/Joyride
Do not be in too much of a hurry to start instruction but give your students time to absorbthe sensation of being in a sailing boat perhaps for the first time. They should be looking outof the dinghy and not inside, enjoying the new sensation of being afloat. The joyride alsodemonstrates your skill and, by making no demands of your students, allows everyone torelax.
• Interesting, enthusiastic and enjoyable
• Instructor at helm
• Students allocated tasks
• Students balance boat and gain awareness of wind direction
• Short session
• Calm, relaxed and controlled
• Return to shore
Session 4 AfloatOrientation/Basic Boat Control
Orientation
• Point out landmarks and wind direction (particularly after manoeuvres such as tacking)
• Lying-to
• Figure of eight course with tack at each end
• Students take helm with target to aim at
TOP T IP Cold people don't learnand quickly becomeunsafe.Wet clothes speed upcooling.
Keep your students asdry as possible
Learn about obviouslandmarks so you canpoint them out tostudents in aninteresting way
TOP T IP
di_001-140_P52 5/6/05 14:44 Page 52

53
• Instructor sits to leeward and forward of the helmsman
• Instructor hands off the tiller
• Simple instructions such as 'pull it towards you a little'
Demonstrate basic boat controls:
• From lying-to position pull mainsail to turn boat towards wind
• Pull jib in to turn away from wind
• Relate changes in boat direction to the direction of the wind
• Students practise
• Discreetly moving your weight may be necessary to guarantee success
• Effect of raising centreboard
• No-go-zone (the windward sector in which the sails flap)
Session 5 Afloat and AshoreTacking or Going About
This is the first complicated manoeuvre your students will attempt. The learning can bedivided into three sections:
A. The very basic skill of turning into the wind through 180º
B. The skill (developed later) of tacking through 90º while sailing to windward
C. Hints and tips for different situations.
A. The basics - turning into the wind through 180º• Not all students will require a land drill, which is best done on a boat ashore
• Demonstrate at normal speed
The process is as follows:
1. At the start of the manoeuvre the dinghy should be flat.
2. If the sheeting arrangement is from the transom the helmsman changes hands (extension and mainsheet).
3. The turn is initiated by easing the tiller extension smoothly away.
4. As boom nears centreline, helmsman starts to move across boat, facing forwards if theboat is centre main rigged or aft if transom rigged.
5. Helmsman revolves extension away from him forward of tiller.*
* If the extension is too long to pass between the end of the tiller and the centre falls it will have to be swungtowards the stern and over the tiller. This is done by sliding the hand down the extension, swivelling it around,and sliding the hand back to the end.
TOP T IPS Demonstrate controlslying-to. Then todemonstrate goodboat control whilstsailing, balance theboat and sails, thentake your hand off thetiller
sectionFOUR
Whether the dinghy is centre or aft mainsheet rigged the process is still the same
Rotate
PushStraighten
di_001-140_P53 5/6/05 14:44 Page 53

54
6. As boom reaches new leeward quarter helmsman sits down.
7. Helmsman centralises tiller as boat points towards new target and mainsail fills.
8. If the dinghy is centre-mainsheet rigged he changes hands at this point by bringing thesheet hand back across in front of his body to hold both tiller extension and sheet. He takes mainsheet with his front hand and brings extension under arm to front of body.
Teaching the basics of tacking through the windVery few students will absorb all the information listed above in one go. Teach the skills alittle at a time, progressively adding bits in. A ‘teaching summary’ might therefore be:
Before turning
• Check the area to windward
• Warn your crew
Then
1 Ease the tiller away from you, towards the sail
2 As the dinghy turns under the boom, begin to move across tothe other side
3 Extend the tiller arm
4 Sit down on the new side
5 As the sail fills straighten the tiller
Whether the dinghy is centre or aft mainsheet rigged the basic process is the same.
Notes
• At the start of the manoeuvre the dinghy should be flat
• If you are tacking a centre mainsheet dinghy change hands when the tack is completeFace basically forward during the manoeuvre
• If you are tacking an aft mainsheet dinghy change hands before you push the tiller away. Face aft during the manoeuvre
• In some dinghies the tiller extension may have to be rotated over the transom
During the learning period the instructor will be in full control of the dinghy, instructing thecrew and choosing the appropriate time and place to turn. Once the process is masteredthe instructor can pass control over to the student.
The student helmsman will then have to:
• Decide when it is appropriate to tack
• Check area into which he is going to sail
• Warn the crew by calling ‘Ready about’
• As he eases the tiller extension firmly away call 'Lee oh'
Train the crew to take the following action as the dinghy is turned:
• When the helmsman calls 'Ready about' the crew uncleats jib sheet and checks area
• When he is ready, he answers 'Yes' to the call ‘Ready about’
• As the boom reaches the centreline crew takes up slack in new jib sheet and moves across boat
• As the mainsail fills crew sheets in jib
TOP T IP Choose obvious targetsfor studentsto sail towards aftertacking
di_001-140_P54 5/6/05 14:44 Page 54

55
B. Tacking through 90º - the complete manoeuvreThe Teaching Points (not the script) of the full 90º tacking manoeuvre are as follows:
A common fault is to sit down too far back after the tack, thus restricting the amount of roomavailable for the tiller. Make sure your students sit as far forward as possible after the tack.
C. Variations on the Method - different situations There are several variations for centre mainsheet boats in addition to the basic one outlinedabove. Which one is appropriate does depend to some extent on the boat and its equipment.
A common problem is where the length of the tiller extension makes bringing the extensionunder the arm difficult (eg a large adult in a Pico):
• Once settled on the new tack, steering with the front arm behind one’s back, bring the sheet hand across in front of the body to hold tiller extension and sheet as before, but point the thumb away from the end of the extension (frying pan grip).
• Take the mainsheet with your front hand as normal.
• Helmsman faces aft and uses frying pan grip (palm up thumb on top)
• Spare mainsheet towards stern under the tiller
• Boat flat
• Front hand holds mainsheet
• Helmsman checks area into which he is about to sail
• Helmsman says 'Ready About'
• Crew checks and, if clear, answers 'Yes'
• Helmsman changes hands on mainsheet and tiller extension by trapping the mainsheet under thumb of rear hand and picking up tiller extension in fronthand
• Initiates turn by easing tiller extension smoothly away from him, saying 'Lee oh' as he does it
• As boom reaches leeward quarter, crew releases jib sheet
• As boom nears centreline, helmsman starts to moveacross boat, facing aft and moving his front foot first
• Helmsman revolves extension away from him forward of tiller
• Crew picks up new jib sheet and balances boat.
• As boom reaches new leeward quarter, both helmsman and crew sit down
• Helmsman centralises the tiller as the sail fills
• Crew sheets in jib.
Tacking Aft Mainsheet Tacking Centre Mainsheet
• Helmsman faces forward throughout and usesdagger grip
• Helmsman checks area into which he is going to sail
• If clear, calls 'Ready about'
• Crew uncleats jib sheet and checks area.
• When ready, he answers 'Yes'
• Helmsman eases mainsheet slightly and calls ' Lee oh' as he eases the tiller extension away
• As the boom reaches the centreline, he moves intothe boat, back foot first, facing forward
• Crew starts to move across
• Helmsman revolves extension around forward of tiller, moving across boat and still holding mainsheet in old front hand
• Crew takes up slack in new jib sheet and moves across boat
• As sails fill, helmsman sits down on new side,steering with tiller arm behind back
• He centralises the tiller as the sail fills, and brings sheet hand back across in front of body to hold bothtiller extension and sheet, thumb pointing towards end of tiller extension. He takes mainsheet with hisfront hand and brings extension under arm to frontof body
• Crew sheets in jib
• Continue to practise until instruction not required.
sectionFOUR
di_001-140_P55 5/6/05 14:45 Page 55

56
• Finally rotate the extension over the arm and in front of the body, changing to dagger grip as you do so.
Many modern boats have such long tiller extensions that the tiller extension will not fit pastthe mainsheet falls (eg RS400), though this is easier if the student crosses the boat after theboom has moved across. In this case simply slide your tiller hand down the extension as youcome into the boat (preventing over-steering) and rotate the extension around the back of theboat over the transom. After crossing the boat, proceed using one of the methods above.
Session 6 AfloatTacking Practice
After practice the student should be able to sail around a shallow figure of eight course, goingabout at each end, without any help from the Instructor. Don't forget to revise and to test atthe beginning of the session.
• Tack from reach to reach often
• Ensure boat is going fast enough to tack
• Check crew and jib position
• Repeat shore drill if necessary
• Remember that good tacking is based on balance and foot placement
It is important that ‘The Method’ for tacking and gybing can lead toprogressive improvement and refinement. For example, studentswho step across too soon will be unable to roll tack (allowing theboat to roll over and the boom to cross fully before crossing theboat) at a later stage.
Session 7 AfloatGoing to Windward
In fluctuating winds, sailing on a close reach initially will make lifeeasier for your students. Be careful about wind shifts.
• Demonstrate that the sails flap as boat turns towards the wind
• Demonstrate the No-go-zone again
• Demonstrate and explain the concept of beating to windward
• Take the boat downwind
• Hand over to the student and ask to be sailed to a point directly upwind
Many students will now be able to do this unaided so onlyintervene if you feel that it is really necessary.
• Don't worry if the tacking is inefficient
• Use the flapping of the jib luff as an indicator of the edge of the No-go-zone
• Relate progress to landmarks
• Check ability to determine wind direction
• Stress that the angle between the sails and the wind stays the same wherever the boatis pointing.
TOP T IP Sticking to a clear scripthelps a great deal asstudents try to build onthe essentials. A typicalscript for the helmsmanof a modern centremainsheet dinghy mightbe “Stand up. Handup. Straighten up”•Wait for the boom tocross the centre-line ofthe boat, then:•Stand and step acrossthe boat back foot first(Stand Up)
•Raise tiller hand untilextension is vertical(Hand Up)•Centralise tiller to stopthe turn (Straighten Up)
di_001-140_P56 5/6/05 14:45 Page 56

57
Tacking will now be through 90˚ although the novice may tack from close reach to close reachinitially. Therefore a more progressive tack will replace the 180˚ turn.
• Ensure the boat is flat
• Crew bring their weight inboard to initiate turn
• The dinghy will turn towards the wind as it heels
• Steer through the wind but discourage over-steering
• Crew’s feet are brought under the body as the dinghy turns
• The mainsail is eased
• Helm and crew move across together
• The dinghy is brought upright and the mainsail sheeted in
Session 8 Ashore and AfloatThe Five EssentialsThe five essentials contain the core skills required to sail a boat properly
1 Sail Setting
• Restate the point regarding the angle between the sails and the wind
• Simple board sketch or a working model
• Sails should be 'just not flapping'. Ease sails when turning away from the wind and sheet in when turning towards the wind (which will also aid tacking)
• One of the most common faults at this stage is the failure to sheet out when bearing away.
2 Balance
• Sail upright for minimum drag
• Demonstrate afloat how heeling makes the boat turn
• Every rudder movement slows the boat
• Remember ‘Balance affects turning’
3 Boat Trim
• Show trim for different points of sailing. Explain why the boatgoes better close hauled with weight forward
• Remember ‘Trim affects speed’
4 Centreboard
• Demonstrate settings for different points of sailing
5 Course Sailed
• Explain different courses that will take you to windward. If the students are ready, introduce the idea that one course may be better than another because of tide, wind shadows or hazards - all in a very basic form
• Encourage students to make their own decisions based on personal observation.
TOP T IP The Five Essentials shouldform a continuous threadat every level. Commenton all five whatever thetheme of the session.
sectionFOUR
TOP T IP When sailing towindward, the action ofthe jib signals the winddirection.
di_001-140_P57 5/6/05 14:45 Page 57

58
Session 9 AfloatDownwind
• Revise and test all previous work
• Concentrate on the training run
• Demonstrate the action of the jib as the training run turns into a dead run
• Allow plenty of room (wind against tide is ideal)
• Students practise running, turning from a beam reach,through a broad reach to a training run and then back to close-hauled
• Any change in direction requires changes in the Five Essentials
• Avoid gybing but also avoid horror stories about it
• End this session with a smooth controlled demonstration gybe
TOP T IP Sailing downwind, theaction of the jib gives aclear indication of winddirection and shifts (bythe lee, dead run,training run.)
di_001-140_P58 5/6/05 14:45 Page 58

59
Session 10 Afloat and AshoreGybing
Similar to tacking, learning the manoeuvre can be divided into three sections:
A. The basic skill of turning through the gybe
B. The full manoeuvre
C. Hints and tips for different situations
Shore Drills for Gybing
• Explain fundamental difference between tacking and gybing
• Take the fear out of gybing
• Stress the very clear difference in commands – ‘Ready About’ for tacking but ‘Stand by to Gybe’ for gybing which avoids any possible confusion
• Concentrate on smooth and inspiring actions
• During any land drill, what you do is more important than what you say
A The basic process for gybing is as follows1 Helmsman sits forward of the tiller and puts the boat on a training run (jib action)
2 Centreboard is only slightly down
3 Helmsman pulls in mainsheet to bring boom clear of shroud
4 If the sheeting arrangement is from the transom the helmsman changes hands (extensionand mainsheet) and moves towards middle of boat facing backwards taking the tillerextension round and forward towards the other side. If the dinghy is centre-main riggedhe faces forwards as he moves to the centre, but does not change hands
5.The extension swings right around the end of the tiller without the tiller itself being moved
6 In an aft-rigged dinghy the helmsman initiates gybe by smoothly pushing the tillerextension towards where he was sitting and waits for the boom to swing across. If centremain rigged the helmsman also uses the falls of the mainsheet to bring the boom acrosspositively at the right moment
7 As the mainsail clew lifts, the helmsman quickly centralises the tiller so that his weight,the boom and the tiller are simultaneously in the middle of the boat
8 He sits out on the new windward side
9 If centre main he changes hands as outlined in the tacking section
sectionFOUR
Whether the dinghy is centre or aft mainsheet rigged the process is still the same
Rotate
PushStraighten
Training run
di_001-140_P59 5/6/05 14:46 Page 59

60
Teaching turning away from the wind – GybingAs with tacking, very few students will absorb all the information listed above in one go. Itis necessary to teach the skills a little at a time, progressively adding bits in. A ‘teachingsummary’ might therefore be:
Before turning
• Check the area into which you will turn
• Warn your crew
Then
1 Move to the centre of the dinghy rotating tiller extension away from you withoutchanging course
2 Extend the tiller arm
3 Push the tiller smoothly towards where you were sitting
4 Straighten the tiller as the sail begins to come across
5 Sit down and sail away
Whether the dinghy is centre or aft mainsheet rigged the process is the same
Notes
• At the start of the manoeuvre the dinghy should be flat.
• If you are gybing a centre main dinghy change hands when the gybe is complete. Face forward during the manoeuvre. Use the falls to initiate the gybe.
• If you are gybing an aft main dinghy change hands before you stand up. Face aft during the manoeuvre.
• In some dinghies the tiller extension may have to be rotated over the transom.
Notes
• During the learning period the instructor will instruct the crew, choose the appropriate time and place to turn and will be in full control of the dinghy. Once the process is mastered the instructor can pass control over to the student.
• The helmsman will then have to:
Decide when it is appropriate to gybe.
Check area into which he is going to turn.
Warn the crew by calling out ‘Stand by to gybe'
As he pushes tiller extension firmly away call ‘Gybe Oh!’
Train the crew to take the following action as the dinghy is turned
When the helmsman calls ‘Stand by to gybe’ the crew uncleats jib sheet and checks area
When he is ready, he answers 'Yes' to the call ‘Stand by to gybe’
Crew balances boat and sheets in jib
di_001-140_P60 5/6/05 14:46 Page 60

61
B Gybing - summary of the full manoeuvre
A common fault in learning to gybe is to approach the manoeuvre too cautiously, oftencaused by the instructor. Children in Oppies will often gybe in preference to tacking,‘Because it’s easier'. Build confidence and do smoothly inspiring demonstrations:
• Gybe the boat at speed, leading to less pressure on the rig and a smoother turn
C Variations for Gybing• The variations in handling the tiller extension are the same as for tacking
• With long tiller extensions, slide your hand down the extension before the gybe to reduce the angle through which you push the tiller
• Holding the ‘Falls’ of the mainsheet to help the sail across only works with a ‘true’ centre main. Aft/Centre combinations can benefit from a pull on the sheet (e.g. Laser) but will not have the same effect
• Helmsman sits forward of the tiller and puts the boat on a training run
• He checks inside the boat, particularly to see that the centreboard is only slightly down
• He checks around the boat, especially the areainto which he is going to sail and says 'Standby to gybe'
• Crew checks the area and says 'Yes'
• Helmsman pulls in mainsheet to bring boom clear of shroud
• He changes hands on mainsheet and tiller extension
• He says 'Gybe oh' and moves towards middleof boat, taking tiller extension round and forward towards the other side
• Demonstrate that, before the gybe, the extension swings right around the end of the tiller without the tiller itself being moved.
• Helmsman initiates gybe by pushing the tiller extension towards where he was sitting and waits for the boom to swing across
• As the mainsail clew lifts, the helmsman quickly centralises the tiller so that his weight,the boom and the tiller are simultaneously in the middle of the boat
• Crew changes jib sheets and moves to centreof boat.
• He sits out on the new windward side
• Crew balances the boat and sets the jib once it has changed sides.
Gybing Aft Mainsheet Gybing Centre Mainsheet
• The important difference about this drill is thatthe helmsman takes hold of the falls of the mainsheet to guide the boom across,preventing a violent gybe
• Helmsman balances boat as necessary and checks all round - especially area into which boat is turning
• He holds extension in dagger grip and calls 'Stand by to gybe'
• Crew checks area and says ‘Yes’
• Helmsman steps back foot first into the middleof the boat whilst revolving extension over to new side without altering tiller itself
• Helmsman holds falls of mainsheet
• Crew moves into centre of boat and changes jib sheets.
• Helmsman calls 'Gybe Oh', pushes tiller towards original sitting position and guides boom across with falls
• As soon as boom starts to move, he centralisestiller and sits down on new windward side
• Crew balances boat
• Helmsman brings sheet hand back across in front of body to hold both tiller extension and sheet, thumb pointing towards end of tiller extension. He takes the mainsheet with his front hand and brings extension under arm to front of body
• He trims mainsheet and settles down on new course
• Crew trims jib sheet
sectionFOUR
di_001-140_P61 5/6/05 14:46 Page 61

62
Session 11 AfloatGybing Practice
• Consider reefing
• Allow plenty of room (wind against tide if possible)
• Stay calm
• Stress that the mainsail should be as far out as possible (without touching the shroud). In missing this small but significant step students often have problems, especially in themedium and stronger breezes
• Facing straight across the boat when moving to the centre can avoid catching the mainsheet around the head, and encourages looking at the boom. ‘Back foot forwards’ then helps with turning to face forwards
Session 12 AfloatTriangular course /First solo
• Triangular course: lay course with one leg to windward
• Sail with students and then move into the teaching boat
• Give instruction where necessary but avoid shouting from the teaching boat, bring students alongside if necessary
• Remember you are still responsible for the safety of boat and crew
Further sessionsIn the course of the previous sessions students will have left and returned to base on severaloccasions. They can now go on to learn jetty work, man overboard, picking up moorings,coming alongside a moored boat etc with more intensity. You will be in and out of the dinghy,demonstrating particular skills and then watching progress from the shore or an escort boat.When setting courses for students, remember that you need to be able to communicate withthem throughout using some of the skills explained in the singlehanders section.
Awareness of other boats will have been part of your teachingin the early stages. Stress it again now. Discuss 'Rule of theRoad' problems as they occur and your solo crew will be lesslikely to become involved in collisions.
Capsize Recovery DrillCapsize recovery drill will fit into your programme at theearliest practical moment. Weather, water temperature andother considerations will influence your Senior Instructor's decision, but it is generallyagreed that early capsizing is beneficial.
The end of a day's sailing provides the best opportunities for drying clothes, personalbuoyancy and gear. Students are usually apprehensive about capsizing, and thatapprehension can blunt the fine edge of their ability to learn. Once capsizing is over, theylearn quickly and are less worried. You can also send them solo with a clearer conscience.
As an instructor, your responsibility is always to go into the water with your students duringcapsize drill. Right up to this stage, you have been teaching in close proximity to yourstudents and it would seem strange if you now left them to fend for themselves. You cannotadequately control the drill from the escort boat, although it should, of course, be standingby. The drill must go smoothly and calmly to have the desired effect of building confidence.
TOP T IP Once you step out ofthe boat, things can gowrong for the student.Give them time tosucceed.
di_001-140_P62 5/6/05 14:46 Page 62

63
• Always ensure that sufficient rescue cover is provided
• Shore briefing or drill using a dinghy tipped on its side
• Explain the scoop method
• Check personal and boat buoyancy
• Check students (contact lenses, glasses, watches and even false teeth!)
• Consider buoying the top of the mast if your boat inverts easily
• Your Senior Instructor is responsible for selecting a suitable site for the drill, away from hazards but close enough to base for safety and recovery
• You are responsible for tipping the boat over (wild swinging on the shrouds is unnecessary: a brisk tack with the mainsail sheeted well in and the crew staying on the old windward side of the boat should cause a gentle capsize)
• Smile, stay calm
• Direct operations from the bow of the boat so you can see both the person on the centreboard and the crew inside the boat
• Keep encouraging students but keep your physical assistance to a minimum
• The students will be much more confident if they have righted the dinghy without your help
Repeat capsize until each student has succeeded but watch out forexhaustion or hypothermia problems after two or three attempts. It is better to stowthe boat and gear after everyone has changed rather than risk difficulties with the cold,Maintain constant encouragement.
The six steps of the Scoop Method outlined in RYA book G3 for an aft mainsheet dinghy arerepeated here in order to stress certain specific teaching points associated with each.
Step 1
• Both the crew swim to the stern. This reduces the risk of one becoming trapped if the boat inverts
• Helmsman checks that the rudder is secure and not floating off
• Crew finds the end of the mainsheet and gives it to the helmsman who, using it as a lifeline, swims around the outside of the boat to the centreboard and holds it or climbs onto it as necessary to prevent inversion
• Crew then swims along the inside of the boat to the centreboard case.
Following initial immersion, most students are still regaining their breath by the time the crewor helmsman has to go UNDER the mainsheet assembly to get clear round to thecentreboard. Many try to swim over the top and some get their personal buoyancy hookedinto the various floating bits of rope. Warn them of these difficulties.
Step 2
• The crew checks that the centreboard is fully down
• Helmsman holds onto it to prevent the boat inverting.
If the centreboard is not fully down, warn the crew of the risk of injury to the helmsman froman over-enthusiastic attempt to lower it without warning.
TOP T IP Consider free floating indeep water (buoy themast head).Tethers and mooringropes can make nervousstudents feel trapped
sectionFOUR
di_001-140_P63 5/6/05 14:47 Page 63

64
Step 3
• Crew finds the top (weather) jib sheet and throws it over to the helmsman, checks mainsheet is free
• Helmsman confirms that he has it
Confirmation of receipt is often inaudible, especially if the helmsman has failed to achieve it.The centreboard case is a useful slot through which to shout.
Step 4
Crew lies in the hull facing forwards and floats above the side-deck, holding on but takingcare not to prevent the boat from righting.
Many students do not, initially, realise the great importance of this point. Some evendisregard it, believing that they will be safer by hanging on.
Step 5
• Helmsman either lies back straight in the water with his feet on the boat's gunwale and hauls on the jib sheet
• Alternatively he climbs onto the centreboard, keeping hisweight as close to the hull as possible to avoid breaking the board, and hauls on the jib sheet to right the dinghy with the crew member in it
Some find it difficult to get onto the centreboard. Anypreliminary advice, which you can provide, is worth giving.Heavyweights will be able to right the dinghy by the first method. With lightweights, theadvice to keep as close to the hull as possible has to be modified in practice, as their weightis sometimes insufficient to provide the necessary righting moment. Stress the value ofstraight legs and back for maximum leverage.
Step 6
• With the jib backed the dinghy is hove-to and the crew is then able to help the helmsman aboard
• Helmsman may find that he can get into the boat as it comes upright
The right place for the helmsman to be brought aboard is beside the weather shroud.Discuss the option of rolling the boat to windward if you have a lightweight crew and aheavyweight helmsman.
In dinghies with open transoms, it may be more practical to re-enter over the stern. Theproblem with this method is that the boat tends to bear away around the person hanging onto the stern, so speed is necessary.
Further practical sessionsMan Overboard RecoveryUse dummy (fender and tyre), not a real person.
• Regain control immediately and turn onto a beam reach
• Maintain visual contact
• Sail away on beam to broad reach for 10 boat lengths, or enough to get the boat under control
• Tack and point the boat at the MOB
• Check the main will flap
TOP T IP Face away from theboat and throw the jibsheet over your head -it's easier
di_001-140_P64 5/6/05 14:47 Page 64

65
• Bear away slightly if necessary so that final approach is on a close reach
• Spill and fill the mainsail to control boat speed
• Stop to leeward and immediately beside a MOB
• Helmsman goes forward and retrieves the MOB by the windward shroud
• A flick to windward on the tiller helps prevent the boat tacking on top of the MOB, whowill act as a drogue or sea anchor to keep the dinghy in the basic hove-to position
• Repeat with helmsman as MOB, i.e. crew takes control of the boat
If it happened for real, the MOB should shout or whistle to gain attention but not swim aboutor he will rapidly lose body heat. If wearing personal buoyancy with additional oral inflation,he should inflate it, although it may need to be deflated for boarding.
Outline the aftercare needed for a real casualty.
Once your students have mastered the basic principles, encourage more realistic practice bybriefing them that it should be the helmsman who 'falls overboard'. When the dummy isdropped over the side, the helmsman should let go of the tiller and mainsheet, move out ofthe way of the crew and take no further part in the manoeuvre. This results in the crew havingto regain full control of the dinghy and achieves better results.
Coming alongside a moored boat or jetty/picking up a mooring
• Choose approach line and escape route
• Ensure sails will flap
• Drop mainsail if wind against or across tide
• Communication with crew
Teaching racing - Level 2Some Senior Instructors like to finish a Level 2 course by a practical assessment in whichthe students sail around a triangular course. Many centres complete the Level 2 course byorganising a short informal race, thus encouraging students to consolidate their skills andintroducing them to the competitive side of the sport. Assuming that you have covered thebasic rules of the road, the minimum extra knowledge needed by students to complete thissatisfactorily is an explanation of the typical port-hand triangular course and a basic startingprocedure.
TOP T IP Never force people tobe competitive whenintroducing racing toanother course. Allowthem to find their ownlevel of competitiveness.
sectionFOUR
Tack
di_001-140_P65 5/6/05 14:47 Page 65

66
THE USE OF POWERED CRAFT IN ATEACHING OR COACHING ENVIRONMENT
Part of the skill of a dinghy instructor or coach is to be able to teach from apowerboat, which is why Powerboat Level 2 is necessary for dinghy instructorsand club racing coaches.
Always wear the kill cord, attached securely to your leg or waist. If you falloverboard, how else will you ensure that the boat does not hit someone?
Don't shout from a moving powerboat to a moving dinghy unless the taskdemands it (eg coaching a fast moving boat). Instead, tell thestudents to stop and lie-to, before approaching the dinghy slowlyfrom the windward side. Alternatively, overtake the dinghy towindward but on a parallel course. Cut the engine and offeradvice as they sail past. Keep the prop away from people andropes at all times.
A capsized boat should always be approached bow-to(techniques are given in G16 Safety Boat Handbook). Take carewhen approaching the shore to keep clear of people in thewater and avoid damage to the prop.
The Level 2 course will include a knowledge of the basicequipment required. The sailing instructor should add to thisas necessary.
See notes on coaching from a powerboat in the section onAdvanced Instructor Training on page 88
TOP T IP
Always wear the kill cordAlways be aware of the propellerFor coaching orsafety, positioning iseverything
During an incident,count heads firstStop the engine onarrival if there issomeone in thewater
di_001-140_P66 5/6/05 14:47 Page 66

67
TEACHING TECHNIQUES USING SINGLEHANDED DINGHIESIt is no accident that single handlers are so popular. Students are in control of their own boatright from the start. They are continuously at the helm and so cannot fail to benefit bypractising new techniques and learning immediately from their mistakes. The boatsthemselves are simple, light and exciting to sail.
General pointsAdvantages
• Students continuously at the helm
• They learn faster
• Light
• Simple and exciting
• Particularly effective for teaching children
• Inexpensive to run
• Durable
• Low skill level required to succeed in some boats (Laser Funboat, Escape Mango)
Problems• Can be frustrating at first
• Students tire easily
• Communication is harder
• Group control
• Cold quicker
You will be responsible for up to six students, possibly well scattered, at one time. Also,because students are always at the helm, possibly in lively boats, they will become tiredmore quickly.
Sessions should therefore be short and the instructor must always watch for signs of fatigue.Capsize is more likely in a single-handed than in the instructed larger dinghy, so suitablepreparation must be made, as outlined below.
EnvironmentIt is important to put your students in the right environment to achieve the tasks required.
Look at
• Equipment - the right size of boat and sail area for the size of student
• Wind strength
• Wind direction
• Temperature
• Sailing area
• Depth of water
• Starting point (beach/pontoon/bank/slipway)
• Length of sessions (short)
sectionFOUR
Warm and sunny
Sandy beach
Grassarea forsimulatorwork
Shelving slope
di_001-140_P67 5/6/05 14:48 Page 67

68
Group control• Frequent briefings
• Recall signals (whistle and hand signals)
• Awareness of sailing area - diagrams, set course before students go afloat so they can see the boundaries
• Question students to check understanding
• Size of sailing area
• Use of 'buddy' system at first sessions
What if...?Always consider
• What is the worst thing that could happen?
• What changes can you make to cope with this?
Communication• Well thought out and structured briefings (include problems that might occur)
• Size of sailing area
• You should not have to shout to your students
• Students stop the boat and you go to them, or students come to you
• Be aware of the noise from an engine or a sail flapping
• If possible take a spare dinghy and sail with your students
• If students can see tasks they will pick them up quicker than simply being told
• Keep session short
• Good debrief
CapsizeBecause your students are on their own and not very confident, you must point out:
• Righting a boat is easy
• It can be fun
• Wearing the right equipment means they will float in the water
• Demonstration from instructor first to show how easy it is
Even on a hot sunny day your students can get cold, once wet:
• Try to avoid capsize practice until the end of the day
• Try to keep them as dry as possible (consider reefing)
• Land drill where possible
PhilosophyThe basic philosophy of the RYA Teaching Method outlined earlier applies just as much tosingle handed teaching as to conventional techniques, but at any stage you should askyourself two questions:
• What do students already know and what is the minimum they need to know before they can complete the next session successfully?
This should save you unnecessary time ashore and save you teaching irrelevant details.
di_001-140_P68 5/6/05 14:48 Page 68

69
OUTLINE PROGRAMME FOR SINGLEHANDERSThe programme given below is just one of many which have been developed successfully. Itis not intended to be definitive, merely to provide an introduction to the techniques needed.
Think of the timing of your shore sessions. You have to cover a lot. Usually your studentsshould know how to turn, stop and deal with a capsize before going afloat.
Session 1 AshoreClothing/footwear personal buoyancy/gearcollection
• As for basic Method
• Consider dry suits and helmets
• Buoyancy aids are preferred to lifejackets
Session 2 AshoreRigging
• Reinforce wind direction
• Rig one boat first as a demonstration
• Students can rig their own boats
• Check each one before they go afloat
Session 3 AshoreTacking land drill/getting out of irons
• Demonstrate going about
• Reinforce wind direction
• Swing boat through the wind
• Demonstrate tacking using the method (centre main or aft mainsheet)
• Each student should then practise
• The instructor should then correct any faults
• Demonstrate getting out of irons (push/push, pull/pull)
Session 4 AfloatPractise tacking/Beam reach/Starting and stopping
• Boats rigged
• Demonstrate launching one boat
• Instructor demonstrates what is to be done. Remember, actions are more effective than words
• Instructor in the water
• Instructor demonstrates capsize drill
• Check student's orientation is correct
• Before letting go, go through sailing position, startingand stopping, tacking (walk boat through tack)
• Once ready send off on way to buoy
• Talk student through tack
• Talk student back to you, stopping the boat by you
• Once each student has had a go, set up a beam reach figure of eight course
sectionFOUR
Approximately 15 boat lengths
Safety boat availablefor immediate use
di_001-140_P69 5/6/05 14:48 Page 69

70
Session 5 Ashore and afloatTurning towards and away from the wind
• Lay course as shown
• Move buoy further into wind as session continues
• Brief clearly using board or diagram
• Demonstrate ashore or afloat the sail positions as boat turns towards and away from the wind
• Reinforce wind direction at each step
• Use four steps for getting from beam reach to close hauled
• Students practise
• Go afloat one boat at a time to revise session 4
• Move buoy up in stages
• Debrief ashore at end of session
Session 6 Ashore and afloatGoing to windward
• Lay course as shown
• Brief clearly using board or diagram
• Reinforce no-go-zone
• Demonstrate in water or on simulator, effects on sail
• Revise luffing up and bearing away
• Demonstrate
• Send off students one at a time at intervals
• Introduce the Five Essentials to this exercise
Session 7 Ashore and afloatGybing practice
• Demonstrate on land using the method (centre main/aft main)
• Training run
• Dagger board position
• Reinforce Five Essentials
• Allow each student to practise
di_001-140_P70 5/6/05 14:48 Page 70

71
Session 8 AfloatTriangular Course
• Lay course as shown
• Demonstrate to students
• Send students off one at a time at intervals
• Move mark B until AB and BC become training runs
• Avoid dead runs and death rolls caused by sailing by the lee
• Debrief ashore
General comments• Keep sessions short and intensive
• Clear briefings are essential
• Debrief each session
• Lay marks between sessions so your students can see the course before setting off
• Check equipment before the course begins
In ideal conditions, with above average students and good support, Sessions 1 to 8 can becompleted in a single long day. It is far more practical, however, to treat this as two days ofinstruction, which is the usual time taken for an RYA Level 1 course.
Single handers are particularly appropriate for teaching children.
Further sessionsComing alongside
• Same principles apply
• Can only be achieved in wind against tide conditions by releasing the mainsail completely or releasing the clew
Lee shore landings
• Explain when to raise dagger board and rudder and when to ease kicker
• Release clew as soon as possible before recovery
Manoeuvres such as collecting objects in the water, using the MOB technique and sailing upto moorings are good boat handling practice.
If your students are working towards their Level 2 certificate, you now have several days toconsolidate the basic techniques and cover the onshore teaching and jetty work etc afloat.
You will already have used a number of buoys to establish short courses for the earlysessions. Introduce students to the slalom course, which is an ideal compact way ofencouraging tacking and gybing practise. Guidance on how to make up and lay a slalom isgiven in the section on mark laying (page 74).
The following are games to reinforce sailing skills taken from the NSSA publicationSailing Across the Curriculum.
Duck Hunt Catch
With the group afloat or awaiting a Le Mans start on the whistle, the 'ducks' are spread overthe sailing area. The winner is the person or team to collect the greatest number.
sectionFOUR
A
B
C
▲
▲
di_001-140_P71 5/6/05 14:49 Page 71

72
Variation: Award points by 'duck' colour,size or marking. The winner is still the onewith the highest score but this offers a moretactical game.
Teaching points: Going about, gybing,awareness of other boats, avoidingcollisions.
Resources: Plastic containers/half inflatedballoons containing a little water to stopthem blowing away.
Orienteering afloat
As for land orienteering by using buoysmarked with code letters.
Teaching points: sailing on all points of the wind.
Resources: Buoys coloured or marked with code letters.
Tag
One boat is 'it', raises dagger board half way, throws tennis ball at other boats. If it hits, thenstruck boat is 'it', retrieves tennis ball, raises dagger board half-way and chases other boats.Useful to play when using different types of boats - Oppies and Toppers.
Teaching points: Use of centre/dagger board, speed control.
Resources: Tennis ball, large buoyant sponge, buoyant Frisbee.
Relays
Team event to transport baton/piece of equipment/person from one shore to another.
Variations: transport to a boat, race round a slalom course, collect gear required for a task.All of these need very clear instructions about changeover procedures, what and howobjects can be carried, time penalties etc.
Teaching points: sailing accurately on all points of sailing, landing on lee shore, leaving leeshore.
Resources:
Buckets, tennis balls, corks
Rounders
This is not a team game, each boat tries to beat the scores of all the other boats. In turn, allboats come alongside the anchored rescue boat - the base. The 'batting' boat throws a ballin any direction and then sails around the buoys. Each buoy rounded scores a rounder.Fielding boats retrieve balls and either hit the batting boat or return the ball to base.
Teaching points: reaching, coming alongside
Resources: one tennis ball, 4 to 6 boats
Topper race all standing
Race around a triangular course without sitting down in the boat (tack by walking around themast or by stepping between boom and sail foot; gybe by stepping around sail clew).
Teaching points: Boat balance and trim
Resources: Three buoys
di_001-140_P72 5/6/05 14:49 Page 72

73
Treasure Hunt
Mix clues both onshore and on-the-water. Have each team follow a completely differentorder of clues. End with a picnic or barbecue when the 'treasure' is discovered. (Have sometreasure for everyone, not just the first team). Add to the fun with pirate costumes!
Teaching points: Accurate and fast sailing, team building.
Resources: Laminated clue sheets, face paints, box of dressing up clothes, 'treasure'.
More advanced techniquesThe majority of teaching in single-handers is aimed at beginners, covering Levels 1 and 2 ofthe RYA National Sailing Scheme. Much of the content of Seamanship Skills courses -concerned with traditional boat handling skills - is inappropriate to single-handers but thesame cannot be said for racing techniques.
Single-handers are popular for teaching many aspects of the Start Racing course, as theirsimplicity of handling allows helmsmen to concentrate on learning and practising the skills ofstrategy and tactics. Many of the exercises used are concerned with improving boathandling techniques and as such are valuable to all students who have mastered the basicskills of sailing.
ConclusionTry to maintain an atmosphere of controlled excitement during training. The boats areexciting in themselves but it is up to you to keep the students occupied and learning all thetime.
Remember that the programme above is just one of many which have been developedsuccessfully over the years. Another aimed specifically at younger children is outlined in theClub Guide. Although children may be more adept at developing new skills, their attentionspan may be much shorter and so the same techniques are covered over a longer period,interspersed with other activities.
There is no single 'right' way; each club or centre will develop its own programme best suitedto its needs. All, however, will follow the same broad philosophy of training.
sectionFOUR
di_001-140_P73 5/6/05 14:49 Page 73

74
MARK LAYING FOR SHORT COURSESWhen running single-handed, improvers or racing sessions, you will need to lay a successionof short, easily moved courses. To avoid problems, remember the following points:
• Keep marks as simple as possible
• Avoid complicated systems with blocks and weights; Sinkers are cheaper and less trouble than anchors
• Always lay marks over the windward side of your teaching boat.Have the warp flaked ready, with the sinker on top ready to go. Retrieve marks in the same way
• Reflake neatly as you haul in
• Lay a warp only just longer than the depth of water
• Don't use warps which float (polypropylene)
• A range of marks of different colours makes identification easier
• Carry a burgee or wind indicator as an aid to laying accurate courses relativeto the wind
• Carry a compass to aid laying precise course angles
• It is sometimes easier to lay a mark in approximately the right place, and then tow it into its exact position. Sinkers make this easier than anchors
• Have a simple communication system if working with a mother ship or committee boat
• Don't be afraid to move a course after large wind shifts
Slalom coursesSimple slalom courses can be used by almost every group of students for concentratedpractice. The most rudimentary system is simply a number of buoys, laid individually, eachwith their own sinker.
Laying this requires considerable work, especially in deep water, and means even more workafter large wind shifts. It is far better to make up a linked system using a long ground line anda number of risers, each one with a buoy.
In non-tidal waters each ground line needs only one anchor, laid at the windward end of theslalom, but in wind against tide or wind across tide conditions, the ground line will have tobe anchored at each end. The length of each riser need only be slightly greater than themaximum draught of your fleet (including the teaching boat), with a small weight at thebottom to keep the riser vertical and the ground line low. A quick release system for attachingrisers to the ground line makes it easier to modify the slalom - altering the distance betweenbuoys according to weather conditions, students' abilities and the type of training The mostcommon arrangement for slalom buoys is shown in the diagram. It can be used as a 'funnel'for repeated tacking, with the wing mark set to keep boats clear of the slalom when headingback to the start.
Exactly the same layout serves for downwind practice, but the intention here is that studentsshould gybe around each buoy in turn. It is conventional to put the wing mark on thestarboard side of the course this time, in order that students will be approaching the top ofthe slalom on starboard tack.
To lay this course you will need two of the downwind strings of buoys described above,together with the isolated wing mark. It takes a certain finesse to get the mark spacingcorrect relative to the students' abilities.
di_001-140_P74 5/6/05 14:49 Page 74

75
It is impossible to be dogmatic about how many boat lengths' separation are needed fordifferent abilities - it's probably better to define the spacing as enough to allow the studentto recover from the manoeuvre of rounding one buoy, settle down and plan the next roundingbefore he has to do it. Anything less than about four boat lengths is going to be counter-productive even for the most experienced sailor, as the boat will have to be thrown into themanoeuvres without any planning or style.
If the double string is too complicated, you can still achieve a great deal with a single slalomline. All it takes is a little more self-discipline by the student to ensure that he does tack orgybe at each buoy as appropriate.
By alternating the colours of the buoys in each string, you can build in different levels of ability;stage one is simply to use all the buoys of one colour; stage two is to use all the buoys.
The final development is to lay a slalom consisting of a double string narrowing down to asingle string, with the spacing getting progressively narrower.
sectionFOUR
Side elevation of slalom Plan view of slalom
di_001-140_P75 5/6/05 14:50 Page 75
76
TEACHING THE ADVANCED MODULES IN THENATIONAL SAILING SCHEME
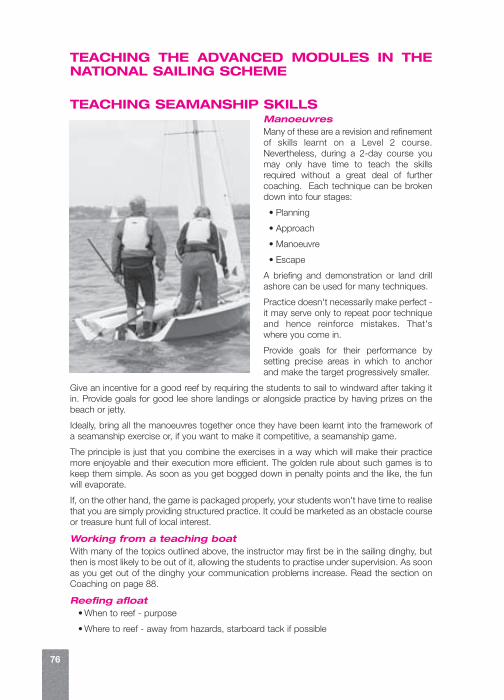
TEACHING SEAMANSHIP SKILLSManoeuvresMany of these are a revision and refinementof skills learnt on a Level 2 course.Nevertheless, during a 2-day course youmay only have time to teach the skillsrequired without a great deal of furthercoaching. Each technique can be brokendown into four stages:
• Planning
• Approach
• Manoeuvre
• Escape
A briefing and demonstration or land drillashore can be used for many techniques.
Practice doesn't necessarily make perfect -it may serve only to repeat poor techniqueand hence reinforce mistakes. That'swhere you come in.
Provide goals for their performance bysetting precise areas in which to anchorand make the target progressively smaller.
Give an incentive for a good reef by requiring the students to sail to windward after taking itin. Provide goals for good lee shore landings or alongside practice by having prizes on thebeach or jetty.
Ideally, bring all the manoeuvres together once they have been learnt into the framework ofa seamanship exercise or, if you want to make it competitive, a seamanship game.
The principle is just that you combine the exercises in a way which will make their practicemore enjoyable and their execution more efficient. The golden rule about such games is tokeep them simple. As soon as you get bogged down in penalty points and the like, the funwill evaporate.
If, on the other hand, the game is packaged properly, your students won't have time to realisethat you are simply providing structured practice. It could be marketed as an obstacle courseor treasure hunt full of local interest.
Working from a teaching boatWith many of the topics outlined above, the instructor may first be in the sailing dinghy, butthen is most likely to be out of it, allowing the students to practise under supervision. As soonas you get out of the dinghy your communication problems increase. Read the section onCoaching on page 88.
Reefing afloat• When to reef - purpose
• Where to reef - away from hazards, starboard tack if possible
di_001-140_P76 5/6/05 14:50 Page 76

77
• How - order of events, co-ordination between helm and crew
• How much - appearance of reefed sail, i.e. efficient shape, boom not drooped, no wrinkles, kicking strap still effective
• Genoa changed to jib and centreboard raised slightly if necessary
AnchoringBriefing ashore
• Type of anchor and selection of suitable anchorage
• Nature of bottom
• Shelter
• Depth (changes with tide)
• Length of warp
Afloat• Approach on close reach or against tidal stream
• Drop main if wind against tide
• Lower anchor when boat stops
• Pay out warp
• Check holding with transits
• Stow sails.
Being Towed By A Powerboat• Good communication
• Approach
• Pass tow line
• Drop mainsail
• Secure towline
• Bridle/strong points
• Quick release system
• Being towed alongside
• Springs
• Being towed stern first
• Centreboard up
• Crew weight aft
• Steer if possible.
sectionFOUR
di_001-140_P77 5/6/05 14:50 Page 77

78
Sailing without a rudder, or with an elastic loop over the tiller• Raise centreboard to 3/4 down
• Rudder can be raised rather than removed, alternatively elastic loop is thick but loose allowing some tiller movement
• Jib in, main out to bear away
• Main in to luff up
• Boats usually have slight weather helm when both sails filling
• If rudder raised keep weight forward
• Heel to windward to bear away
• Heel to leeward to luff up
• Slow movements across the boat
• Can be easier if jib sheets tied together and mainsheet reeved as a simple purchase
• Following gybe keep jib to windward until settled on new course to prevent spinning
Sailing without a centreboard• Explain the underwater shape of the dinghy
• Discuss lateral resistance and how this can be increased by moving the crew weight forward
Sailing Backwards• Explain the context, which is usually escaping from a crowded mooring
• Centreboard at least half down
• Explain the need to bring the dinghy head to wind
• Push the boom so that the sail backs
• Explain the importance of steering by looking backwards (the dinghy follows the direction that the rudder is pointing)
Road Trailers and Towing• Discuss security of dinghy on road trailer
• Discuss towing regulations (lighting, speed restrictions, number plate visibility etc.)
di_001-140_P78 5/6/05 14:50 Page 78

79
TEACHING DAY SAILING SKILLSNavigation
• Dinghy navigation is really pilotage
• You cannot do detailed chart work in a dinghy
• Pre-planning is essential
Charts• Chart datum
• Measuring distances from latitude scale
• Soundings
• Drying heights
• Heights above mean high water springs
• Conspicuous features, lighthouses, headlands etc
• Common hazards, rocks, wrecks, overfalls etc
Compass• Compass rose
• Variation - corrections
• Awareness of deviation
Tide tables• High and low water
• Correction for BST
• Springs and neaps
• Rule of twelfths/percentage rule
Food and drink• Suitable clothing
• Harbour regulations
• Avoiding shipping
• Where to moor or beach at destination
Planning and Pilotage• Sailing a passage, which has first been planned
• Consideration of tide and weather conditions, traffic etc.
• Use laminated charts and chinagraph pencil
Pilotage is usually a visual exercise rather than sailing for long distances on a compassbearing. If you know where you are, with a chart and compass you should be able to identifywhere to go next.
• Courses and distances on chart
• Sail on transits to avoid being set sideways by tide
• At known positions eg buoys, confirm position or alter course
sectionFOUR
di_001-140_P79 5/6/05 14:51 Page 79

80
Emergencies• Pin point red flares
• Orange smoke flares
• Combined day/night flares are also a possibility
MeteorologySources of weather information
• Television/Radio - shipping forecast, local forecast (details in nautical almanac)
• Weather fax/text forecasts by mobile phone/telephone
• Internet and email forecasts
• Newspapers
• Coastguard
• Harbour master
Terms used in shipping forecasts
• Beaufort scale
• Backing and veering
• Good, moderate and poor visibility
Weather patterns
• Rapid barometric change usually indicates strong winds
• Anticlockwise wind circulation around lows
• Clockwise wind circulation around highs
• Warm front - lowering cloud, decreasing visibility, drizzle, south west winds
• Cold front - veer, cooler, north west wind, clear, showery
• Sea breeze - air over warm land rises, cool sea, air drawn ashore
• Fog - advection: warm air over cool sea, or radiation: land cools
Observation afloat
• Squalls
• Gusts
• Approach of low pressure - cirrus clouds, hazy sun
Decision Making
• Planning for difficult conditions
• Alternative destinations
• The effect of wind and tide on sea conditions
di_001-140_P80 5/6/05 14:52 Page 80

81
TEACHING SAILING WITH SPINNAKERSSpinnaker hoistsThere are a number of ways to hoist the spinnaker, depending on the situation.
Conventional spinnaker - Leeward hoist (or spinnaker chute hoist)• Crew puts pole on
• Helm hoists spinnaker and balances boat
• Crew takes the guy and cleats, then sits on windward side deck
• Helm sits to leeward
• Crew takes sheet and adjusts as necessary
Conventional spinnaker - Windward hoist• Crew gathers spinnaker up into a ball and checks that the spinnaker guy is free
• Crew throws the spinnaker forward and the helm hoists quickly
• Communication is very important, otherwise the spinnaker will end up under the bow of the boat
• Crew puts pole on whilst helm plays the guy and the sheet
• Crew takes the guy and sits to windward
• Helm sits to leeward
• Crew takes the sheet and adjusts as necessary
Asymmetric spinnaker - hoist• Helm bears away until the boat is in the hoist/drop zone, i.e. broad reach
• Crew pulls pole out
sectionFOUR
di_001-140_P81 5/6/05 14:54 Page 81

82
• Helm adjusts pole alignment if necessary(RS400 etc]
• Crew hoists spinnaker
• Helm luffs as crew sheets in
• As the boat accelerates the helm bearsaway and the crew eases the sheet
• Communication paramount to keep theboat achieving maximum VMG (velocitymade good) i.e. sailing as low as possiblebut not losing the increased apparent windstrength, which enables the boat to sail low.
Spinnaker gybingAgain, there are a number of ways to sharejobs during the gybe
Conventional
• As the helm bears away the crew releases the guy and pivots the spinnaker around to windward
• Helm gybes the mainsail
• Crew stands up and swaps the pole to the new side whilst the helm balances the boat and plays both the guy and sheet
• Crew takes over the guy and sits on new windward side, helm sits to leeward
• Crew takes sheet and adjusts as necessary
• On a run to run gybe, helm may control the spinnaker andthe crew gybe the main with the kicker
Asymmetric
• Choose a good place to gybe when the boat is travelling fast (down the face of a wave) and in clear water
• Helm may centralise pole
• Helm bears away and gybes the main, steering carefully throughout the manoeuvre
• Whilst the helm is bearing away the crew gradually eases the sheet to assist the spinnaker to slide through the slot in front of the jib, then releases the old sheet and pulls quickly on the new sheet
• Helm re-aligns the pole (RS400 etc)
• Helm will probably have to luff slightly to pick up the apparent wind and then bear away as the boat speed increases.
• Crew eases sheet as boat bears away
W
di_001-140_P82 5/6/05 14:55 Page 82

83
Spinnaker dropBag
• Crew hands sheet to helm to play whilst pole is being removed
• Crew takes the pole off the mast and then off the spinnaker clew and then stores it
• Helm releases spinnaker halyard and crew pulls the spinnaker down on the windward side, working up the leech first and then along the foot (this reduces the chance of the spinnaker twisting on the next hoist)
• Meanwhile the helm is looking ahead ready for the mark rounding
Asymmetric
• Crew either hands sheet to helm to play or stands on it (this enables the spinnaker to be kept flying for longer, keeps the boat moving faster and keeps the spinnaker out of the water during the drop)
• Crew pulls in excess retrieval line (to stop spinnaker going under the bow and to speedup the drop)
• Crew uncleats pole outhaul and halyard and pulls spinnaker down by retrieval line
• As this is happening, the helm releases the pole alignment controls (if applicable), balances the boat and looks ahead ready for the mark rounding.
Design and PerformanceFat deep hull shapes tend to be slow (Wayfarer, Enterprise), though boats with a lot of rockertend to sail fast and cleanly in waves, and be easier to launch through waves (Scorpion). Skifftype hull shapes would basically skim rather than plough and need to be light in weight toassist planing (29er, RS800). Once planing, they sail fast downwind, requiring accurate andsmooth helming. Sailing fast downwind reduces pressure on the rig, so they can be easierto gybe.
Sails with full length battens (RS400) produce a lot of power but can be hard to read and donot de-power easily, so it can be difficult to stop the boat or control it ashore. Boats with aconventional spinnaker can sail directly downwind. In contrast, those with asymmetricspinnakers zigzag downwind, sailing at higher speeds but travelling further. Intermediate skiffdesigns (RS400, Laser 4000) often have spinnaker poles which ‘cant’ to windward, enablingthem to sail deeper downwind than would be possible with a fixed pole.
sectionFOUR
di_001-140_P83 5/6/05 14:56 Page 83

84
THE INSTRUCTOR COURSEMODERATION/ASSESSMENT
Following the five days of your Instructortraining, your course will be moderated byan RYA Coach/Assessor to confirmwhether you match up to the qualities of anRYA Instructor outlined at the beginning ofthis handbook. The purpose of themoderation is also to ensure that RYAInstructor courses are run to the correctstandards as specified by the RYA.
The moderation will usually take placeimmediately after the training course, butthere are some advantages in delaying ituntil you have had time to put all the theoryof instructional technique into practice. Ifyour training Coach feels that you are notyet ready for assessment immediately aftertraining, he will probably recommend thatyou wait until you have brushed up onsome of your techniques or gained moreconfidence from assisting qualifiedinstructors.
Before the moderation starts, the Assessor will agree with you a plan for the day, so that youcan show evidence of your competence in instructional ability afloat and ashore. The specificitems involved are: practical instruction afloat, a prepared teaching activity, shore drills andwritten paper, although for convenience the paper may have been given during the trainingcourse.
If you feel slightly apprehensive about the moderation, try to think of the Assessor as both adetective and a judge. You stand accused of being a competent instructor - the Assessor'sjob is to gather enough evidence to get a conviction! In other words, you should be workingtogether to ensure that your ability exceeds the minimum standard set, so that in turnstudents on RYA courses can be sure of receiving accurate instruction in a safe, enjoyableenvironment.
Practical instruction based on RYA teaching methodsWhenever possible, this will be done with beginners. The usual arrangement is for a groupof people to be brought in specifically for you to teach, and it is very important that they areproperly briefed on their role.
It is also likely that the Assessor will have to play the part of a beginner or an improver atsome stage in the assessment, so that he can test your teaching over a range of skillsproperly. When this happens, he will explain the role he is going to play and the ability, whichhe has. If you are in any doubt about his briefing, please ask him to explain further.
The Assessor will be looking for• The ability to plan the session according to the needs of your students
• A friendly, supportive manner towards your students, from their arrival to departure
• The boat rigged according to weather conditions and the abilities of your students
• Adequate boat control at all times
di_001-140_P84 5/6/05 14:56 Page 84

85
• Teaching according to the methods outlined on your course and in this book, progressing according to the students' abilities
• Correct positioning of instructor and students
• Successful demonstrations and clear explanations
• Correct diagnosis and tactful correction of students' faults.
• Use of lying-to position for crew changes and briefings
It is far more natural for you to be teaching beginners than for another instructor or theAssessor to play the role of a student, but if the latter is necessary the Assessor will takeaccount of the false situation.
When beginners are used, the Assessor will also be assessing you through their reaction,looking for the three key factors, which are important for successful teaching:
• Are the students safe?
• Are they learning anything valuable?
• Are they enjoying themselves?
No particular weighting is put on any one of these three, as they are inter-related. The goodinstructor is the one who meets each of these goals all the time.
Prepared 10 minute talk/training activityThe Assessor will not expect you to be a professional lecturer or a polished orator; in factthe title of this part of the assessment is deliberately chosen to allow a practical bias. He willbe looking for the following:
• Overall format clear - introduction, development and summary
• Audible, interesting voice - right speed of presentation
• Accurate, relevant content - sufficient material but not way beyond the demands of thesyllabus
• Essential points emphasised and summarised
• Teaching aids prepared and used as appropriate
• Difficulties discovered and explained
• Questions prompted and answered
The most common faults of nervous, inexperienced instructors are to try to cram too muchdetail into the time available and then rush through it by speaking too quickly. During yourpreparation, remember to split the content up into:
• What must be covered
• What should be covered
• What could be covered
Then rehearse to see how it fits into the time available. You can then edit the talk by cuttingout or shortening some of the less important detail.
Practical demonstration of shore drillsThe assessor may expect you to cover tiller extension drills for aft and/or centre mainsheetdinghies. Before doing so, he will have discussed with your training Coach the techniquesused during the course, in case there are any local differences from the drills outlined in thishandbook.
sectionFOUR
di_001-140_P85 5/6/05 14:56 Page 85

86
The Assessor is not trying to catch you out by minute attention to detail, but he will belooking for:
• A brief explanation of why drills are used
• Adequate preparation (and explanation) of equipment
• Good positioning of students
• Clear accurate demonstrations, both at normal speed and slowly with commentary
• Ability to identify and correct students' faults
The written paperAlthough the written paper forms part of your assessment as an RYA Instructor, it is includedunder the 'training' part of the course as a practical necessity. It is difficult enough for thevisiting Assessor to conduct all the practical parts of the assessment in one day, let aloneinvigilate and mark a written paper.
Conventionally, it will be scheduled into the programme towards the end of the course, andit is designed with two objectives in mind. The first is to confirm that there are no large gapsin the background knowledge of the subjects you are intending to teach; the second is toprovide an assessment of those areas of teaching, which cannot realistically be covered bypractical assessment.
Literary or artistic excellence is not required, but you will have to prove that you understandboth the facts and how best to put them across. The paper should not be seen as a testof literacy and may be completed in other ways.
Overall assessmentIt is usual for a number of candidates to be assessed on the same day and this will result insome time when you are not directly under the attention of the Assessor, but he may still bekeeping a distant eye on your work.
Throughout the moderation, in addition to considering the detailed points outlined above,the Assessor will be making an overall (or holistic) judgement, based on the criteria andmeasured against his experience of the sport. The qualities sought can be summarised as:
• Enthusiasm for the sport
• Confidence in the subject
• Teaching ability
• Awareness
• Anticipation
At some point, often at the middle of the day, he will seek comments from the trainingCoach, who has been monitoring your progress throughout the course and so has a goodidea of your ability. This will help the Assessor to take account of any particularcircumstances on the day.
The Assessor and training coach will review your performance with you. This debrief mayinclude several more questions, to ensure that you have sufficient understanding of differentaspects of work as an instructor.
Finally, the training Coach and Assessor will confirm whether or not you have yet proved yourcompetence as an RYA Dinghy Instructor, complete the necessary paperwork and agree anaction plan with you for the future. Such a plan will help you to overcome any gaps in yourknowledge or ability, if for some reason you are not entirely successful in the assessment.
If you disagree with the decision, he will discuss the way in which someone else can re-assess you, or the procedure for appeal to the RYA.
di_001-140_P86 5/6/05 14:56 Page 86

87
ADVANCED INSTRUCTOR TRAININGThe Advanced Instructor must have the background knowledge, technical ability and skillsto demonstrate any of the Sailing with Spinnakers and Performance Sailing courses.Teaching people how to sail performance dinghies requires a subtle change in the attitude ofthe Instructor. There are many different skills to learn from a coaching point of view. Whilemany people will wish to receive coaching or instruction in race standard Wayfarers orGP14s, many of the newer boats will be a lot faster, so adapt your coaching style to suit.While your students will know the basic skills required to get the boat from A to B, you haveto be able to analyse their performance, give positive feedback and coach themprogressively. It goes without saying that you must be confident in sailing the dinghies inwhich you are coaching.
There are a number of areas where the Advanced Instructor will focus.
Briefing.The briefing is vitally important because high performance dinghies could be spread out overa far larger area than a fleet of Toppers. Make certain of your briefing:
• Clear and concise (use pictures and diagrams)
• Safety and recall signals understood by everyone
• The session aims are clear
• The learning objectives are clear and understood by all students. This is especially important in a group of mixed ability
• The sailing area is suitable for the purpose of the session. Downwind sailing in a breeze will require much more space than roll tacking practice in light winds
• Use bullet points and don’t waffle
• Use effective questioning to make sure everyone understands what is going to happen on the water
• Don’t try and cover too much in each session - concentrate on “bite size chunks”
Land DrillsDue to the nature of the dinghies and the subject matter involved, the use of land drills ishighly recommended. See the notes on land drills on page 26
Boat Set UpThis will include general principles and use of rig controls
Boat HandlingIncluding use of symmetric and asymmetric spinnakers, trapezing and safety
CoachingCandidates will be encouraged to develop a positive but relaxed style, which bringsabout improvement in those being coached
Use of the PowerboatSafe and effective driving and positioning for coaching and safety
Advanced Instructor candidates are referred to the relevant chapters of theAdvanced Handbook G12 for more information
sectionFOUR
di_001-140_P87 5/6/05 14:57 Page 87

88
Exercises which can benefit from land drills include:
• Spinnaker hoists, gybes and drops
• Trapeze work
• Sail setting and sail controls. This is also an excellent way to make sure that all dinghies are set up correctly for the conditions
• Tacking and gybing practice
Demonstrate and then give the students time to practice, using positive coaching all the time.Take care that no one will get hurt falling off a trapeze or falling out of a dinghy whilst droppinga spinnaker etc
DemonstrationsThe use of demonstrations is a valuable tool in the Advanced Instructor’s armoury. This iswhy it is of paramount importance that you as the Instructor can competently sailperformance dinghies. Areas of coaching that benefit from demonstrations include:
• Tacking and gybing
• Mark rounding
• Spinnaker hoist, gybe and drop
CoachingEffective coaching whilst on the water is one of the mostimportant aspects of becoming an Advanced Instructor. Theability to assess the performance of a dinghy or student andmake a valid contribution to their improvement is fundamentalto your role.
• Be effective. If you don’t have anything useful to say, don’t say anything!
• Be positive. Sailing is fun
• Keep it short and simple (KISS). Don’t overload your students
• Try and reduce stress levels, people perform much better if they are relaxed
• Be precise and don’t waffle. Tell them exactly how to improve. For clarity use the same words as you used when briefing where possible
• Don’t try and shout across an expanse of water, get them to stop and come alongside – it saves time in the long run
• Make notes whilst on the water to assist your debrief
Use of the PowerboatThe best strategy is usually to float free or anchor, calling boats over for input. However youmay wish to observe and coach boats sailing at high speeds. Constant vigilance is essential.The ability to drive a powerboat well and control its position in relation to a fast moving dinghyis a skill that only comes with practice. Whilst on the water, even though you may have halfa dozen boats in your group, you will often be working in a one to one scenario and thenmoving on to the next boat whilst the others practice.
Specific points regarding coaching from a moving powerboat:
• ALWAYS have the kill cord attached to you. A RIB travelling at speed with no driver is extremely dangerous
• Can they hear you? Get close and give clear and concise instructions
TOP T IP Try not to shout,particularly upwind
di_001-140_P88 5/6/05 14:57 Page 88

89
• Safety – downwind position your powerboat just to windward and level with the dinghy’s transom. If someone falls overboard, will you avoid them? If going upwind youmay be just to leeward, so you are clear if the boat tacks
• Most performance dinghies are not easy boats to stop and lie-to, so draw clear diagrams or instructions on a white board for the students to see as they sail past.
• If alongside a boat with racks or wings rest the wing on the side of the powerboat. This is sometimes called the “secure lie-to”
• Types of powerboat – most performance boats are fairly fragile so RIBs with console steering are the best choice.
• Positioning yourself relative to the group. Depending on the session you will need to position your coach boat in the correct place to enable effective coaching. These are:
1Tacking exercise; coach boat to leeward of the fleet
2Gybing exercise; coach boat to windward of the fleet
3Windward mark rounding; coach boat to windward of the mark
4Leeward mark rounding; coach boat to windward of the mark or use coach boat as theleeward mark
5Trapezing, spinnaker work or boat speed exercise; follow individual dinghies
6Starting practice; coach boat at windward end of the line and on the line
• If using a camera, it is strongly recommended that someone else drives the boat
TOP T IPS
Asymmetric Coaching and Instructing
When hoisting the asymmetric the helm should bear away to the hoist/drop zoneand then keep the boat flat by steering rather than by moving their weight around.
Before gybing in strong winds, get the boat moving as fast as possible and wellbalanced, steer quickly and smoothly through the gybe, keeping the boat flat atall times.
When dropping the asymmetric apply the same techniques as hoisting, i.e. duringthe drop keep the boat flat by steering rather than moving crew weight.
Try to anticipate gusts; as a gust hits, bear away and sail lower without easing thesails much. The apparent wind will move forward as your speed increasestherefore the boat's angle to the apparent wind will remain roughly constant.
If racing in dinghies with fully battened mains, keep the kicker eased slightlyduring pre-start manoeuvres. This will stop the boat becoming stuck in-irons atthe critical moment.
When roll tacking and gybing in light winds, be careful not to catch the wings orracks in the water by rolling too far. This would slow the boat considerably.
A lot of asymmetric dinghies are very skiff-shaped with little rocker. In light windstrim the bow down to keep the transom clear of the water. Quite often the crewsits in front of the mast and completes tacks and gybes from there.
sectionFOUR
di_001-140_P89 5/6/05 14:57 Page 89

90
DebriefThe debrief is very important. You must give positive feedback from the session on the water.Very often your debrief will be analytical and will deal with a number of small but specificpoints. It may involve going back to a land drill to demonstrate a point or specific manoeuvre.Always try and involve all of the students and find a positive point for them all.
Debrief points to remember:
• Use the Traffic Light for feedback (see page 24)
• Be specific
• Analyse each dinghy’s performance individually
• Relate performance to session aims as well as what actually happened on the water
• Involve all of the students
• Be positive, (a lot of students will be ecstatic at just having sailed an RS200 with a kite up, so don’t pull their performance to pieces!)
• Don’t be afraid to go back to a land drill – it will reinforce their learning
• Remember it’s fun, they should want to go back on the water to improve their sailing
Safety.Sailing high performance dinghies always involves capsizing at some point. The ability tocapsize, right the dinghy and sail on is an essential skill when racing high performance boats.It is important that you make your students aware of the particular risks, which can beinvolved. Useful issues can include:
• Clothing. Make sure all students have the correct personal equipment required for sailing a performance dinghy. Wetsuits or dry suits, good quality gloves, trapeze harness that fits correctly, dinghy or wetsuit boots, buoyancy aid that is suitable (i.e. high fit that gives plenty of room for movement)
• Knife. Advise that they should all carry a knife that can be used to cut themselves clear of the boat or equipment
• Run a positive safety session before your students go afloat. Don’t put your students off, but make them aware of relevant issues on the day:
1 The lack of an air pocket under many high performance dinghies when inverted
2 The risk of being caught on rigging with a trapeze harness
3 The risk of injury during a high-speed wipe-out
• Make sure that all dinghies being used are safe. Tape up any sharp areas or fittings,make sure that wire is not fraying, check all fittings and control lines on a regular basis.
• Ascertain the ability of all students before going afloat. You can always increase the challenge, but lost confidence is difficult to replace.
TOP T IP When gybing, ensureyour students look wherethey are going andmake small adjustmentsto the helm all the waythrough - ‘Steer throughthe gybe'.
di_001-140_P90 5/6/05 14:57 Page 90

91
RACING INSTRUCTOR TRAININGDuring instructor training, coaches may sign up those candidates who demonstrate sufficientcompetence as racing instructors. The minimum experience required is that candidateshave completed a minimum of eight club races and have assisted the club race officer. Thedecision to sign off the endorsement is at the discretion of the coaching team.
IntroductionThe majority of dinghy sailing in Britain takes place in clubs; most clubs organise dinghyracing which is a main focus of their activities. Many people learn to sail each year but canbe put off the sport when faced for the first time with the apparent complexities of club racing.
The Racing Instructor course is designed to enable Dinghy Instructors to introduce relativelyinexperienced sailors to club racing. All RYA Instructor courses should include approximatelyhalf a day of practical training on the subject.
It may also be run as a stand alone course of minimum duration one day.
The course should include the following characteristics:
• An emphasis on racing as fun
• Ensuring that starts and rules are not intimidating
• The provision of enough information for Level 2 standard sailors to get round a club racingcourse safely, without presenting a hazard to other sailors
• Encouragement to sailors to start racing, join a club and progress within the sport
The Course and Starting Sequence
Club CourseMost clubs will have fixed buoys with asystem to identify them. The course usedwill depend upon the wind direction on theday. It will normally be posted as a list ofbuoys in the order they are to be roundedand which side to leave them on (port orstarboard) e.g. SL (Start Line) Ep Bs DpAp SL 3 laps
Trapezoid with outer loopPopular open meeting course, especiallywith youth classes. These types of courseare also extremely good when sailingmultiple classes on the same course -different loops can be specified fordifferent classes. This keeps the classesapart on the water.
sectionFOUR
di_001-140_P91 5/6/05 14:58 Page 91

92
Trapezoid with inner loopPopular open meeting course, as above.
Triangle sausage course Originally called an Olympic triangle,useful with established classes at openmeetings and national events.
Sausage orwindward/leeward courseVery popular with modern asymmetricboats, as they have to go downwind in aseries of broad reaches for maximumspeed.
di_001-140_P92 5/6/05 14:58 Page 92

93
Starting sequenceThe starting system used by the majority of sailing clubs consists of a warning signal, apreparatory signal and a start signal. The flags and sound signals used to draw attention tothe starting sequence are shown in G12, the RYA Advanced Handbook. The most commonsystem is 5 minute - 4 minute - 1 minute - go.
Other signals relating to startingIndividual Recall
If one or more competitors are over the line at the start then flag X (blue cross against whitebackground) will be displayed immediately after the start with a sound signal. This will bedisplayed until all competitors have started properly, or up to 4 minutes after the start, or upto 1 minute before a following start.
General Recall
If several unidentified boats are over the line at the start then the race will be restarted toensure fairness. Under these circumstances the First Substitute flag (Yellow triangle on a bluetriangular background) will be flown with 2 sound signals. The preparatory signal for the nextstart will normally be 1 minute after the First Substitute is lowered.
Starting Penalty Flags
The starting penalty flags are displayed with the preparatory flags and dropped 1 minutebefore the start. If any one of these flags is flown then a boat that enters the triangle formedby the two ends of the start line and the first buoy will be penalised as follows:
Flag I - the competitor must sail to the pre-start side of the line by going around either endof the line.
Flag Z - the competitor shall receive a 20% scoring penalty.
Black Flag - the competitor shall be disqualified and shall not be allowed to restart the raceif a general recall is necessary.
Boat TuningTuning a boat can vary between knowing when to ease the kicking strap or pull on theCunningham in a Laser, to adjusting mast rake and altering the spreaders in a Fireball. Thebest place to start tuning is to find out what other people who race successfully in the classare doing. Most class associations and sail makers publish tuning guides. Class websites area good place to start.
Before experimenting with any rig settings on a boat it is a good idea to set it up to the classaverage given in the tuning guides.
Tactics and StrategyThis covers everything from finding the fastest way up the beat using the changes in directionof the wind to manoeuvring at close quarters to gain an advantage on other boats.
Race strategyThis determines the fastest route around the course dependant on the weather, tidal currents,sea state and surrounding land masses.
Tactics The course you actually take around the race course taking into consideration other boatsand the rules that govern fair sailing. These include sailing your boat clear of dirty wind,approaching marks using the rules, over taking slower boats, etc.
sectionFOUR
di_001-140_P93 5/6/05 14:58 Page 93

94
Dirty WindThe wind to leeward of a dinghy isaffected in both strength and direction. Tocontinue on the same tack, to leewardand behind another boat, will result in theboat sailing both lower and slower until ithas dropped far enough behind to not beaffected.
Wind bendsWhere the wind bends there can be asignificant advantage in sailing towardsthe inside of the bend. This should resultin the boat sailing a shorter distance, asit will spend more time on a lifted tack
Course down the reachA tactical advantage can be gained bysailing very low at the start of a reach aslong as there is a gap behind you toprevent your wind being blanketed byother boats. This technique allows for afast approach to the next buoy on theinside of boats which have gone high.
Using Gusts and Lifts andAvoiding Headers By studying the water upwind whilstbeating, gusts can be seen as dark areason the water. Advantages can be gainedby preparing the boat for the gusts andaltering course to make the best use ofthem. The wind is constantly changing indirection so one tack will always point adinghy slightly closer to the next markthan the other - this is the lifted tack.
Sail towards the centre of a wind bend
Wind bend aroundheadland
Wind bend off land
Course sailed byfleet is an arc
Fast approachto mark
Leader goes in a straight line
Bear off rapidly round the windward mark. Bestdone with a gap behind you.You also approach gybe mark on the inside.
di_001-140_P94 5/6/05 14:59 Page 94

95
Boat HandlingTo be able to apply tactics around the race course good boat handling skills are essential.There are many exercises which concentrate specifically on boat handling includingtacking/gybing on the whistle, follow my leader, start line exercises and racing around a shortcourse.
Videoing sailors can be a useful way to provide feedback which should focus on the keypoints of the exercise rather than recording everything.
It is generally accepted that to develop boat handling skills it is important to break down aparticular manoeuvre into smaller segments. This enables the sailor to focus on particularareas of improvement. Remember you can't eat an elephant whole.
Simple RulesRefer to the racing rules as the key terms of reference.
As well as port/starboard and windward/leeward rules we need toadd a few more useful rules when we are racing.
OvertakingThe generalisation of overtaking boat keeps clear does have somelimitations. The main one being that if the boats are on oppositetack, as often happens on downwind legs, then the boat on portmust keep clear.
Mark RoundingIf boat A has on overlap with boat B when either of the two boatsreaches the two length zone then boat B shall allow room for boatA to pass the mark.
This applies even if the overlap is subsequently broken. Boat A hasno rights if an overlap is gained inside the two-length zone.
The two-length zone is defined as an imaginary circle with a radiusequivalent to twice the hull length of the boat concerned, centeredon the mark.
Tacking and Gybing When a boat is tacking or gybing it has no right of way and mustkeep clear of all other boats.
If after completing a tack or gybe it gains a right of way overanother boat, the other boat must have opportunity to keep clearafter the completion of the tack or gybe.
Room to keep clearIf a right of way boat changes course she must give the other boatroom to keep clear.
PenaltiesA boat infringing a rule may exonerate itself by taking a penalty.The penalty is to turn the boat through two tacks and two gybesin the same direction at the earliest opportunity. The boat shallhave no rights of way during the manoeuvre.
If a boat fouls a mark she may exonerate herself by performing a360º turn at the earliest opportunity.
It should be noted that both of these penalties are routinely alteredby the Sailing Instructions.
sectionFOUR
Overtaking rule 12I’m clear
astern on the sametack, so I have to
keep clear.
No, onopposite tacks,
port keeps clear.
Roomplease
Rule 18
Tackingrule 13
Keep clearwhen tacking
Giveme roomto keep
clear
Gybingrule 15
di_001-140 5/21/05 15:57 Page 95

96
Practical Racing and exercisesBy far the most important aspect of teaching people to race is actually racing on the water.Many different exercises can be used to develop sailors understanding and performancearound a course. The race can be broken down as follows and specific exercises used toimprove performance.
StartingA good start is measured by: Sailing at maximum speed, in clear air and on or close to theline when the start signal sounds. Starting is a key skill and confidence on the start line isessential if racing is to be enjoyed successfully. Starting exercises should receive majoremphasis during a 'Start Racing' Course.
Timing to hit line at start
A simple start line and a short windward leg can be used to practice a number of starts witha short race afterwards. For the purpose of training a shortened 2 minute - 1 minute - go isnormally used.
Holding position and accelerating
Again a simple start line and windward leg can be used, but the start sequence should involvethe start being sounded 15 seconds or so either side of the normal start signal. Thisencourages people to practice holding position near the start line and accelerating away atthe start signal. One of the problems in training with a small number of dinghies is that thestarts are not very realistic - there is rarely congestion at the start line. Boats can practisethese skills by hovering next to a buoy for as long as possible before bearing away with thesails, sheeting in slowing and accelerating to full speed. Sailing backwards can also be auseful skill.
Another useful exercise is 'Follow my leader', taking the boats on a close reach and slowingdown almost to a standstill before accelerating again.
Line bias
To raise awareness of the line bias the anchor rope on the committee boat can be periodicallylengthened and shortened between starts to alter the bias. This will encourage sailors toregularly check the bias of the start line.
Windward legSpeed upwind
Start the sailors lying-to in a line across the wind, level and in clear air. This comparesspeed and pointing. Once they have spread out, regroup and start again.
Tactics and lay lines
After a briefing on tactics a number of short races can be run with a finish between the safetyboat and the windward mark. Boats should be encouraged to practice tacking on the lay lineand covering other boats up the beat whilst protecting their clear air. They should vary theirapproach to the mark but always on starboard tack and in clear air.
di_001-140_P96 5/6/05 15:00 Page 96

97
Mark roundingPractice bearing away
A small triangular or sausage course should be laid with all the boats sailing around it. Thesafety boat can then be held near the windward mark to offer coaching advice to the boatsbearing away. The emphasis should be on heeling the boat slightly to windward and easingthe main, to minimise use of the rudder. You should ask them to consider easing the kicker,Cunningham, adjusting the centreboard and when windy, getting the crew weight back toassist the turn.
Practice gybing
A slalom course can be used to practice reach to reach gybing or a whistle to initiate run-to-run gybing.
Tactics
Start the boats at the windward mark of a triangular course, enabling the boats to arrive atthe gybe mark close together. This should allow sailors a chance to think ahead andpractice good mark rounding. The safety boat should ideally be positioned inside the coursenear the gybe mark.
Offwind legsSpeed including spinnakers if applicable
Start the boats from 'Follow-my-leader' on a beam reach, a good distance upwind of amark. This will allow the boats an equal start with other boats in close proximity. Focusshould be on boat speed alone with the boats not attempting to block the wind of others.
Tactics
A similar exercise can be run but this time with the emphasis on gaining position by coveringother boats whilst keeping their own air clear. This can be done on a reach or a run.
The RYA Portsmouth Yardstick SchemeThe RYA Portsmouth Yardstick Scheme is operated jointly by the RYA and the clubs toquantify the performance of different class boats, enabling them to race against each otheron level terms.
The measure of performance is the Portsmouth Number (PN), expressed as whole numbersfrom 600 to 1700. The ratio between two PNs reflects the difference in performance.Assuming Nervous Wreck has a PN of 700 and Late Starter one of 1400, if Nervous Wreckcompletes a race in 70 minutes then, for Late Starter to beat her on Corrected Time, shehas to finish the race in under 140 minutes.
To establish a PN for a new class of boat it is necessary for a boat of that class to raceagainst boats with well established PNs (classified as Yardsticks) against which theassessment of the new class can be made. This is done over a period of time until the PNbecomes stable.
Each year the RYA circulates all clubs with a questionnaire requesting details of theirassessments. The lists of Portsmouth Numbers are based on this data and published in theRYA book YR2 and on the RYA web site: www.rya.org.uk. This booklet also gives fullrecommendations on the use of the Scheme and is a must for any club running yardstickraces.
There are many methods of applying the Scheme at club level as detailed in YR2 but themost popular of these are the conventional Portsmouth Yardstick Scheme race and thePursuit Race.
sectionFOUR
di_001-140 6/7/05 7:56 PM Page 97

98
In the former all boats start at the same time, sail the same course and finish on the samefinish line. The race result is then determined by calculating a Corrected Time (C) for eachboat by the formula C=1000xE/PN where E is the elapsed time i.e. the time it took for theboat to complete the race. The boat with the shortest C wins.
With the most common form of Pursuit Races each class of boat starts at a different, pre-determined, time with the slowest starting first and the fastest last. All boats sail the samecourse for a set time. The order of the boats when that time expires gives the race result. Thedifferent start times are calculated from the PN of each class and the desired start time forthe race.
Simple examples of the calculations for both of these types of race are given below.
Handicap RaceStart all boats at the same time, make them sail the same distance and record their finishingtimes. A simple formula can then be used to give all the boats a corrected time.
Pursuit RaceStart all boats at different times with the slow boats going first and make them sail for apredetermined period. This has the advantage that boats know how they have finished inthe race - the first boat to finish is the winner. Some compromise is unavoidable because thestart times have to be rounded to the nearest 30 seconds.
CalculationsConventional PYS Race
For example if an RS 400 finished in 42 minutes 30 secs, a Laser finished the race in 45minutes 30 secs and a Wayfarer finished in 46 minutes 9 secs.
The corrected time for the RS 400 ( PN 952) would be;
Elapsed time in secs 42 minutes 30 secs = (42 x 60) + 30 secs = 2550 secs
Corrected time 2550952
x 1000 = 2679 secs = 44 minutes 39 secs
The corrected time for the Laser ( PN 1078) would be;
Elapsed time in secs 45 minutes 30 secs = (45 x 60) + 30 secs = 2730 secs
Corrected time 27301078
x 1000 = 2532 secs = 42 minutes 12 secs
The corrected time for the Wayfarer (PN1099) would be;
Elapsed time in secs 46 minutes 9 secs = (46 x 60) + 9 secs = 2769 secs
Corrected time 27691099
x 1000 = 2519 secs = 41 minutes 59 secs
Therefore even though the Wayfarer finished last on the water it actually beat the Laser andthe RS 400 on corrected time.
di_001-140 6/7/05 7:58 PM Page 98


![ABBTA Minutes General Meeting November 18th 2015 · 2. Phil Black, Senior Instructor of Coastal Skydive 3. [Possible] Members of Port Noarlunga Business and Tourism Association DID](https://static.fdocuments.net/doc/165x107/5f7b437678d76534b8332741/abbta-minutes-general-meeting-november-18th-2015-2-phil-black-senior-instructor.jpg)