ANNA - Prima Games | Free and premium video game guides · PDF fileanna tekken tag tournament...
48
ANNA Anna is a poking and pressure heavy character that puts her opponents into bad situations where she can capitalize on their mistakes for tremendous damage. Unlike Anna’s sister, Nina, who relies on out maneuvering and poking her opponents to create opportunities, Anna tends to rely more on brute force and frame traps to break down her opponent’s defense. Chaos Judgment (CAT) is Anna’s primary stance that opens up a wealth of offensive options, namely access to a few key (and painful) 50/50s. Anna is also one of the only characters in the game with full crouch (FC) mix-ups where she can launch you by either going low or attacking mid, further solidifying her strength as a mix-up character. OVERVIEW Tyler Bustinza Tyler “Tyler2k” Bustinza has had the fighting game bug since Mortal Kombat III was released in arcades. He originally played at Vallco Tilt, and he made the permanent move to Sunnyvale Golfland as Tilt closed its doors. Tyler’s first competitive fighting game was SoulCalibur II. He transitioned over to Tekken once SoulCalibur III was released, and was introduced to Tekken Zaibatsu through his activity on the old soulcalibur.com fan forum. He has been active on Tekken Zaibatsu ever since, and is currently a moderator for both the Dragunov and Jinpachi forums. Two years ago, Tyler launched his own fighting game blog, www.tyler2k.com. Earlier this year, he launched a second blog, www.tyler2k.info, which is devoted to general gaming/ tournament strategies and FGC-related articles. CHARACTERS • ANNA TEKKEN TAG TOURNAMENT 2 202 Protected by copyright. Unauthorized or unlawful copying or downloading expressly prohibited.
Transcript of ANNA - Prima Games | Free and premium video game guides · PDF fileanna tekken tag tournament...

ANNA
Anna is a poking and pressure heavy character that puts her opponents into bad situations where she can capitalize on their mistakes for tremendous damage. Unlike Anna’s sister, Nina, who relies on out maneuvering and poking her opponents to create opportunities, Anna tends to rely more on brute force and frame traps to break down her opponent’s defense. Chaos Judgment (CAT) is Anna’s primary stance that opens up a wealth of offensive options, namely access to a few key (and painful) 50/50s. Anna is also one of the only characters in the game with full crouch (FC) mix-ups where she can launch you by either going low or attacking mid, further solidifying her strength as a mix-up character.
OVERVIEW
Tyler Bustinza
Tyler “Tyler2k” Bustinza has had the fighting game bug since Mortal Kombat III was released in arcades. He originally played at Vallco Tilt, and he made the permanent move to Sunnyvale Golfland as Tilt closed its doors. Tyler’s first competitive
fighting game was SoulCalibur II. He transitioned over to Tekken once SoulCalibur III was released, and was introduced to Tekken Zaibatsu through his activity on the old soulcalibur.com fan forum. He has been active on Tekken Zaibatsu ever since, and is currently a moderator for both the Dragunov and Jinpachi forums. Two years ago, Tyler launched his own fighting game blog,www.tyler2k.com. Earlier this year, he launched a second blog, www.tyler2k.info, which is devoted to general gaming/tournament strategies and FGC-related articles.
CHA
RA
CTER
S •
AN
NA
TEKKEN TAG TOURNAMENT 2
202
Protected by copyright. Unauthorized or unlawful copying or downloading expressly prohibited.

KEY MOVES
+ , Anna’s new and improved i14 punisher. Anna takes a respectable step forward before attacking. This does great standing damage and will knockdown and wall splat on natural hit. The second hit is high, so try not to use it outside of punishment, but if fully guarded the combo is safe on block.
FC +Anna’s signature launcher out of FC. The properties on hit have been tinkered with to lower the damage potential, e.g. FC + now leaves the opponent FUFA instead of FDFA, but with the new tag system you are able to immediately switch to the secondary character with a
+ , ~TAG follow up. This leaves two available options: either continue the combo and destroy red life, or use a Tag Assault and do more total damage, but deal no red life damage at the same time.
QCF+There’s only one word to describe QCF+ and that’s “incredible”. QCF+ is a quick elbow attack, is positive frames on block, and launches on counter hit. QCF+ is Anna’s answer to finding a balance between an offense starter (on block/hit) and a full launcher (on CH). Try not to go overboard with QCF+ , as it is high and can be ducked, but it’s definitely Anna’s go-to option in many situations.
TAG PARTNERSDue to the changes to a few of Anna’s key moves (such as FC + and + , ) she greatly benefits from a tag partner with a somewhat quick, long range bind combo. Otherwise, from a gameplan stand point, Bruce has good synergy with Anna since he has strong wall carry and CH options. Jack-6 provides superior standing range to Anna while also giving her access to a highly powerful + re-launch option, allowing Anna to use stronger wall carry filler and increasing her damage potential. Even though they hate each other, Nina unlocks Williams sisters-specific combos and throws, while giving you different pokes and 50/50 options once Nina is tagged in.
CHA
RA
CTER
S • A
NN
A
PRIMA Offi cial Game Guide | primagames.com
203
Protected by copyright. Unauthorized or unlawful copying or downloading expressly prohibited.

QCF+Everyone’s favorite kicking combo, QCF+ is a strong option in almost all situations. This causes knockdown and wall splat on natural hit, and has enough pushback on block (as well as Anna recovering in FC) that punishing QCF+ requires very specialized knowledge of the Anna
match up. Anna also kicks twice during the animation, so it’s possible that the opponent will be too far for the first kick to land, but will be close enough afterwards due to Anna’s naturally advancing movement during QCF+ .
+One of the most frustrating attacks to be hit by, + is a nearly invisible low that leaves the opponent slightly off-axis (to Anna) and in a while standing (WS) state. Since the opponent recovers in WS, the fastest attack they can perform is i11 (everyone except for Lee and Lei, that is). Therefore, the frames on hit are closer to +6 for Anna, since she’s remains in a standing state.
Even though Anna is at “+6” and performs a high attack (such as jabs), a WS high crush attack will still beat her due to the crush system. Also from a WS state the opponent can still perform a FC jab (i10), thereby only giving the +5 frame advantage to Anna.
+ , Anna’s high crush low to launching mid. This combo is NCc, as well as tag bufferable, making it versatile in many situations (for instance as combo filler to destroy red life). New to TTT2, + , is no longer launch punishable on block and is instead only -13, making + , an incredible combo to throw out while being pitbulled or being pressured by a jab-happy opponent.
+ One of Anna’s strongest pressure tools, this is only made stronger by the addition of + being made into a homing attack. The knockdown on hit sets up wake-up and tech traps, while at +6 on block, Anna can go for guaranteed pokes (such as + , ) or CH launchers (such as QCF+ or standing ).
QCF+ ,Incredibly easy to hit confirm, QCF+ , is Anna’s poke of choice while trying to score a natural hit knockdown wall splat. The crouch dash (CD) motion gives the attack some more natural range on top of Anna extending her left leg forward. The combo can be delayed and is still fully NC, even if the final input is delayed to the very end. The second hit is high and the combo does not jail, but it is still safe on block, as well as being one of the easiest hit confirms in the game.
KEY MOVESCH
AR
ACT
ERS •
AN
NA
TEKKEN TAG TOURNAMENT 2
204
Protected by copyright. Unauthorized or unlawful copying or downloading expressly prohibited.

Poking vs. Pressure
ADVANCED STRATEGIES
While Anna’s poking game is solid, she gets most of her damage off her CH launchers and NH confirmable knockdown wall splat combos. You should think of Anna’s pokes as a part of her neutral game that leads to the real damage, pokes like + , , (mixed with the occasional + , , and
+ , , ), + , + mix-ups which slowly break down the opponent’s guard. Near the wall, Anna gains access to a few key options, QCF+ and QCF+ , which when executed properly are safe wallsplat attempts.
One of Anna’s signature play styles is her ability to apply real pressure from FC, namely FC + (which is now a tag launcher and only -14 on block), FC + (which leaves the opponent in WS, making it a stronger option against characters with no notable WS i12-i13 attacks), FC + (Anna’s low launcher), as well as mixing with WS+ (which is a little safer than FC + , although with less damage potential).
If you ever lose your momentum, starting and restarting pressure is usually done with QCF+ and + . Both attacks naturally option select to their respective strength on NH/CH, but in any case both attacks are positive frames on guard, which is the backbone of continuing more pressure follow-ups. It’s also in your best interest to scout out player familiarity against Anna, particularly referring to CAT stance. Against an uninitiated player, CAT is a nightmare to fight against, not only for its auto reversal options, but also for its basic 50/50 of CAT + , (which high crushes) and CAT + (which low crushes).
Chaos Judgment (CAT) is Anna’s primary stance, opening up access to strong pressure options really anywhere on the level. As mentioned earlier, CAT has fairly unique properties when held in a neutral position. CAT automatically reverses low attacks, for a guaranteed launcher, as well as reversing any throw attempts against Anna. These reversal properties continue until Anna commits to an attack, or finally once Anna simply falls out of stance (after 41 frames of CAT).• CAT – Anna’s incredible +15 high slap out of
CAT grants a free i15 or faster follow up on hit,such + , + , , or + , for BT positive frame shenanigans.
• CAT , – This high to mid has no remarkable properties on hit, but the combo is NC and ends witha safe mid.
• CAT – Anna’s quickest kick out of CAT. On CH,this attack leads to full combo, although is -12 on block.
• CAT – Anna’s high crushing sweep from CAT, very punishable on block , grounded follow-ups on hit.
• CAT – Anna’s new bound mid option out of CAT. Only -4 on block and leaves Anna recovering FC/WS, making CAT a good option for getting access to Anna’s FC mix-ups out of CAT.
• CAT – Anna’s hip check/shoulder mid. Useful with the opponent’s back to the wall as a shoulder trade will always be in Anna’s favor, unfortunately it’s also now launch punishable on block.
• CAT + , – Anna’s safer high crush option while in CAT, this low to high is good for shutting down panic jabs and other quick high attacks.
• CAT + – This mid is Anna’s only NH launching option out of CAT. The animation is identical to that of the CAT’s auto-low reversal, so the two are often confused by the opponent.
Anna also has the ability to cancel out of CAT in two ways. The first is by holding which puts her into a CD motion (where she has access to all her CD attacks). The second way is by tapping , which puts Anna into a rolling state. From her roll, Anna can choose to do one of two attacks (either a mid hitting knockdown wall splat attack, or a high tag launcher), or she can do nothing and simply roll forward.
CAT Stance and Options Out of CAT
CHA
RA
CTER
S • A
NN
A
PRIMA Offi cial Game Guide | primagames.com
205
Protected by copyright. Unauthorized or unlawful copying or downloading expressly prohibited.

ADVANCED STRATEGIES
Using CAT Effectively for PressureBecause there are so few (practical) ways to naturally transition into CAT at frame advantage, the strongest being WS+ ~ , CAT pressure is most effectively applied post knockdown (by manually entering CAT) or using a block trap such as + , , + . CAT also has a two prong effect with the opponent’s back to the wall, not only does it put the opponent in a disadvantageous position where a panic low jab will grant a free, high wall splat, but CAT will also guarantee any of Anna’s i15 or faster attacks will land for a full wall splat and combo follow-up. These facts, combined with the knowledge that players tend to panic and freeze up with their back to the wall, make Anna’s 50/50s (inside and outside of CAT) very terrifying to fight against.
Since CAT is Anna’s only stance, you should try to have a game plan (while in CAT) for as many situations as possible. This is something that normally comes with practice and lots of experience, but that doesn’t mean that it’s not worth practicing. Starting with the basics, you should practice three key situations: CAT at negative frames, CAT at neutral frames, and CAT at positive frame.
After that, CAT at negative frames deserves the longest look, even if you know the prior three states inside and out. Discover what options are strong against which characters. What would the opponent most likely do in this situation and can Anna beat it? It’s possible that simply going into CAT might eat enough options to make it not worth trying to interrupt the opponent’s attacks, but it’s for you to decide what you’re most comfortable with.
There are a few key combos and single strike attacks that can be hit confirmed for a guaranteed follow up and usually a free knockdown or wall splat attack. As such, practice hit confirming until you have all of Anna’s readily at your disposal. Master attacks such as QCF+
, which causes knockdown or wall splat on NH, CH + which grants +19 to Anna for free launcher, and CAT
which guarantees a free wall splat follow up when the opponent’s back is to the wall.
Plan CAT Situations
Hit Confirming
One of the best skills a player can learn is how to recognize desperation during pressure combos, especially when so many for Anna cause knockdown, wall splat, or full launch. With combos such as ( , ,) , ( , ,) , ( +
, ), , ( + , ), , ( ), , ( ), , etc. Anna can extend her mid and high poking combos with (usually) a high finisher that causes knockdown and wall splat on natural hit. As such, they can be used to interrupt quick retaliations and twitch SS. A few combos can also be delayed on block, which gives Anna the ability to interrupt character tag outs when the opponent would normally think a tag out is safe, namely at plus frames after a combo. It’s important to recognize that nearly all of Anna’s
combos like this are very punishable, one way or another. Whether it’s that the combo ends high or hits mid and is -14 on block, using them blindly is a poor decision.
Lastly, most (if not all) of Anna combos that end in knockdown, wall splat, or launcher are NCc preceding the final hit. As an example, , , , is not NC/NCc, but CH ( ,
), , is, just like how CH ( ), , , ( ), , , and (+ ), , etc. are as well. While not true hit confirming, you can take an educated guess as to whether a combo will hit on CH dependent on what the opponent is currently doing. If you actively see them in a combo or believe they’ll be inclined to fall into your trap, then it might be worth doing.
Recognizing Desperation
THINGS TO PRACTICE
CHA
RA
CTER
S •
AN
NA
TEKKEN TAG TOURNAMENT 2
206
Protected by copyright. Unauthorized or unlawful copying or downloading expressly prohibited.

Solo Combos
Tag Combos
HOW TO BEAT ANNAThe best way to beat Anna is to shut down her offense game before it ramps up. As she gains momentum, you’ll be forced into more 50/50s where Anna is at the advantage. This includes, but is not limited to, frame advantage combos and punishers manually into CAT stance, inbound character tagging (especially near the wall), or frame advantage attacks on block (such as + or QCF+ ). As long as you can stop Anna’s momentum, you are never in huge danger.It’s important to recognize CAT as a serious threat, especially when your Anna experience may be poor. While in CAT, Anna is completely invulnerable to low attacks and will reverse throw attempts. If Anna does input an attack out of CAT, then the automatic reversal window is gone and Anna can be interrupted by a low poke or throw. So unless you are 100% sure it’s going to work, do not try interrupting CAT with a low (including s-mids, such as crouch jabs) or throws.Anytime you’re at positive frames and Anna is in CAT, it’s in your best interest to try jabbing her out of offensive options. That leaves CAT + , and CAT as Anna’s high crushing answers, both of which can launch punishable on block. Similarly it’s in your best interest to keep pressure on Anna so she can’t settle into a full crouch (FC) mix-up game either. Keep your eyes open for innocent looking pokes leave Anna naturally in FC, such as + , + , + , , , and new moves such as CAT .Otherwise, only duck seeable lows. Anna’s + is launch punishable on block, but isn’t worth eating a full launch for. Anna has way too many solid mid options to discourage constant ducking, such as + , , +, + , QCF+ , and QCF+ , . The only time you should consider ducking is to catch + , FC + , or to try and punish a high ending combo/poke. But be aware that if you’re constantly ducking for anything other than high combo punishment, you should take a step back and see that you’re probably not winning the match.
WITH BRUCE Anna: CH QCF+ , QCF+ , QCF+ , + , , [TA!], Bruce: CD+ ,( ), Anna: QCF+ , +WITH BRUCE Anna: CH QCF+ , + , ~TAG, Bruce: + , ~MTS + , [TA!], Anna: QCF+ , , Bruce: WR+
START NINA Nina: + ~TAG, Anna: + , , + , ~ ~ , , [W!], + , ,[ TA!], Nina: + , , , Anna: +
+ , + , ~ ~ , + , , [B!], QCF+ ,+ , + , , + , + , , [B!], ( + ), ,
CH CAT , WS+ ~CAT , [B!], , + , , +
COMBOS
CHA
RA
CTER
S • A
NN
A
PRIMA Offi cial Game Guide | primagames.com
207
Protected by copyright. Unauthorized or unlawful copying or downloading expressly prohibited.

BRUCEOVERVIEW
Bruce continues his long standing tradition of being a counter hit (CH) heavy character with long range pokes to slowly wear down his opponent. He uses poke damage to chip away at his opponents, and CH damage to deal large amounts of damage at a time. Take your pick; Bruce excels at both. Bruce also has an incredibly strong wall splat game that’s remarkably safe at the same time. Despite some balance changes from Tekken 6 to TTT2, Bruce retains most of his consistent wall carry options, as well as some of the strongest standing and while standing (WS) punishers in the game. In fact, with strong execution, Bruce is now one of the only characters in the game with a launching WS i13 punisher. Bruce is a solid, well-rounded character who can make any teambetter simply by being on it.
CHA
RA
CTER
S •
BR
UCE
TEKKEN TAG TOURNAMENT 2
208
Protected by copyright. Unauthorized or unlawful copying or downloading expressly prohibited.

KEY MOVES
TAG PARTNERSDue to Bruce’s above average wall carry and his strong, single strike attack damage, Bruce can be paired with nearly any character and remain just as effective. If the poking/CH launch playstyle of Bruce suits you well, then Anna is a good choice as a tag partner as now only does she have strong CH options, but also a large amount of hit confirmable knockdown and wall splat options. If increasing your combo damage is a top priority, then it’s
hard to pass up characters like Jack-6 or Dragunov that can provide strong combo extending options or pure damage, even while at the wall. Interestingly enough, both characters also have above average range which can extend the overall punishment options to outside of range 1. Possibly forcing the opponent to play wildly differently dependent on which character is currently on point.
CD+Bruce’s CD to low poke. As with most of Bruce’s options out of CD, his CD+ can be delayed tremendously. CD+ deals a large amount of damage, for a single strike low, and leaves Bruce at positive frames on hit. Unfortunately, CD+
is now -14 on block, making it launch punishable against certain characters, but it should still be liberally used against characters with poor WS punishment.
, ,Bruce’s very damaging i10 punisher. The frame advantage on hit isn’t the best, but the opponent is left at the range where really Bruce excels (range 1-2). Even though the combo is launch punishable on block, the last hit can be easily hit confirmed, opening up the option to use , , as a safe poke for solid damage.
+ , , Counter hit confirmable, delayable, knockdown or wall splat combo. The combo is NCc and will wall splat to your
opponent’s back-left. It’s particularly strong against characters without an i10-i13 knockdown or wall splat punisher, therefore making the reward worth the risk for Bruce, especially when his opponent’s back is to the wall. Delaying the combo, even without CH, is a great way to catch the opponent off guard if they are quick to try and do anything (other than guard) after + , lands.
, ~ , ~ gives Bruce access to his most consistent carry
option. Bruce cancels his , into a crouch dash (CD) and at any time during the dash he can perform a CD attack, namely CD+ for carry filler, CD+ for ending long combos with the option of tagging Bruce out, CD+ for a high damage low, and CD+ which acts as his WS+ . The amount of reps possible (of wall carry) is slightly lower in TTT2, but overall , ~ , , , ~ , is still consistent as a combo ender.
+
This has great range, is safe on block, causes knockdown
CHA
RA
CTER
S • B
RU
CE
PRIMA Offi cial Game Guide | primagames.com
209
Protected by copyright. Unauthorized or unlawful copying or downloading expressly prohibited.

Bruce tends to play best as a quick harassment character, but not quite as relentless as a poke character (who tend to have safer pokes). A quick + here, a long standing there, basically just checks to keep his opponent at his optimum range, but nothing that overexerts Bruce out of his neutral game. From this range, strong attacks such as + and his CD+ will often beat or trade with any opponent’s options. If your opponent opts to play a SS/SW game at this range,
+ is a very safe (only -3 on block) homing move that will knockdown or wall splat on NH.
Once you’re ready to close the gap, iWR+ and CD+ (although now -14 on block, so be careful which characters you’re using it on) are a few strong options to get right in the opponent’s face. While on the offense at close range, Bruce’s quicker options open up. Attacks such as + , , combos, , , hit confirm, CH + , , confirm, CH standing for quick launch, and to counter SS/SW. As the opponent starts to slip out of Bruce’s close range game he can start pressuring with his CD game again, such as CD+ which can catch airborne opponents for small combo and wall carry,
+ as a quick safe launcher, and + to eat various options for full launch. Bruce also has an above average
punishment game, with a great i10 ( , , ), i12 ( + , ),and a brand new i14 ( + ) as well as a launcher out of WS i13 (WS+ , ), Bruce is a solid character on the defense.
A great side effect of so many attacks of Bruce being either an elbow or knee is that he cannot be defended against with reversals and most parry attacks. Elbows and knees will go right through them, although without opportunity to CH, which slightly increases the value of CD+ and + against opponents who may be inclined to use reversals (since they launch on NH).
Head, Shoulders, Knees, and Elbows
ADVANCED STRATEGIES
on normal hit, and will full launch on counter hit. + is Bruce’s consistent answer to a ton of options. For instance, this will knock Xiayou out of AOP and Christine and Eddy out of RLX. On hit, Bruce can go for a + , style reset, although in TTT2 Bruce now automatically goes into Pasart stance, making it a bit less safe on whiff and naturally reducing Bruce’s damage potential.
+ At i13, Bruce’s + is an absolute beast of an attack. It’s his longest standing poke and it just so happens to be an incredibly fast low. The frames on natural hit aren’t great, so it’s best used as a quick poking low or check. Since + is in fact launch punishable, you should try your best to not be predictable with them. It’s worth using frequently, but don’t fall into a pattern.
Standing Bruce’s quickest CH launcher, leads to full combo and wall
carry. It’s important to note that magic attacks have been universally nerfed in TTT2, so they aren’t quite as spammable as they were in past Tekken games. This doesn’t make his magic useless, though. All it really means is you’ll have to be more selective when using Bruce’s standing .
+ Bruce’s highest damage single hit, standing launcher. This has the added benefits of being a knee, safe on block, and a tag launcher. + has no notable tracking so it will usually have to be proceeded by a SS to either side to realign Bruce to his opponent. Interesting enough it’s possible to do two + reps before tagging in to your secondary character. This is particularly useful if your inbound character has an option weaker than Bruce’s + .
KEY MOVESCH
AR
ACT
ERS •
BR
UCE
TEKKEN TAG TOURNAMENT 2
210
Protected by copyright. Unauthorized or unlawful copying or downloading expressly prohibited.

MTS is Bruce’s only stance and is used primarily as an offensive tool. Unlike most other characters that can manually enter their stances, Bruce must use specific attacks that allow him to enter MTS temporarily. The fastest way for Bruce to enter MTS is through + , but , , , , , + , , , + ,
, and + , all enter MTS as well. While in MTS, Bruce has access to strong NH combos and safe CH launchers, which makes challenging Bruce while in MTS fairly dangerous.• MTS , – Bruce’s high to mid backhand to knee, this
causes knockdown or wall splat on natural hit. Only jab punishable on block.
• MTS – Bruce’s high CH launcher. Good frames on block, great frames on hit, full combo on CH.
• MTS – This mid knockdown knee out of MTS has guaranteed follow ups on hit if the opponent does not tech.
• MTS – Bruce’s MTS low. Not the best frames on hit, but at least it gives him a low while in MTS.
• MTS + – Bruce’s signature bound mid attack out of MTS. This safe on block, and launches on CH.
It’s important to note that Bruce cannot manually cancel his transition into MTS. As soon as he uses a combo like , , or + , , Bruce is forced into MTS. If one of those combos is blocked, Bruce automatically transitions to MTS, and then you can opt to do nothing. Just be aware that you are possibly leaving yourself open to launch punishment. As such, you should almost always go to an MTS option instead of trying to guard.
Pasart Stance (MTS)
While much of the cast has combos that usually end high and knockdown or wall splat if the opponent gets too anxious and tries to immediately move or attack, many of Bruce’s combo enders or extensions launch on CH. These are CH ( , ), , CH ( ), , CH ( ), , CH ( + ), ,( + ), ~ , CH ( + ), , CH ( + ), (stun is escapable), ( + , ), + ~ (not the strongest mix-up), MTS + , and MTS . There are also combos that now naturally transition to MTS, such as CH ( , ), ,CH ( ), , CH ( + ), , CH ( + ), , and CH ( +
, ), (although not a viable option).
CH Launching and Traps
CHA
RA
CTER
S • B
RU
CE
PRIMA Offi cial Game Guide | primagames.com
211
Protected by copyright. Unauthorized or unlawful copying or downloading expressly prohibited.

Launchers are not just about maximizing damage. Understanding what launcher to use in what situation is an important skill to have. It can mean the difference between winning and losing.
• + – Bruce’s go-to launcher in the open field. This low crushes attacks, so it’s useful when the opponent may panic low attack. It’s also Bruce’s longest range i15, so it’ll be his preferred whiff/launch punisher.
• + – Bruce’s lesser ranged i15 launcher tracks to Bruce’s right, making it a decent anti-SS option while playing on 2P side. Due to it being an elbow, + cannot be reversed or punch parried, making it a strong
option against reversal happy characters (such as Asuka and Jun).
• CD+ – Bruce’s long range whiff punisher can crush high attacks during its animation. It is tag bufferable to destroy enemy red life. Similarly to + , Bruce’s CD+
is an elbow attack, therefore cannot be reversed or punch parried.
• + – Bruce’s safe knee launcher is tag bufferable like CD+ , and is a knee so it cannot be reversed like
+ . Unfortunately + has poor tracking, therefore usually requires manual realignment (either by dashing in or sidestepping) to land more consistently.
Launchers
In Tekken 6, Bruce could usually get away with forward buffering + , rarely did he ever require a quick dash in to land a + for a combo (e.g. + as a neutral input might be interpreted as iWR+ ). Now in TTT2, quick dashing + , is an important skill now that WS+ , will consistently lead to an aerial combo, without requiring exact stage/wall positioning.
After landing WS+ , , you must quickly dash in and perform a + , , which also now automatically
transitions into MTS. Be careful to not buffer forward too long into + , (after the quick dash) as the game may interpret the input as + , ~ , getting a completely different attack. It’s also possible to land + ,( ) without the opportunity to [B!] if executed a little too late. In any case, it’s easy to hit confirm whether + , fully landed, partially landed, or completely whiffed, which will help you determine what to do next.
Quick Dashing
One of Bruce’s major strengths is the large selection of safe NH knockdown or wall splat attacks that makes him particularly dangerous with the opponent’s back to the wall. If at any time the opponent ducks, these attacks will wall splat for full combo: + - + - + - iWR+
- - + - CD+ - FC + CH WS+ and best of all those attacks are all entirely safe on
block. After that Bruce can use CH confirmable attacks and combos that will also wall splat while remaining safe if the combo isn’t completed, such as: CH standing - CH + ,
, - CH , - CH SS+ , .
Safe NH Knockdown or Wall Splat
Since so many of Bruce’s attacks have special properties on CH, the sooner you learn how to counter hit confirm, the better. Start with the basics: CH + to full aerial combo, CH standing to a follow-up such as + to continue the combo. Then, move on to the inherently riskier attacks such as CH ( + ), and CH WS+ that requires a +
, follow up (which can be ducked if you’re too slow to react). From there you can move on to punishable combos, CH + , , is fairly easy to CH confirm (-13 on block),
CH + , , is also easy to CH confirm but much more dangerous on block (-16, thereby launch punishable), as well as CH + , , , , which is easy to CH confirm but even worse on block (-20). Finally, move on to the big leagues: CH , and the newly NCc _ + , ~
, both of which have distinct animations that cue the opponent to duck the second hit if the first does not land CH, leaving you open to WS launch punishment.
Counter Hit Confirm
THINGS TO PRACTICE
ADVANCED STRATEGIESCH
AR
ACT
ERS •
BR
UCE
TEKKEN TAG TOURNAMENT 2
212
Protected by copyright. Unauthorized or unlawful copying or downloading expressly prohibited.

Solo Combos
Tag Combos
START DRAGUNOV
Dragunov: QCF+ ~TAG, Bruce: + , , ~ ~ , , , ~MTS , [W!], + , [TA!], Dragunov: + ~CDc, , , , Bruce: + , ,
START JACK-6 Jack-6: WS+ ~TAG, Bruce: + , , ~MTS, + , [TA!], Jack-6: + , Bruce: , ~ ~ , , ~ ~
WITH ANNA Bruce: CH + , + , + ~MTS + , [TA!], Anna: + , ~ ~ , , Bruce: , +
+ , + , + ~MTS + , [B!], + , , ~ ~ , , ~ ~CD+ , + , + ~MTS + , [B!], , , ~ ~ , , ~ ~ , , ~ ~CH standing , + , , ~MTS + , [B!], , ~ ~ , , ~ ~
COMBOS
CHA
RA
CTER
S • B
RU
CE
PRIMA Offi cial Game Guide | primagames.com
213
Protected by copyright. Unauthorized or unlawful copying or downloading expressly prohibited.

DEVIL JIN
OVERVIEW
TAG PARTNERSDue to his primary launcher (EWGF) being tag bufferable, any character with strong solo wall carry is a major threat to your opponent’s red life. Characters like Dragunov and Bruce have both the range and carry to be an effective tag partner with Devil Jin. They also provide strong counter hit (CH) options to complement Devil Jin’s strong natural hit (NH) launching options, allowing the player to focus on different pressure options depending on the current point character. If constantly destroying enemy red life is your goal, then nothing else matches Asuka and Devil Jin as a pair. Many of Asuka’s key moves, combo launchers, and aerial combo fillers are tag bufferable, allowing easy access to red life destruction. This lets Devil Jin and Asuka rapidly tag in and out to destroy red life, even on smaller combos.
There’s no doubt about it… TTT2 is a Mishima world, and everyone else is just living in it. Devil Jin is the total package: an incredible launch game, an incredible pressure game, a strong homing game, and a great punishment game. This isn’t to say that any player can just pick up a Mishima and instantly be good at the game—it’s quite the opposite, actually. A character like Devil Jin requires a certain level of execution in order to excel. At the same time, Devil Jin tends to work best as a pitbull character, which often requires the use of punishable, though hard to see, attacks. Delaying the execution of these attacks, even by a few frames, is the difference between whether or not your move is hard to see or perfectly visible.
Due to his primary launcher (EWGF) being tag bufferable, any character with strong solo wall carry is a major threat to your opponent’s red life. Characters like Dragunov and Bruce have both the range and carry to be an effective tag partner with Devil Jin. They also provide strong counter hit (CH) options to complement Devil Jin’s strong natural hit (NH) launching options, allowing the player to focus on different pressure options depending on the current point character. If constantly destroying enemy red life is your goal, then nothing else matches Asuka and Devil Jin as a pair. Many of Asuka’s key moves, combo launchers, and aerial combo fillers are tag bufferable, allowing easy access to red life destruction. This lets Devil Jin and Asuka
Due to his primary launcher (EWGF) being tag bufferable, any character with strong solo wall carry is a major threat to your opponent’s red life. Characters like Dragunov and Bruce have both the range and carry to be an effective tag partner with Devil Jin. They also provide strong counter hit (CH) options to complement Devil Jin’s strong natural hit (NH) launching options, allowing the player to focus on different pressure options depending on the current point character. If constantly destroying enemy red life is your goal, then nothing else matches Asuka and Devil Jin as a pair. Many of Asuka’s key moves, combo launchers, and aerial combo fillers are tag bufferable, allowing easy access to red life destruction. This lets Devil Jin and Asuka
CHA
RA
CTER
S •
DEV
IL J
IN
TEKKEN TAG TOURNAMENT 2
214
Protected by copyright. Unauthorized or unlawful copying or downloading expressly prohibited.

CHA
RA
CTER
S • D
EV
IL JIN
PRIMA Offi cial Game Guide | primagames.com
215
Protected by copyright. Unauthorized or unlawful copying or downloading expressly prohibited.

KEY MOVES
, , A Mishima signature, , , is Devil Jin’s i10 NC KND punisher. Even though , , is launch punishable on block, the last hit is hit confirmable and , leaves Devil Jin at -1 on guard. This makes using , as a basic poke, even outside of punishment, a very strong option to score a knockdown or to set up side step (SS) traps, both of which help shift momentum in Devil Jin’s favor.
Electric Wind God Fist ( : ) Electric Wind God Fist (EWGF) is an extremely fast, tag bufferable launcher that is +4 on block. Dependent on the options available, Devil Jin can tag to the secondary character after two or three reps of EWGF, as well as ending combos with DEWGF~TAG to quickly tag out.
+Even though + no longer causes knockdown or wall splat on natural hit, + is still one of Devil Jin’s strongest mid options. It’s particularly strong as + now more consistently hits grounded opponents, making dash in + a very dirty option as okizeme. If they lay there they’ll get hit, if they wake-up late they can get flipped over mid-air, and if they get up with a wake-up kick chances are Devil Jin will get CH + which leads to full combo and resetting the situation.
+ Devil Jin’s safe, low crushing, knockdown kick. This move sets up okizeme on hit, which is further strengthened by wall distance and positioning. + is also a strong attack to use while tagging in Devil Jin as it retains all its safe properties, as well as being considered airborne, and therefore is unable to be full launched if interrupted mid-animation.
+ ~FLY Even though + ’s crushing properties have been slighly toned down in TTT2, + is still a strong option to counter panic low jabs and kicks. It’s also useful at catching panic tags where your opponent may enter with a low jab or safe jab combos since + will consistently crush both options for free combo.
CD+ ,Devil Jin’s crouch dash (CD) to hellsweep. Due to standing damage scaling to 135% in TTT2 (compared to 120% in Tekken 6), CD+ , now deals five more points of damage. If executed correctly, CD+
, is effectively invisible, making it a very effective mix-up with CD iWS+ . CD+ , also combos on CH which, with the Tag Assault system, allows for more damage and better wall carry.
+ , Devil Jin’s i12 punisher of choice, this causes knockdown or wall splat on natural hit and deals more damage than , , with fewer hits. In TTT2, + , is now launch punishable on block, so be sure to know what you’re punishing before blindly using it. Luckily + , is hit confirmable, so even without being absolutely certain, it’s possible to check if +
, will land or not.
+ Even though + is a tad quicker and has the special stumble animation on CH, + is a more solid low option for breaking defenses. Consistently +5 on hit, meaning you don’t have look out for CH in order to apply pressure. If + hits an airborne opponent, Devil Jin gets a small bobble combo for additional damage. + also tracks to Devil Jin’s right, making it a stronger option when the opponent is forced to SS to that side (usually due to wall positioning).
CHA
RA
CTER
S •
DEV
IL J
IN
TEKKEN TAG TOURNAMENT 2
216
Protected by copyright. Unauthorized or unlawful copying or downloading expressly prohibited.

In order to succeed with Devil Jin, you’ll need to find a good balance between waiting for the opponent to make a mistake and applying pressure to force the opponent to make a mistake. With strong punishers such as ,, (at i10), + , (at i12), EWGF (at i14), and + (at i15), Devil Jin has a punishment option for almost all situations. At the same time it’s important to notice that your punishment has to be spot on as all of the punishers mentioned are all launch punishable on block, one way or another, so incorrectly punishing an attack or punishing even one frame too late might leave Devil Jin open to huge damage. Out of WS Devil Jin has above average punish options as well, tsunami kicks WS+ , (at i11), good frame advantage and safe WS+ , (at i13), and his launching WS+ (at i15).
Devil Jin’s strong punishment options aren’t limited to just use while punishing, many of them are strong options to use while side stepping and side walking. If the opponent
whiffs, then you can commit to an attack, otherwise just the threat of one of Devil Jin’s quick attacks is a deterrent for the opponent to not poke (while they’re on the defensive or at in a neutral game). Devil Jin can then use low pokes like + and + open up the opponent a little, while remaining not too punishable on block. + , is a strong safe NCc combo that will interrupt slower pokes while giving Devil Jin frame advantage on hit.
It’s important to distinguish between open field pressure and wall pressure. The big difference being Devil Jin’s positive frame attacks on block tend to push the opponent too far away to make any follow up truly valid, except when the opponent’s back is to the wall. Then there’s no place for them to go except in the wall, leaving Devil Jin closer to his opponent where his pressure game really shines. This includes attacks like + , iWR+ , + , and lesser used combos such as , , . Devil Jin also can start use safer CH launching attacks and combos such as CH + ,CH ( + ), or NH KND and launching options such as CD+ and + .
Wave dashing is essentially the act of stringing together crouch dashes. This allows the character to rapidly move forward while still having access to their CD attacks (such as Devil Jin’s CD+ and CD+ , ). It’s usually performed as CD neutral CD… ( , , …) although different types of dashing do exist. Wave dashing is very tricky to deal with as you’re never quite sure when would be a good time to attack. It usually comes down wall positioning and mind games. The longer a Devil Jin player wave dashes, the longer the opponent will have react accordingly.
“But if a WD is just a series of crouch dashes, can’t I just duck the mix-up? That would block CD+ , and duck EWGF. In both cases I could launch punish.” Is a very astute observation and, to be honest, a valid question. The problem is that Mishimas can cancel their WD/CD two different ways.
The first way is that the CD motion ( ) allows for the game to interpret the motion as a forward buffer
input. That means that doing a motion command such as CD, acts as a motion, which essentially gives Mishimas access to attacks instantly out of CD. While Devil Jin’s attacks aren’t as scary as Kazuya and Heihachi’s + , he does have + , a safe knockdown or wall splat mid attack that will wall splat for full combo. Against players that would prefer to try and SS to EWGF’s weaker side, Devil Jin can also perform CD, +
,or Devil Jin’s positive frames on block, homing, knockdown or wall splat + out of CD.
The second way is to cancel the CD motion into an instant while standing attack (iWS). This is similar to first example, except that you will be cancelling the CD into back instead of forward. The notation would look like followed immediately by the WS attack input. Therefore to get access to Devil Jin’s WS+ from CD, it would be performed as ~ . Please note that pressing back and simultaneously, rather than the after the back input will cause + to come out instead, most likely leaving you open to WS launch punishment.
Punishers, Patience, and Pressure
Wave Dashing
ADVANCED STRATEGIESCH
AR
ACT
ERS • D
EV
IL JIN
PRIMA Offi cial Game Guide | primagames.com
217
Protected by copyright. Unauthorized or unlawful copying or downloading expressly prohibited.

Fly Stance (FLY)
Wave DashingWhile not necessary to learn Devil Jin and be somewhat effective with, learning and practicing how to wave dash/crouch dash will help elevate your game. At the same time newer players (and even experienced ones) will learn and perfect a WD on a single side, not realizing that they’ve only effectively learnt half of the technique. This is often referred to as having a “1p/2p Mishima” (in reference to what side they most commonly play on) or a “side handicap”. It’s in your best interest to not be side biased, frequently swap sides as you perfect your WD. As soon as you start saying, “I think I’m getting the hang of WD, this is getting pretty easy,” it’s time to switch sides.
Execution Speed Devil Jin and the Mishimas, as a whole, are their scariest when they are played at their peak speed. As such, practicing execution speed not only strengthens your ability to fully punish certain attacks, but makes it so that your attacks (in general, whatever they may be) are harder to react to. This includes performing EWGF in i14, being able to perform a quick DEWGF for use in combos such as WS+ , DEWGF, and being certain that animation of CD+ , is masked well enough
that it can’t be guarded on reaction with no doubt as to it being CD+ , before it lands. Things like these make up the small differences between a good Devil Jin player and a great one.
A training regimen might include:• Practice punishing -14 attacks with EWGF• Practice CD+ , timing with combos such as CH + ,
CD+ , , [B!]• Practice DEWGF by using it as a combo ender
At the same time don’t become side biased, be sure to practice your execution on both sides!
Hit Confirming Learning how to hit confirm is often the difference between an attack being safe and incredibly punishable. Key moves of Devil Jin such as , , , + , , and + , are incredibly strong tools outside of use as punishers. Or recognizing opponent CH animation for + will net greater positive frames or the electric “spark” of Devil Jin’s + guarantees the combo + , . Otherwise easier confirms such as CH + and CH FLY or + grant combo and grounded follow ups, while remaining completely safe on block.
THINGS TO PRACTICE
Fly (FLY) is Devil Jin’s only stance, signified by Devil Jin hovering in the air in a ready position. While in FLY, Devil Jin’s attacks cause him to quickly strike downward at his opponent.• FLY – Devil Jin’s high FLY backhand. Even frames on
block, this will knockdown on NH and full launch on CH.
• FLY – This high throw option from FLY can be ducked to dodge the grab, although it is admittedly hard to see.
• FLY – Devil Jin’s mid bound option out FLY, unsafe on block, but knockdown on NH and CD.
• FLY – Unblockable eye laser from FLY, can hit grounded opponents. Side step to avoid.
• FLY + – Nearly identical to FLY except Devil Jin flies over his opponent before firing his laser.
+ ~ is Devil Jin’s most commonly used technique for entering FLY, otherwise Devil Jin can manually enter fly with
or through combos such as + , ~ , + , ,~ , or even while he’s grounded face up FUFA_FUFT .What’s unique about FLY is that his transitions on block are are not safe to retaliation but at the same time are difficult to punish properly as Devil Jin’s hurt box will cause certain moves to completely whiff. At the same time, his FLY transitions will usually cause the opponent to be knocked into the air on hit, making only FLY a valid follow up to combo with.
ADVANCED STRATEGIESCH
AR
ACT
ERS •
DEV
IL J
IN
TEKKEN TAG TOURNAMENT 2
218
Protected by copyright. Unauthorized or unlawful copying or downloading expressly prohibited.

Solo Combos
Tag Combos
HOW TO BEAT DEVIL JIN
Beating a smart Devil Jin player is no small feat. Chances are they’ll only use EWGF and hellsweeps (CD+, ) when it’s most advantageous to their pressure game, i.e. corralling you into a corner or for +frames
on block and hit (respectively). This makes ducking and reacting to otherwise “random” whiffed electrics extremely hard to do.Recognizing when you are at negative frames is an easy way to not get destroyed by frame traps. Apart from the obvious jab pokes and punishers, such as , at +8 or , at +7, Devil Jin has a few other notable attacks that tend to catch people who aren’t paying attention. For positive frames on block, be sure to look out for + , + , and EWGF. For positive frames on hit, look out for attacks such as CD+ , and CH + , .At the same time look out for very punishable key moves, such as CD+ , (which is launch punishable if either attack is blocked) and , , . New moves such as + and + , if improperly spaced at the end of a combo. As well as newly more punishable attacks, such as + , and even its cancel + ,~ , which many players use as a crutch to properly hit confirming + , . Otherwise just look out for his standard launch punishable attacks such as + and SS+ , which will occur less frequently.
WITH DRAGUNOV Devil Jin: CH CD+ , , [TA!], Dragunov: + ~CD+ , Devil Jin: + , ~ , EWGF
WITH DRAGUNOV Dragunov: QCF+ ~TAG, Devil Jin: SSL iWS+ , , + , [TA!], Dragunov: SSL + , , , Devil Jin: , +
WITH ASUKA Devil Jin: EWGF~TAG, Asuka: + , , + , [B!], + , ~TAG, [W!], Devil Jin:, dash, + , ,<
EWGF, + , ~ , , + , [B!], + , ,SS+ , + , + , ~ , , + , [B!], + , ,CH + , CD+ , , [B!], +
COMBOS
CHA
RA
CTER
S • D
EV
IL JIN
PRIMA Offi cial Game Guide | primagames.com
219
Protected by copyright. Unauthorized or unlawful copying or downloading expressly prohibited.

JIN
OVERVIEWWhat Jin lacks in pure damage, he makes up in pokes and counter hit (CH) game. The first thing to notice about Jin is that none of his pokes are very punishable on block, and as such he can continuously apply pressure without fear of major punishment. He may take 20 damage every now and then, but when Jin is landing 60+ damage CH combos, the tradeoff is an easy one to make. Overall, Jin is a quick character with misleading animations that make reading a few of his pokes very difficult. Factor in his long range lows and naturally advancing mids and it’s easy to see that Jin is a threat at all ranges. Add in Jin’s parry option to create punishment opportunities against the opponent’s normally safe combos, and top it all off with Jin’s incredibly consistent wall carry options, and you’re left withone scary character that only becomes more dangerous due to the new tag assault TA! system.
about Jin is that none of his pokes are very punishable on block, and as such he can continuously apply pressure without fear of major punishment. He may take 20 damage every now and then, but when Jin is landing 60+ damage CH combos, the tradeoff is an easy one to make. Overall, Jin is a quick character with misleading animations that make reading a few of his pokes very difficult. Factor in his long range lows and naturally advancing mids and it’s easy to see that Jin is a threat at all ranges. Add in Jin’s parry option to create punishment opportunities against the opponent’s normally safe combos, and top it all off with Jin’s incredibly consistent wall
one scary character that only becomes more dangerous due to the new tag
CHA
RA
CTER
S •
JIN
TEKKEN TAG TOURNAMENT 2
220
Protected by copyright. Unauthorized or unlawful copying or downloading expressly prohibited.

KEY MOVES
TAG PARTNERSWhile Jin has great CH launchers and consistent wall carry, he is lacking in open field combo damage due to generally weaker combo filler options. This makes Tag Assault a valuable tool for increasing Jin’s damage potential. Interestingly enough, his re-launch assists are slightly devalued due to Jin often having to sacrifice consistent wall carry options just to squeeze out a bit more damage. As such, a slightly lower damage Tag Assault wall carry assist, followed by Jin’s + , , is far more practical. Since strong carry options are far more common than re-launchers, Jin can be paired with nearly any character
to be more effective during combos. Bob has solid pokes and good range, while maintaining Jin’s above-average punisher strength. Nina has a strong poke and CH game that really complements Jin’s play style. On the opposite end, Xiaoyu is a very stance heavy character with most of her pressure game coming from mix-ups out of those stances. Where Jin relies on a straight-forward, strong CH game, Xiaoyu has more of a tricky 50/50 poke-to-death play style with some notable launchers in between, and the two mesh well as a pair.
,Jin’s i10 punisher causes knockdown or wall splat on hit. The cannot be forwarded buffered for extra range, due to
+ being a completely different attack, without adding extra execution time to the combo. Luckily Jin’s has about the same range as his forward buffered standing ,so almost everything that can be punished by him at i10 can be punished with , . Be aware that , will only wall splat if the wall is slightly or directly to Jin’s right. This is caused by Jin kicking from his left to his right, thereby knocking down the opponent to his right.
+ , Although + , has changed drastically from its Tekken 6 incarnation, it’s still a strong combo for catching duck, especially near the wall. The entire combo deals standing damage, making it a high damaging wall splat starter for full combo. Although the last high of the combo can be ducked and WS launch punished,
+ , is safe on block, as well as having a slower mid extension that launches on NH and is only -11 on block.
+If there’s one attack of Jin’s that you don’t want blocked from standing, it would have to be + . The goal with this attack is, obviously, to never use it when the opponent can freely guard it. At i15, it’s Jin fastest standing NH launcher that grants a full combo, unlike + which grants a smaller combo on NH compared to CH. Instead, + is best used as a SS whiff punisher or for catching incoming tagged characters as Jin takes a step forward and will crush low attacks, such as panic low jabs.
+This is one of two long range low pokes for Jin, the other being + . + hits about range 2 and launches for full combo on CH. The attack is very hard to see, is very jarring to get hit by, and has incredible tracking to the left and above average tracking to the right, making it a strong option in many situations. The only major downside is that + does not hit grounded, while + does.
+ ,Jin’s consistent aerial combo starter, filler, combo ender, and wall carry. This combo is safe on block, as well as delayable, making it a solid poke combo to annoy the opponent with variable timing. At the end of a combo,
+ hits low enough to pick up falling opponents and the final launches the opponent high and away to give consistent wall splats if there’s a wall nearby.
Electric Wind Hook Fist ( : )Electric Wind Hook Fist (EWHF) is Jin’s signature CH launcher. It grants you positive frames on guard, causes knockdown or wall splat on natural hit, and fully launches on counter hit. It’s particularly strong near the wall as the attack will still wall splat for full combo on NH/CH and leave Jin at +5 on guard, making a follow-up EWHF uninterruptible. This effectively makes EWHF a frame trap for itself near the wall.
+Jin’s long range kick can now transition into Mental Alertness (MA). On CH, the + allows for a full combo by cancelling the MA dash (noted as MAc) into an option such as + , or + ~MA. Interestingly enough, cancelling the dash still gives Jin time to guard the opponent’s attacks, even if the initial + was blocked. Just be sure to execute the dash cancel properly every time it’s used.
Standing The fastest homing move in the game, this also grants a small combo on CH. The combo potential post CH has been lowered due to + , no longer flipping the opponent to the correct direction, and instead they now remain back turned during the combo.
CHA
RA
CTER
S • JIN
PRIMA Offi cial Game Guide | primagames.com
221
Protected by copyright. Unauthorized or unlawful copying or downloading expressly prohibited.

Jin excels as an above range poking character, with long low pokes such as + and + as well as long mids such + and + . Jin is also able to convert CH to a full launcher on some of those very pokes, namely + and + . + , is a long hitting mid combo that not only is safe on block, but is also delayable and if it hits an airborne opponent, gives Jin a small combo and carry. Jin also has an assortment of safe KND and W! attacks, +
and hit confirmable combos such as MA , . At close range Jin can use mid safe pokes such as + and + and extended + , to discourage a ducking strategy against Jin.
Getting a little riskier, Jin has strong options out of crouch dash, such as CD+ , his tag bufferable mid launcher, CD+
, Jin’s advantage on block high that launches for full combo on CH, and CD+ , Jin’s low sweep that nets a small combo on hit. Jin also has standard mid launching faire,
+ as his safe, pressure option and + to low
crush attacks and catch inbound tagging characters. Jin has tools to be effective in many different situations, it’s just a question of “how do you want to play Jin?“
Mental Alertness (MA) is Jin’s major stance, it gives Jin some more evasive options, as well as notable combo filler. Jin has two ways to enter MA, either by + , in which Jin takes a step back before entering MA, or by + , where immediately enters MA where he’s standing. Mental Alertness is also commonly referred to as CDS, but due to Jin having commonly used attacks out of CD, as well as the option to CD and CDc while in MA, I opted to use its technical name in order to cut down on confusion.• MA , – Jin’s hit confirmable mid to mid combo
causes knockdown or wall splat on hit. MA is often used as an aerial combo filler in combos where Jin may enter MA to get closer to his opponent.
• MA – Jin’s mid NH knockdown attack. Jin takes a quick sidestep right before punching, giving the attack some evasive properties.
• MA – Jin leaps into the air and performs a flying jump kick. This high causes knockdown on natural hit, full wallsplat with the opponent’s back to the wall, and leaves Jin at positive frames on guard. It is useful for beating panic lows.
• MA – Jin’s low MA sweep high crushes attacks, causes knockdown on natural hit, and is launch punishable on block. At the wall, MA , WS+ , , [B!] is guaranteed, leading to a full combo.
• MA – Jin’s new high to high double strike launcher out of MA is not very useful against a standing opponent, but it works well as combo filler since it’s tag bufferable and can cause high wall splat.
New to TTT2, Jin can now enter MA through various combos and attacks, increasing MA’s usefulness as a pressure tool or its attacks used as combo filler. The MA transitions are: + ~ , + ~ , + , ~ , + , ~ , WS+
, ~ , and , , ~ . Of these six attacks, the first two are CH launchers that can transition into MA and are safe on block. The most useful attack is + ~MA as + is a long range mid poke that can lead a long, wall carry aerial combo on CH. The easiest way to convert of CH + is to go directly into MA and then use MA . This will bobble the opponent high enough to land a , ~ bound combo, where Jin can then Tag Assault or continue the aerial combo solo.
A more difficult (but more rewarding) option is to cancel MA and perform a standing combo instead. To cancel MA, you can
Pokes and Pressure
Mental Alertness Stance (MA)
ADVANCED STRATEGIESCH
AR
ACT
ERS •
JIN
TEKKEN TAG TOURNAMENT 2
222
Protected by copyright. Unauthorized or unlawful copying or downloading expressly prohibited.

hold which will transition Jin out of MA and into his crouch dash instead (where Jin can perform attacks such as CD+ ,CD+ , etc.). To cancel his CD out of MA, let the joystick fall
(neutral). From there you have access to Jin’s FC options, none of which are worth mentioning, so it’s time to cancel his FC into a usable state. From there you can CC by tapping where Jin will then have access to full stand immediately, or
by tapping the and an attack simultaneously (otherwise the game will interpret something like ~ as WS+, even though you meant + ). Putting it all together, an example combo of Jin entering MA twice would be CH +~ ~ + ~ ,MA , , ~ , [B!], , +
, ,< , or more cleanly, CH + ~MAc, + ~MA …
ParryingJin’s parry is a unique defensive option that allows him to circumvent certain game mechanics. What it does is allow Jin to act as if he isn’t actively blocking an attack or combo, causing the attack to behave as if it completely whiffed. As many attacks are worse on whiff compared to block, this allows Jin to squeeze better punishment out of attacks that are normally only slightly punishable or safe on block. It’s important to note that this doesn’t make everything punishable on block, Jin’s parry costs about four frames of animation as Jin parries and sidesteps out of the way. That makes attacks that have 10 frames of recovery (-10 on whiff) be about -6 relative to Jin, therefore not being any more punishable than if Jin was to passively block.
Parry is a strong option against non-jailing combos that don’t end with a high. Jin can parry during the flash frame and sneak in a parry mid combo, usually causing the final hit (if Jin continues to parry throughout) to be launch punishable. It’s almost important to understand that for combos where Jin parries the first hit, Jin must follow through the entire combo to gain the extra frames at the end. Therefore if a combo is three hits, Jin must parry three times to punish the final hit. Luckily if you do not follow through and parry just the first or second hit, Jin can immediately block and be safe against any follow up hits of the combo.
An interesting property of parry is that it also allows Jin to effective reverse normally un-reversible attacks. For instance a knee and elbow may be safe against a generic reversal, but can still be parried and punished by Jin. This also extends to tag crashes in TTT2, a tag crash is normally an invulnerable
mechanic for safely tagging in your secondary character, but Jin is able to parry and + punish tag crash.
CHA
RA
CTER
S • JIN
PRIMA Offi cial Game Guide | primagames.com
223
Protected by copyright. Unauthorized or unlawful copying or downloading expressly prohibited.

With the addition of numerous MA transitions, wall carry options, as well as the ability to cancel MA, it’s obvious that these will be gain even more importance as TTT2 develops. As such, practicing MA options as combo filler and MAc to have the execution down pat will improve
Jin’s game tremendously. Most notably with +~MAc which is a completely safe option when executed properly, delaying the cancel by even one frame will leave Jin open to jab punishment.
Mental Alertness Options
Learning how do things based on anticipation (instead of always relying on reaction) is the key to developing your Jin game. While Jin’s parry is somewhat safe, it still actively requires the player to properly react in time, but this doesn’t help you when the player might do a two-hit combo versus a delayed three-hit combo. Therefore, scouting what options
your opponent tends to use and knowing what options they can use far outweigh your ability to react to something they might do. This boils down to matchup and player experience, which comes with time, but is still something you should actively keep in your mind.
Anticipation
Omen and Mishima SynergyWhen paired with a Mishima (such as Heihachi, Kazuya, or Devil Jin), Jin’s Omen allows him to mimic certain Mishima moves until it is cancelled by performing an attack or being hit. To perform Possession, enter Omen ( + ) and then immediately follow with ~ . This will cause Jin to enter a stance that looks identical to Heihachi’s, and when he dashes backwards or forwards he will emanate red electricity.• Omen , , – This Mishima style , , , is an i10
NC that causes knockdown, and it is launch punishable on block.
• Omen , , – A Mishima style , , , this is an i10 NC, grants positive frames on hit, and is jab punishable on block.
• Omen , , – Jin style , to + . This can transition to MA, and is a standard CH + ~MA launcher.
• Omen – This NH stun launcher can immediately turn Jin into Devil Jin if Devil Jin is your secondary character.
• Omen + , , – This is a Devil Jin style Laser Cannon combo.
• Omen + , , + – A classic Jin style Laser Scraper combo, this is NCc and will fully launch on counter hit.
• Omen CD+ – A Mishima style TGF mid, this causes knockdown or wallsplat and is launch punishable on block.
• Omen CD+ – Mishima style EWGF. This will always come out as EWGF, regardless of execution speed.
• Omen CD+ , , – This is a Heihachi style hellsweep. The first hit launches on hit, and the second hit allows for combo follow up. As such, it’s best used as CD+ , for full launch.
• Omen + – This is a high Mishima style Stonehead throw. It has no special animation if immediately tag buffered.
Jin will remain in Possession until he either attacks, performs a CD that doesn’t immediately precede a CD attack, or is hit out of the stance. Jin can remain in possession by using EWGF, which makes combos like EWGF, EWGF, EWGF possible. If EWGF is blocked by a character other than a Mishima, then Jin remains in possession and is left at positive frames. If EWGF is blocked by a Mishima, then both characters will be pushed far away from each other and Jin will be knocked out of possession.
ADVANCED STRATEGIES
THINGS TO PRACTICE
CHA
RA
CTER
S •
JIN
TEKKEN TAG TOURNAMENT 2
224
Protected by copyright. Unauthorized or unlawful copying or downloading expressly prohibited.

HOW TO BEAT JIN
Going against a Jin player with a good amount of parry experience for the first time is a lesson in humility. The best way to stop a Jin player from abusing his parry game is to vary the timing of your mid attacks or go for low poking options. For instance, a Jin may use a safe poke combo such as , or ,
and immediately parry. If you stick out of a long poke/check or might be inclined to try and “punish”, his parry will eat your option leaving your open to punishment. But if you use a slower (preferably safe) knockdown or wall splat mid, then the Jin player will be unable to recover in time to block, thereby getting hit. The other option is to use low attacks more liberally, as Jin’s parry cannot parry low attacks, but be aware that this will leave you open to low crush attacks such as + or + .Now that + and a few other attacks such as + can lead into MA for a free CH combo, be prepared to see them used much more frequently. Even though they are safe on block, they leave Jin at about -9 frames on block. This means that Jin must guard against any incoming mix-up, without an option to SS or BD away. Use this opportunity to apply a strong 50/50 option, if you land enough, it may cause the Jin player to fade away from his safe, CH poke game plan.Otherwise, punish properly and be sure to attack with safe frame advantage. Workhorse moves such as CD+ are now always -12 on block, regardless of if they are electric or not, and + CH launching pokes (including Jin’s similar looking straight kicks) are all -11 or worse. Other than that, Jin’s punisher attacks are also punishable on block. Jin’s i10 , can be ducked and WS launched, Jin’s i12
is -14 on block, Jin’s i13 + , can be ducked and WS launched, and Jin’s i15 launchers + and + are -13 on block and -19 on block, respectively.
Solo Combos
Tag Combos
START BOB Bob: CH CD+ , iWS+ , ~TAG, Jin: + , , [W!], , , , [TA!], Bob: + , , Jin: + ,WITH BOB Jin: CH EWHF, , , + , , , ~ , [TA!] Bob: , + , , Jin: + ,SPECIAL COMBO + ~ ~ CD+ , , , , , ~ , [B!], + , + , , [W!], , ,
WS+ , + , , , ~ , [B!], , + , + ,CH + ~MAc, + ~MA , , ~ , [B!], + , ,<CH , + , , + , ,
COMBOS
CHA
RA
CTER
S • JIN
PRIMA Offi cial Game Guide | primagames.com
225
Protected by copyright. Unauthorized or unlawful copying or downloading expressly prohibited.

First introduced as the boss of Tekken 5, Jinpachi is now a playable character in TTT2 that shares the Mishima name, but plays nothing like one. Instead Jinpachi is a long range, mix-up heavy character with some of the best punishers in the game. With standing and while standing (WS) launchers at i14, great care must be taken while fighting against him, otherwise risk losing large chunks of health at a time. This is further enhanced by Jinpachi’s attacks usually requiring a simple direction + button input, making it easy to get max damage in tense moments. Instead Jinpachi’s complexity comes from his three unique stances that provide a wealth of options for very different situations.
JINPACHI
First introduced as the boss of Tekken 5, Jinpachi is now a playable character in TTT2 that shares the Mishima name, TTT2 that shares the Mishima name, TTT2but plays nothing like one. Instead Jinpachi is a long range, mix-up heavy character with some of the best punishers in the game. With standing and while standing (WS) launchers at i14, great care must be taken while fighting against him, otherwise risk losing large chunks of health at a time. This is further enhanced by Jinpachi’s attacks usually requiring a simple direction + button input, making it easy to get max damage in tense moments. Instead Jinpachi’s complexity comes from his three unique stances that provide a wealth of options for very different situations.
OVERVIEW
CHA
RA
CTER
S •
JIN
PACH
I
TEKKEN TAG TOURNAMENT 2
226
Protected by copyright. Unauthorized or unlawful copying or downloading expressly prohibited.

KEY MOVES
TAG PARTNERS
,This is Jinpachi’s signature i10 jab punisher. It has above average range and grants knockdown or wall splat on NH for full combo. Be forewarned that using the combo blindly leaves you at -17 frames, which means it is launch punishable by nearly the entire cast. Luckily, , hits high to mid, and as such, can catch twitch duckers who may bait out jab punish attempts to leave their opponent open for a free WS launcher.
+This is Jinpachi’s long range i14 launch punisher. Its range allows it to consistently punish -14 attacks that have pushback on block (such as Steve DCK+ ). While + hits high, the attack also has a mid hitting extension that extends the combo’s range as well as can catch twitch duckers and players that may attempt to punish the single + attack. Similarly to , , the mid extension to + ( + , )is launch punishable on block, so it’s in your best interest to only use + , when you are certain that either the first or second hit will successfully land.
+ + is a safe mid launcher that has incredible tracking to
both sides. It’s the type of launcher that cements Jinpachi’s repertoire of strong tracking options, and it has the incredible benefit of being safe on block. Even though Jinpachi must immediately bound post-hit, the damage potential still exceeds that of most standing solo combos.
+ ,Jinpachi’s longest range poke provides his best positive frames on hit. This combo is safe on block, as well as delayable. If the second hit of the combo lands counter hit, then it acts as a launcher that nets Jinpachi a full combo. + , has poor tracking to Jinpachi’s left, therefore you should try to train your opponent to refrain from stepping by
using key moves such as + , + , and , + . Once they stop side stepping, + , becomes one of Jinpachi’s strongest tools for pressure.
+ + is the type of move that must be respected at all
times. It’s a safe, low crush mid with a very long reach that guarantees a stomp on hit. + has some natural tracking due to the input motion. It is also a strong option for chasing down desperation tags as it will cause knockdown on natural hit, as well as leave advantageous trades if your opponent tags in with an attack. It also causes [F!] during combos, making + a strong option when floor break is available after an extended combo.
+ Jinpachi’s fairly quick mid is safe, low crushes, and offers slight tracking to either side. This is a knee that guarantees a free stomp on hit. + is Jinpachi’s go-to attack in high pressure situations due to its incredible properties. +
can immediately follow a + , + series if you believe your opponent will try get up with a wake-up attack, resetting the wake-up situation.
+This is Jinpachi’s strongest answer to side steppers. Not only does this cause knockdown or wall splat on natural hit, but it also leaves you with frames on block. The frames are so favorable that nearly all options are available post-block due to + ’s naturally long range. What attacks should be used in such a situation really comes down to what you may think your opponent may do. A panic combo will be beaten by + , , punches will be beaten by a + _ punch reversal, low attacks will be beaten by a + , otherwise if you read SS/SW or just blocking another + will reset the mind games.
While Jinpachi’s knockdown game is very strong, he suffers from overall poor pokes and limited mobility. Characters such as Wang and Feng have above an above average poking game, as well as stronger mobility due to stance transitions and very useful high/low crushing attacks. They also provide slight re-launch Tag Assault options that allow Jinpachi to
gain better wall carry and overall higher damage potential. If Mishima style play is more to your liking, Kazuya’s deadly close range game mixed with his above average speed helps cover Jinpachi’s underwhelming (defensive) range 0 game, as well as his slower non-launching attacks.
CHA
RA
CTER
S • JIN
PACH
I
PRIMA Offi cial Game Guide | primagames.com
227
Protected by copyright. Unauthorized or unlawful copying or downloading expressly prohibited.

Stances
ADVANCED STRATEGIES
There are two major approaches to playing Jinpachi: you’re either punishing your opponent, or pressuring your opponent with a stance. Jinpachi’s standing game is enough to chip away at an opponent’s health, but it lacks the necessary frame advantage to start his offense. That’s where Jinpachi’s large assortment of knockdown or wall splat attacks come into play. Once Jinpachi scores a knockdown, he can safely apply stance pressure until (ideally) Jinpachi can once again knockdown his opponent, continuing a chain of pain. Learning when to use which stance and their respective attacks is a skill that will come with experience. Each of Jinpachi’s stances are unique and cover very different situations, so learning when to use Astral Projection (AP), Nyoishou (FLY), or Hatsurai (CHG) is an invaluable skill.
For punishment, Jinpachi has incredible options, all of which either knockdown, wall splat, or launch. At i10, Jinpachi has
, (which has above average range for standing jabs). At i12, Jinpachi has + , (which also has respectable range). At i14, Jinpachi can get full launch with + .Jinpachi is no slouch at WS punishment, either! At i11, Jinpachi gets his high damage WS+ , . At i13, Jinpachi either gets a guaranteed WS+ or can opt for crouch throws, of which his + leads to full launch (although both options are escapable). At i14, Jinpachi gets full launch using WS+ , . At i20 (for low stagger stuns), Jinpachi gets his huge WS+ launcher which is tag bufferable and has a unique bound follow up with WS+ , .
If you prefer standing game, Jinpachi has safe knockdown options (outside of only punishment combos) such as +
, , + , CH ( ), + , + , and + .
Otherwise, you can use pokes and combos such as + , , + , and + , to leave the opponent standing, a departure from Jinpachi’s standard play. Jinpachi also has an assortment of safe options for guaranteed follow up or combo such as + , + , CH ( + ), , and + .
Astral Projection ( + _ + ) Astral Projection (AP) allows Jinpachi to scoot forward or backwards across the arena. The recovery time on advancing AP is superior to the retreating AP, so try to use + sparingly, otherwise it can be used to fish for countering the opponent’s advancing attacks if they get too close. It’s important to note that although Jinpachi moves rapidly during AP, he is not invulnerable while moving.
• AP – This mid is unsafe on block, but will knockdown or wall splat on natural hit. It has some evasive properties.
• AP – This high, safe panic attack will knockdown on natural hit, which is useful for stopping pressure.
• AP – This is Jinpachi’s grab option. It requires a escape, and it can grab airborne opponents for an air throw.
Nyoishou ( + )Nyoishou (FLY) is unique in that it is Jinpachi’s purely offensive stance. Unlike AP, which can allow the player to retreat and has a large frame window for late/delayed inputs, FLY has only one setting: attack. The player must commit to an attack or combo immediately after inputting the initial FLY command. This leaves no room for error, and very little opportunity to react to what your opponent does. Instead, you must have a plan of attack prior to entering FLY and act accordingly.
• FLY , , – This move has limited use outside of combos, and as such is used mostly as filler. The last hit provides above average wall carry, although the requirements for it to land successfully are tricky.
• FLY , , : – In this follow up to FLY , , ,Jinpachi snatches the opponent out of the air and slams them back into the ground. This causes [F!] and the last hit deals un-scaled damage because it’s classified as an air throw.
CHA
RA
CTER
S •
JIN
PACH
I
TEKKEN TAG TOURNAMENT 2
228
Protected by copyright. Unauthorized or unlawful copying or downloading expressly prohibited.

• FLY , , –This + style attack causes [B!]/[F!] during combo and is best suited as combo filler before bound has been used. This is useful as a combo ender, as well, since the final hit is far reaching.
• FLY –This is Jinpachi’s only safe FLY option on block, as well as his most damaging single strike [B!]/[F!] attack. This mid causes guard stun on block even though Jinpachi is left at negative frames.
• FLY , –This is a scissor kick attack that will knockdown or wall splat on natural hit. It is one of Jinpachi’s fastest options.
• FLY –Jinpachi’s low option out of FLY is very unsafe on block, but causes knockdown on natural hit. It should be noted that performing FLY over a grounded opponent has a tendency to completely cross over the character, causing the attack to whiff. Learning its effective range will stop this from happening.
Hatsurai ( + )Hatsurai (CHG) is Jinpachi’s new and improved charging stance. In Tekken 5: Dark Resurrection, Jinpachi would have to supercharge in order to gain access to his charge stance. In TTT2, CHG is considerably less dangerous because getting hit while charging will no longer score a counter hit for the opponent. CHG is best used as waiting stance since Jinpachi automatically advances to half-screen to attack your opponent, and therefore range to the opponent is not as important while using CHG.
• CHG – Jinpachi performs an advancing TGF mid that crushes many attacks and knocks down the opponent or wall splats them. This is relatively safe on block (-13) when compared to the other Mishima TGF that’s normally launch punishable.
• CHG – An incredibly powerful high tag launcher, this +8 on block move allows for continuous pressure, especially when your opponent’s back is to the wall. CHG also tracks to both sides, making it a strong option against side stepping and side walking.
MobilityWhile Jinpachi’s overall mobility may be lacking, his stances allow him to move around the stage rapidly. This makes him a constant threat to his opponent, regardless of where Jinpachi may be.
AP is Jinpachi’s general movement stance. AP quickly moves forwards or backwards, depending on the direction accompanying the AP input. Forward AP recovers much more quickly than backward AP, and can be used to quickly dash in and follow up with a non-AP combo (such as ,+ or + , as many players will twitch duck thinking an AP is upcoming). Backward AP recovers much more slowly than forward AP, and as such, only allows for AP attacks. Still, backward AP is very strong for gaining breathing room.
FLY launches Jinpachi forward into the air and is useful for applying pressure at ranges where the opponent may normally not be expecting an attack (such as range 2/3). Inversely, FLY is devalued at close range where the opponent may simply jab to start their offense, causing Jinpachi to be bobbled mid-air where they can convert for a small combo.
CHG is unique as it applies the threat of Jinpachi’s attacks without actually committing to movement, unlike AP and FLY which must move before any attack happens. This makes CHG inherently safer, as you can commit to a pressure range without the risk of CH or airborne bobble. CHG is also a very strong stance when the opponent’s life is dwindling. Spacing out CHG and leaving the illusion of a safe tag, followed immediately by CHG once the opponent tags in, can be very effective. When you factor in CHG being a tag launcher, their assumed safe tag will cost them a tremendous amount of red life as combo damage.
CHA
RA
CTER
S • JIN
PACH
I
PRIMA Offi cial Game Guide | primagames.com
229
Protected by copyright. Unauthorized or unlawful copying or downloading expressly prohibited.

Anticipating your opponent’s actions is a huge part of Jinpachi’s pressure game. With FLY requiring an immediate command input, you should never go into FLY without a plan of attack. It’s possible to react to the opponent while first inputting + , but you should always have at least a two prong option lined up. FLY mixed with FLY is a basic 50/50 that beginners should start with, FLY being a safe mid option and FLY being the wildly unsafe knockdown low.
Jinpachi is one of the best punish characters in the game, be sure to punish everything. If you aren’t punishing attacks, then a good amount of Jinpachi’s move set is going to waste. If you’re new to Tekken, start with the basics. Use , to punish instead of , . Use + , to punish i14 instead of + at first.
Once you have a solid grasp of punishment, you can graduate to the more risky and rewarding punishers. Remember, one of the worst habits a player can pick up is to stop learning. If you failed to properly punish an attack, it’s better to recognize that you could have punished but failed rather than to shrug it off in passing.
Don’t be afraid to retreat. Jinpachi doesn’t always have to go on the offensive. With such a large selection of natural hit knockdown or wall splat attacks, he can afford to let his opponent make the mistakes. A good amount of Jinpachi’s game comes from grounding the opponent nearby, so attacks like + and + are strong options when the opponent tries to come in. Otherwise, retreating AP ( + ) is a strong evasive stance for gaining some breathing room while being pressured, or to more safely tag in Jinpachi while raw tagging. It’s important to realize that it is not safe on whiff, but the stance can be cancelled into a quick AP if your opponent decides to rushdown.
Anticipation
Punishing
Retreat
THINGS TO PRACTICECH
AR
ACT
ERS •
JIN
PACH
I
TEKKEN TAG TOURNAMENT 2
230
Protected by copyright. Unauthorized or unlawful copying or downloading expressly prohibited.

HOW TO BEAT JINPACHI
Pressuring Jinpachi with safe or hit/counter-hit confirmable combos is the easiest way to break down Jinpachi’s defense. With a lack of scary crush options, Jinpachi usually has no choice but to try and weather attacks before attempting to begin his own offense. Instead Jinpachi players will usually have to wait for punishable attacks, in order to score a knockdown and gain some breathing room. When in doubt, it’s in an attacker’s best interest to poke with a -11 or -12 low since while Jinpachi’s Tsunami Kicks (WS+ , ) may deal above average damage, they also leave him at -4 on hit, making a tag interruptible even post-hit.Jinpachi’s crush game also leaves much to be desired. His signature low pokes such + , (-4 on hit) and + (-2 on hit) make continuing pressure post-hit very challenging. Then there’s + which high crushes and is even on hit, but is punishable by most of the cast with a high damage ,
combo starter. Jinpachi’s + is a strong low crush option, but performing the attack at anything other than even or positive frames risks getting jabbed out of the air for a small combo, as well as losing whatever momentum the Jinpachi player may have gained.
Solo Combos
Tag Combos
WITH WANG Jinpachi: WS+ , , [TA!], Wang: + , , , Jinpachi: + , ~ , FLY , ,WITH WANG Jinpachi: WS+ , , [TA!], Wang: + , , Jinpachi: + , + , ,START KAZUYA Kazuya: EWGF, EWGF~TAG, Jinpachi: + , ~ , FLY , , , [W!], + , ,
+ , + , [B!] ( + ), ~ , FLY , , :+ , , + , , [B!], , + ,
CH + , iWS+ , + , + , ~ , FLY , ,
COMBOSCOMBOS
CHA
RA
CTER
S • JIN
PACH
I
PRIMA Offi cial Game Guide | primagames.com
231
Protected by copyright. Unauthorized or unlawful copying or downloading expressly prohibited.

TEKKEN TAG TOURNAMENT 2
LEE
If you’re looking for a character that can literally poke your opponent to death, then look no further than Lee. Shifting between difficult to see pokes and hit confirmable NC combos, Lee will continuously wear down his opponent until they mentally break. When they do break, Lee has an assortment of safe CH launchers that can convert to full combos, which often leave his opponent near or on the wall due to his incredibly strong wall carry. Once he has his opponent at the wall, Lee has hit confirmable combos that will wall splat on hit, resetting the situation and pressure opportunities in Lee’s favor.
OVERVIEWIf you’re looking for a character that can literally poke your opponent to death, then look no further than Lee. Shifting between difficult to see pokes and hit confirmable NC combos, Lee will continuously wear down his opponent until they mentally break. When they do break, Lee has an assortment of safe CH launchers that can convert to full combos, which often leave his opponent near or on the wall due to his incredibly strong wall carry. Once he has his opponent at the wall, Lee has hit confirmable combos that will wall splat on hit, resetting the situation and pressure opportunities in
CHA
RA
CTER
S •
LEE
232
Protected by copyright. Unauthorized or unlawful copying or downloading expressly prohibited.

PRIMA Offi cial Game Guide | primagames.com
KEY MOVES
TAG PARTNERS
+ , This is Lee’s fastest hit confirmable knockdown or wall splat attack. At i14, it gives him the option to punish notable -14 attacks. Lee takes a step forward while he attacks, gaining some extra range. Even though + , is -12 on block, the combo pushes an opponent far enough back that most characters will be unable to punish properly. Keep in mind, however, that + , hits mid to high and does not jail.
+An often overlooked part of Lee’s poke game, + is an incredible move in a wide variety of situations. It has a misleading range, is +7 on hit, fully launches on counter hit, and is only -3 on block.
+ ,Not only does + by itself give Lee a long range i11 punisher, but + , is also one of Lee’s strongest and most versatile combos. The combo is NCc for 44 damage and a whopping +7 on hit, on top of being safe on block. On CH( + ), it is also a launcher for full combo. The combo is delayable, making the final uninterruptable any time the
+ lands (whether by punish or poke). This also makes it useful for pressuring opponents that may be inclined to push buttons when under stress.
+ : ,Lee’s hit confirmable just frame (JF) version of + , , will knockdown or wall splat on hit. Lee will yell out loud to signify that the JF version has occurred. What is interesting is that the frames on block, compared to the non-JF, are actually much safer (-6 vs. -11). Both versions are non-jailing and end in a high, making them susceptible to WS punishment.
iWR+ ,A new addition to TTT2, iWR+ , ( + , )
replaces Lee’s older, more generic looking mist step animation while running. With the newer iWR+ , , Lee quickly jumps off the ground and lifts with his knee before slamming the opponent back into the ground while upside down. iWR+ , is a strong option when raw tagging Lee in because it low crushes and has a tendency to trade against counter attacks while airborne. The last hit will still cause knockdown, even though it will not combo normally. While iWR+ , is a strong attack, it has abysmal tracking to either side. Using WR+ , at range 3+ just begs to be side stepped or side walked. Try not to get too predictable with inbound tag WR+ , for the same reason.
Standing What fun would a poking game be without a magic (Specific standing attacks that launch on CH for full combo)? Whenever you are at positive frames and believe your opponent will immediately attack, it’s highly in your favor to throw out a standing
.
+A crucial part of Lee’s wake-up game, + is a strong wake-up option as it is not only safe and hits ground, but it can also catch a back turned opponent for a full combo under certain wake-up situations.
is Lee’s workhorse mid homing attack. Although it is a little on the slow side, covers an incredible niche for Lee. It is a homing mid attack that launches on CH and has a strong combination of great frames on both hit and block. Lee also naturally advances during the attack, giving a misleading range that actually hits at about range 1-2.
Lee’s speed, wall carry, and poke game are all well above average—so much so, in fact, that he isn’t pigeonholed into only pairing with characters that cover his problem areas in order to remain competitive. Instead, picking a tag partner really comes down to your play style. Do you prefer a character that complements Lee’s ground game, or would you rather pair him with a character that complements his aerial combo/wall carry potential? Characters like Jack-6, Raven, and JayCee have re-launch options which increase Lee’s
damage potential and wall carry distance. On the other hand, while a character like Alisa doesn’t provide an incredibly strong Tag Assault option, she does match Lee’s poking game quite well. With Lee and Alisa paired, it doesn’t matter which character is on point; fast pokes are in their opponent’s future either way. Then there are characters such as Lars that provide a strong balance between Tag Assault damage and poking, giving you the best of both worlds.
CHA
RA
CTER
S • LEE
233
Protected by copyright. Unauthorized or unlawful copying or downloading expressly prohibited.

TEKKEN TAG TOURNAMENT 2
A huge part of Lee’s game is devoted to just overall annoying his opponent. In the open field Lee can alternate between + and + , both positive frames on hit, which then set up his fast CH poking game, such as standing and ( +
), . If the opponent is starting to close up, you can start using slower, more advantageous CH launchers such as and + which are only -1 and -3 on block (respectively). Players tend to open up more against those attacks as the frame opening is delayed, making it feel as if there’s more advantage than actually present. You can use these opportunities to SS and wait for an opening to attack, for instance if the opponent throws out whiffed attack or uses a poor poke. If not, the situation naturally resets and Lee can continue to apply pressure with his pokes.
Hitman is Lee’s primary stance. It can be entered by either manually inputting , or by inputting a after key kick attacks, although a few combos do require a or input! Therefore, if you aren’t 100% sure how to drop into HMS, you can option select both inputs by buffering the opposite kick input, essentially pressing as read by the console. A couple examples of buffering are: , , ,, which can be input as , , , ~ by pressing and holding , and then sliding to hit the final ; or ,
, , can be input as , , ~ by holding and then sliding to the .• HMS – This high is Lee’s quickest attack from
HMS. On natural hit (NH) Lee is left at large positive frames, making nearly any follow up attack uninterruptible. This move automatically transitions Lee back into HMS.
• HMS , , , – Lee’s rapid fire HMS , although not a combo, has similar properties to HMS .
• HMS , – This is an HMS jab to kick ender. It is safe on block, even on hit, and can transition Lee back into HMS.
• HMS – Lee’s signature tag bufferable launcher, this mid has some evasive properties and is only -13 on block, making HMS a very strong option.
• HMS – Lee’s consistent answer to side steps from HMS is now a high homing move. On NH, HMS shifts to attack throw, which leaves the opponent next to Lee.
• HMS – Lee’s low hitting, high crush sweep. On hit, this sets up wake-up opportunities due the opponent being left in FDFT position, making it especially strong near the wall. Beware, it is launch punishable.
• HMS – Hitman’s quickest mid hitting option, this is safe on block and +6 on hit.
• HMS + – This is Lee’s quickest low crush wall splat option out of HMS. It is -10 on block, but can transition back into HMS, effectively making it safe on block.
• HMS + – One of Lee’s strongest option out of HMS, this mid low crushes attacks, causes knockdown on NH, launches on CH, and is completely safe on block.
HMS is naturally evasive because Lee will lean backwards into his stance. This doesn’t mean that Lee can’t be hit at normally punishable frames (for example, + ~HMS is still -14 and can be consistently hit). What it does mean is that dropping into HMS at only -4 or so frames is not only safe (by definition) but can also be used to bait out whiffed attacks.
Poke, Poke, Poke
Hitman Stance (HMS)
ADVANCED STRATEGIESCH
AR
ACT
ERS •
LEE
234
Protected by copyright. Unauthorized or unlawful copying or downloading expressly prohibited.

PRIMA Offi cial Game Guide | primagames.com
Attack Transitions into HMSThere are some key moves for Lee which can be canceled into HMS to make them safer on block, or to give Lee some different options that would normally be unavailable. The most notable is + , which is Lee’s strongest option against characters with naturally retreating stances/movement (such as Paul and Bryan’s SWY or Feng’s KNP). Unfortunately, + is -17 on block, leaving Lee open to WS launch punishment against nearly the entire cast. On the other hand, + can transition HMS, lowering the frame disadvantage from -17 to -14 on block, making it not launch punishable against nearly the entire cast. Open field strategy also increases the value of a poke like + : where you may want to drop into HMS instead of scoring a
knockdown. When + : transitions to HMS, it’s +9 on hit (instead of +6), making it a very dangerous situation for your opponent.
Please note that this doesn’t hold true for all attacks that can be canceled into HMS. Some combos are actually worse on block simply because of the recovery time associated with dropping into HMS. Similarly, other times the advantage on hit may be slightly worse, but comes with the (not immediately obvious) benefit of spacing to a range where HMS can limit an opponent’s options. It may be advantageous to properly scout how an opponent deals with HMS. Abuse transitions and 50/50s if your opponent is unfamiliar with or has no strong options against HMS.
While option selects (specific attacks or movements that could beat out multiple options or branches of a particular combo) existed in Tekken 6, they were nowhere near as prevalent as they are in TTT2. With the introduction of the tag system, it’s now possible to option select certain launchers to make them safer (in past games these launches may have been consistently punishable on block). These option selects are performed by doing the original attack input, quickly pressing the tag button, and then inputting the final command. If the original launcher hits, the game will read the tag input and automatically tag to the secondary character. If the original launcher does not hit, then the game will automatically perform the final command.
Lee’s notable tag option select is FC _ + ~TAG~ . If the launcher hits, Lee will immediately tag in his partner who can then continue the combo while destroying the opponent’s red life. If the launcher doesn’t hit, then Lee automatically transitions to HMS. Even though Lee remains at -16 on block, his transition to HMS makes it incredibly difficult for an opponent to properly punish the attack.
Another of Lee’s strengths is that he’s able to perform his combos normally, and then end them with a strong, wall carrying tag option. This includes key moves such as WS+ , and + , , from which Lee can quickly tag in his partner. This allows Lee perform his signature wall carry combos, and then bring in his partner to destroy enemy red life with a consistent wall splat combo.
Option Selects and Tag Switching
CHA
RA
CTER
S • LEE
235
Protected by copyright. Unauthorized or unlawful copying or downloading expressly prohibited.

TEKKEN TAG TOURNAMENT 2
One of the scariest things about Lee is that he can be incredibly safe when used by a player who knows how to properly hit confirm. Getting past the obvious CH launchers such as + , ( + ), , and standing , Lee’s standing natural hit game has an incredible amount of mid (usually safe!) knockdown or wall splatting hit confirmable combos. At the forefront is Lee’s + , , his fastest (i14) knockdown or wall splat combo, which has a respectable amount of leniency to hit confirm. Slowing down a little bit, Lee’s + , is safer on block (-3 vs. -12, although both final hits can be ducked), is slightly easier to hit confirm (due to opponent hit animation), and deals more damage on hit
(55 vs. 46).
From there, hit confirming is a little more basic. Combos such as + : , and CH + ~HMS provide the safety of a proper hit confirm, as well as the added bonus of different properties on hit/block. + : , will knockdown or wall splat on hit, it just takes a little practice on the timing to get the JF version instead of the non-JF
+ , , version. On CH, + will knockdown the opponent to guarantee a free ground hitting follow up, but since + is so punishable on block, always accompany it with a transition to HMS. Then, when seeing the CH, you will have a guaranteed HMS follow up since it hits grounded.
It’s in your best interest to practice eslide (FC + )execution. Eslide is still an incredible mix-up and pressure tool. When executed properly, it’s extremely hard to see and usually requires a specialized combo to punish properly,
which luckily only deals heavily scaled damage because Lee is still considered airborne during his slide. Lee’s slide is also a strong tool against inbound tagging characters, as well as chasing down point characters (that may be covered by Tag Crash) for that extra bit of damage.
Hit Confirming
Eslide Execution
Mist Step
THINGS TO PRACTICE
Arguably Lee’s most stylish aerial combo filler, + ~mist step allows Lee to stay as close to his opponent as possible while performing his signature wall carry. The mist step animation causes Lee to take a sliding step forward every time it’s performed, slightly circumventing the hit stun decay. It also allows Lee to end combos with an iWS+ , attack, which in turn can allow Lee to quickly tag out, either to recover red health, or to let his partner deal red life damage.
The official notation for + ~mist step is + ~ ,so in order to do multiple + reps during a combo, the notation would be: + ~ , + ~ , + ~
, etc. To perform a WS attack out of mist step, Lee’s mist step must be cancelled into his sway. This is done by mist step~sway, or mist step~ , , (for instance to get WS+ , ). Therefore, the notation for three + reps into iWS+ , would be: + ~ , + ~ , + ~ , , . It’s in your best interest to practice
+ ~mist step, even if you aren’t inclined to use it as aerial combo filler.
CHA
RA
CTER
S •
LEE
236
Protected by copyright. Unauthorized or unlawful copying or downloading expressly prohibited.

PRIMA Offi cial Game Guide | primagames.com
HOW TO BEAT LEE
No matter what happens, don’t lose your cool. A good Lee player will continuously whittle away at your health until you do something brash, and that’s when they’ll be waiting with a frame trap and/or an easy hit or counter hit confirm. Eat the poke damage until you can properly establish your offense. Try to refrain from panic hopkicks since a standard + poke will interrupt you mid jump, giving Lee a bobble combo which can easily convert to a wall splat with his strong carry.Unlike his mid pokes and combos that are inherently safe with proper hit confirming, Lee’s low attacks tend to be the complete opposite. Ranging from -12 to -16 on block, a character with a strong WS i12 option or a launching WS i14 will cause major problems for Lee. It’s possible to hamper Lee’s poking game by proving to your opponent that you can punish both properly and consistently, especially when scoring a knockdown will allow you to reverse the momentum.Lee’s poke game usually requires staying in close range, so characters that can effectively (and safely) push Lee out of range 0 are at a natural advantage. Lee is also naturally hindered by many of his pokes having poor tracking to the right, so when in doubt, it’s a good idea to side walk right to try and bait out a whiffed attack. Be forewarned that even though Lee’s right side is his weak side, he still has strong options (such as + , , and + ) to discourage moving to his right.
Solo Combos
Tag Combos
START LARS Lars: + ~TAG, Lee: + , + ~ , + ~ , + , , [TA!], Lars: + , , Lee: WR+ ,
START LARS Lars: + ~TAG, Lee: + , + ~ , + ~ , + , , ~TAG, [W!], Lars: , DE , [TA!], Lee: SSL, + , , , Lars: + , , ,
WITH FENG Lee: + , + , [TA!] Feng: + , , Lee: ~ , + ~ , + ~ , + ~, , ,
+ , + , + ~ , + ~ , + ~ , + , , [B!], , + , ,WS+ , , + , , [B!], , + , + ~ , ~ ,CH , + , ~ , , + ~ , + ~ , + ~ , + , , [B!], +
COMBOS
CHA
RA
CTER
S • LEE
237
Protected by copyright. Unauthorized or unlawful copying or downloading expressly prohibited.

TEKKEN TAG TOURNAMENT 2
RAVEN
OVERVIEWRaven likes to poke and chip away at his opponents until they give up, willingly or not. He is one of the trickiest characters in the game, and can be a complete nightmare to face against with little or no matchup experience. He has two major stances, Haze (HAZ) and a back turned stance (SDW), which each have distinct options for pressuring his opponent. Raven’s pressure game is further strengthened by his incredible ability to not only reverse and parry attacks out of his stances, but to also dictate the pacing of a match by effectively running away until he can find an opening. Unlike other tricky characters that tend to deal below-average combo damage, Raven can do significantly high CH damage without the need of a Tag Assault or a wall. This opens up Raven’s options for partners, letting him choose from characters that do more than just give him an aerial combo filler assist.
OVERVIEWRaven likes to poke and chip away at his opponents until they give up, willingly or not. He is one of the trickiest characters in the game, and can be a complete nightmare to face against with little or no matchup experience. He has two major stances, Haze (HAZ) and a back turned stance (SDW), which each have distinct options for pressuring his opponent. Raven’s pressure game is further strengthened by his incredible ability to not only reverse and parry attacks out of his stances, but to also dictate the pacing of a match by effectively running away until he can find an opening. Unlike other tricky characters that tend to deal below-average combo damage, Raven can do significantly high CH damage without the need of a Tag Assault or a wall. This opens up Raven’s options for partners, letting him choose from characters that do more than just give him an aerial combo filler assist.
CHA
RA
CTER
S •
RAV
EN
238
Protected by copyright. Unauthorized or unlawful copying or downloading expressly prohibited.

PRIMA Offi cial Game Guide | primagames.com
TAG PARTNERSRaven is a well-rounded character with above average combo damage, as well as above average wall carry. Realistically, almost any character in the cast will improve Raven’s damage potential. Since this is the case, you can choose to play to Raven’s strengths or weaknesses when picking a tag partner. If you like Raven’s tricky play style, pairing him with a character like Zafina or Xiaoyu will be an incredible test of how much your opponent knows about the game.
Both Zafina and Xiaoyu have their own distinct strengths and weaknesses, as well as at least two unique stances that you would need to master. If you don’t want to go the trickster route, a character like Lars will not only give Raven damage and carry to extend his signature combos, but also has access to a standing i14 and i15 launcher when Lars is on point, which is something that Raven still lacks in TTT2.
This is Raven’s longest range launcher. Varying the timing of the inputs will dictate the speed of the attack (obviously), as well as its range (not so obvious). As such, playing with the timing of the attack slows it slightly, but can extend its range by approximately 50%. This allows Raven to have incredible reach when an opponent may normally consider it safe to tag out. By buffering forward inputs prior to the actual tag, you can queue up Raven’s + knee without actually committing to the attack. You should never use + blindly, however, as it is -14 on block and thereby launch punishable to some characters. With that in mind, try to use it only as a whiff punisher.
WS+ This is Raven’s i14 while standing (WS) launch punisher. Raven’s WS attacks can be performed from his crouch dash (CD), which also allows Raven to sneak under certain mid attacks (and all highs) if timed properly. Therefore WS+ can act like in the sense that Raven can perform a CD and wait to see if an opponent has whiffed any big attacks. If so, let his CD fall to neutral and immediately input the . Also, just like + , WS+ is -14 on block, so be careful which characters you’re using it against.
WS+Raven’s versatile i13 WS attack is +8 on hit, will nosebleed stun, and launches on CH for a full combo. WS+ also has the added bonus of being safe on block, and therefore is useful in tense moments as a punishment trap. Opponents will often try to punish Raven’s WS+ , leaving them open to a quick duck and whiff punisher such as WS+ .
,Raven now has an i12 punisher. (I can’t believe how long I’ve waited to say that!) One of Raven’s weaknesses for so very long was his complete lack of punishers, but in TTT2 he can at least punish hopkicks properly to try and discourage their use. , also leaves Raven in SDW on both hit and block, opening up normally inaccessible options without having to manually enter SDW.
++ is one of Raven’s strongest defensive options. It
also doubles as a half decent attack. If Raven is attacked at the beginning of the animation, he disappears and then reappears in the air with a HAZ style attack. It’s particularly strong against combos as the opponent will usually not recover in time to guard Raven’s counter attack. The attack has incredible pushback on block, making it safe in almost all situations. Both hits of + will knockdown on NH.
+An often overlooked option for dealing with jab happy pitbulls, Raven’s + high crushes and launches on CH for a high damage, long wall carry combo. In TTT2, + is now safe on block while still retaining its large frame advantage on hit. Please note that, like WS+ , + causes a nosebleed stun, so the +7 advantage can change depending on if your opponent breaks the stun or not.
Even though Raven now has a true punisher in the i12-i13 range, he’s still lacking a standing i15 launcher. Luckily, Raven has which gives him a safe knockdown i15 that sets up okizeme situations post-hit. On CH, also causes wall splat, as well as a guaranteed follow up if the opponent does not properly tech.
SDW A huge addition for Raven in TTT2, SDW now re-launches an opponent high into the air where Raven (or his tag partner, since SDW is tag bufferable) can continue with a very damaging combo. SDW acts as a launcher, so it can easily be fit into ~ or another slower attack to maximize damage. It’s possible, although very difficult, to fit in SDW during Tag Assault, even after numerous hits, by going into SDW and immediately dashing in.
KEY MOVES
tag partner. If you like Raven’s tricky play style, pairing him with a character like Zafina or Xiaoyu will be an incredible test of how much your opponent knows about the game.
This is Raven’s longest range launcher. Varying the timing of the inputs will dictate the speed of the attack (obviously), as well as its range (not so obvious). As such, playing with the timing of the attack slows it slightly, but can extend its range by approximately 50%. This allows Raven to have incredible reach when an opponent may normally consider it safe to tag out. By buffering forward inputs prior to the actual tag, you can queue up Raven’s committing to the attack. You should never use blindly, however, as it is -14 on block and thereby launch punishable to some characters. With that in mind, try to use it only as a whiff punisher.
WS+This is Raven’s i14 while standing (WS) launch punisher. Raven’s WS attacks can be performed from his crouch dash (CD), which also allows Raven to sneak under certain mid attacks (and all highs) if timed properly. Therefore WS+can act like a CD and wait to see if an opponent has whiffed any big attacks. If so, let his CD fall to neutral and immediately input the . Also, just like careful which characters you’re using it against.
WS+Raven’s versatile i13 WS attack is +8 on hit, will nosebleed stun, and launches on CH for a full combo. WS+the added bonus of being safe on block, and therefore is useful in tense moments as a punishment trap. Opponents will often try to punish Raven’s WS+a quick duck and whiff punisher such as WS+
KEY MOVES
CHA
RA
CTER
S • R
AVEN
239
Protected by copyright. Unauthorized or unlawful copying or downloading expressly prohibited.

TEKKEN TAG TOURNAMENT 2
The ultimate goal for Raven players is generally to take an early lead and sit on it. Raven’s turtle breaking options aren’t the greatest, but he has one of the best defensive and run away games in all of TTT2. Raven has two primary stances: Labyrinth (SDW) which is a back turned stance, and Haze (HAZ) which is as best described as a quick vanishing stance. SDW is Raven’s all-purpose stance, while HAZ is his offensive pressure stance. Raven also has some very long hitting options. + can be used to full launch whiffs and attacks with considerable push back, + is a long range wall splat option that is hard to punish at max range, and + , can gain extended range with forward buffering.
Raven also has some incredible poke options to complement his ability to set the pace of a match. + is a moderate tracking option that causes a noticeable pause on block; + is Raven’s quick low with a misleading range; + low crushes, causes knockdown on CH, and is -11 on block; and + is an elbow attack that transitions Raven into SDW and allows him to keep the pressure up on hit. The key to playing Raven is taking advantage of his evasion, mobility, and stance 50/50s to slowly win the match. Players can also utilize his CH damage and wall carry to end the match quicker if the situation arises.
Labyrinth (SDW) will be the bane of new Raven players until they get a grasp of not only what enters SDW, but also what situations Raven will recover into SDW from. Entering SDW manually is performed using + , but otherwise the combos , , ~ , + ~ , + ,
+ , + , , + , , + , + , + , , _ + , FC + , , HAZ , HAZ , SDW , SDW ,
~ , SDW , , SDW , , , SDW + , SDW + ~ , SDW + , SDW + ~ , SDW + , SDW
+ ~ , SDW + , SDW + , and finally SDW all leave Raven in SDW. If you aren’t comfortable
with SDW yet, I would definitely suggest not doing any the above mentioned attacks.• SDW – A quick (i8!) single jab out of SDW that
turns Raven around automatically.
• SDW , – A quick natural hit knockdown or wall splat. This does not jail on block, making it WS launch punishable.
• SDW , – Raven’s SDW combo filler. Even though Raven automatically turns around while jabbing, he can opt to stay in SDW by holding back.
• SDW , – A mid-ending option out of SDW to catch twitch duckers. This move is safe on block.
• SDW , , – One of Raven’s BT combos. The last hit causes [B!] and can hit grounded.
• SDW , , – The second of Raven’s BT combos, this can be used to end aerial combos. This move provides interesting okizeme setups due to the last hit allowing Raven to teleport to the other side of his opponent by holding forward.
• SDW – This is Raven’s NH knockdown option out of SDW. It guarantees ground hitting follow ups on hit.
• SDW – Raven’s huge SDW launcher is tag bufferable, incredibly bad on block, and can be used during Tag Assault to cause re-launch combos.
• SDW + – This move causes an attack throw on hit that leaves the opponent and Raven BT to each other.
Take An Early Lead and Sit On It
Labyrinth Stance (SDW)
ADVANCED STRATEGIESCH
AR
ACT
ERS •
RAV
EN
240
Protected by copyright. Unauthorized or unlawful copying or downloading expressly prohibited.

PRIMA Offi cial Game Guide | primagames.com
• SDW + , – This is Raven’s primary [B!] option out of SDW. It is delayable, NCc, and causes knockdown on CH. In TTT2, it is now jab punishable on block.
• SDW + , , – This is one of Raven’s consistent combo enders. It is not as useful in TTT2, but is still nice to have.
• SDW + – A quick knee that causes a minor stun (MSc) on CH. Raven can hold back to stay in SDW.
• SDW + , – This is a NC low poke to high attack. It is more useful near a wall than in the open field due to the opponent stumbling backwards (nosebleed stun). This move does not jail on block and is open to WS launchers.
• SDW + – This ground hitting mid causes knockdown. Hold forward to teleport to the other side.
• SDW + – Raven’s NH low launcher can crush highs and some mids. This move launches only on a clean hit.
• SDW + , – Raven’s SDW + to SDW launcher, this combo is NCc and launch punishable.
• SDW + , – This is Raven’s safe poke combo from SDW. Even though the second hit is high, the combo jails, making it WS punishable only on whiff. This move is safe on block, and leaves Raven at neutral frames on hit.
• SDW + – This is Raven’s safe knockdown or wall splat option out of SDW. It is useful as a + and + trap option on block.
• SDW + – Raven’s sliding low launcher leads to SDW + , or SDW on hit.
• SDW – Raven teleports to the other side of the opponent. This is sometimes useful for escaping.
Based on the situation, Raven’s key SDW moves will change. While performing a combo in SDW, you’ll most frequently be using SDW , SDW + , , SDW ,
, and SDW , , depending on the amount of hits preceding Raven’s transition into SDW. SDW and SDW
+ , are combos that immediately leave Raven in SDW. Use SDW , as an aerial combo filler after about four or five hits, and SDW , as a combo wall splat ender where SDW won’t reach. In a neutral situation, SDW + , is a misleadingly long poke that’s safe on block. Although now unsafe on block, SDW + ,
is NCc and counter hit confirmable, scoring an easy knockdown CH. SDW + is also a tricky option when spaced properly, not too far and not too close, especially now that it leads to a launcher at all ranges. While pressuring an opponent, SDW + is a safe knockdown or wall splat attack, SDW + launches for full combo while crushing high attacks at the same time, and SDW , can catch opponents off guard for a quick wall splat attempt.
Haze Stance (HAZ)HAZ is Raven’s more offensive stance. It is best entered with frame advantage, and preferably when your opponent’s back is to the wall. Unlike SDW, which tends to be more poke-oriented, HAZ is based more around CH launching and NH knockdown (which is why having +frames before entering HAZ is preferable). Haze can be entered by inputting or through the combo QCF+ , .• HAZ – HAZ to mid elbow is safe on block and
launches on CH for full combo.
• HAZ ~ – HAZ elbow to doppelganger allows Raven to teleport on hit. Raven can choose what side to reappear on by holding the corresponding direction (hold left to appear on the left, hold right to appear on the right).
• HAZ , – HAZ elbow to HAZ, this mid can immediately do HAZ for [B!] if the HAZ hits as CH.
• HAZ – Raven teleports into the air and comes down with an unblockable that also hits grounded opponents.
• HAZ – HAZ low poke that leaves Raven in SDW and leads to full launch on CH.
• HAZ – HAZ teleport kick downward which causes [B!] on hit and hits grounded opponents.
• HAZ –Raven’s quickest option out of HAZ, this mid causes knockdown or wall splat on natural hit.
• HAZ – Raven’s double low is pretty slow to come out, and is very punishable on block.
The moves you’ll be using most often while in HAZ are HAZ (CH launcher, +frames on hit), HAZ (CH launcher,
+frames on hit), and HAZ (NH KND, leaves Raven in SDW on block). HAZ is an important part of Raven’s HAZ game as on hit it allows Raven to re-enter HAZ with more frame
advantage than he started, setting up a guaranteed 50/50 (which will lead to a free CH launch if the opponent attempts to interrupt you), on top of being a safe CH launcher. HAZ high crushes and now leads to a free SDW on CH, which is huge, huge damage. HAZ is Raven’s safest option out of HAZ, causes knockdown on hit, grants an attack throw on clean hit, and can offer a free bound combo if your opponent is hit while airborne.
CHA
RA
CTER
S • R
AVEN
241
Protected by copyright. Unauthorized or unlawful copying or downloading expressly prohibited.

TEKKEN TAG TOURNAMENT 2
Everyone does it from time to time: a bad + input that comes out as + . It is crucial to learn the timing for + to be used as combo filler. This includes the timing for situations in which you need to buffer +, not just the timing for using it out in the open. There are so many nuances to the timing of + that this move
alone deserves a second and third look. Practice getting the timing down for a perfect execution and then practice delaying the inputs as much as possible, noticing how much the range of the attack extends. Practice + , + combo enders, and then practice using + as a punisher. They are not quite the same, are they?
Raven has a large assortment of high and low crushing options that seem to have been designed to cut down on an opponent’s offensive pressure options. Attacks such as + (high crush CH launcher), + (low crush CH launcher), and + (all-around evasive attack) each excel in very different situations.
Raven also has one of the best attack reversals in the game, + which will naturally option select. If it acts as a reversal, Raven will counter attack with a HAZ
. Otherwise on block it will push the opponent far away (making it safe at -10), or on hit it will knockdown the opponent for a grounded hit or okizeme. New to TTT2, Raven’s teleport reversal + _ will now deal no damage to Raven as he teleports away. This makes tagging Raven in with his reversal a strong option. It is also a decent option for escaping tag punishment. Raven has some less useful reversals such as and QCF+, which have incredibly tight reversal windows—so much so that you’re more likely to see them accidentally while performing these attacks.
Raven’s ability to run away is also very strong. He has a backflip ( ), which is usually unique to female
characters. His backflip crushes lows while backing him up simultaneously. He can also rapidly enter SDW and cancel shadow, giving him immediate access to strong CH launchers, high and low crush games, and long range pokes. Raven also can enter HAZ to give him a safe CH poke/launcher, as well as an evasive low that naturally transitions to SDW. The only question that remains is how desperate your opponent is to get in. Be prepared and punish accordingly.
+
Defense, Reversals, and Running Away
Stance Familiarity
Crouch Step
As with so many other tricky characters, gaining familiarity with your character’s stances is the key to long term success. The absolute worst thing you can do while playing as Raven is get stuck in back turned and just freeze up. Knowing your options for escaping different scenarios, such as using SDW + as a reversal or SDW + _ to quickly teleport away, may save you in a future match.
Alternatively, HAZ does not leave Raven in BT but provides interesting wake-up options, especially near the wall.
Working out scenarios where certain options are preferable to others, such as HAZ for perpendicular wall splat versus HAZ for side wall splats where the opponent may tech and most likely recover with an attack. Find what matches your play style the best and learn it inside and out. Practice it until it’s so ingrained in your play that you can focus on the game at hand, rather than trying to figure out what stance options are valid at what times.
Practice Raven’s crouch step ( ), even without committing to a follow-up attack. Discover what mid attacks it can crush, and get a good feel for its range. Once you can perform it on command, it gives you access to quick
NH and CH launching options out of a high to mid crushing step. This move is often overlooked in Raven’s command list, but it is one that really helps take Raven’s pressure game to the next level.
THINGS TO PRACTICEADVANCED STRATEGIESCH
AR
ACT
ERS •
RAV
EN
242
Protected by copyright. Unauthorized or unlawful copying or downloading expressly prohibited.

PRIMA Offi cial Game Guide | primagames.com
COMBOSSolo Combos
Tag Combos
HOW TO BEAT RAVENThe easiest way to beat Raven is to turtle up and punish him properly, especially if your character has consistent i14 standing and while standing punishers. Key moves such as + , QCF+ (at anything other than max range),
+ , WS+ , WS_QCF+ , SDW , and his new combo + , are all -14 on block. Key lows + and + are also WS i14 punishable. This doesn’t mean that you should only punish Raven’s i14 moves; he has his share
of launch punishable attacks, too, it’s just that some of his most used moves all happen to be -14 on block.Most of Raven’s strongest attacks hit either high or mid, and some of Raven’s notable lows have been tinkered with in TTT2. + is now only -14 on block, but no longer launches on CH, Raven’s signature NH low launcher QCF+ now requires a special combo, lowering its damage potential while at the same time doing two points less damage (even after the 120% to 135% standing damage buff in TTT2). So why duck?Even though much of his move list is punishable, Raven does have some attacks that aren’t punishable and instead set up punishment traps to catch an opponent off guard. The key to most of them is for Raven to use his attack reversal + which eats offensive options, and then Raven counter attacks from the sky. If you think the Raven player will be using a + trap, the best thing you can do is stick out a quick recovering poke (such as a standing ) and immediately side step. If Raven disappears, that means he’ll be counter attacking soon and will completely miss you, due to the SS, leaving him open to launch punishment. Some common traps are off of +, SDW + , WS+ (which is better suited for Raven to twitch duck and WS+ ), , , (with opponent’s back to the wall), and SS+ .Lastly, Raven’s mid crush game is basically non-existent, but never, ever challenge his high/low crush abilities. Too much of his crush game is now safe (compared to his crush game in Tekken 6), and you’ll eventually lose on trades alone. It’s easier to stick to turtling and just wait him out.
The easiest way to beat Raven is to turtle up and punish him properly, especially if your character has consistent i14
WITH ZAFINA Raven: + , + , , + , [TA!], Zafina: SSL, + , , Raven: + , + ,
WITH ZAFINA Raven: ~ ~TAG, Zafina: + , + , , SCW ~TAG, [W!], Raven: dash + , , [TA!], Zafina: + , , , Raven: + ,
WITH LARS Raven: + , SDW + , ~TAG, Lars: , + , [W!], DE , [TA!], Raven: + , , , Lars: + , , ,
~ , SDW + , , + , , + , + ,+ , + , , + , [B!], + , , +
CHA
RA
CTER
S • R
AVEN
243
Protected by copyright. Unauthorized or unlawful copying or downloading expressly prohibited.

TEKKEN TAG TOURNAMENT 2
ZAFINA
OVERVIEWZafina is the ultimate test of matchup experience, second only to Lei in total number of unique stances and attacks out of those stances. Zafina is through and through a tricky character; she’s stance and mix-up heavy, with transitions to stances from numerous attacks. Her three unique stances, Scarecrow (SCR), Mantis (MNT), and Tarantula (TRT), give her strong crush options while simultaneously applying pressure to her opponent. In fact, it’s Zafina’s affinity with crushing attacks that makes her dangerous to approach safely. This means that opponents often need to have a Zafina-specific plan of attack that might not normally be applicable to other characters (such as specific moves to help counter Zafina’s unique stances). Zafina’s attacks also tend to have above average ranges, and she can punish her opponents from what are normally safe ranges, making her a threat even at range 2.
OVERVIEWZafina is the ultimate test of matchup experience, second only to Lei in total number of unique stances and attacks out of those stances. Zafina is through and through a tricky character; she’s stance and mix-up heavy, with transitions to stances from numerous attacks. Her three unique stances, Scarecrow (SCR), Mantis (MNT), and Tarantula (TRT), give her strong crush options while simultaneously applying pressure to her opponent. In fact, it’s Zafina’s affinity with crushing attacks that makes her dangerous to approach safely. This means that opponents often need to have a Zafina-specific plan of attack that might not normally be applicable to other characters (such as specific moves to help counter Zafina’s unique stances). Zafina’s attacks also tend to have above average ranges, and she can punish her opponents from what are normally safe ranges, making her a threat even at range 2.
Zafina is the ultimate test of matchup experience, second only to Lei in total number of unique stances and attacks out of those stances. Zafina is through
simultaneously applying pressure to her opponent. In fact, it’s Zafina’s affinity with crushing attacks that makes her dangerous to approach safely. This means that opponents often need to have a Zafina-specific plan of attack that might not normally be applicable to other characters (such as specific moves to help counter Zafina’s unique stances). Zafina’s attacks also tend to have above average ranges, and she can punish her opponents from what are normally safe ranges, making her a threat even at range 2.
Zafina is the ultimate test of matchup experience, second only to Lei in total number of unique stances and attacks out of those stances. Zafina is through
her opponent. In fact, it’s Zafina’s affinity with crushing attacks that makes her dangerous to approach safely. This means that opponents often need to have a Zafina-specific plan
applicable to other characters (such as specific moves to help counter Zafina’s unique stances). Zafina’s attacks also tend to have above average ranges, and she can punish her opponents from what are normally safe ranges, making her a threat even at range 2.
CHA
RA
CTER
S •
ZA
FIN
A
244
Protected by copyright. Unauthorized or unlawful copying or downloading expressly prohibited.

PRIMA Offi cial Game Guide | primagames.com
TAG PARTNERS
KEY MOVES
Zafina, being a newer character, still has some holes in her offensive (lack of flexible combo options) and defensive (lack of i12/i13 punisher and a standing i14/i15 launcher) abilities. Pick a character that can fill these holes and better balance your team. Lars is a solid addition to any team, bringing great punishers, fast standing launchers, and damaging combo fillers to the table. If you’d prefer to stay with the “tricky”
play style of Zafina for your secondary character, Raven is one of the most unique characters in the game, and he provides some damaging Tag Assault filler options to help improve damage potential. While Alisa may not be considered a tricky character, she does has some very hard-to-see pokes on top of some unusual crushing properties, which makes her a good fit if you tend to focus on a more poke-centric game.
, This is Zafina’s second strongest i10 punisher. In TTT2, it automatically transitions into her scarecrow stance (SCR). Zafina can also cancel the transition into SCR by tapping back, but the frame advantage and disadvantage are both worsened due to Zafina visually cancelling SCR. At +5, Zafina has some strong options out of SCR, including: SCR for a quick advantage poke; CH confirm SCR , for a quick bind; SCR , for safe mid pokes; and finally, if you want to play risky, SCR , + for knockdown or wall splat, or SCR for a full launch.
WS+ ,Zafina’s fastest while standing (WS) launcher is also tag bufferable to destroy red life. Unfortunately, the first hit of the combo floats the opponent, immediately scaling the combo damage down and lowering its damage potential. Outside of launch punishment, WS+ , can be used at a Tag Assault option where + , might normally push the opponent too far away.
WS+ Although Zafina’s WS+ is slower than most WS launchers, it does have some interesting properties that are worth mentioning. First and foremost, WS+ has some incredible crushing properties. Not only does it crush high attacks, but it can also crush certain mid hitting attacks (such as Dragunov’s iWR+ ). Secondly, it can be option selected into Mantis stance (MNT) by quickly tagging and then immediately tapping down. See the advanced strategies section for more information.
+ , Zafina’s NCc low to mid launcher high crushes after the first few frames of animation and remains crushing until the kick connects.
+ has great tracking to Zafina’s right side, but only basic tracking to her left. + , is also tag bufferable to allow for easy destruction of red life. It’s also a strong Tag Assault filler since it doesn’t push the opponent too far away during a combo.
+Zafina’s incredible homing attack does great damage on hit, causes knockdown or wall splat, is +1 on block, and hits up to range 2. + gives Zafina the ability to apply pressure outside of her normal effective range (about range 1), while also closing the gap and getting back into her ideal range.
+ , + , is Zafina’s strongest standing punisher aside
from her launcher at i16. The combo has great range and is a monstrous +9 on hit, leaving your opponent no real option other than to block post-hit. If they do not, your opponent is left at the perfect range for a free + launch. Even though + , is -6 on block, the last hit is high and does not jail, so try not to use + , outside of punishment.
+Zafina’s quickest NH standing launcher, + is the type of move that must always be in the back of your mind. Just like Jack’s + , as soon as you stop respecting Zafina’s + ,that is when you’ll get hit by it the hardest. Zafina takes a step forward before attacking, giving + even more range than what would be expected. This is a great whiff punisher, a great SS launcher, and just an overall great attack.
+ , , This is Zafina’s new extension to her + , poke that can also be delayed. This move is great for interrupting opponents who may immediately try to punish + , on block. The combo extension also gives Zafina a consistent, high damage wall combo ([W!] + , + , , ).
CHA
RA
CTER
S • Z
AFIN
A
245
Protected by copyright. Unauthorized or unlawful copying or downloading expressly prohibited.
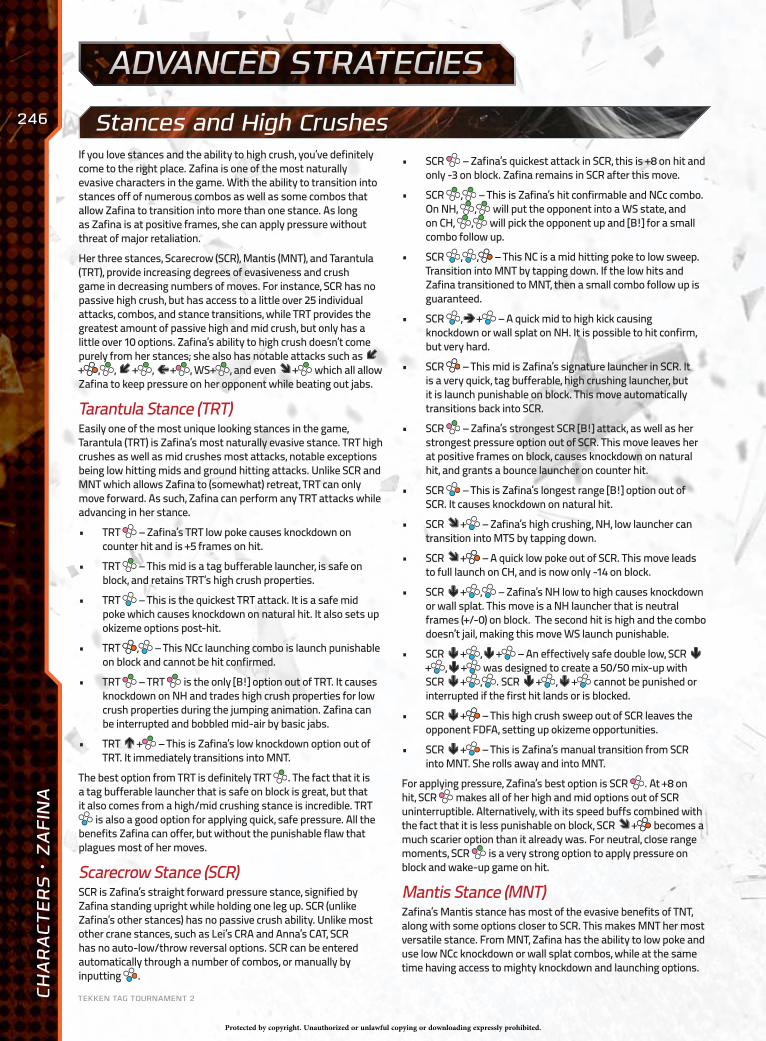
TEKKEN TAG TOURNAMENT 2
Stances and High Crushes
ADVANCED STRATEGIES
If you love stances and the ability to high crush, you’ve definitely come to the right place. Zafina is one of the most naturally evasive characters in the game. With the ability to transition into stances off of numerous combos as well as some combos that allow Zafina to transition into more than one stance. As long as Zafina is at positive frames, she can apply pressure without threat of major retaliation.
Her three stances, Scarecrow (SCR), Mantis (MNT), and Tarantula (TRT), provide increasing degrees of evasiveness and crush game in decreasing numbers of moves. For instance, SCR has no passive high crush, but has access to a little over 25 individual attacks, combos, and stance transitions, while TRT provides the greatest amount of passive high and mid crush, but only has a little over 10 options. Zafina’s ability to high crush doesn’t come purely from her stances; she also has notable attacks such as + , , + , + , WS+ , and even + which all allow Zafina to keep pressure on her opponent while beating out jabs.
Tarantula Stance (TRT)Easily one of the most unique looking stances in the game, Tarantula (TRT) is Zafina’s most naturally evasive stance. TRT high crushes as well as mid crushes most attacks, notable exceptions being low hitting mids and ground hitting attacks. Unlike SCR and MNT which allows Zafina to (somewhat) retreat, TRT can only move forward. As such, Zafina can perform any TRT attacks while advancing in her stance.
• TRT – Zafina’s TRT low poke causes knockdown on counter hit and is +5 frames on hit.
• TRT – This mid is a tag bufferable launcher, is safe on block, and retains TRT’s high crush properties.
• TRT – This is the quickest TRT attack. It is a safe mid poke which causes knockdown on natural hit. It also sets up okizeme options post-hit.
• TRT , – This NCc launching combo is launch punishable on block and cannot be hit confirmed.
• TRT – TRT is the only [B!] option out of TRT. It causes knockdown on NH and trades high crush properties for low crush properties during the jumping animation. Zafina can be interrupted and bobbled mid-air by basic jabs.
• TRT + – This is Zafina’s low knockdown option out of TRT. It immediately transitions into MNT.
The best option from TRT is definitely TRT . The fact that it is a tag bufferable launcher that is safe on block is great, but that it also comes from a high/mid crushing stance is incredible. TRT
is also a good option for applying quick, safe pressure. All the benefits Zafina can offer, but without the punishable flaw that plagues most of her moves.
Scarecrow Stance (SCR)SCR is Zafina’s straight forward pressure stance, signified by Zafina standing upright while holding one leg up. SCR (unlike Zafina’s other stances) has no passive crush ability. Unlike most other crane stances, such as Lei’s CRA and Anna’s CAT, SCR has no auto-low/throw reversal options. SCR can be entered automatically through a number of combos, or manually by inputting .
• SCR – Zafina’s quickest attack in SCR, this is +8 on hit and only -3 on block. Zafina remains in SCR after this move.
• SCR , – This is Zafina’s hit confirmable and NCc combo. On NH, , will put the opponent into a WS state, and on CH, , will pick the opponent up and [B!] for a small combo follow up.
• SCR , , – This NC is a mid hitting poke to low sweep. Transition into MNT by tapping down. If the low hits and Zafina transitioned to MNT, then a small combo follow up is guaranteed.
• SCR , + – A quick mid to high kick causing knockdown or wall splat on NH. It is possible to hit confirm, but very hard.
• SCR – This mid is Zafina’s signature launcher in SCR. It is a very quick, tag bufferable, high crushing launcher, but it is launch punishable on block. This move automatically transitions back into SCR.
• SCR – Zafina’s strongest SCR [B!] attack, as well as her strongest pressure option out of SCR. This move leaves her at positive frames on block, causes knockdown on natural hit, and grants a bounce launcher on counter hit.
• SCR – This is Zafina’s longest range [B!] option out of SCR. It causes knockdown on natural hit.
• SCR + – Zafina’s high crushing, NH, low launcher can transition into MTS by tapping down.
• SCR + – A quick low poke out of SCR. This move leads to full launch on CH, and is now only -14 on block.
• SCR + , – Zafina’s NH low to high causes knockdown or wall splat. This move is a NH launcher that is neutral frames (+/-0) on block. The second hit is high and the combo doesn’t jail, making this move WS launch punishable.
• SCR + , + – An effectively safe double low, SCR + , + was designed to create a 50/50 mix-up with SCR + , . SCR + , + cannot be punished or interrupted if the first hit lands or is blocked.
• SCR + – This high crush sweep out of SCR leaves the opponent FDFA, setting up okizeme opportunities.
• SCR + – This is Zafina’s manual transition from SCR into MNT. She rolls away and into MNT.
For applying pressure, Zafina’s best option is SCR . At +8 on hit, SCR makes all of her high and mid options out of SCR uninterruptible. Alternatively, with its speed buffs combined with the fact that it is less punishable on block, SCR + becomes a much scarier option than it already was. For neutral, close range moments, SCR is a very strong option to apply pressure on block and wake-up game on hit.
Mantis Stance (MNT)Zafina’s Mantis stance has most of the evasive benefits of TNT, along with some options closer to SCR. This makes MNT her most versatile stance. From MNT, Zafina has the ability to low poke and use low NCc knockdown or wall splat combos, while at the same time having access to mighty knockdown and launching options.
CHA
RA
CTER
S •
ZA
FIN
A
246
Protected by copyright. Unauthorized or unlawful copying or downloading expressly prohibited.

PRIMA Offi cial Game Guide | primagames.com
• MNT – This is Zafina’s quickest attack out of MNT. It is primarily used as aerial combo filler to escape MNT.
• MNT , , – These are MNT attacks with a ton of different properties. First of all, MNT , , is NCc and will knockdown or wall splat. CH MNT by itself is a knockdown attack with follow ups, MNT ( ), , is a knockdown or wall splat NC combo, and MNT ( , ), is an attack that also causes knockdown or wall splat.
• MNT , , – Similar to MNT , , , MNT , , is NCc because CH causes knockdown, although this
combo is much weaker in general due to its poor frames on block.
• MNT , , + – This move is identical to MNT ,, except that Zafina ends with a low instead of a
knockdown mid.
• MNT , – This high crush is a NCc launcher. It is not hit confirmable and is launch punishable on block.
• MNT – This makes Zafina turn around while in MNT, and can be used to run away quickly.
• MNT + – A tag bufferable launcher out of MNT that causes mid-air flip, reducing damage potential.
• MNT + – This is Zafina’s handstand kick. It is +11 on hit, will knockdown or wall splat on CH, and is -17 on block with a large pushback.
• MNT + , – This NCc knockdown or wall splat combo is primarily used as an aerial combo filler/ender.
• MNT + , – Zafina’s signature MNT aerial combo filler, this combo is safe on block and is also NCc, causing an air bobble state and guaranteeing a small combo follow up.
• MNT + – A high crush slide out of MNT. Knocks down the opponent on CH, leaving them FDFA.
• MNT + – This low crush option out of MNT now causes knockdown on both NH and CH.
At i13, MNT , , is a strong option for interrupting counter MNT pressure while simultaneously knocking down your opponent on CH, and MNT ( ), , is a NC for full wallsplat. MNT + is another incredible option in MNT, as it naturally option selects for you. On hit, Zafina is left at +11 at range 0, and on block Zafina will be pushed far away (out of harm’s way). On CH the attack will full wall splat and leave Zafina right at the wall. MNT + is a very unexpected attack; it’s one of only a few low crush attacks for Zafina, and it is only -10 on block. It causes knockdown on natural hit to keep pressure up afterwards.
Exposing Character UnfamiliarityIt doesn’t matter how theoretically punishable your character is once you realize that your opponent has almost no clue what’s going on. This is especially true with tricky characters that naturally have a steep learning curve and therefore aren’t as frequently played. Of course, this means that your encounters with these characters in the wild will be fewer in number, since fewer players will use them. Because play experience is probably one of the best ways to learn in Tekken, if you never play or practice with a tricky character, chances are you won’t know how to play against one.
Since you never know how familiar an opponent is with playing against your character, you’ll have to use a tactic referred to as scouting. This refers to using a specific combo
or attack early enough in the match that, if punished properly, shouldn’t have much bearing on the remainder of the match. If your opponent fails to react properly, test them again with a different combo. Keep doing this until you’re confident about their familiarity level with your character. If they are unfamiliar with Zafina, abuse some of her incredibly strong options such as SCR + , , SCR , , , ,
+ , , and + , . If they prove that they know how to react well against your combos, or have shown subconscious muscle memory (such as twitch ducking but not punishing afterward), play it smart. It’s possible that they are sandbagging and waiting for you to make a mistake at a more crucial time.
Stance Transitions
THINGS TO PRACTICE
One of the things that Zafina excels at is her ability to convert standard pokes into stance transitions. This is a way for Zafina to apply stance pressure without immediately telegraphing what stance she’s entering. This forces players that don’t know Zafina through and through to have to adjust their strategy on the fly, possibly buying you more time to apply stance pressure. Learn exactly what pokes go into which stances and how they might fit your play style.
Zafina’s stance transitions (while neutral):
• Scarecrow (SCR) – , , , , , , + , , +, + , + , ~ , + , + , WS+
• Tarantula (TRT): , , + , + , ~ , +, WR+ ~
• Mantis (MNT): , , , , , ~ , + , , + , , + ~ , + ~ , + , + ~ , WS+ ~ , FC + ~
Usually Zafina’s attacks, while in a stance, will naturally
transition back into that stance. The frames on hit and block are usually more advantageous when transitioning to a stance, so be forewarned that canceling a stance transition to a neutral state (instead of a different stance) is not always the best idea.
Zafina’s stance transitions (while in stance):
• Scarecrow (SCR) – SCR , SCR , SCR , SCR , , SCR , + , SCR , SCR + , SCR + , , SCR
+ , + , SCR +
• Tarantula (TRT) – TRT , TRT , TRT ~ , SCR ~
• Mantis (MNT) – TRT ~ , TRT , TRT + , SCR , , ~ , SCR ~ , SCR + ~ , SCR + ~, SCR + ~ , SCR + , MNT , MNT , MNT , , MNT , , , MNT , MNT , , MNT ,, + , MNT , MNT , , MNT + , MNT
+ , , MNT + , MNT + , MNT + , , MNT + ~ , MNT + ~
CHA
RA
CTER
S • Z
AFIN
A
247
Protected by copyright. Unauthorized or unlawful copying or downloading expressly prohibited.

TEKKEN TAG TOURNAMENT 2
Stance Ranges and Situations
Punishing
People always tell you to practice your combos practice your punishers, and sometimes to practice your traps, but practicing stance ranges and situations is an often overlooked topic, especially for tricky characters. While this comes with match experience and simply playing the game, the last thing you want to encounter in a match is a situation that you’ve never seen before. Most players will ad-lib and make something work, but great players will know exactly what to do regardless of how frequently (or rarely) that particular situation might occur.
Here are a few ideas to start you off:
• If you are stuck in SCR while getting a “happy birthday,” what’s the best way to keep the tagging character in?
• If you are caught BT in MNT at range 1 and negative frames, what is the best way to escape?
• If you have caught an airborne opponent while in TRT with the wall coming up, how do you maximize damage?
Due to Zafina’s above average range, she’s able to punish raw tags and whiffs at ranges that normally would be unexpected for a standard size character to reach. Try to get a feel for exactly how far + launches from, and then practice staying at that preferred range and punish accordingly.
HOW TO BEAT ZAFINA
Although greatly improved from Tekken 6, Zafina still has a wealth of punishable combos and attacks. Instead of many of her attacks being launch punishable on block, now many range from being -12 to -14 on block. This makes characters with standing i12 punishment and WS i14 launchers even more valuable because they can still punish these safer attacks, as well as the rest of her punishable combos. These include practically all of Zafina’s stance lows such as TRT + , SCR + , SCR +
, SCR + , and MNT + . The easiest way to deal with Zafina’s stances is to know what your character’s options are before entering the match. Mid attacks that tend to hit lower in the hit box are more likely to land versus those that hit higher. For instance, Heihachi’s + will completely miss Zafina’s Mantis stance, but his + will consistently hit. At the same time, Heihachi’s + will completely miss Zafina’s Tarantula stance, but his + will consistently hit. Zafina’s stances also have limited tracking, so if you character has no strong or safe option, you can opt to SS/SW instead and punish accordingly.This doesn’t mean that you should pitbull Zafina constantly because you have a few moves to deal with her stances. It’s quite the opposite! Zafina has a wide selection of crushing moves for countering opponents who may be complacent with their anti-Zafina strategies. Whereas most tricky characters will manually enter a stance, giving the opponent time to react, Zafina can transition into a stance from approximately 70 different attacks and combos (not including stance cancels). This makes reacting to a stance immediately a little more difficult, but here are some key combos to stance transitions that you should be on the lookout for: , (into SCR), , (into TRT), WS+ ~ (into MNT) and new attacks such as + (into TRT) and + ~ (goes to MNT).Zafina is able to option select her WS+ by inputting WS+ ~TAG~ . This means that if her opponent is hit, Zafina’s secondary character is immediately tagged in to destroy red life, and if the attack is blocked then Zafina transitions into MNT. While the frame disadvantage is worse on WS+
~ , it is also much harder to punish properly. Be sure to figure out your best punish option and discourage the use of this option select.
THINGS TO PRACTICECH
AR
ACT
ERS •
ZA
FIN
A
248
Protected by copyright. Unauthorized or unlawful copying or downloading expressly prohibited.

PRIMA Offi cial Game Guide | primagames.com
Solo Combos
Tag Combos
START ALISA Alisa: WS+ ~TAG, Zafina: , [TA!], Alisa: + , , Zafina: , + , ,START ALISA Alisa: FLY ~TAG, Zafina: ~ , + , , SCW , [TA!], Alisa: + , , Zafina: +
START RAVEN Raven: QCF+ ~TAG, Zafina: + , + , + , , SCW , [TA!], Raven: SDW , , [W!], Zafina: + , + , ,
+ , + , + , + , , SCR , [B!], , + ,WS+ , , + , [B!], , + , + , ,CH + , , + , + , + , , SCR , [B!], , + ,
COMBOSCH
AR
ACT
ERS • Z
AFIN
A
249
Protected by copyright. Unauthorized or unlawful copying or downloading expressly prohibited.
![Atlas.botanic.[Română] TEKKEN](https://static.fdocuments.net/doc/165x107/55cf8c685503462b138c1440/atlasbotanicromana-tekken.jpg)