Android porting to beagleboard
14
Android porting to beagle board using Ubuntu on your machine Kaushik Prajapati E-mail: [email protected] San Jose State University Computer Engineering Department STEP 1: Install the necessary software in order to compile and build the Android For Ubuntu Linux (32-bit x86) users: To set up your Linux development environment, make sure you have the following: Required Packages: Git 1.5.4 or newer and the GNU Privacy Guard. JDK 5.0, update 12 or higher. Java 6 is not supported, because of incompatibilities with @Override. flex, bison, gperf, libsdl-dev, libesd0-dev, libwxgtk2.6-dev (optional), build-essential, zip, curl. $ sudo apt-get install git-core gnupg sun-java5-jdk flex bison gperf libsdl-dev libesd0-dev libwxgtk2.6-dev build-essential zip curl libncurses5-dev zlib1g-dev You might also want Valgrind, a tool that will help you find memory leaks, stack corruption, array bounds overflows, etc. $ sudo apt-get install valgrind Intrepid (8.10) users may need a newer version of libreadline: $ sudo apt-get install lib32readline5-dev For Ubuntu Linux (64-bit x86) users: This has not been as well tested. Please send success or failure reports to android- [email protected]. The Android build requires a 32-bit build environment as well as some other tools: Required Packages: Git, JDK, flex, and the other packages as listed above in the i386 instructions: JDK 5.0, update 12 or higher. Java 6 is not supported, because of incompatibilities with @Override. Pieces from the 32-bit cross-building environment X11 development $ sudo apt-get install git-core gnupg flex bison gperf build-essential zip curl sun-java5-jdk zlib1g-dev gcc-multilib g++-multilib libc6-dev- i386 lib32ncurses5-dev ia32-libs x11proto-core-dev libx11-dev lib32readline5-dev lib32z-dev
-
Upload
pratik-mahajan -
Category
Documents
-
view
1.069 -
download
3
Transcript of Android porting to beagleboard

Android porting to beagle board using Ubuntu on your machine
Kaushik Prajapati
E-mail: [email protected]
San Jose State University
Computer Engineering Department
STEP 1: Install the necessary software in order to compile and build the Android
For Ubuntu Linux (32-bit x86) users:
To set up your Linux development environment, make sure you have the following:
Required Packages:
Git 1.5.4 or newer and the GNU Privacy Guard.
JDK 5.0, update 12 or higher. Java 6 is not supported, because of incompatibilities with
@Override.
flex, bison, gperf, libsdl-dev, libesd0-dev, libwxgtk2.6-dev (optional), build-essential, zip, curl.
$ sudo apt-get install git-core gnupg sun-java5-jdk flex bison gperf
libsdl-dev libesd0-dev libwxgtk2.6-dev build-essential zip curl
libncurses5-dev zlib1g-dev
You might also want Valgrind, a tool that will help you find memory leaks, stack corruption,
array bounds overflows, etc.
$ sudo apt-get install valgrind
Intrepid (8.10) users may need a newer version of libreadline:
$ sudo apt-get install lib32readline5-dev
For Ubuntu Linux (64-bit x86) users:
This has not been as well tested. Please send success or failure reports to android-
The Android build requires a 32-bit build environment as well as some other tools:
Required Packages:
Git, JDK, flex, and the other packages as listed above in the i386 instructions:
JDK 5.0, update 12 or higher. Java 6 is not supported, because of incompatibilities with
@Override.
Pieces from the 32-bit cross-building environment
X11 development
$ sudo apt-get install git-core gnupg flex bison gperf build-essential
zip curl sun-java5-jdk zlib1g-dev gcc-multilib g++-multilib libc6-dev-
i386 lib32ncurses5-dev ia32-libs x11proto-core-dev libx11-dev
lib32readline5-dev lib32z-dev
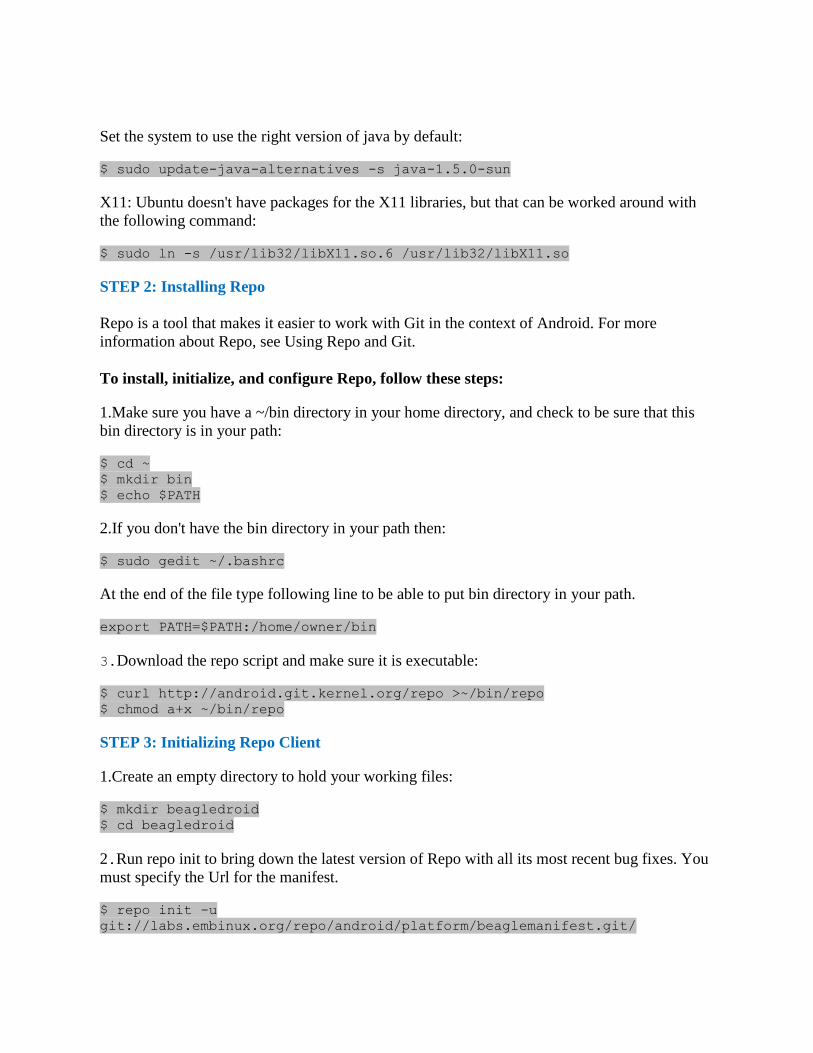
Set the system to use the right version of java by default:
$ sudo update-java-alternatives -s java-1.5.0-sun
X11: Ubuntu doesn't have packages for the X11 libraries, but that can be worked around with
the following command:
$ sudo ln -s /usr/lib32/libX11.so.6 /usr/lib32/libX11.so
STEP 2: Installing Repo
Repo is a tool that makes it easier to work with Git in the context of Android. For more
information about Repo, see Using Repo and Git.
To install, initialize, and configure Repo, follow these steps:
1.Make sure you have a ~/bin directory in your home directory, and check to be sure that this
bin directory is in your path:
$ cd ~
$ mkdir bin
$ echo $PATH
2.If you don't have the bin directory in your path then:
$ sudo gedit ~/.bashrc
At the end of the file type following line to be able to put bin directory in your path.
export PATH=$PATH:/home/owner/bin
3.Download the repo script and make sure it is executable:
$ curl http://android.git.kernel.org/repo >~/bin/repo
$ chmod a+x ~/bin/repo
STEP 3: Initializing Repo Client
1.Create an empty directory to hold your working files:
$ mkdir beagledroid
$ cd beagledroid
2.Run repo init to bring down the latest version of Repo with all its most recent bug fixes. You
must specify the Url for the manifest.
$ repo init -u
git://labs.embinux.org/repo/android/platform/beaglemanifest.git/
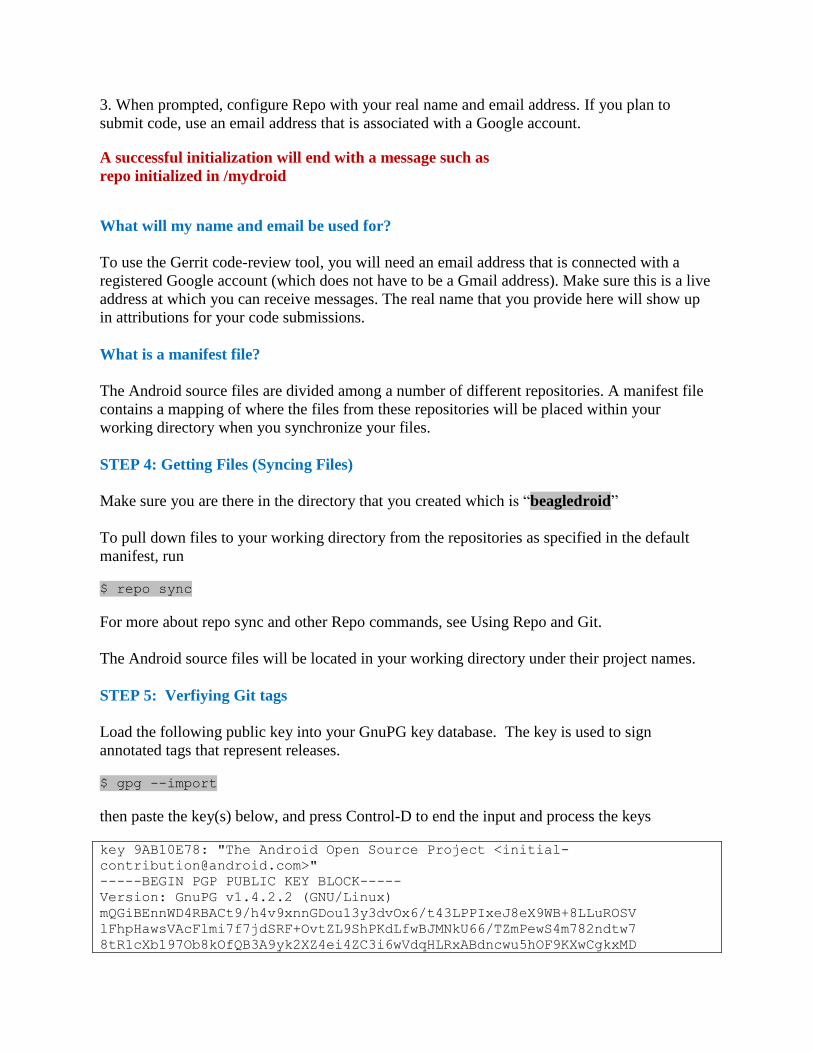
3. When prompted, configure Repo with your real name and email address. If you plan to
submit code, use an email address that is associated with a Google account.
A successful initialization will end with a message such as
repo initialized in /mydroid
What will my name and email be used for?
To use the Gerrit code-review tool, you will need an email address that is connected with a
registered Google account (which does not have to be a Gmail address). Make sure this is a live
address at which you can receive messages. The real name that you provide here will show up
in attributions for your code submissions.
What is a manifest file?
The Android source files are divided among a number of different repositories. A manifest file
contains a mapping of where the files from these repositories will be placed within your
working directory when you synchronize your files.
STEP 4: Getting Files (Syncing Files)
Make sure you are there in the directory that you created which is “beagledroid”
To pull down files to your working directory from the repositories as specified in the default
manifest, run
$ repo sync
For more about repo sync and other Repo commands, see Using Repo and Git.
The Android source files will be located in your working directory under their project names.
STEP 5: Verfiying Git tags
Load the following public key into your GnuPG key database. The key is used to sign
annotated tags that represent releases.
$ gpg --import
then paste the key(s) below, and press Control-D to end the input and process the keys
key 9AB10E78: "The Android Open Source Project <initial-
-----BEGIN PGP PUBLIC KEY BLOCK-----
Version: GnuPG v1.4.2.2 (GNU/Linux)
mQGiBEnnWD4RBACt9/h4v9xnnGDou13y3dvOx6/t43LPPIxeJ8eX9WB+8LLuROSV
lFhpHawsVAcFlmi7f7jdSRF+OvtZL9ShPKdLfwBJMNkU66/TZmPewS4m782ndtw7
8tR1cXb197Ob8kOfQB3A9yk2XZ4ei4ZC3i6wVdqHLRxABdncwu5hOF9KXwCgkxMD
u4PVgChaAJzTYJ1EG+UYBIUEAJmfearb0qRAN7dEoff0FeXsEaUA6U90sEoVks0Z
wNj96SA8BL+a1OoEUUfpMhiHyLuQSftxisJxTh+2QclzDviDyaTrkANjdYY7p2cq
/HMdOY7LJlHaqtXmZxXjjtw5Uc2QG8UY8aziU3IE9nTjSwCXeJnuyvoizl9/I1S5
jU5SA/9WwIps4SC84ielIXiGWEqq6i6/sk4I9q1YemZF2XVVKnmI1F4iCMtNKsR4
MGSa1gA8s4iQbsKNWPgp7M3a51JCVCu6l/8zTpA+uUGapw4tWCp4o0dpIvDPBEa9
b/aF/ygcR8mh5hgUfpF9IpXdknOsbKCvM9lSSfRciETykZc4wrRCVGhlIEFuZHJv
aWQgT3BlbiBTb3VyY2UgUHJvamVjdCA8aW5pdGlhbC1jb250cmlidXRpb25AYW5k
cm9pZC5jb20+iGAEExECACAFAknnWD4CGwMGCwkIBwMCBBUCCAMEFgIDAQIeAQIX
gAAKCRDorT+BmrEOeNr+AJ42Xy6tEW7r3KzrJxnRX8mij9z8tgCdFfQYiHpYngkI
2t09Ed+9Bm4gmEO5Ag0ESedYRBAIAKVW1JcMBWvV/0Bo9WiByJ9WJ5swMN36/vAl
QN4mWRhfzDOk/Rosdb0csAO/l8Kz0gKQPOfObtyYjvI8JMC3rmi+LIvSUT9806Up
hisyEmmHv6U8gUb/xHLIanXGxwhYzjgeuAXVCsv+EvoPIHbY4L/KvP5x+oCJIDbk
C2b1TvVk9PryzmE4BPIQL/NtgR1oLWm/uWR9zRUFtBnE411aMAN3qnAHBBMZzKMX
LWBGWE0znfRrnczI5p49i2YZJAjyX1P2WzmScK49CV82dzLo71MnrF6fj+Udtb5+
OgTg7Cow+8PRaTkJEW5Y2JIZpnRUq0CYxAmHYX79EMKHDSThf/8AAwUIAJPWsB/M
pK+KMs/s3r6nJrnYLTfdZhtmQXimpoDMJg1zxmL8UfNUKiQZ6esoAWtDgpqt7Y7s
KZ8laHRARonte394hidZzM5nb6hQvpPjt2OlPRsyqVxw4c/KsjADtAuKW9/d8phb
N8bTyOJo856qg4oOEzKG9eeF7oaZTYBy33BTL0408sEBxiMior6b8LrZrAhkqDjA
vUXRwm/fFKgpsOysxC6xi553CxBUCH2omNV6Ka1LNMwzSp9ILz8jEGqmUtkBszwo
G1S8fXgE0Lq3cdDM/GJ4QXP/p6LiwNF99faDMTV3+2SAOGvytOX6KjKVzKOSsfJQ
hN0DlsIw8hqJc0WISQQYEQIACQUCSedYRAIbDAAKCRDorT+BmrEOeCUOAJ9qmR0l
EXzeoxcdoafxqf6gZlJZlACgkWF7wi2YLW3Oa+jv2QSTlrx4KLM=
=Wi5D
-----END PGP PUBLIC KEY BLOCK-----
STEP 6: Building the code
To build the files, run make from within your working directory:
$ cd ~/beagledroid
$ make
if you have multiple core in your CPU then you can run “make -j 2” instead of
“make”. This will make the build processor faster by running tasks concurrently.
STEP 7: Android Root file system
Now, after you are done with the android build. It's the time to get the android file system
Get inside your working directory beagledroid
$ cd beagledroid/out/target/product/generic/
$ mkdir Android_RFS
$ cd Android_RFS
$ cp -a ../root/* ./
$ cp -a ../datat/* ./ data/
$ cp -a ../system/* ./ system/
$ sudo chown -R root.root *
$ sudo chmod -R 777 data system
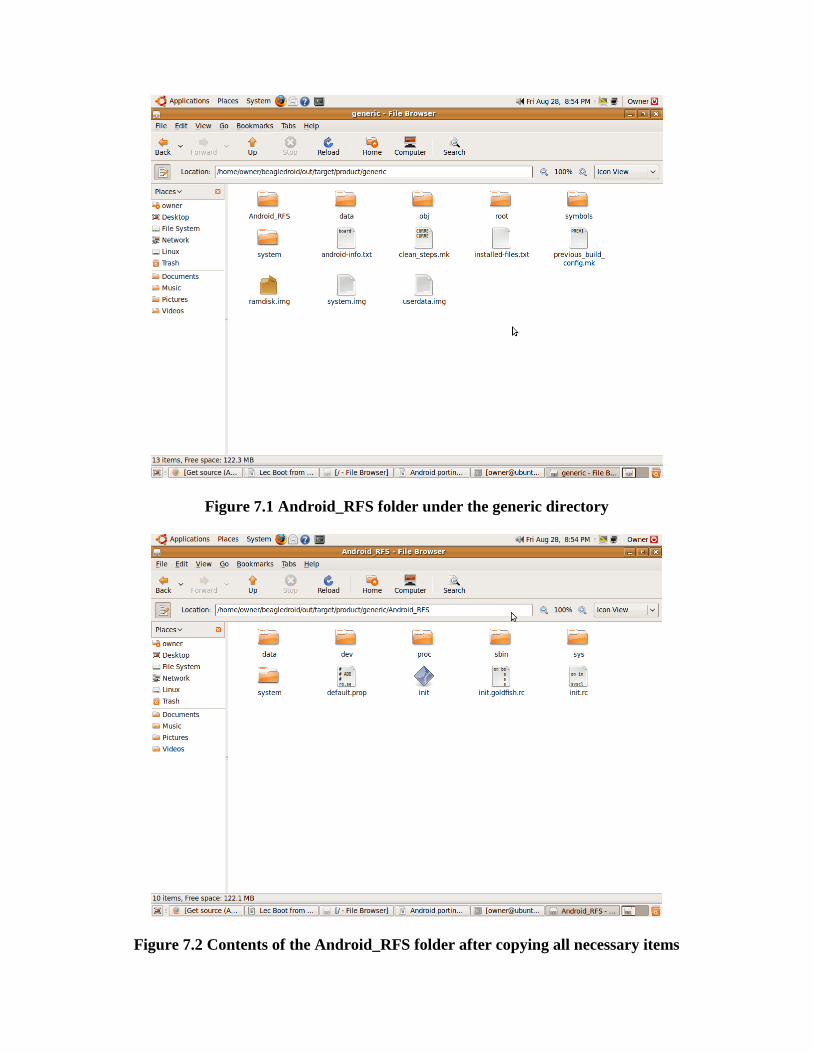
Figure 7.1 Android_RFS folder under the generic directory
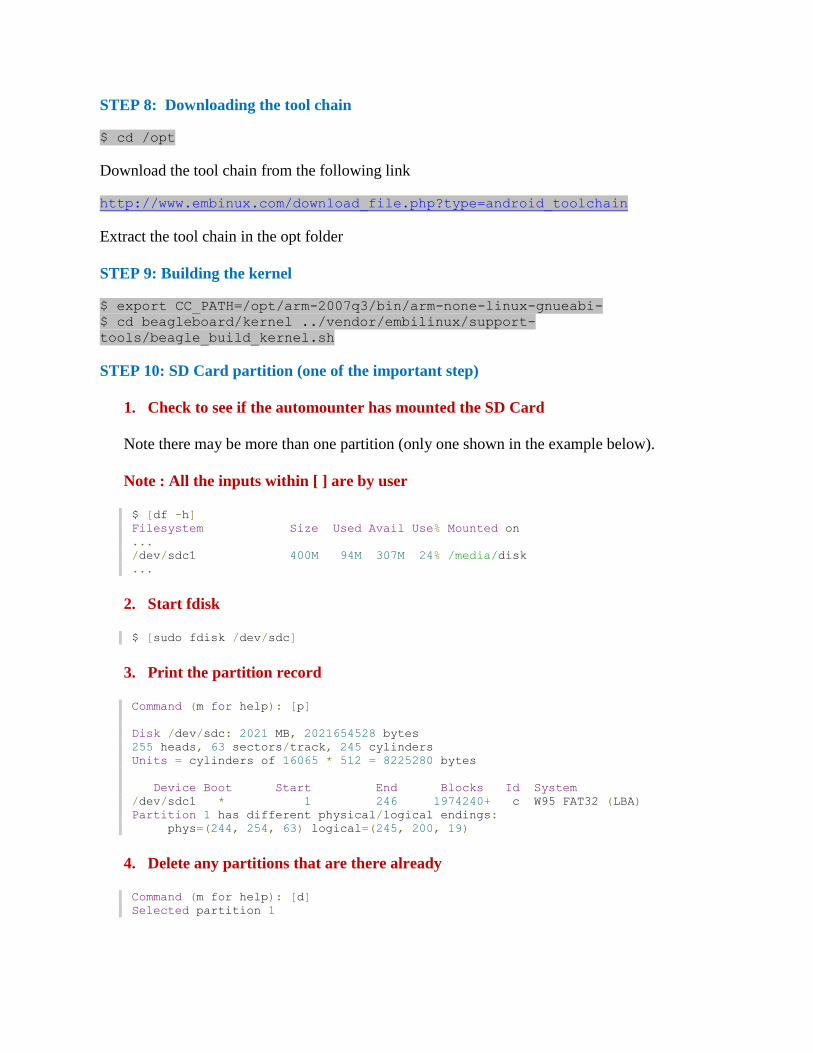
Figure 7.2 Contents of the Android_RFS folder after copying all necessary items
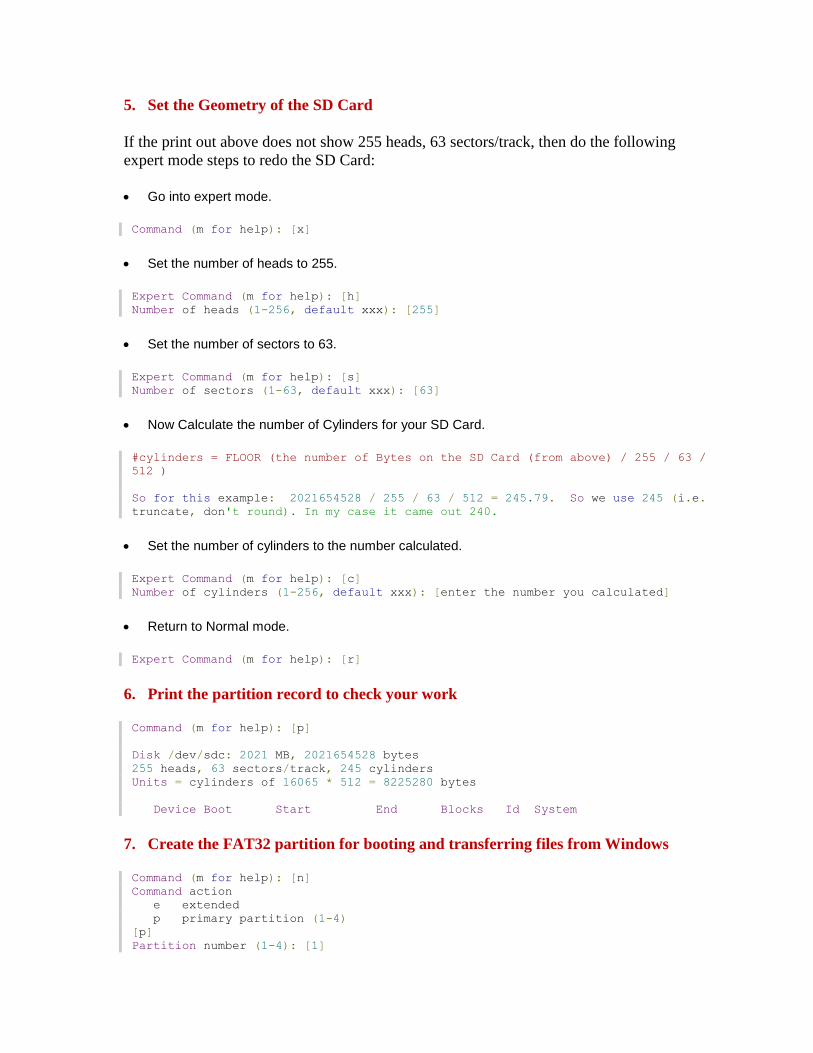
STEP 8: Downloading the tool chain
$ cd /opt
Download the tool chain from the following link
http://www.embinux.com/download_file.php?type=android_toolchain
Extract the tool chain in the opt folder
STEP 9: Building the kernel
$ export CC_PATH=/opt/arm-2007q3/bin/arm-none-linux-gnueabi-
$ cd beagleboard/kernel ../vendor/embilinux/support-
tools/beagle_build_kernel.sh
STEP 10: SD Card partition (one of the important step)
1. Check to see if the automounter has mounted the SD Card
Note there may be more than one partition (only one shown in the example below).
Note : All the inputs within [ ] are by user
$ [df -h]
Filesystem Size Used Avail Use% Mounted on
...
/dev/sdc1 400M 94M 307M 24% /media/disk
...
2. Start fdisk
$ [sudo fdisk /dev/sdc]
3. Print the partition record
Command (m for help): [p]
Disk /dev/sdc: 2021 MB, 2021654528 bytes
255 heads, 63 sectors/track, 245 cylinders
Units = cylinders of 16065 * 512 = 8225280 bytes
Device Boot Start End Blocks Id System
/dev/sdc1 * 1 246 1974240+ c W95 FAT32 (LBA)
Partition 1 has different physical/logical endings:
phys=(244, 254, 63) logical=(245, 200, 19)
4. Delete any partitions that are there already
Command (m for help): [d]
Selected partition 1
5. Set the Geometry of the SD Card
If the print out above does not show 255 heads, 63 sectors/track, then do the following
expert mode steps to redo the SD Card:
Go into expert mode.
Command (m for help): [x]
Set the number of heads to 255.
Expert Command (m for help): [h]
Number of heads (1-256, default xxx): [255]
Set the number of sectors to 63.
Expert Command (m for help): [s]
Number of sectors (1-63, default xxx): [63]
Now Calculate the number of Cylinders for your SD Card.
#cylinders = FLOOR (the number of Bytes on the SD Card (from above) / 255 / 63 /
512 )
So for this example: 2021654528 / 255 / 63 / 512 = 245.79. So we use 245 (i.e.
truncate, don't round). In my case it came out 240.
Set the number of cylinders to the number calculated.
Expert Command (m for help): [c]
Number of cylinders (1-256, default xxx): [enter the number you calculated]
Return to Normal mode.
Expert Command (m for help): [r]
6. Print the partition record to check your work
Command (m for help): [p]
Disk /dev/sdc: 2021 MB, 2021654528 bytes
255 heads, 63 sectors/track, 245 cylinders
Units = cylinders of 16065 * 512 = 8225280 bytes
Device Boot Start End Blocks Id System
7. Create the FAT32 partition for booting and transferring files from Windows
Command (m for help): [n]
Command action
e extended
p primary partition (1-4)
[p]
Partition number (1-4): [1]
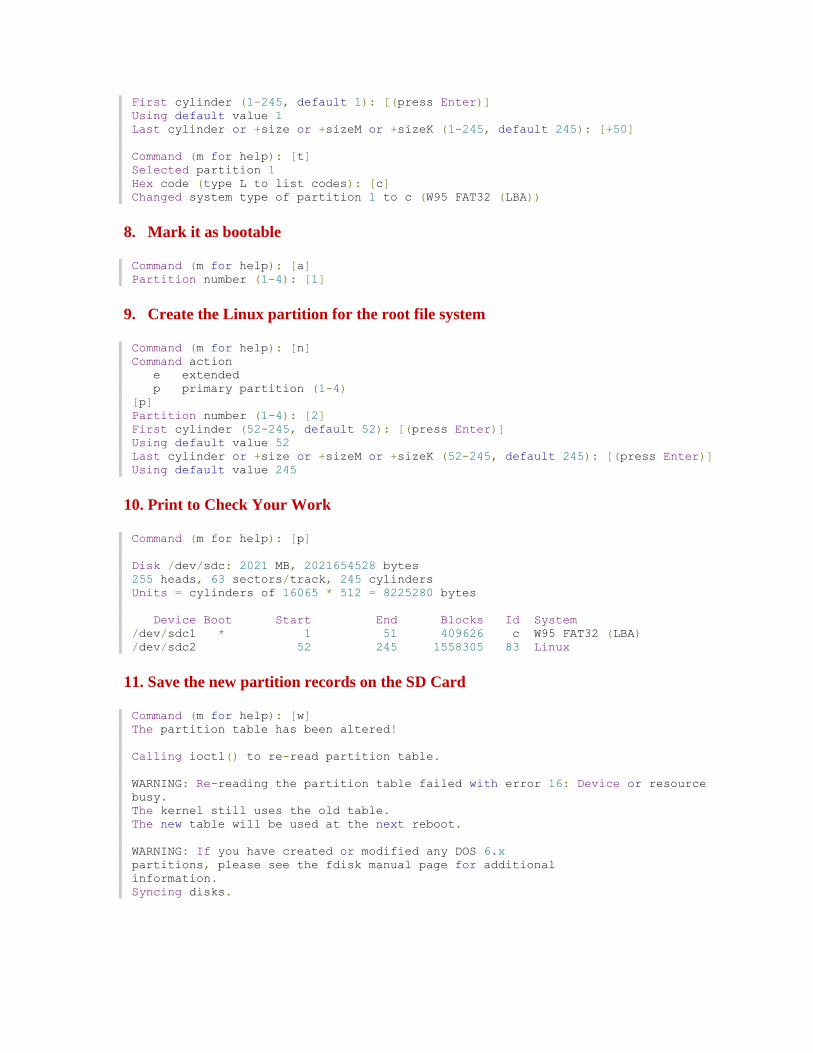
First cylinder (1-245, default 1): [(press Enter)]
Using default value 1
Last cylinder or +size or +sizeM or +sizeK (1-245, default 245): [+50]
Command (m for help): [t]
Selected partition 1
Hex code (type L to list codes): [c]
Changed system type of partition 1 to c (W95 FAT32 (LBA))
8. Mark it as bootable
Command (m for help): [a]
Partition number (1-4): [1]
9. Create the Linux partition for the root file system
Command (m for help): [n]
Command action
e extended
p primary partition (1-4)
[p]
Partition number (1-4): [2]
First cylinder (52-245, default 52): [(press Enter)]
Using default value 52
Last cylinder or +size or +sizeM or +sizeK (52-245, default 245): [(press Enter)]
Using default value 245
10. Print to Check Your Work
Command (m for help): [p]
Disk /dev/sdc: 2021 MB, 2021654528 bytes
255 heads, 63 sectors/track, 245 cylinders
Units = cylinders of 16065 * 512 = 8225280 bytes
Device Boot Start End Blocks Id System
/dev/sdc1 * 1 51 409626 c W95 FAT32 (LBA)
/dev/sdc2 52 245 1558305 83 Linux
11. Save the new partition records on the SD Card
Command (m for help): [w]
The partition table has been altered!
Calling ioctl() to re-read partition table.
WARNING: Re-reading the partition table failed with error 16: Device or resource
busy.
The kernel still uses the old table.
The new table will be used at the next reboot.
WARNING: If you have created or modified any DOS 6.x
partitions, please see the fdisk manual page for additional
information.
Syncing disks.
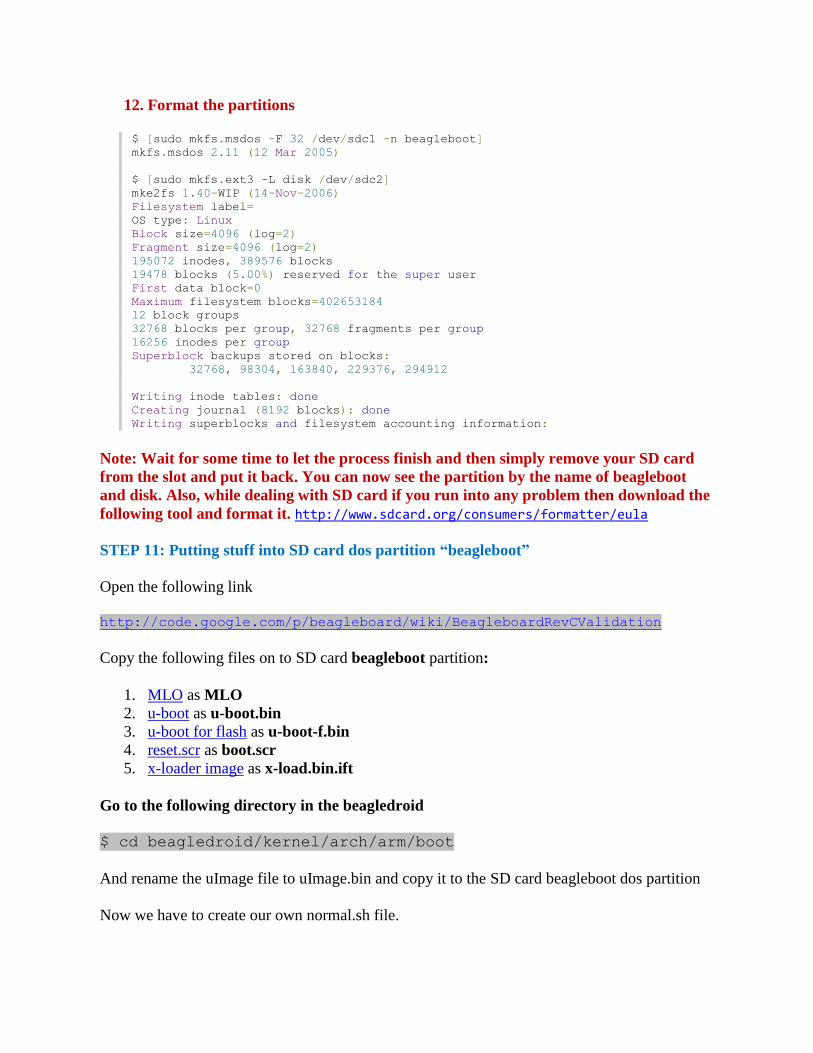
12. Format the partitions
$ [sudo mkfs.msdos -F 32 /dev/sdc1 -n beagleboot]
mkfs.msdos 2.11 (12 Mar 2005)
$ [sudo mkfs.ext3 -L disk /dev/sdc2]
mke2fs 1.40-WIP (14-Nov-2006)
Filesystem label=
OS type: Linux
Block size=4096 (log=2)
Fragment size=4096 (log=2)
195072 inodes, 389576 blocks
19478 blocks (5.00%) reserved for the super user
First data block=0
Maximum filesystem blocks=402653184
12 block groups
32768 blocks per group, 32768 fragments per group
16256 inodes per group
Superblock backups stored on blocks:
32768, 98304, 163840, 229376, 294912
Writing inode tables: done
Creating journal (8192 blocks): done
Writing superblocks and filesystem accounting information:
Note: Wait for some time to let the process finish and then simply remove your SD card
from the slot and put it back. You can now see the partition by the name of beagleboot
and disk. Also, while dealing with SD card if you run into any problem then download the
following tool and format it. http://www.sdcard.org/consumers/formatter/eula
STEP 11: Putting stuff into SD card dos partition “beagleboot”
Open the following link
http://code.google.com/p/beagleboard/wiki/BeagleboardRevCValidation
Copy the following files on to SD card beagleboot partition:
1. MLO as MLO
2. u-boot as u-boot.bin
3. u-boot for flash as u-boot-f.bin
4. reset.scr as boot.scr
5. x-loader image as x-load.bin.ift
Go to the following directory in the beagledroid
$ cd beagledroid/kernel/arch/arm/boot
And rename the uImage file to uImage.bin and copy it to the SD card beagleboot dos partition
Now we have to create our own normal.sh file.
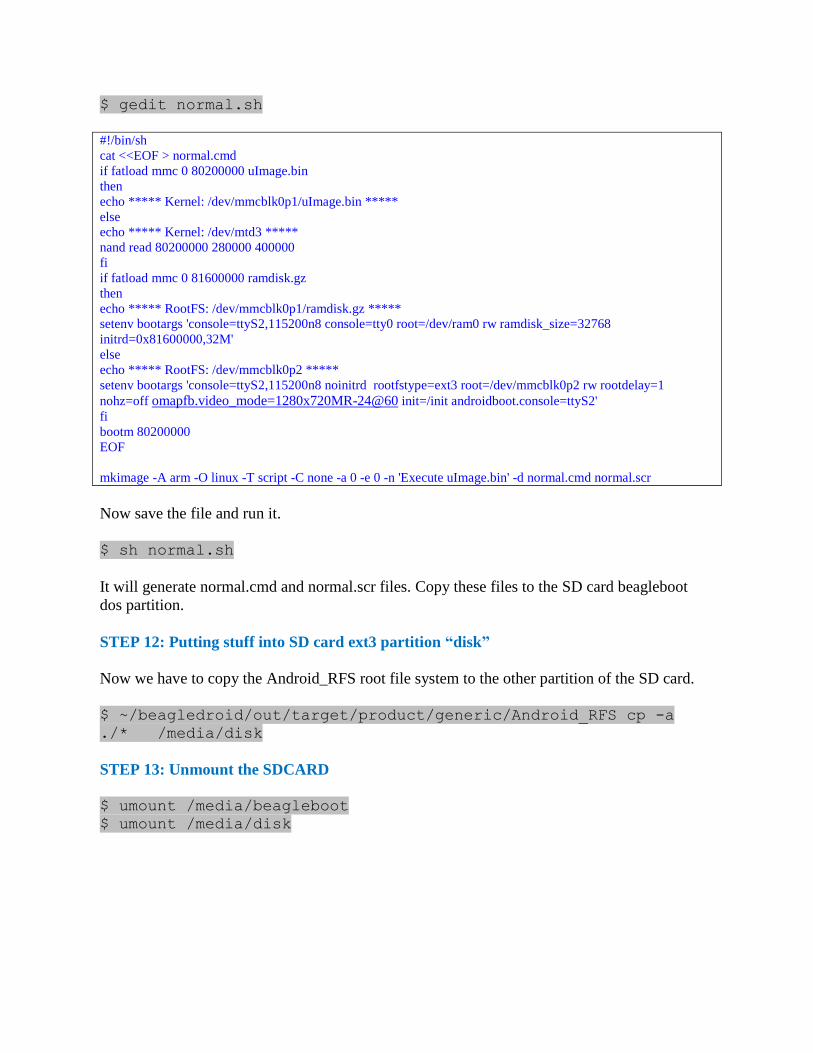
$ gedit normal.sh
#!/bin/sh
cat <<EOF > normal.cmd
if fatload mmc 0 80200000 uImage.bin
then
echo ***** Kernel: /dev/mmcblk0p1/uImage.bin *****
else
echo ***** Kernel: /dev/mtd3 *****
nand read 80200000 280000 400000
fi
if fatload mmc 0 81600000 ramdisk.gz
then
echo ***** RootFS: /dev/mmcblk0p1/ramdisk.gz *****
setenv bootargs 'console=ttyS2,115200n8 console=tty0 root=/dev/ram0 rw ramdisk_size=32768
initrd=0x81600000,32M'
else
echo ***** RootFS: /dev/mmcblk0p2 *****
setenv bootargs 'console=ttyS2,115200n8 noinitrd rootfstype=ext3 root=/dev/mmcblk0p2 rw rootdelay=1
nohz=off omapfb.video_mode=1280x720MR-24@60 init=/init androidboot.console=ttyS2'
fi
bootm 80200000
EOF
mkimage -A arm -O linux -T script -C none -a 0 -e 0 -n 'Execute uImage.bin' -d normal.cmd normal.scr
Now save the file and run it.
$ sh normal.sh
It will generate normal.cmd and normal.scr files. Copy these files to the SD card beagleboot
dos partition.
STEP 12: Putting stuff into SD card ext3 partition “disk”
Now we have to copy the Android_RFS root file system to the other partition of the SD card.
$ ~/beagledroid/out/target/product/generic/Android_RFS cp -a
./* /media/disk
STEP 13: Unmount the SDCARD
$ umount /media/beagleboot
$ umount /media/disk
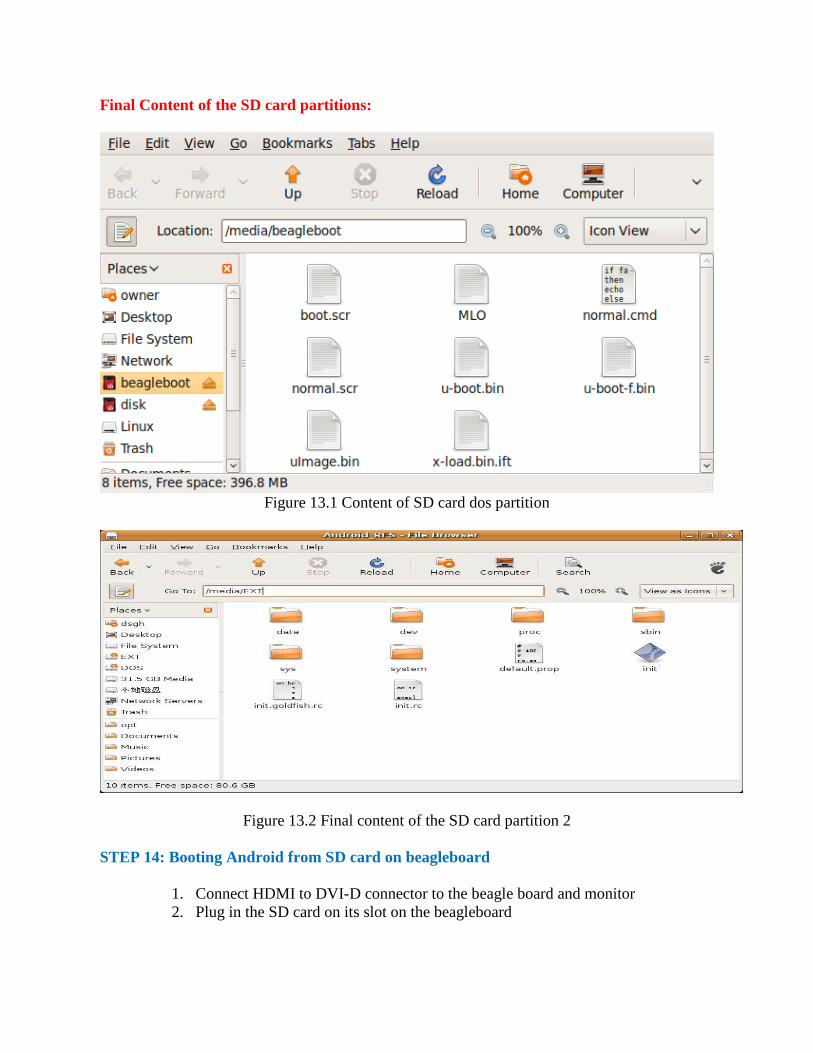
Final Content of the SD card partitions:
Figure 13.1 Content of SD card dos partition
Figure 13.2 Final content of the SD card partition 2
STEP 14: Booting Android from SD card on beagleboard
1. Connect HDMI to DVI-D connector to the beagle board and monitor
2. Plug in the SD card on its slot on the beagleboard
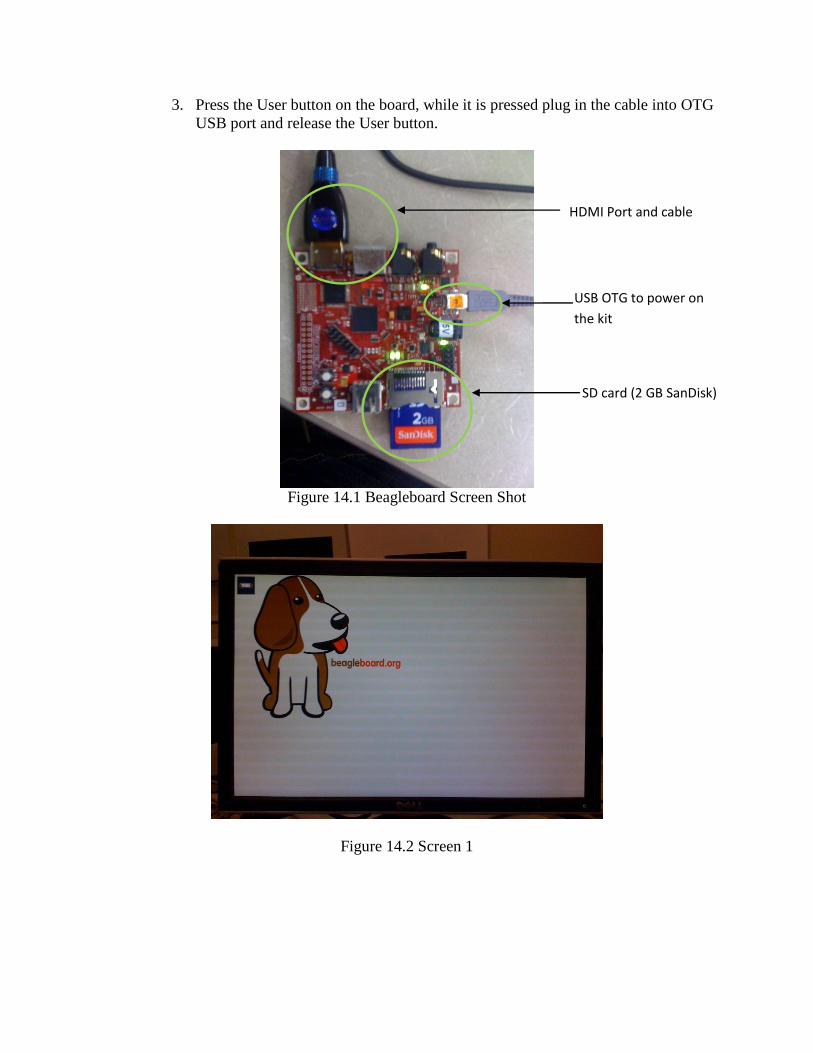
3. Press the User button on the board, while it is pressed plug in the cable into OTG
USB port and release the User button.
Figure 14.1 Beagleboard Screen Shot
Figure 14.2 Screen 1
HDMI Port and cable
USB OTG to power on
the kit
SD card (2 GB SanDisk)
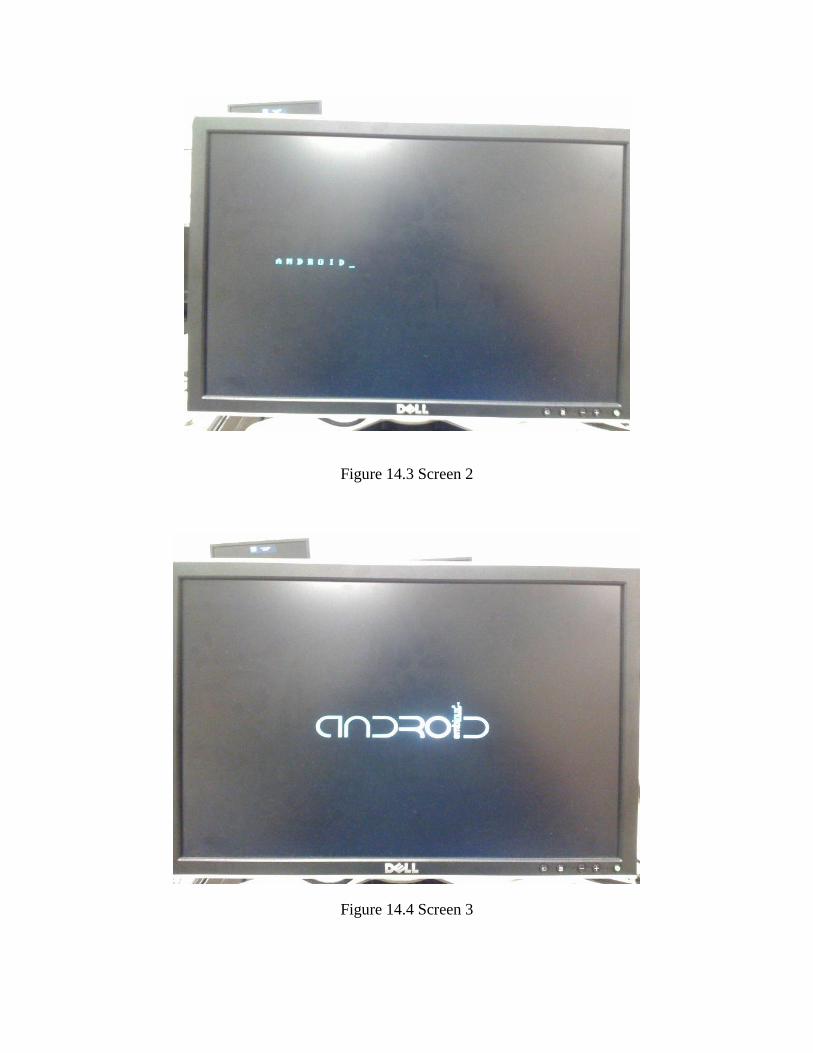
Figure 14.3 Screen 2
Figure 14.4 Screen 3
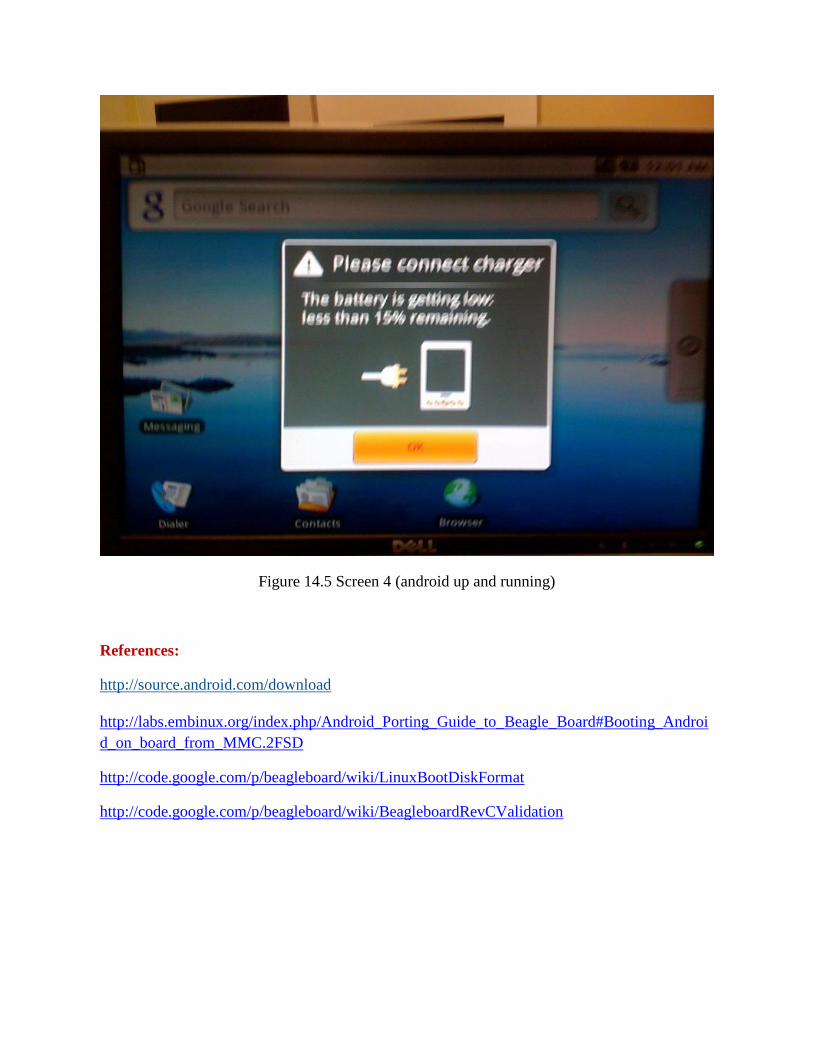
Figure 14.5 Screen 4 (android up and running)
References:
http://source.android.com/download
http://labs.embinux.org/index.php/Android_Porting_Guide_to_Beagle_Board#Booting_Androi
d_on_board_from_MMC.2FSD
http://code.google.com/p/beagleboard/wiki/LinuxBootDiskFormat
http://code.google.com/p/beagleboard/wiki/BeagleboardRevCValidation