Ambassadeur 30 service - realsreels.com 30 service.pdf · Ambassadeur 30 service ... The left side...
7
Ambassadeur 30 service Please refer to the part numbers in the above schematic as I’m not too sure of all of the part names. This must be one of the easiest reels to service-a brilliant design enables you to strip it down to grease the gears/service the bearings and drag without needing any tools at all. I was surprised with how few parts there were on this reel-an uncomplicated design means less things that can go wrong. That’s one thing I’ve always loved about Ambassadeurs-they are very simple to maintain and it seems like they’ve actually been designed with owner maintenance in mind. For this service I’ve broken down the reel more than necessary as I’m not sure when it was last serviced and there were a couple of areas where salt deposits had formed that needed attention.
Transcript of Ambassadeur 30 service - realsreels.com 30 service.pdf · Ambassadeur 30 service ... The left side...
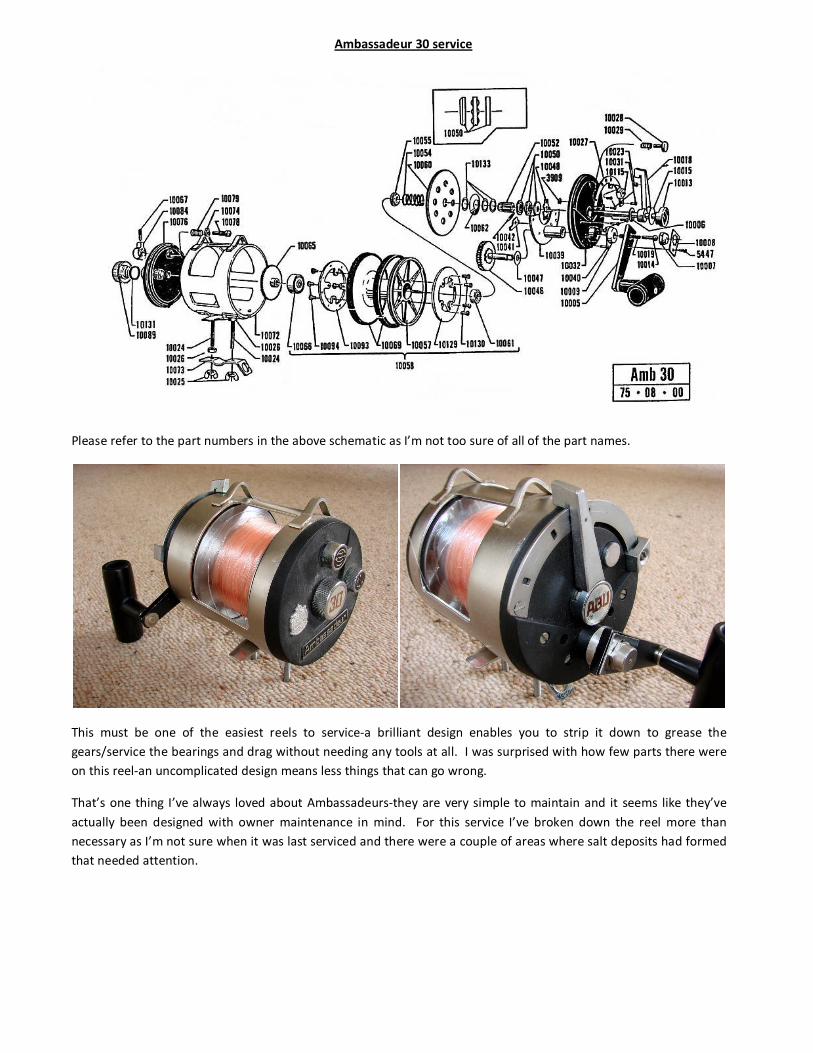
Ambassadeur 30 service
Please refer to the part numbers in the above schematic as I’m not too sure of all of the part names.
This must be one of the easiest reels to service-a brilliant design enables you to strip it down to grease the gears/service the bearings and drag without needing any tools at all. I was surprised with how few parts there were on this reel-an uncomplicated design means less things that can go wrong.
That’s one thing I’ve always loved about Ambassadeurs-they are very simple to maintain and it seems like they’ve actually been designed with owner maintenance in mind. For this service I’ve broken down the reel more than necessary as I’m not sure when it was last serviced and there were a couple of areas where salt deposits had formed that needed attention.

The left side plate shows some verdigris and some salt deposits on the clicker mechanism.
Unscrew the knob #10089 from the left side plate-note the o ring #10131.
The left side plate can be removed from the frame. Undo screw #10067-the clicker knob (#10084) simply lifts off and parts #10078, #10079, #10074 can be removed from the inside of the side plate. Clean off all salt deposits before lightly greasing the assembly and replacing in the side plate.

Remove the entire right side plate assembly and spool from the frame.
Unscrew gear #10065 from the spool shaft and remove the spool.
Remove the spring and plastic washer (#10054 and #10055) and the drag plate #10060. Note the washers (#10133 and #10062) and their orientation on the other side of the drag plate.

Note that there is slight cracking on the side plate (highlighted)-part #10027 is held in place by self tapping screws and it looks as if one has been over tightened. Remove the handle nut lock plate screw (#5447) and the lock plate (#10008). Remove the handle nut along with the grease nipple and spring (#10014, #10019).
Spring, grease nipple, handle nut and lock plate laid out. Remove the shaft (#10013) from the right side of the right side plate. The pinion gear #10052 slides off the shaft.
Remove the main gear (#10046) from the right side plate. Note the copper washer #10047.
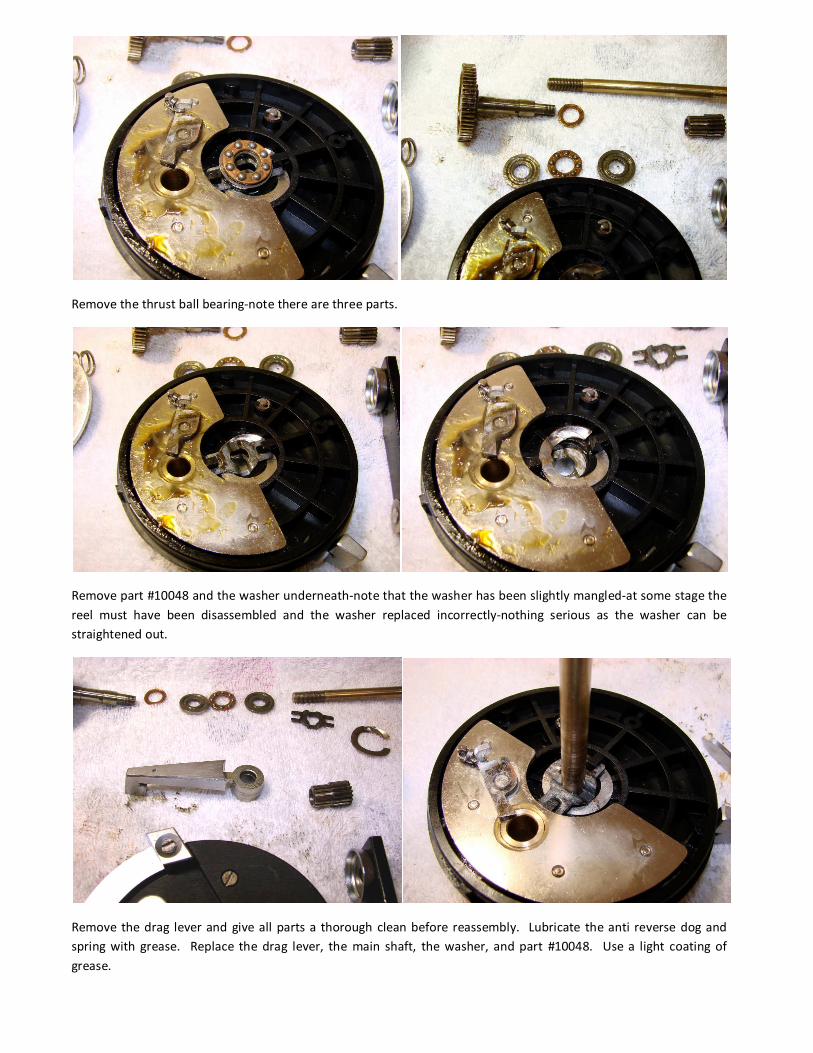
Remove the thrust ball bearing-note there are three parts.
Remove part #10048 and the washer underneath-note that the washer has been slightly mangled-at some stage the reel must have been disassembled and the washer replaced incorrectly-nothing serious as the washer can be straightened out.
Remove the drag lever and give all parts a thorough clean before reassembly. Lubricate the anti reverse dog and spring with grease. Replace the drag lever, the main shaft, the washer, and part #10048. Use a light coating of grease.

Replace the thrust bearing and pack it with grease-make sure the parts are replaced in the correct sequence.
Grease the pinion gear teeth (and the bore) and replace on the main shaft. Replace the copper shim on the main gear and grease the gear shaft, gear teeth, and where the anti reverse dog contacts.
Replace the main gear in the side plate-you will have to ‘push out’ the anti reverse dog to enable the main gear to seat properly. Replace washers#10133 and #10062 in the correct orientation (check schematic).
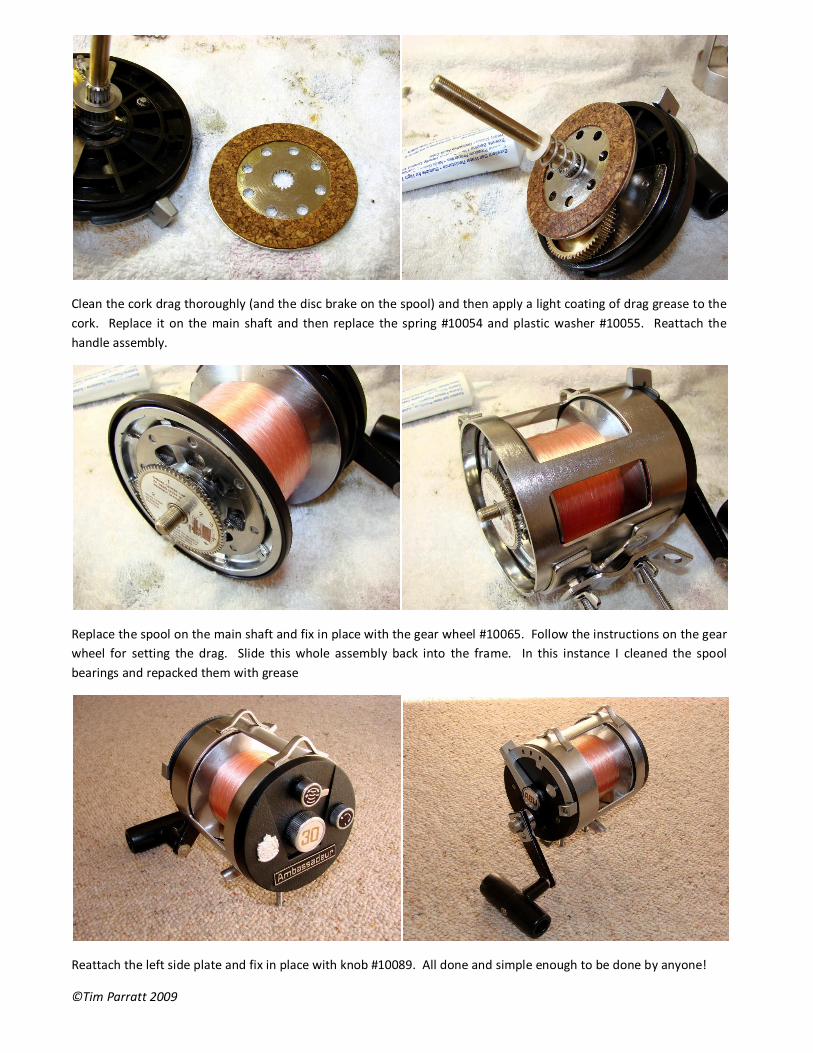
Clean the cork drag thoroughly (and the disc brake on the spool) and then apply a light coating of drag grease to the cork. Replace it on the main shaft and then replace the spring #10054 and plastic washer #10055. Reattach the handle assembly.
Replace the spool on the main shaft and fix in place with the gear wheel #10065. Follow the instructions on the gear wheel for setting the drag. Slide this whole assembly back into the frame. In this instance I cleaned the spool bearings and repacked them with grease
Reattach the left side plate and fix in place with knob #10089. All done and simple enough to be done by anyone!
©Tim Parratt 2009