Alberta Roadside Design Guideagkwan/Chapter J Roadside Design Nov... · 3 Roadside Design Process...
45
Alberta Roadside Design Guide 1
Transcript of Alberta Roadside Design Guideagkwan/Chapter J Roadside Design Nov... · 3 Roadside Design Process...

Alberta RoadsideDesign Guide
1

2
Module 3Clear Zone Concept

3
Roadside Design Process
Data Requirements
Design Speed
AADT
Foreslope and Backslope Information
Horizontal Curves
Features within the ROW
• Bridges
• Culverts
Determine Desirable Clear Zone
Identify Hazards
Examples:Sideslope steeper than 2 to 1
Trees with diameter of 100mm or more
Fixed objects extending above the ground surface by more than 100mm such as bridge rail ends, bridge abutments, piers, or retaining wall ends
Non-breakaway signs and light pole supports, and utility poles
Vertical drops greater than 300mm
Bodies of water with depth of 1m or more
Data Requirements
Remove Hazard
Redesign Hazard
Relocate Hazard
Reduce Severity Hazard
Shield Hazard
Delineate Hazard
Figure H3.1
Page H3-1

The Clear Zone Concept
• The clear zone is defined as the border area starting at the edge of the travel lane that should be clear of hazards and available for use by errant vehicles
4
Glossary H1.6
Page H1-8
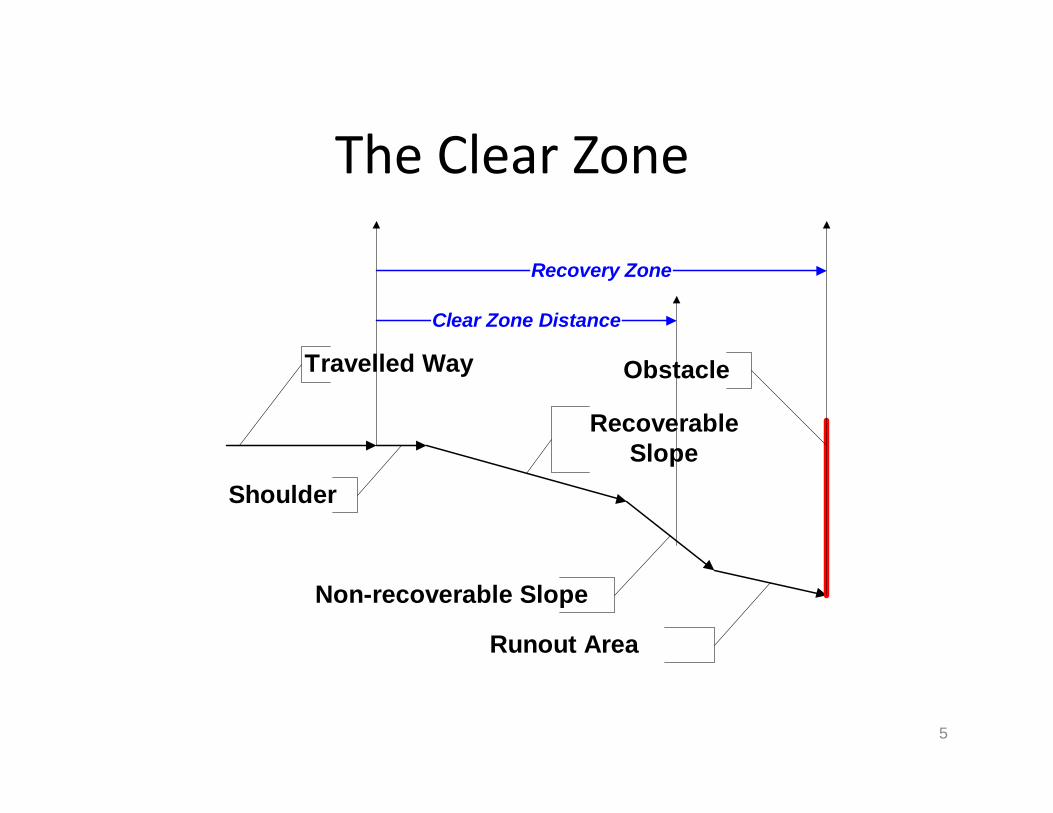
The Clear Zone
5
ObstacleTravelled Way
Shoulder
RecoverableSlope
Non-recoverable Slope
Runout Area
Clear Zone Distance
Recovery Zone

The Clear Zone
• A traversable area that starts at the edge of the traffic lane, includes the shoulder, and extends laterally a sufficient distance to allow a driver to stop or return to the road before encountering a hazard or overturning.
6
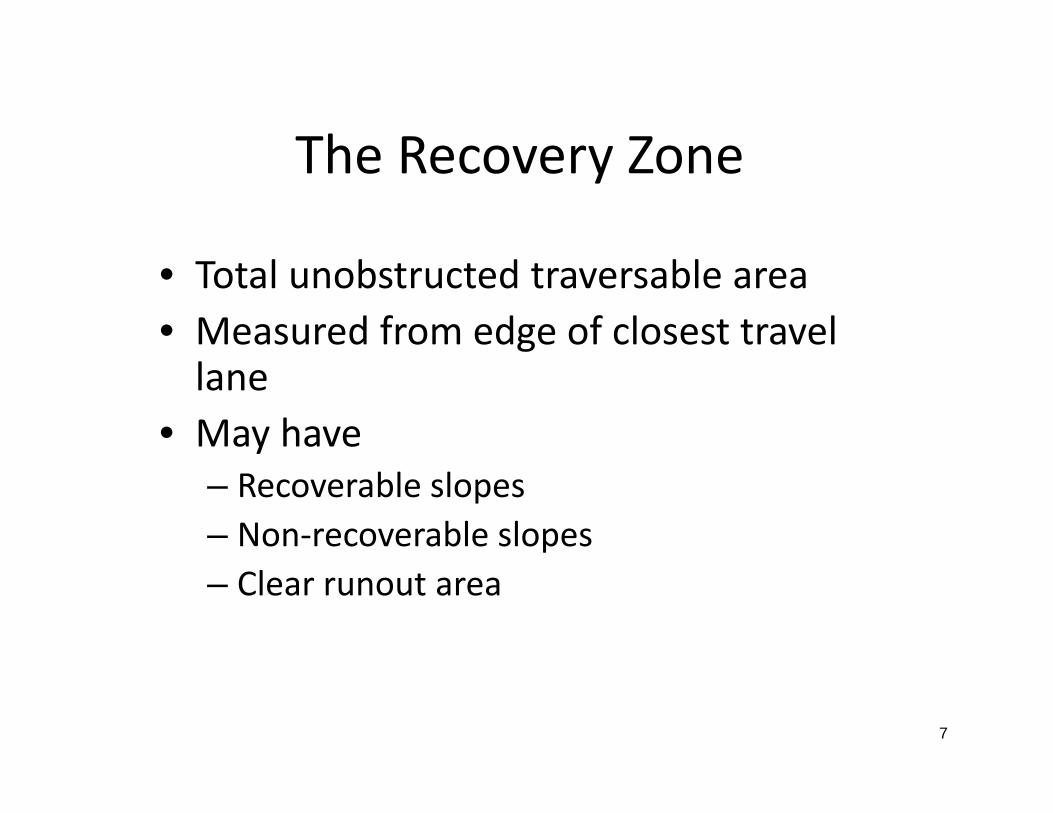
The Recovery Zone
• Total unobstructed traversable area• Measured from edge of closest travel lane
• May have– Recoverable slopes– Non‐recoverable slopes– Clear runout area
7

The Clear Zone
8
EncroachmentProbabilities :Foundation forthe Clear Zone
20%
10 m
Probability
Encroachment

Recoverable Slopes
• Recoverable slopes are those on which a driver may to a greater or lesser extent, retain or regain control of an errant vehicle.
9
Slopes 4:1 or flatter, are generally considered recoverable.
Non‐recoverable Slopes
• A non‐recoverable slope may be traversable, but a vehicle will generally continue to the bottom with no chance of recovery.
10
Embankment slopes between 3:1 and 4:1 maybe traversable, but non-recoverable.
Run‐Out Area
• A clear runout area is located at the toe of a non‐recoverable slope and is available for safe use by an errant vehicle
11

Roadside Recovery Zone
12
Note: If the clear zone distance ends on a non-recoverable slope a clear runout area is required.
Clear Zone
• The clear zone reflects the influence of:
• design speed• traffic volume• The presence of cut or fill slopes• Horizontal curve adjustments
13
Embankment slope definitions
• Recoverable slope: 4:1 or flatter– Drivers may retain or regain control– No need for recovery area at Toe of Slope
• Non‐recoverable: between 3:1 & 4:1– Traversable – Recovery area required at Toe of Slope
• Critical slopes: steeper than 3:1– Overturning likely– Constitutes an obstacle
14
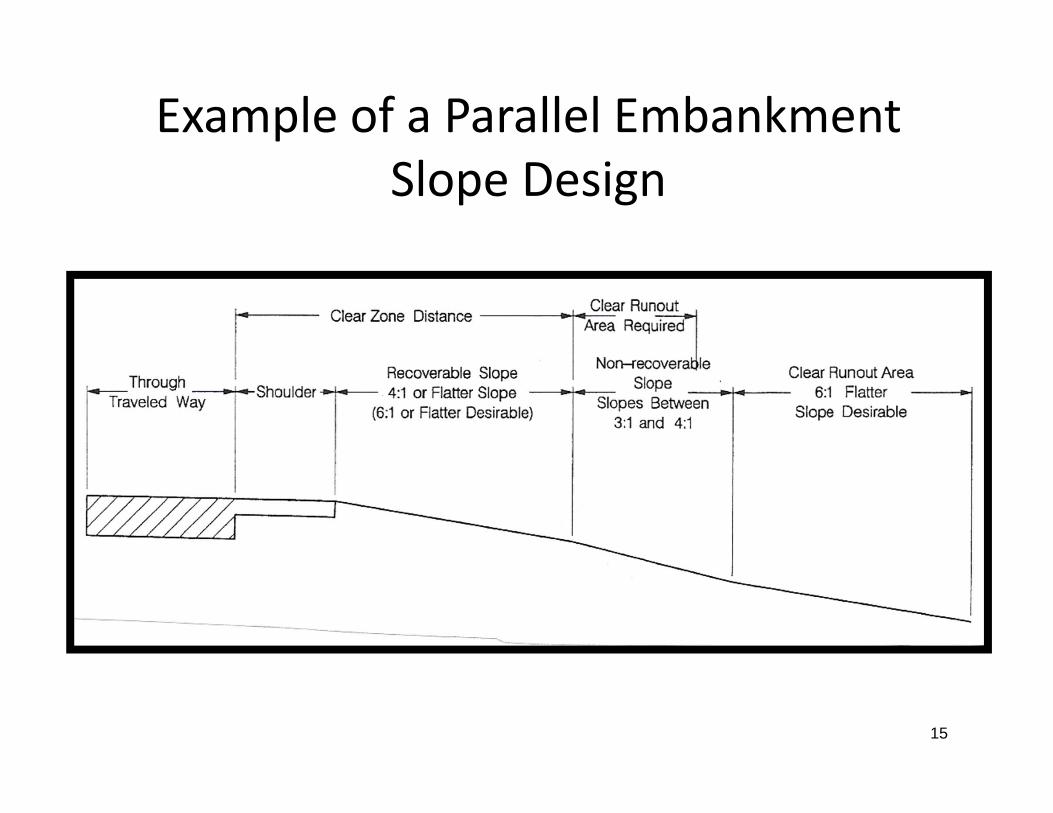
Example of a Parallel Embankment Slope Design
15

Clear Zone Distances(in metres from edge of driving lane)
16
Table H3.1Page H3-4

Desirable Clear Zone (DCZ)
17
Width of Adjacent roadside border area for use by an errant vehicle.
Note:
Clear Zone = Desirable Clear Zone
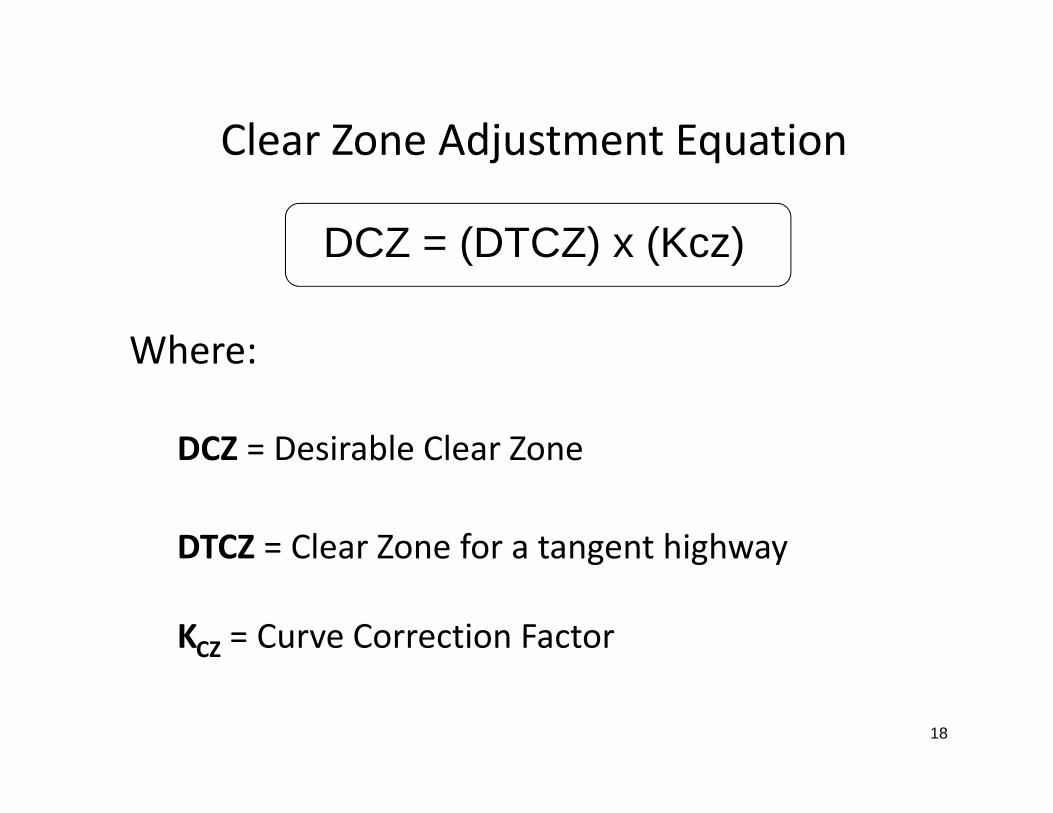
Clear Zone Adjustment Equation
Where:
DCZ = Desirable Clear Zone
DTCZ = Clear Zone for a tangent highway
KCZ = Curve Correction Factor
18
DCZ = (DTCZ) x (Kcz)
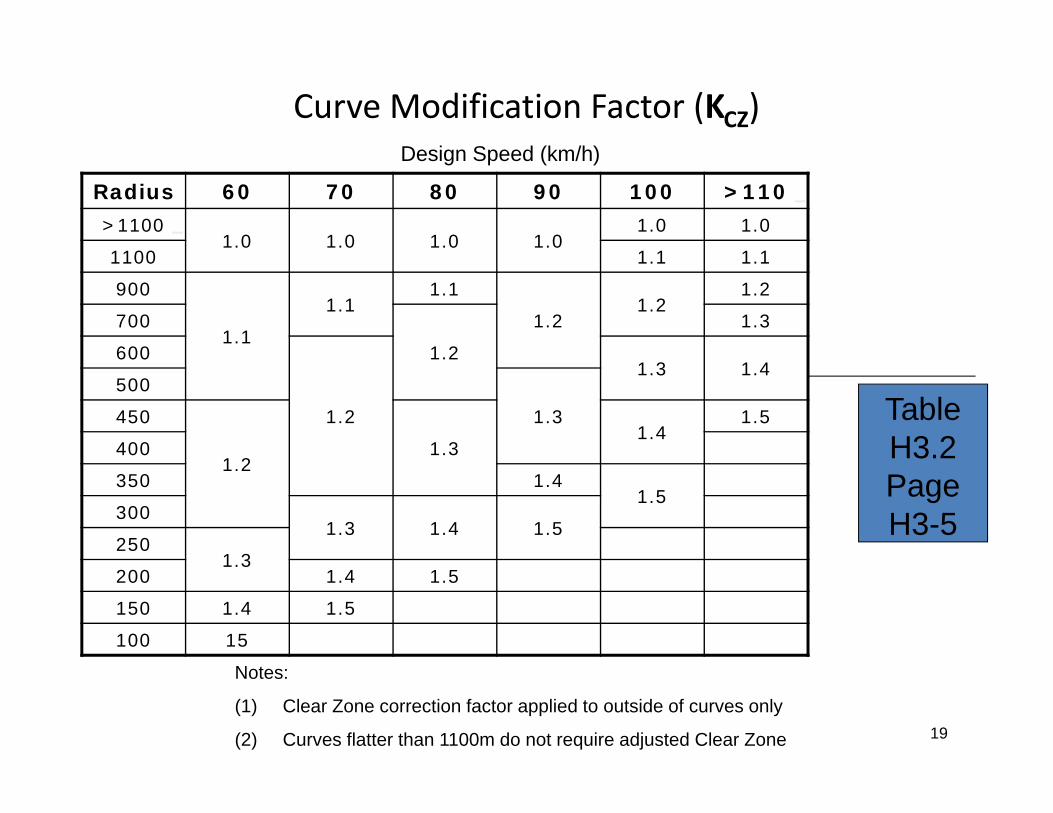
Curve Modification Factor (KCZ)
Radius 60 70 80 90 100 >110>1100
1.0 1.0 1.0 1.01.0 1.0
1100 1.1 1.1
900
1.1
1.11.1
1.21.2
1.2
700
1.2
1.3
600
1.2
1.3 1.4500
1.3450
1.21.3
1.41.5
400
350 1.41.5
3001.3 1.4 1.5
2501.3
200 1.4 1.5
150 1.4 1.5
100 15
19
Design Speed (km/h)
Notes:
(1) Clear Zone correction factor applied to outside of curves only
(2) Curves flatter than 1100m do not require adjusted Clear Zone
Table H3.2Page H3-5
Notes on KCZ
• Applies to outside of curves • For R > 1100m KCZ not required
20

Desirable Clear Zone
DCZ should not be considered the maximum clear distance
Mitigation should be considered for:• Cliffs• Water• Bridge piers• Terrain that channels errant vehicles to a hazard
21

Hazards in Clear Zones
• Sideslopes• Roadside obstacles• Permanent body of water• Barriers (low severity, SI 4.0)
22

Sideslopes and Backslopes
• Sideslope Ratio > 3:1 are a hazard• High embankments are hazards• Steep backslopes are hazards
23
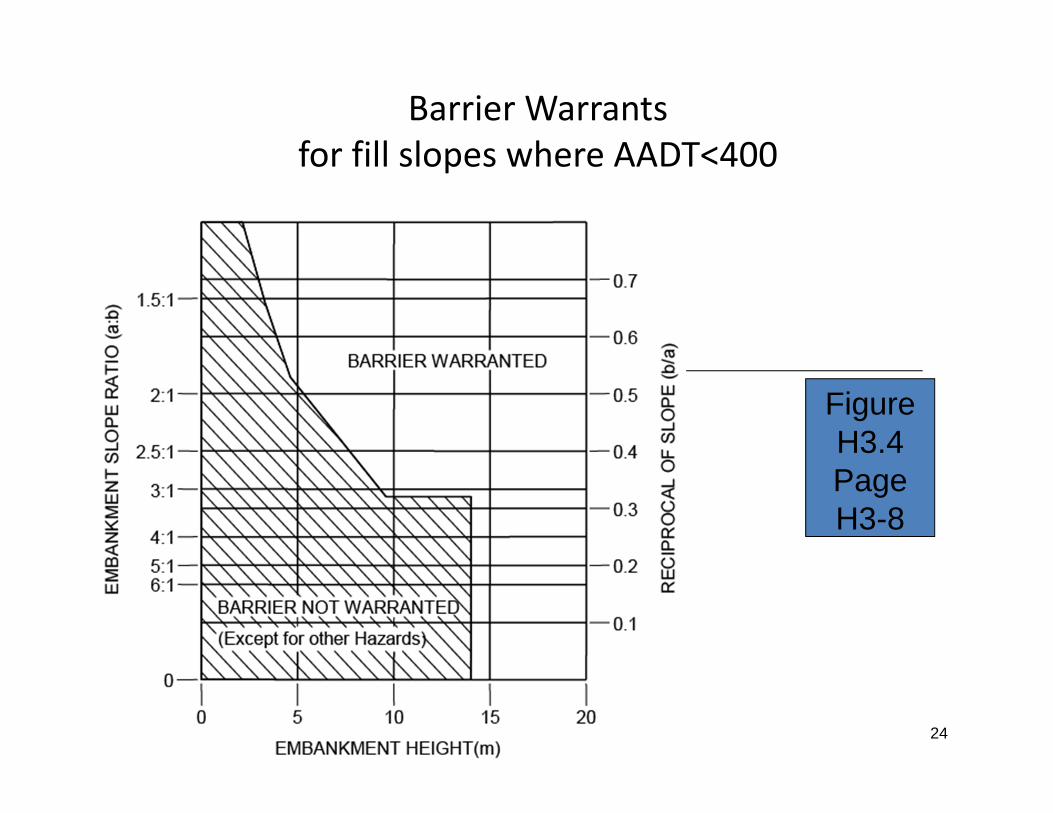
Barrier Warrants for fill slopes where AADT<400
24
FigureH3.4Page H3-8
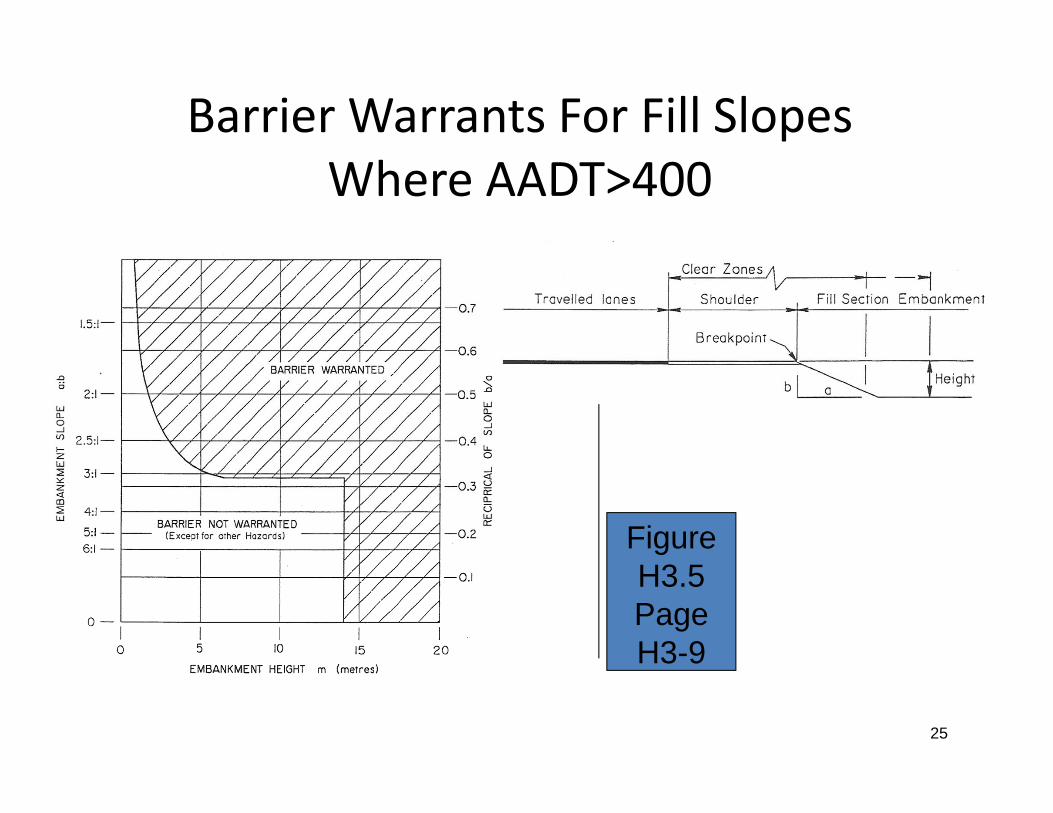
Barrier Warrants For Fill Slopes Where AADT>400
25
FigureH3.5Page H3-9

Roadside Obstacles
• Non‐traversable (eg. drainage device)• Fixed object
26

Hazards for Mitigation• Wood poles > (100mm x 100mm)• Trees Diameter >100mm• Fixed objects extending > 100mm
27
Hazards for Mitigation
• Non‐breakaway sign supports• Non‐breakaway utility poles• Shoulder drop‐off > 300mm
28
Mailboxes are a Hazard• Wood post > 100mm• Steel post > 50mm
29

Drainage Structures are Hazards
• With a diameter > 600mm• Must be mitered• Have piperunners*• Headwalls must be shielded
*Note: Piperunners are not mentioned in the ARDG, however are considered good practice.
30

Mitigation Strategies
• Consider at grading design stage
31

Underpasses• Design bulletin #22/2004 barrier is normally required if pier is located in the Clear Zone.(Ref: Figure H7.1 in ARDG)
• A suitable minimum offset for an unprotected 2:1 backslope for any given speed is ½ the Clear Zone
32
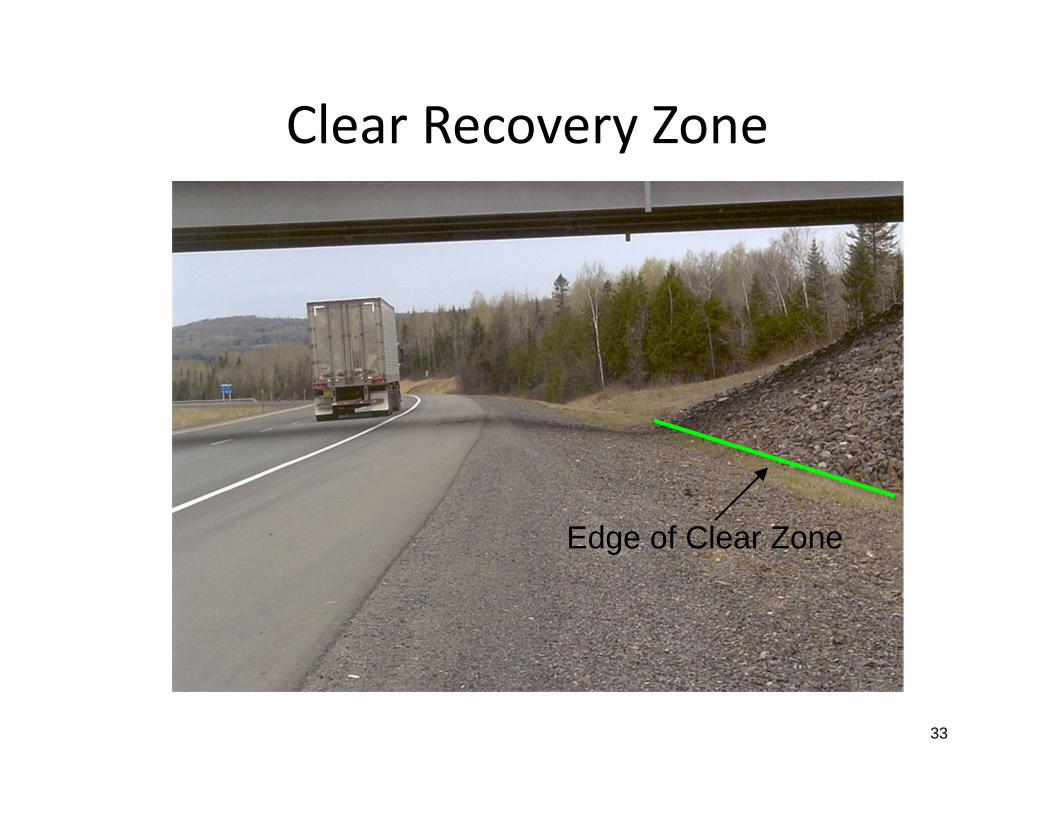
Clear Recovery Zone
33
Edge of Clear Zone
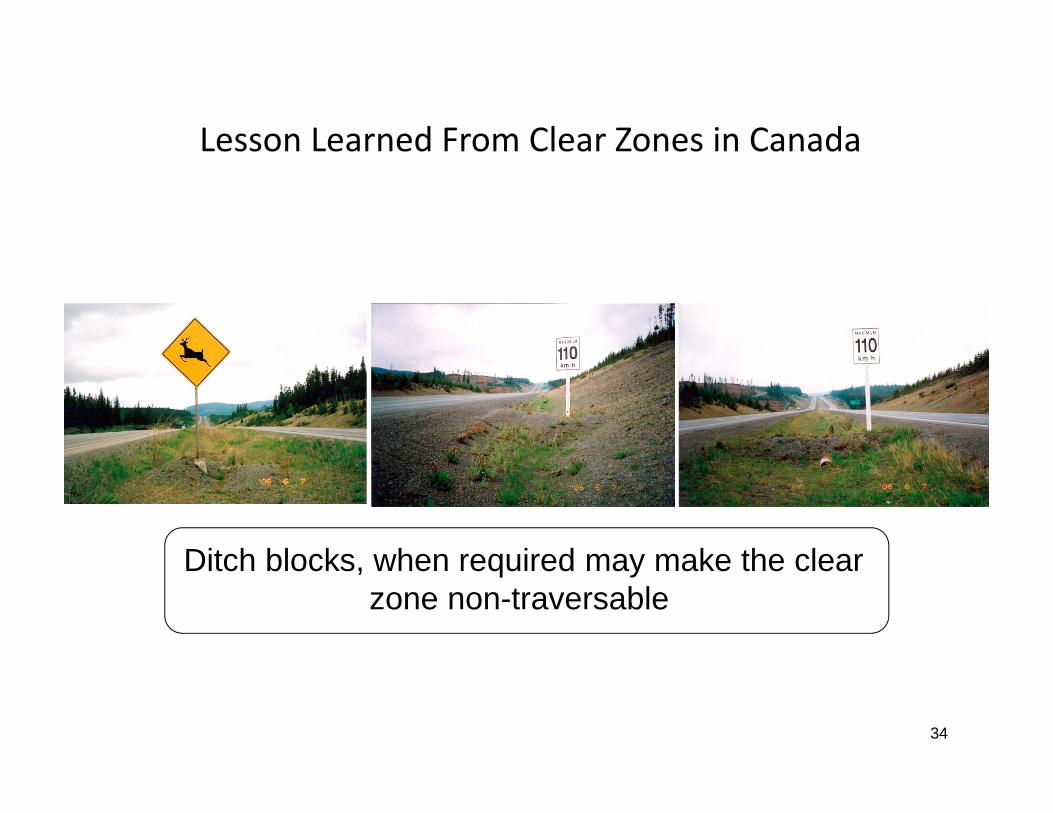
Lesson Learned From Clear Zones in Canada
34
Ditch blocks, when required may make the clear zone non-traversable
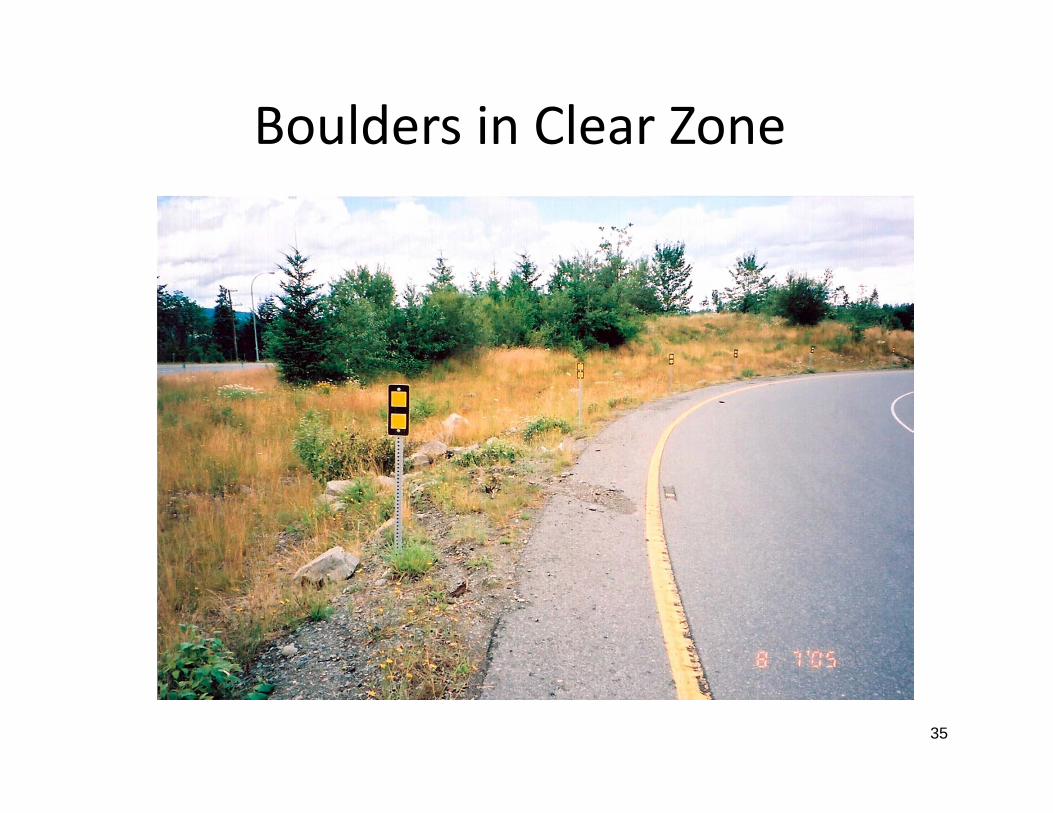
Boulders in Clear Zone
35
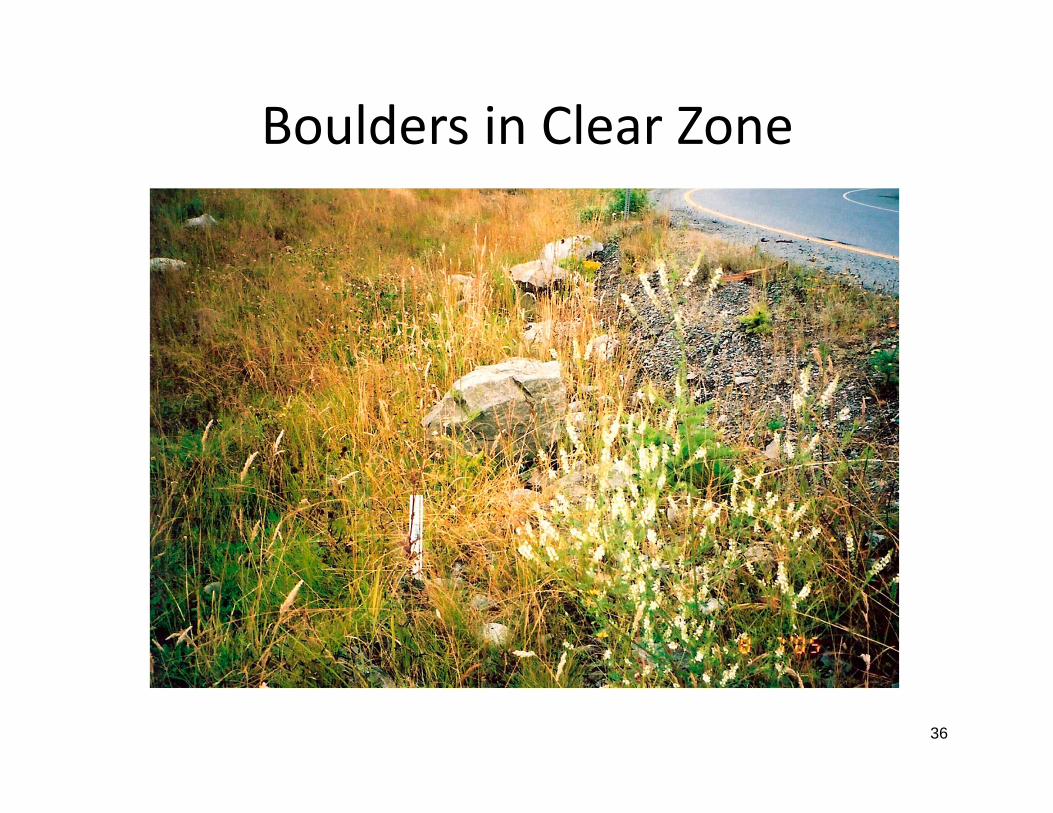
Boulders in Clear Zone
36

Shielded Poles
37
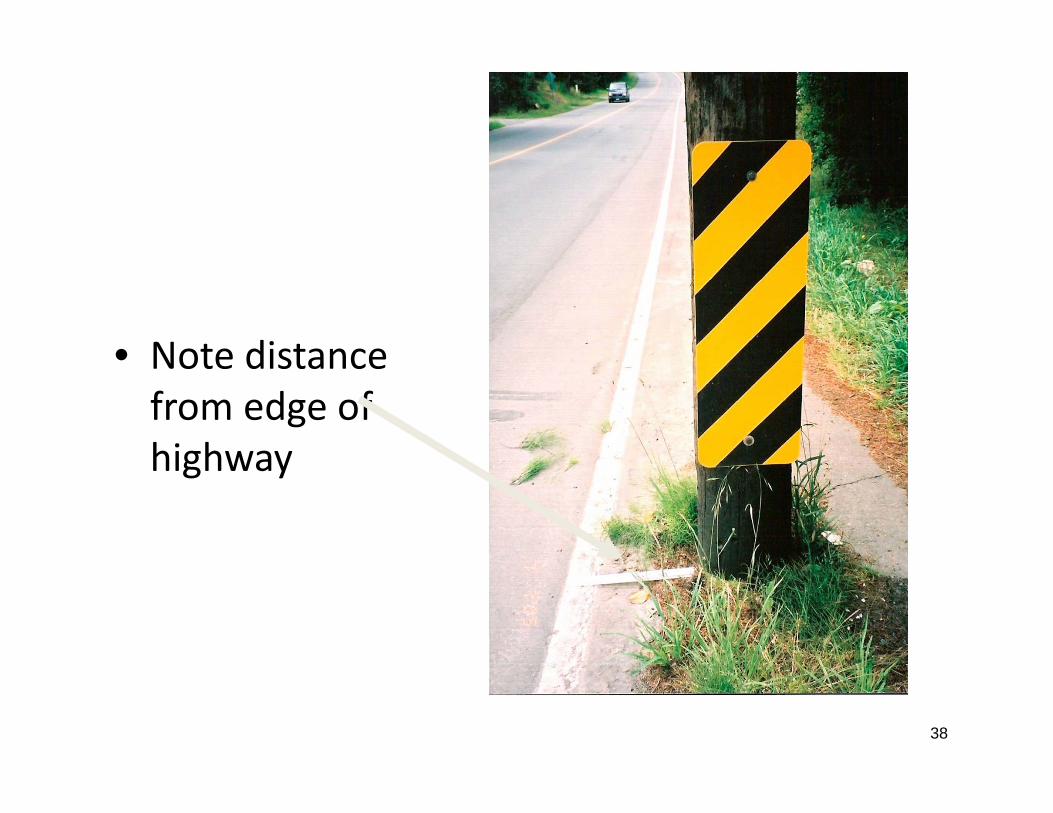
• Note distance from edge of highway
38

Unshielded Poles in Clear Zone
39

Curb Usage
• Curbs may be required due to R/W restrictions, drainage, access control or other curb functions.
• However curbs are discouraged for high speed roadways (i.e. ≥ 70 km/h).
• See RDG Table H4.1


Operating Speed
Table H4.1
AlbertaRoadsideDesignGuide
Revised July 2009

Excerpt from RDG Table H4.1
Installation of curb/barrier combinationnot recommended.
Operating Speed> 100 km/h
Revised July 2009

Excerpt from RDG Table H4.1
OperatingSpeed
>85 - 100Only Mountable Curb is permitted with barrier
Revised July 2009

Excerpt from RDG Table H4.1
OperatingSpeed
>60 - 70
Mountable and Semi-mountable maybe used depending on offset.
Revised July 2009