AIR FORCE QUALIFICATION TRAINING PACKAGE (AFQTP) · air force qualification training package...
39
AFQTP 3E3X1-16 31 JANUARY 2003 AIR FORCE QUALIFICATION TRAINING PACKAGE (AFQTP) FOR STRUCTURAL (3E3X1) MODULE 16 CONCRETE STRUCTURES
Transcript of AIR FORCE QUALIFICATION TRAINING PACKAGE (AFQTP) · air force qualification training package...

AFQTP 3E3X1-16 31 JANUARY 2003
AIR FORCE QUALIFICATION TRAINING PACKAGE (AFQTP)
FOR
STRUCTURAL (3E3X1)
MODULE 16
CONCRETE STRUCTURES

AFQTP 3E3X1-16
TABLE OF CONTENTS
MODULE 16
CONCRETE STRUCTURES
AFQTP GUIDANCE INTRODUCTION..............................................................................................16-3
AFQTP UNIT 2 CONCRETE REINFORCEMENT
INSTALL REINFORCING STEEL (16.2.1.) ......................................................16-4
AFQTP UNIT 3 CONSTRUCT FORMS
SLABS (16.3.4.) .............................................................................................16-10
AFQTP UNIT 5 INSTALL FORMS (16.5.)................................................................................16-16
AFQTP UNIT 9 PLACE CONCRETE IN FORMS (16.9.).........................................................16-23
AFQTP UNIT 12 FINISH CONCRETE (16.12.) .........................................................................16-29
REVIEW ANSWER KEY.......................................................................................................KEY-1
CORRECTIONS/IMPROVEMENT LETTER ............................................................. APPENDIX A
Career Field Education and Training Plan (CFETP) references from 1 August 2002 version.
OPR: HQ AFCESA/CEOF Certified by: HQ AFCESA/CEOF (SMSgt Dan Sacks) (CMSgt Myrl F. Kibbe) Supersedes AFQTP 3E3X1-15, 14 Jul 00 Pages: 39/Distribution F
Notice. This AFQTP is NOT intended to replace the applicable technical references nor is it intended to replace hands-on training. It is to be used in conjunction with these for training purposes only.
16-2

AFQTP 3E3X1-16
AIR FORCE QUALIFICATION TRAINING PACKAGES
FOR
STRUCTURAL (3E3X1)
INTRODUCTION
Before starting this AFQTP, refer to and read the “AFQTP Trainer/Trainee Guide”
AFQTPs are mandatory and must be completed to fulfill task knowledge requirements on core and diamond tasks for upgrade training. It is important for the trainer and trainee to understand that an AFQTP does not replace hands-on training, nor will completion of an AFQTP meet the requirement for core task certification. AFQTPs will be used in conjunction with applicable technical references and hands-on training. AFQTPs and Certification and Testing (CerTest) must be used as minimum upgrade requirements for Diamond tasks.
MANDATORY minimum upgrade requirements: Core task: AFQTP completion Hands-on certification Diamond task: AFQTP completion CerTest completion (80% minimum to pass) Note: Trainees will receive hands-on certification training for Diamond Tasks when equipment becomes available either at home station or at a TDY location. Put this package to use. Subject matter experts under the direction and guidance of HQ AFCESA/CEOF revised this AFQTP. If you have any recommendations for improving this document, please contact the Structures Career Field Manager at the address below.
HQ AFCESA/CEOF 139 Barnes Dr. Suite 1
Tyndall AFB, FL 32403-5319 DSN: 523-6421, Comm: (850) 283-6421
Fax: DSN 523-6488 E-mail: [email protected]
Notice. This AFQTP is NOT intended to replace the applicable technical references nor is it intended to replace hands-on training. It is to be used in conjunction with these for training purposes only.
16-3

AFQTP 3E3X1-16 16.2.1.
CONCRETE REINFORCEMENT
MODULE 16 AFQTP UNIT 2
INSTALL REINFORCING STEEL (16.2.1.)
Notice. This AFQTP is NOT intended to replace the applicable technical references nor is it intended to replace hands-on training. It is to be used in conjunction with these for training purposes only.
16-4

AFQTP 3E3X1-16 16.2.1.
INSTALL REINFORCING STEEL
Task Training Guide
STS Reference Number/Title:
16.2.1. - Install reinforcing steel.
Training References:
1. Career Development Course (CDC) Structural Journeyman 3E351C, Volume 2, Unit 1, Section 1-2, Lesson 304, Reinforced Concrete.
2. Navy Advancement Training (NAVEDTRA) Course 14043; Builder 3 & 2, Volume 1.
Prerequisites: 1. Possess as a minimum a 3E331 AFSC. 2. Review the following references:
2.1. CDC Structural Journeyman 3E351C, Volume 2, Unit 1, Section 1-2, Lesson 304. 2.2. NAVEDTRA 14043, Chapter 7, Working with Concrete.
3. Complete this AFQTP Unit 3, Construct Forms and Unit 5, Install Forms prior to completing this task.
Equipment/Tools Required:
1. Rebar or wire fabric. 2. Rebar cutter. 3. Wire cutters. 4. Flexible wire. 5. Wire snips. 6. Leather gloves. 7. Safety glasses.
Learning Objective:
Trainee will be able to install reinforced steel in concrete for a required job.
Samples of Behavior:
Trainee will know the different types reinforced steel and how to install them.
Note: 1. This AFQTP may need to be complete with assistance from Horizontal Repair Section. 2. Any safety violation will result in a failure. 3. Trainer must develop an exercise scenario based upon placing rebar into the forms to
validate ability of trainee to meet learning objectives and samples of behavior.
Notice. This AFQTP is NOT intended to replace the applicable technical references nor is it intended to replace hands-on training. It is to be used in conjunction with these for training purposes only.
16-5

AFQTP 3E3X1-16 16.2.1.
INSTALL REINFORCING STEEL
1. Background. Concrete is the basic material for many construction projects. It is used for building foundations, pads, and sidewalks. Concrete is very heavy, but by itself, it is not strong enough to support a large amount of weight. For that reason, steel reinforcement is necessary to ensure a finished product that is durable and will last a long time without requiring repair. 2. Overview. Steel reinforcement is by far the most popular and readily available material for reinforcing concrete. The two types used in the Air Force are steel reinforcing rods (more commonly called rebar) and welded wire fabric. The reinforcement type used is dependent upon the concrete job you are doing. If replacing a section of sidewalk, the wire fabric will most likely be used, whereas if constructing a pad or foundation, rebar is the preferred method. In a contingency environment, slabs are used for tent A/C units and for “permanent” floors for tents and shelters. The reinforcement that you use will be dictated by the job or, if possible, consult drawings, notes and specifications. If you are still unsure, ask your supervisor. It is better to ask than to install the wrong reinforcement and have to start the project over.
2.1. Slab. Slab construction, as a rule, is the most common concrete construction used in the Air Force. Understanding how the reinforcement is placed inside the forms is crucial to ensure a high quality product. Remember, rebar should be relatively clean from oils, grease, rust and dirt, so that the adhesion between the rebar and concrete will not be impeded. When placed in the forms, rebar should be no closer to the forms than 1” or 1 & ⅓ times the diameter of the largest aggregate used, whichever is greater. Also, use stirrups or bolsters to place the rebar at the correct height — 3” for exterior pads and ¾” for interior pads, (Figure 2-1).
NOTE: DO NOT use a torch to cut rebar as the heating will cause changes in the bar’s metal properties and impact the strength of the metal.
Figure 2-1. Reinforced Steel Rods.
Notice. This AFQTP is NOT intended to replace the applicable technical references nor is it intended to replace hands-on training. It is to be used in conjunction with these for training purposes only.
16-6

AFQTP 3E3X1-16 16.2.1.
2.2. Footers and Walls. Rebar is placed in footings very much as it is placed in floor slabs. Stones, rather than steel supports, may be used to support the steel at the proper distance above the subgrade. Stub up the rebar at least 3 feet above the footer or stem wall, especially if constructing a block wall. This allows for more rebar to be attached as the work progresses up. When overlapping rebar, it should be at least 30 times the bar diameter or 12” and tied with at least three wires. After the rebar is attached to the stubbed up sections, fill the block cells with cement.
NOTE TO TRAINER/CERTIFIER: If a concrete project is not available, the minimum required for upgrade training is the following: give trainee a scenario based on the steps below. Have trainee measure and cut rebar to fit correctly into the form that was constructed/installed in Unit 3 and 5. The trainee should be able to secure the rebar together using any two ties below.
3. Procedures. Follow these steps to install rebar into a form:
SAFETY: SAFETY GLASSES MUST BE WORN WHEN CUTTING THE REBAR AND WIRE.
Step 1: Determine the rebar size needed from the drawings. Step 2: Determine the rebar length needed based upon the size of the forms. Step 3: Cut the rebar to size. Use hack saw, portable band saw or like tool to cut the rebar.
Figure 2-2. Rebar tie patterns. Step 4: Tie the rebar into a lattice pattern (see Figure 2-2). Step 5: Place rebar correctly into form. Ensure rebar is spaced correctly both from the ground and from the sides of the forms.
Notice. This AFQTP is NOT intended to replace the applicable technical references nor is it intended to replace hands-on training. It is to be used in conjunction with these for training purposes only.
16-7

AFQTP 3E3X1-16 16.2.1.
REVIEW QUESTIONS
FOR INSTALL REINFORCING STEEL
QUESTION ANSWER 1. Concrete is strong under compression, but
not under tension. a. True. b. False.
2. The rebar should be how high off the ground in an exterior slab?
a. At least 3/4 inches. b. At least 1 inch. c. At least 3 inches. d. At least 8 inches.
3. How much overlap should there be when overlapping rebar?
a. 10 times diameter or 3” b. 15 times diameter or 6” c. 20 times diameter or 9” d. 30 times diameter or 12”
4. What should you use as spacers for rebar in the subgrade?
a. Pea gravel. b. Stones. c. Block. d. Dirt.
5. Why should rebar be tied together? a. To strengthen the rebar b. To strengthen the concrete. c. To ensure the rebar does not move. d. None of the above.
Notice. This AFQTP is NOT intended to replace the applicable technical references nor is it intended to replace hands-on training. It is to be used in conjunction with these for training purposes only.
16-8

AFQTP 3E3X1-16 16.2.1.
INSTALL REINFORCING STEEL PERFORMANCE CHECKLIST INSTRUCTIONS:
The trainee must satisfactorily perform all parts of the task without assistance. Evaluate the trainee’s performance using this checklist.
DID THE TRAINEE…. YES NO 1. cut the rebar correctly and to proper length? 2. get the proper spacing for the rebar on the slab for an exterior slab? 3. overlap the rebar and use enough ties on the rebar to hold it together? 4. construct the cage together properly for a column? 5. stub up the rebar high enough when laying block walls? 6. comply with safety requirements? FEEDBACK: Trainer/Certifier should provide both positive and/or negative feedback to the trainee immediately after the task is performed. This will ensure the issue is still fresh in the mind of both the trainee and trainer/certifier.
Notice. This AFQTP is NOT intended to replace the applicable technical references nor is it intended to replace hands-on training. It is to be used in conjunction with these for training purposes only.
16-9

AFQTP 3E3X1-16 16.3.4.
CONSTRUCT FORMS
MODULE 16 AFQTP UNIT 3
SLABS (16.3.4.)
Notice. This AFQTP is NOT intended to replace the applicable technical references nor is it intended to replace hands-on training. It is to be used in conjunction with these for training purposes only.
16-10

AFQTP 3E3X1-16 16.3.4.
CONSTRUCT FORMS FOR SLABS
Task Training Guide
STS Reference Number/Title:
16.3.4. – Construct forms for slabs.
Training References:
1. Career Development Course (CDC) Structural Journeyman 3E351C, Volume 2, Unit 1, Section 1-2, Lesson 305; Forms Used in Concrete Construction.
2. Navy Advancement Training (NAVEDTRA) Course 14043; Builder 3 & 2, Volume 1.
3. Commercial Manual, Modern Masonry by Clois E. Kicklighter, 1991.
Prerequisites 1. Possess as a minimum a 3E331 AFSC. 2. Review the following references:
2.1. CDC Structural Journeyman 3E351C, Volume 2, Unit 1, Section 1-2, Lesson 305. 2.2. NAVEDTRA 14043, Chapter 7, Working with Concrete. 2.3. Modern Masonry, Chapter 10, Form Construction.
3. Complete this AFQTP Unit 5, Install Forms prior to completing this task.
Equipment/Tools Required:
1. 3E3X1 Consolidated Tool Kit (CTK). 2. Safety glasses. 3. Circular saw. 4. Sledgehammer. 5. Shovel. 6. 4’ level. 7. Lumber.
Learning Objective:
Trainee should know how to construct forms for a concrete slab.
Samples of Behavior:
Trainee should be able to demonstrate how to construct concrete forms for slabs, using wood or steel.
Notes: 1. This QTP may need to be complete with assistance from Horizontal Repair Section. 2. Any safety violation will result in a failure. 3. Trainer must develop an exercise scenario based upon constructing forms to validate ability
of trainee to meet learning objectives and samples of behavior.
Notice. This AFQTP is NOT intended to replace the applicable technical references nor is it intended to replace hands-on training. It is to be used in conjunction with these for training purposes only.
16-11

AFQTP 3E3X1-16 16.3.4.
CONSTRUCT FORMS FOR SLABS
1. Background. In very basic terms, forms are what give shape to concrete. With that in mind, it is important in construction to build the forms correctly so the slab is the desired shape. Forms are used to help make other foundation elements that include walls, piers, and footings. The drawings will indicate what type of foundation elements are needed and the notes and specifications should indicate how to tie them together. The most important things to remember about forms for pads are that they must be level and square.
2. Form Types. There are two basic form types used today—metal and wood. In this unit, we will discuss both types.
Figure 3-1. Metal Forms Set Up For A Square Floor Slab.
2.1. Metal forms are used where the construction is duplicated at more than one location or in a long run such as a sidewalk. They are initially more expensive than wood forms, but are more economical as they can be reused. Metal forms come in many different sizes and shapes for doing different types of concrete work such as column, walls, bridges, and slabs. Metal forms are used primarily for square or rectangular pads as shown in Figure 3-1. They are generally 10’ in length with the height equivalent to that of 2” lumber (4”, 6” etc.). Figure 3-2. Metal Stake And Wedge For
Form.
2.1.1. Metal forms are all anchored with a metal stake and wedge. The stake is inserted through the backside of the form and driven just below the top of the form. The stake is then held into position with a steel wedge that is part of the form itself, Figure 3-2.
Figure 3-3. Metal Form Overrun. 2.1.2. If the pad is less than 10’ in length, overrun the corners as shown in Figure 3-3. If over 10’, add another form or fill in the gap with the same size piece of lumber cut to length. Ensure to brace the joint where the wood filler material is and along the wood filler itself.
Notice. This AFQTP is NOT intended to replace the applicable technical references nor is it intended to replace hands-on training. It is to be used in conjunction with these for training purposes only.
16-12

AFQTP 3E3X1-16 16.3.4.
Figure 3-4. Wood Stakes with Wood
Form. 2.2. Wood forms are often used for slab foundations, Figure 3-4. Lumber is readily available in many different sizes at local lumberyards.
2.2.1. To determine the size lumber needed, measure from where the finished slab is suppose to be, down to the ground or subgrade. Normally use 2” x 4”s for driveways, patios, and sidewalks; 1 x 4’s to curve a sidewalk or driveway. Use larger material such as 2” x 6”s on up to 2” x 12”s for building foundations.
2.2.2. There is no rule for how many stakes or braces to use. A common practice is a stake placed every 2’. If in doubt, always add more stakes or braces. Remember, once the concrete has been placed into forms and the forms start to give way, it is very difficult if not impossible, to push the forms back into place.
3. Regardless of the type of form used, several tools will be required to construct and install them. The most popular tools to use are a circular saw, handsaw, hammer, sledgehammer, shovel, 4’ level, and a line level for wood forms.
NOTE TO TRAINER/CERTIFIER: If a concrete project is not available, the minimum required for upgrade training is the following: give trainee a scenario based on the steps for wood forms listed below. Have trainee measure and cut wood to form a pad that is based upon the building line layout from Unit 5.
4. Procedures. Follow these steps to construct wooden form:
SAFETY: PERSONAL PROTECTIVE EQUIPMENT MUST BE WORN WHILE CUTTING FORMS.
Step 1: Determine the size and thickness of the pad needed and its location. Step 2: Gather tools and materials. Step 3: Measure and cut forms to length.
Notice. This AFQTP is NOT intended to replace the applicable technical references nor is it intended to replace hands-on training. It is to be used in conjunction with these for training purposes only.
16-13

AFQTP 3E3X1-16 16.3.4.
REVIEW QUESTIONS
FOR CONSTRUCT FORMS FOR SLABS
QUESTION ANSWER 1. What is the standard length for steel forms? a. 20 feet.
b. 10 feet. c. All the above. d. None of the above.
2. What is the standard length for wood forms? a. 20 feet. b. 10 feet. c. There is not a standard length for wood
forms. d. None of the above.
3. Sidewalks are generally formed using 2” x 8”? a. True. b. False.
4. What type of lumber should be used for creating a curve on a driveway?
a. 1” x 4” x 8’. b. 2” x 4” x 16’. c. 2” x 6” x 16'. d. 4” x 4” x 16’.
5. Metal forms may be used for which of the following?
a. Walls. b. Columns. c. Ceilings. d. A and B only.
Notice. This AFQTP is NOT intended to replace the applicable technical references nor is it intended to replace hands-on training. It is to be used in conjunction with these for training purposes only.
16-14

AFQTP 3E3X1-16 16.3.4.
CONSTRUCT FORMS FOR SLABS PERFORMANCE CHECKLIST INSTRUCTIONS:
The trainee must satisfactorily perform all parts of the task without assistance. Evaluate the trainee’s performance using this checklist.
DID THE TRAINEE…. YES NO 1. explain the difference between metal and wood forms? 2. use the correct tools? 3. state the correct size lumber to use in building a 4” pad? 4. given the size pad, layout, and cut the forms? 5. comply with safety requirements? FEEDBACK: Trainer/Certifier should provide both positive and/or negative feedback to the trainee immediately after the task is performed. This will ensure the issue is still fresh in the mind of both the trainee and trainer/certifier.
Notice. This AFQTP is NOT intended to replace the applicable technical references nor is it intended to replace hands-on training. It is to be used in conjunction with these for training purposes only.
16-15

AFQTP 3E3X1-16 16.5.
CONCRETE STRUCTURES
MODULE 16 AFQTP UNIT 5
INSTALL FORMS (16.5.)
Notice. This AFQTP is NOT intended to replace the applicable technical references nor is it intended to replace hands-on training. It is to be used in conjunction with these for training purposes only.
16-16
AFQTP 3E3X1-16 16.5.
INSTALL FORMS
Task Training Guide
STS Reference Number/Title:
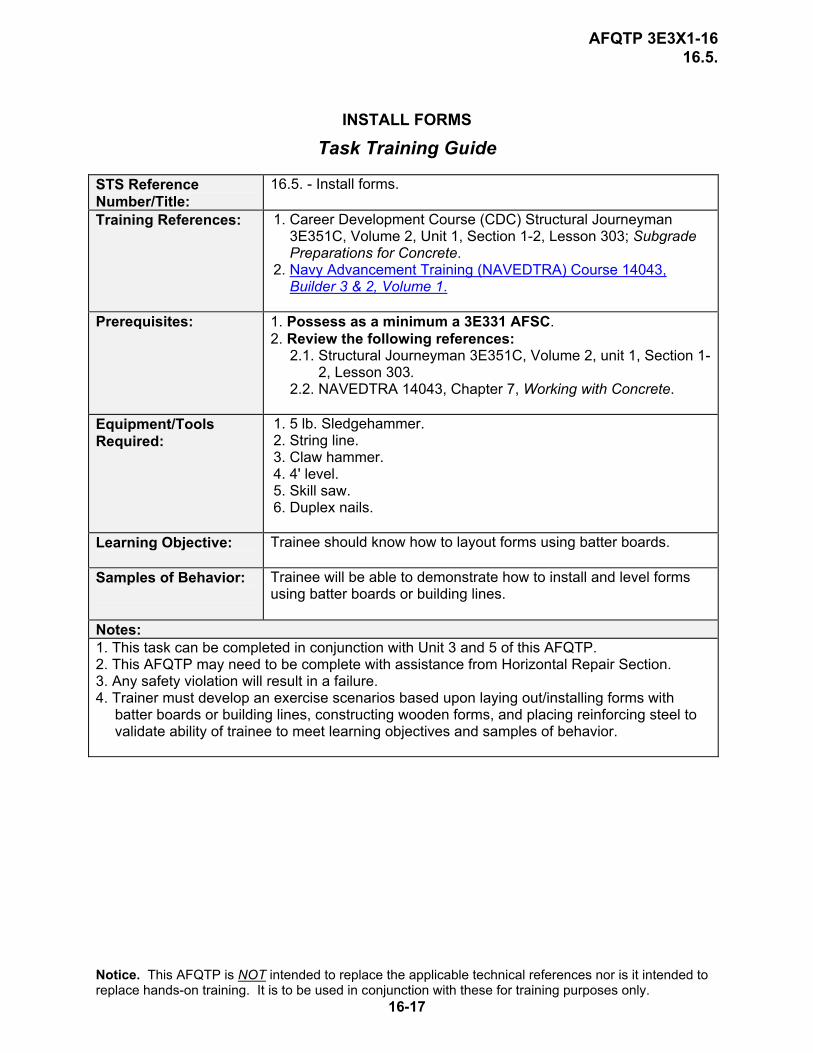
16.5. - Install forms.
Training References:
1. Career Development Course (CDC) Structural Journeyman 3E351C, Volume 2, Unit 1, Section 1-2, Lesson 303; Subgrade Preparations for Concrete.
2. Navy Advancement Training (NAVEDTRA) Course 14043, Builder 3 & 2, Volume 1.
Prerequisites: 1. Possess as a minimum a 3E331 AFSC.
2. Review the following references: 2.1. Structural Journeyman 3E351C, Volume 2, unit 1, Section 1-
2, Lesson 303. 2.2. NAVEDTRA 14043, Chapter 7, Working with Concrete.
Equipment/Tools Required:
1. 5 lb. Sledgehammer. 2. String line. 3. Claw hammer. 4. 4' level. 5. Skill saw. 6. Duplex nails.
Learning Objective:
Trainee should know how to layout forms using batter boards.
Samples of Behavior:
Trainee will be able to demonstrate how to install and level forms using batter boards or building lines.
Notes: 1. This task can be completed in conjunction with Unit 3 and 5 of this AFQTP. 2. This AFQTP may need to be complete with assistance from Horizontal Repair Section. 3. Any safety violation will result in a failure. 4. Trainer must develop an exercise scenarios based upon laying out/installing forms with
batter boards or building lines, constructing wooden forms, and placing reinforcing steel to validate ability of trainee to meet learning objectives and samples of behavior.
Notice. This AFQTP is NOT intended to replace the applicable technical references nor is it intended to replace hands-on training. It is to be used in conjunction with these for training purposes only.
16-17

AFQTP 3E3X1-16 16.5.
INSTALL FORMS
1. Background. The portion of a structure that extends above ground level is called the superstructure and the portion that extends below ground level is called the substructure. The substructure parts that distribute building loads to the ground are called foundations. In this unit we will discuss different types of forms used to form your more common slab types that you may encounter in your Air Force career.
2. Site Preparation. The building site may require grading and/or tree removal. Grading may be needed before the building lines are laid out. This may require the placement of grade level stakes. Engineering Technicians can assist using a transit or level. If the grass and vegetation are not removed from the building site, the grass will eventually die after the concrete has been placed. The dead grass will then leave voids under the new concrete slab.
3. Area Layout. There are two layout methods for form placement depending on the slab size — with batter boards and without.
3.1. For large slabs, it is advisable to have an Engineering Technician come out to the job site and assist in installing the batter boards with a transit and level (Figure 5-1). Once the batter boards are in place, the string lines represent the outside of the slab. Simply follow the string lines and set the forms to the outside of the lines. Always double-check the string lines to ensure they are square before staking down all the forms and securing them prior to the concrete being poured.
Figure 5-1. Typical Batter Board Layout.
Notice. This AFQTP is NOT intended to replace the applicable technical references nor is it intended to replace hands-on training. It is to be used in conjunction with these for training purposes only.
16-18

AFQTP 3E3X1-16 16.5.
3.2. For smaller slabs, batter boards may not be required. The area can be laid out with a 4’ level, string line and some grade stakes, Figure 5-2. Again, this is for some smaller slabs that may be encountered. The form installation procedures here are the same as the procedures used for batter boards, the only difference is in the layout.
Figure 5-2. Stake Layout Method.
3.2.1. Use 2” x 2” lumber cut into stakes. Approximately one foot from the outside edge of the proposed slab, drive the stake in line with the first corner. It is important to start at the highest corner of the excavation if it is not level, (Figure 5-3). Start driving the remaining stakes after the first stake is established.
3.2.2. Measure out to the second corner, add 1’, and install the second stake. Run a string line between the two stakes (this establishes the baseline for the remaining stakes). Use a line level to setover 50’ between stakes, use a water levefinished slab.
3.2.3. To set the third corner, run anothersquare the line with your baseline. Use thcorner is established (square and level), u
Notice. This AFQTP is NOT intended to replace thereplace hands-on training. It is to be used in conjun
16
4. Form Installation. With the building lines in Ensure once again that all corners are square alines—barely touching the lines. Begin staking to level. Additional stakes may always be addeplacement. Every once in awhile, double-checklevel. When using metal or wood forms, try to ueasy disassembly.
Figure 5-3. Excavation and Building
the string level between the stakes (if the run is l). The string line will represent the top of the
string line level at the correct measurement, and e 3, 4, 5 method of squaring. Once the third se the same procedure to find the fourth corner.
applicable technical references nor is it intended to ction with these for training purposes only. -19
place, the entire slab perimeter is now identified. nd start installing the forms under the string the forms every 2’ to 4’ or as much as necessary d later for added strength prior to concrete the string line to ensure it is still square and se duplex nails as much as possible to allow for

AFQTP 3E3X1-16 16.5.
4.1. Once the forms are in place and all stakes have been installed, it is advisable to backfill around the outside edge of the forms. When using metal forms, concrete gathers in the outside portion of the form and will be difficult to clean out. By backfilling with some loose fill material, the concrete will not fill up this portion of the form. Backfilling also assists in strengthening the forms as well. 4.2. The next step prior to pouring the concrete is to put some type of oil onto the form surface that will be in contact with the concrete. This will give you a better finish and also assist in cleaning the forms once removed.
5
Nre
NOTE TO TRAINER/CERTIFIER: If a concrete project is not available, the minimum required for upgrade training is the following: give trainee a scenario based on the steps below. Have trainee and assistant layout stakes and building lines for a pad that is at least 5’ x 5’ and is 4” deep (nominal).
. Procedures. Follow these steps to install forms.
Step 1: Prepare the site by clearing any vegetation. Step 2: Set the first corner.
2.1. Starting at the highest corner of the slab and set the first corner stake. 2.2. Measure out to the second corner and set another stake. 2.3. Run a string line between the two stakes using a line level. The string line will represent the top of the finished slab. 2.4. Repeat these steps to find the third and fourth corners.
Step 3: Place the forms under the string line. 3.1. After all corners have been established, place your forms under the string line barely touching the string itself. 3.2. If the forms are too long, over run the corner of slabs, Figure 3. 3.3. If you are using wood forms, simply cut the form to length.
Step 4: Stake the forms. 4.1. Stake the forms down to the ground every 2’ to 4’ or as much as necessary. 4.2. Keep the forms level and continue to stake them down. 4.3. Try to use duplex nails when available.
Step 5: Level and square. 5.1. After all the forms are in place and secured, check to see if they are all level and square. 5.2. Back fill forms to keep clean and before placing any concrete in them. 5.3. Oil them to make it easier to take them apart and clean them.
CAUTION: USE VEGETABLE OIL INSTEAD OF MOTOR OIL OR DIESEL FUEL. VEGETABLE OIL IS ENVIRONMENTALLY SAFE.
otice. This AFQTP is NOT intended to replace the applicable technical references nor is it intended to place hands-on training. It is to be used in conjunction with these for training purposes only.
16-20

AFQTP 3E3X1-16 16.5.
REVIEW QUESTIONS FOR
INSTALL FORMS
QUESTION ANSWER 1. Why do you want to remove any grass and
vegetation prior to pouring a new pad? a. Easier installation of forms. b. The grass will grow up into the pad. c. The grass will create a void in the
concrete. d. The grass will remove all the water from
the concrete.
2. What is the determining factor of installing forms with the use of batter boards or grade stakes?
a. Location of new pad. b. Size of the new pad. c. Thickness of the new pad. d. If the pour will be monolithic.
3. What instrument can be used to assist the Engineer technician in setting batter boards?
a. Shovel. b. Transit. c. Line level. d. Plumb bob.
4. When first starting to form a pad, what corner should you start in to get your baseline?
a. Start with the highest corner. b. Start with the lowest corner. c. Do not start at the corner, start in the
middle of the pad. d. All the above.
5. What type of nails should you use for installing forms?
a. Box. b. Form. c. Finish. d. Duplex.
Notice. This AFQTP is NOT intended to replace the applicable technical references nor is it intended to replace hands-on training. It is to be used in conjunction with these for training purposes only.
16-21

AFQTP 3E3X1-16 16.5.
INSTALL FORMS PERFORMANCE CHECKLIST INSTRUCTIONS:
The trainee must satisfactorily perform all parts of the task without assistance. Evaluate the trainee’s performance using this checklist.
DID THE TRAINEE…. YES NO 1. remove all vegetation from the slab location prior to installing forms? 2. install batter boards and/or grade stakes for the form correctly? 3. start at the highest corner of the pad when they installed the forms? 4. install the forms to the line? 5. install the correct amount of stakes? 6. use vegetable oil on forms? 7. comply with safety requirements? FEEDBACK: Trainer/Certifier should provide both positive and/or negative feedback to the trainee immediately after the task is performed. This will ensure the issue is still fresh in the mind of both the trainee and trainer/certifier.
Notice. This AFQTP is NOT intended to replace the applicable technical references nor is it intended to replace hands-on training. It is to be used in conjunction with these for training purposes only.
16-22

AFQTP 3E3X1-16 16.9.
CONCRETE STRUCTURES
MODULE 16 AFQTP UNIT 9
PLACE CONCRETE IN FORMS (16.9.)
Notice. This AFQTP is NOT intended to replace the applicable technical references nor is it intended to replace hands-on training. It is to be used in conjunction with these for training purposes only.
16-23

AFQTP 3E3X1-16 16.9.
PLACE CONCRETE IN FORMS
Task Training Guide
STS Reference Number/Title:
16.9. - Place concrete in forms.
Training References:
1. Career Development Course (CDC) Structural Journeyman 3E351C, Volume 2, Unit 2, Section 2-1; Mixing and Placing Concrete.
2. Navy Advancement Training (NAVEDTRA) Course 14043, Builder 3 & 2, Volume 1.
Prerequisites: 1. Possess as a minimum a 3E331 AFSC.
2. Review the following references: 2.1. CDC Structural Journeyman 3E351C, Volume 2, Unit 2, Section 2-1. 2.2. NAVEDTRA 14043; Chapter 6, Concrete and Chapter 7, Working with Concrete.
3. Complete this AFQTP Unit 2, Install Reinforcing Steel, Unit 3, Construct Forms and Unit 5, Install Forms prior to completing this task.
Equipment/Tools Required:
1. Shovel. 2. Concrete rake. 3. Spade tool. 4. Mechanical vibrator. 5. Hand vibrator. 6. Wheelbarrow. 7. Concrete.
Learning Objective:
Trainee should know steps required to place concrete in forms.
Samples of Behavior:
Trainee should be able to demonstrate the procedures to place concrete in forms.
Notes: 1. This AFQTP may need to be complete with assistance from Horizontal Repair Section. 2. Any safety violation will result in a failure. 3. Trainer must develop an exercise scenario based upon placing concrete into the forms to
validate ability of trainee to meet learning objectives and samples of behavior.
Notice. This AFQTP is NOT intended to replace the applicable technical references nor is it intended to replace hands-on training. It is to be used in conjunction with these for training purposes only.
16-24

AFQTP 3E3X1-16 16.9.
PLACE CONCRETE IN FORMS
1. Background. After the forms are set and square, a vapor barrier placed over the ground, and the reinforcement materials installed, it is time to place the concrete into the forms. The manner in which the concrete is consolidated, finished, and cured determines the final product. As a structural journeyman, it is your responsibility to ensure these items are accomplished correctly.
2. General Information. Most concrete can be poured directly from the ready-mix truck into the forms. To move the concrete to other areas not accessible to the truck, a wheelbarrow or bucket is generally used. Place the concrete near to where it will rest. Never allow it to run or be worked over long distances. To do so could cause segregation (this is a condition in which large aggregates get separated from cement paste and smaller aggregates). Place concrete in forms promptly after mixing, or immediately after the ready-mix truck arrives.
2.1. In general, concrete for walls should be placed in the forms in horizontal layers of uniform thickness not exceeding 12 inches. As the concrete is placed, spade or vibrate it enough to compact it thoroughly. This produces a dense mass.
2.2. Working the concrete next to the form tends to produce a smooth surface. It prevents honeycombing along the form faces. A spade or thin board may be used for this purpose, Figure 9-1. Large aggregates are forced away from the forms and any air trapped along the form face is released. Mechanical vibrators are effective in consolidating concrete, Figure 9-2.
Figure 9-1. Spade Tool Used to Work Concrete on Sides of Form.
Figure 9-2. Mechanical Vibrator Used to Work Concrete.
n pool of cement paste from the
surrounding concrete.
r surface
id the strength of
the concrete depends on its proper location.
2.2.1. However, vibrators create added pressure on theforms. This factor must be considered in the form design. The vibrator should not be held in one locatiolong enough to draw a
2.3. Consolidating eliminates rock pockets and large aibubbles and brings enough fine material to the to produce the desired finish. In the process of consolidation, carefully work the concrete around the reinforcing steel to assure proper embedding of the steel in the concrete. In consolidating, try to avodisplacing the reinforcing steel, because
Notice. This AFQTP is NOT intended to replace the applicable technical references nor is it intended to replace hands-on training. It is to be used in conjunction with these for training purposes only.
16-25

AFQTP 3E3X1-16 16.9.
NOTE TO TRAINER/CERTIFIER: If a concrete project is not available, the minimum required for upgrade training is the following: give trainee a scenario based on the steps below based on the tasks accomplished in Units, 2, 3, and 5. It is ideal to complete this task in conjunction with Unit 12.
3. Procedures. Follow these steps to place concrete in forms:
Step 1: Double-check all the forms. Ensure they are well anchored in place and they are still level and square.
Step 2: Ensure the wire mesh or reinforcement bar is installed and tied correctly. 2.1. This is where you will get all the strength required for a good pad. 2.2. It is a good idea to put down a moisture vapor under the mesh or rebar. This will allow the concrete to cure more slowly by not allowing the water from the concrete to be absorbed into the ground. A good vapor barrier is 6-mil plastic over the entire ground surface.
Step 3: Plan ahead on where the concrete truck will deliver the concrete. 3.1. Always start placing the concrete at the far end of the form away from your concrete source working towards the source. This way you do not have to work over the freshly poured concrete. 3.2. Be prepared if you have to stop pouring for a long period of time. Roughen the top or edge of the poured concrete so that when you resume, the new concrete will have a good surface to adhere to.
Step 4: As the concrete is being poured. Ensure you work it enough to get the desired finish. You can use the spade tool described previous or a mechanical vibrator.
Step 5: Prepare to finish concrete. (Covered in the Unit 12.)
Notice. This AFQTP is NOT intended to replace the applicable technical references nor is it intended to replace hands-on training. It is to be used in conjunction with these for training purposes only.
16-26

AFQTP 3E3X1-16 16.9.
REVIEW QUESTIONS FOR
PLACE CONCRETE IN FORMS
QUESTION ANSWER 1. What should be accomplished prior to the
concrete being placed into the form? a. Rebar is in place. b. Forms are square and level. c. Forms are well secured. d. All of the above.
2. Why do you NOT want to work concrete over long distances?
a. To do so will cause segregation. b. It will cause a smooth finish. c. It will not cure. d. The will be too much cement in the mix.
3. Concrete for walls should be place in _________ layers of uniform thickness not exceeding 12 inches.
a. vertical. b. plumb. c. horizontal. d. diagonal.
4. What can be placed down prior to the mesh or rebar to keep the ground from absorbing all the water out of the concrete?
a. 6-mil plastic. b. Plywood. c. Sheet metal. d. Base course.
5. What sort of tool(s) can be used to consolidate the concrete to provide a smooth surface?
a. Spade tool. b. Shovel. c. Mechanical vibrator. d. Both a and c.
Notice. This AFQTP is NOT intended to replace the applicable technical references nor is it intended to replace hands-on training. It is to be used in conjunction with these for training purposes only.
16-27

AFQTP 3E3X1-16 16.9.
PLACE CONCRETE IN FORMS PERFORMANCE CHECKLIST INSTRUCTIONS:
The trainee must satisfactorily perform all parts of the task without assistance. Evaluate the trainee’s performance using this checklist.
DID THE TRAINEE…. YES NO 1. check the stakes prior to the concrete being placed into the forms? 2. plan the delivery of the concrete and how it will be transported into the
forms?
3. explain why a moisture barrier is used prior to placing the rebar? 4. list the tools used to consolidate the concrete? 5. explain why not to disturb reinforcements? 6. comply with all safety requirements? FEEDBACK: Trainer/Certifier should provide both positive and/or negative feedback to the trainee immediately after the task is performed. This will ensure the issue is still fresh in the mind of both the trainee and trainer/certifier.
Notice. This AFQTP is NOT intended to replace the applicable technical references nor is it intended to replace hands-on training. It is to be used in conjunction with these for training purposes only.
16-28

AFQTP 3E3X1-16 16.12.
CONCRETE STRUCTURES
MODULE 16 AFQTP UNIT 12
FINISH CONCRETE (16.12.)
Notice. This AFQTP is NOT intended to replace the applicable technical references nor is it intended to replace hands-on training. It is to be used in conjunction with these for training purposes only.
16-29

AFQTP 3E3X1-16 16.12.
FINISH CONCRETE
Task Training Guide
STS Reference Number/Title:
16.12. - Finish concrete.
Training References:
1. Career Development Course (CDC) Structural Journeyman 3E351C, Volume 2, Unit 2, Section 2-2, Lesson 308; Finishing and Curing Concrete.
2. Navy Advancement Training (NAVEDTRA) 14043; Builder 3 & 2, Volume 1.
3. Commercial Manual, Modern Masonry by Clois E. Kicklighter, 1991.
4. Commercial Manual, Modern Carpentry by Willis Wagner, 1992.
Prerequisites: 1. Possess as a minimum a 3E331 AFSC. 2. Review the following references:
2.1. CDC Structural Journeyman 3E351C, Volume 2, Unit 2, Section 2-2, Lesson 308. 2.2. NAVEDTRA 14043; Chapter 6, Concrete and Chapter 7, Working with Concrete. 2.3. Modern Masonry, Chapter 7, Concrete Fundamentals. 2.4. Modern Carpentry, Chapter 6, Footings and Foundations.
Equipment/Tools Required:
1. Screed board. 2. Jitterbug. 3. Float. 4. Edger. 5. Jointer. 6. Steel trowel. 7. Plastic.
Learning Objective:
Trainee should know the steps and procedures of finishing and curing concrete.
Samples of Behavior:
Trainee should be able to demonstrate the steps and procedures of finishing and curing concrete
Notes: 1. This AFQTP may need to be complete with assistance from Horizontal Repair Section. 2. Any safety violation will result in a failure. 3. Trainer must develop an exercise scenario based upon finishing and curing concrete to
validate ability of trainee to meet learning objectives and samples of behavior.
Notice. This AFQTP is NOT intended to replace the applicable technical references nor is it intended to replace hands-on training. It is to be used in conjunction with these for training purposes only.
16-30

AFQTP 3E3X1-16 16.12.
FINISH CONCRETE
1. Background. Finishing concrete that has been poured is a very important part of the curing process. This will help in the overall appearance of the concrete after it has set up. If the proper attention has not been taken during the finishing process, then repairs must be made to the concrete surface wasting time and money. In this unit, we will discuss how to finish concrete.
2. Finish Concrete. Finishing concrete is a relatively simple task that requires knowledge and skill. The main subtasks associated with finishing are screeding, floating, edging, jointing, surfacing and curing the concrete. Let’s learn about each one.
2.1. Screeding. The first step in finishing concrete is to screed the excess concrete to a level elevation. Screeding may be the only type of finish required. The drawings, notes and specifications will indicate what finish is required. See Figure 12-1 for an example of screeding.
Figure 12-1. Screeding Concrete.
2.2. Floating. The next process is to float the concrete. This process gives the surface a smooth texture. Wood or aluminum magnesium floats are the tools used in the floating process (Figures 12-2 and 12-3). Do not overwork the concrete while it is still plastic as this brings too much water to the surface and will cause the concrete to scale (wear out) in the future.
Figure 12-2. Wood Float. Figure 12-3. Long-handled Float.
Notice. This AFQTP is NOT intended to replace the applicable technical references nor is it intended to replace hands-on training. It is to be used in conjunction with these for training purposes only.
16-31

AFQTP 3E3X1-16 16.12.
2.3. Edging and Jointing. The next process will include edging and jointing before the concrete gets too stiff. Edging should be completed soon after the floating takes place. It gives a rounded look and prevents the concrete from chipping around the edges, Figure 12-4. Jointing should also be accomplished soon after the floating. This helps the concrete to not crack or chip along stress areas. A jointer tool and straight edge are used to accomplish this task, Figure 12-5.
Figure 12-4. Edging Concrete. Figure 12-5. Jointer.
2.4. Surfacing. Surfacing is the last process. There are many different methods used to surface. Brooms provide a non-skid surface while hand and power steel trowels will give a hard firm surface. (Figure 12-6). Over-finishing concrete could also cause scaling, Figure 12-7.
Figure 12-6. Troweling Cement. Figure 12-7. Scaling Due to Over Finishing. Notice. This AFQTP is NOT intended to replace the applicable technical references nor is it intended to replace hands-on training. It is to be used in conjunction with these for training purposes only.
16-32

AFQTP 3E3X1-16 16.12.
2.5. Curing. Curing is the last step in finishing concrete. The weather conditions will dictate which method of curing is needed. If you have any questions, check with your supervisor. If the concrete is cured correctly, it should have a nice smooth appearance, Figure 12-8.
Figure 12-8. Curing the Concrete. 3. This unit should give the information necessary to help in the concrete finish process. As one would expect there are several ways to accomplish concrete finishing. This unit has enough information to get started on a concrete finishing job.
NOTE TO TRAINER/CERTIFIER: If a concrete project is not available, the minimum required for upgrade training is the following: give trainee a scenario based on the steps below. Have trainee finish the concrete that was placed from Unit 9. The surface should have one joint and contain both a smooth and broomed finish.
4. Procedures. Follow these steps to finish concrete:
Step 1: Select the appropriate screed board and place it on the forms. (Note: Two people will be required to accomplish this task.)
1.1. Move the board forward with a sawing motion and at a slight angle. 1.2. Strike off excess concrete from forms and pad.
Step 2: Float the pad. 2.1. Use a bull float (for large pads) or hand mag-aluminum float (small pads). 2.2. Use wood float.
Step 3: Edging and jointing. 3.1. Use an edger to set the edge of the pad. 3.2. Use a jointer to strike control joints.
Step 4: Surfacing. 4.1. Use a steel trowel to produce a hard smooth finish. 4.2. Use a broom to produce a non-skid surface.
Step 5: Place cover over concrete to aid in curing.
Notice. This AFQTP is NOT intended to replace the applicable technical references nor is it intended to replace hands-on training. It is to be used in conjunction with these for training purposes only.
16-33

AFQTP 3E3X1-16 16.12.
REVIEW QUESTIONS
FOR FINISH CONCRETE
QUESTION ANSWER 1. What is the first step in finishing the concrete
after it has been placed? a. Edging. b. Cover with plastic. c. Screeding to a level elevation. d. Bull floating.
2. When should the edging of the concrete take place?
a. Before the concrete gets too stiff. b. After the floating takes place. c. Before the floating takes place. d. Both a and b.
3. What is used to get a machine finish on the concrete?
a. Power trowel. b. Jointer. c. Broom. d. Carborundum stone.
4. What happens to concrete if it is over finished?
a. Cracking. b. Glazing. c. Produce a smooth surface. d. None of the above.
5. What can be used to cover the concrete to assist in the curing process?
a. Plastic. b. Wet burlap. c. Water. d. All of the above.
Notice. This AFQTP is NOT intended to replace the applicable technical references nor is it intended to replace hands-on training. It is to be used in conjunction with these for training purposes only.
16-34

AFQTP 3E3X1-16 16.12.
FINISH CONCRETE PERFORMANCE CHECKLIST INSTRUCTIONS:
The trainee must satisfactorily perform all parts of the task without assistance. Evaluate the trainee’s performance using this checklist.
DID THE TRAINEE…. YES NO 1. screed the concrete to level the surface? 2. know when to begin the floating process? 3. begin the edging and jointing process too soon or too late? 4. begin surfacing the concrete at the correct time? 5. explain the difference between the final finish and machine finish of the
concrete?
6. cover the finished concrete with plastic, water, or wet burlap? 7. comply with safety requirements? FEEDBACK: Trainer/Certifier should provide both positive and/or negative feedback to the trainee immediately after the task is performed. This will ensure the issue is still fresh in the mind of both the trainee and trainer/certifier.
Notice. This AFQTP is NOT intended to replace the applicable technical references nor is it intended to replace hands-on training. It is to be used in conjunction with these for training purposes only.
16-35

AFQTP 3E3X1-16 KEY
Air Force Civil Engineer
QUALIFICATION TRAINING PACKAGE (QTP)
REVIEW ANSWER KEY
FOR
STRUCTURAL (3E3X1)
MODULE 16
CONCRETE STRUCTURES
Notice. This AFQTP is NOT intended to replace the applicable technical references nor is it intended to replace hands-on training. It is to be used in conjunction with these for training purposes only.
Key-1

AFQTP 3E3X1-16 KEY
INSTALL REINFORCING STEEL
(3E3X1-16.2.1.)
QUESTION ANSWER 1. Concrete is strong under compression, but
not under tension. a. True.
2. The rebar should be how high off the ground in an exterior slab?
c. At least 3 inches.
3. How much overlap should there be when overlapping rebar
d. 30 times diameter or 12”
4. What should you use as spacers for rebar in the subgrade?
b Stones
5. Why should rebar be tied together? c. To ensure the rebar does not move.
CONSTRUCT FORMS FOR SLABS (3E3X1-16.3.4.)
QUESTION ANSWER 1. What is the standard length for steel forms? b. 10 feet.
2. What is the standard length for wood forms? c. There is no standard length for wood
forms. 3. Sidewalks are generally formed using 2” x
8”. b. False
4. What type of lumber should be used for creating a curve on a driveway?
a. 1” x 4” x 8’.
5. Metal forms may be used for which of the following?
d. A and B only.
INSTALL FORMS (3E3X1-16.5.)
QUESTION ANSWER 1. Why do you want to remove any grass and
vegetation prior to pouring a new pad? c. The grass will create a void in the
concrete. 2. What is the determining factor of installing
forms with the use of batter boards or grade stakes?
b. Size of the new pad.
3. What instrument can be used to assist the Engineer technician in setting batter boards?
b. Transit.
4. When first starting to form a pad, what corner should you start in to get your baseline?
a. Start with the highest corner.
5. What type of nails should you use for installing forms?
d. Duplex.
Notice. This AFQTP is NOT intended to replace the applicable technical references nor is it intended to replace hands-on training. It is to be used in conjunction with these for training purposes only.
Key-2

AFQTP 3E3X1-16 KEY
PLACE CONCRETE IN FORMS
(3E3X1-16.9.)
QUESTION ANSWER 1. What should be accomplished prior to the
concrete being placed into the form?
d. All of the above.
2. Why do you NOT want to work concrete over long distances?
a. To do so will cause segregation.
3. Concrete for walls should be place in _________ layers of uniform thickness not exceeding 6 to 12 inches.
c. horizontal
4. What can be placed down prior to the mesh or rebar to keep the ground from absorbing all the water out of the concrete?
a. 6-mil plastic.
5. What sort of tool(s) can be used to consolidate the concrete to provide a smooth surface?
d. Both a and c.
FINISH CONCRETE (3E3X1-16.12.)
QUESTION ANSWER 1. What is the first step in finishing the concrete
after it has been placed? c. Screeding to a level elevation.
2. When should the edging of the concrete take place?
d. Both a and b.
3. What is used to get a machine finish on the concrete?
a. Power trowel.
4. What happens to concrete if it is over finished?
d. None of the above.
5. What can be used to cover the concrete to assist in the curing process?
d. All of the above.
Notice. This AFQTP is NOT intended to replace the applicable technical references nor is it intended to replace hands-on training. It is to be used in conjunction with these for training purposes only.
Key-3

Appendix A
MEMORANDUM FOR HQ AFCESA/CEOF
139 Barnes Drive Suite 1 Tyndall AFB, FL 32403-5319
FROM: SUBJECT: Qualification Training Package Improvement 1. Identify module.
Module # and title__________________________________________________ 2. Identify improvement/correction section(s):
_____ STS Task Reference ______ Performance Checklist _____ Training Reference ______ Feedback _____ Evaluation Instructions ______ Format _____ Performance Resources ______ Other _____ Steps in Task Performance
3. Recommended changes--use a continuation sheet if necessary.
_________________________________________________________________________________________________________________________________________________________________________________________________________________________________________________________________________________________________________________________________________________________________________________________________________________________________________________________________________________________________________________________________________________________________________________________________________________________________________________________________________________
4. You may choose to call in your recommendations to DSN 523-6445 or FAX
DSN/Commercial 523-6488 or (850) 283-6488 or email [email protected]. 5. Thank you for your time and interest.
YOUR NAME, RANK, USAF Title/Position