Adding CF Attributes to an HDF5 File - HDFEOS.org · Adding CF Attributes to an HDF5 File ... This...
17
June 13, 2011 2011-06-13.v2 Page 1 of 17 Adding CF Attributes to an HDF5 File Isayah Reed Muqun Yang This document gives the reader an introduction to CF conventions and demonstrates how to use software libraries to add CF attributes to an HDF5 file. We assume that the reader has some knowledge of HDF5 and netCDF4 as well as C, Python, and FORTRAN programming languages. 1 Introduction Climate and forecast (CF) conventions are metadata conventions for earth science data 1 . The conventions define metadata included in the same file as the data, that provide a definitive description of what the data in each variable represents, and of the spatial and temporal properties of the data. This enables users of data from different sources to decide which data are comparable. CF conventions extend and generalize the COARDS (Cooperative Ocean/Atmosphere Research Data Service) conventions 2 . Data that follows the COARDS standard also meets CF standards. In addition to the COARDS standards, CF data include extra features such as horizontal grids other than latitude– longitude, non-spatiotemporal axes, climatological statistics and data compression. CF metadata use values of attributes to represent 3 : 1. Data provenance: title, institution, contact, source, history, references, comment 2. Description of associated activity: project, experiment 3. Meaning of grid cells: cell_methods, cell_measures, and climatological statistics 4. Description of data: units, standard_name, long_name, auxiliary_variables, missing_value, valid_range, flag_values, flag_meanings 5. Description of coordinates: coordinates, bounds, grid_mapping (with formula_terms); time specified with reference_time ("time since T0") and calendar attributes This document focuses on “description of data” and some parts of “description of coordinates” for CF metadata. Table 1 shows the descriptions of some CF attributes that are either required or recommended by CF conventions.
-
Upload
hoangkhanh -
Category
Documents
-
view
225 -
download
0
Transcript of Adding CF Attributes to an HDF5 File - HDFEOS.org · Adding CF Attributes to an HDF5 File ... This...
June 13, 2011 2011-06-13.v2
Page 1 of 17
Adding CF Attributes to an HDF5 File
Isayah Reed Muqun Yang
This document gives the reader an introduction to CF conventions and demonstrates how to use software libraries to add CF attributes to an HDF5 file. We assume that the reader has some knowledge of HDF5 and netCDF4 as well as C, Python, and FORTRAN programming languages.
1 Introduction
Climate and forecast (CF) conventions are metadata conventions for earth science data1. The conventions define metadata included in the same file as the data, that provide a definitive description of what the data in each variable represents, and of the spatial and temporal properties of the data. This enables users of data from different sources to decide which data are comparable. CF conventions extend and generalize the COARDS (Cooperative Ocean/Atmosphere Research Data Service) conventions2. Data that follows the COARDS standard also meets CF standards. In addition to the COARDS standards, CF data include extra features such as horizontal grids other than latitude–longitude, non-spatiotemporal axes, climatological statistics and data compression. CF metadata use values of attributes to represent3:
1. Data provenance: title, institution, contact, source, history, references, comment
2. Description of associated activity: project, experiment
3. Meaning of grid cells: cell_methods, cell_measures, and climatological statistics
4. Description of data: units, standard_name, long_name, auxiliary_variables, missing_value,
valid_range, flag_values, flag_meanings
5. Description of coordinates: coordinates, bounds, grid_mapping (with formula_terms); time
specified with reference_time ("time since T0") and calendar attributes
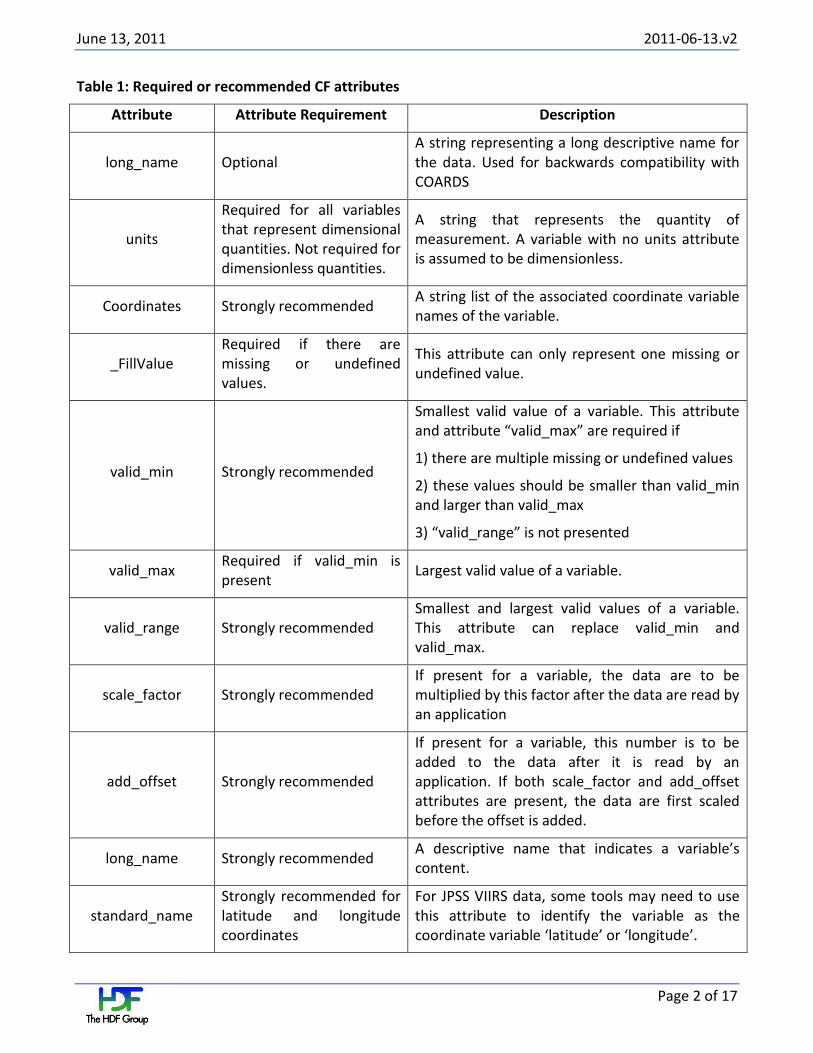
This document focuses on “description of data” and some parts of “description of coordinates” for CF metadata. Table 1 shows the descriptions of some CF attributes that are either required or recommended by CF conventions.
June 13, 2011 2011-06-13.v2
Page 2 of 17
Table 1: Required or recommended CF attributes
Attribute Attribute Requirement Description
long_name Optional A string representing a long descriptive name for the data. Used for backwards compatibility with COARDS
units
Required for all variables that represent dimensional quantities. Not required for dimensionless quantities.
A string that represents the quantity of measurement. A variable with no units attribute is assumed to be dimensionless.
Coordinates Strongly recommended A string list of the associated coordinate variable names of the variable.
_FillValue Required if there are missing or undefined values.
This attribute can only represent one missing or undefined value.
valid_min Strongly recommended
Smallest valid value of a variable. This attribute and attribute “valid_max” are required if
1) there are multiple missing or undefined values
2) these values should be smaller than valid_min and larger than valid_max
3) “valid_range” is not presented
valid_max Required if valid_min is present
Largest valid value of a variable.
valid_range Strongly recommended Smallest and largest valid values of a variable. This attribute can replace valid_min and valid_max.
scale_factor Strongly recommended If present for a variable, the data are to be multiplied by this factor after the data are read by an application
add_offset Strongly recommended
If present for a variable, this number is to be added to the data after it is read by an application. If both scale_factor and add_offset attributes are present, the data are first scaled before the offset is added.
long_name Strongly recommended A descriptive name that indicates a variable’s content.
standard_name Strongly recommended for latitude and longitude coordinates
For JPSS VIIRS data, some tools may need to use this attribute to identify the variable as the coordinate variable ‘latitude’ or ‘longitude’.
June 13, 2011 2011-06-13.v2
Page 3 of 17
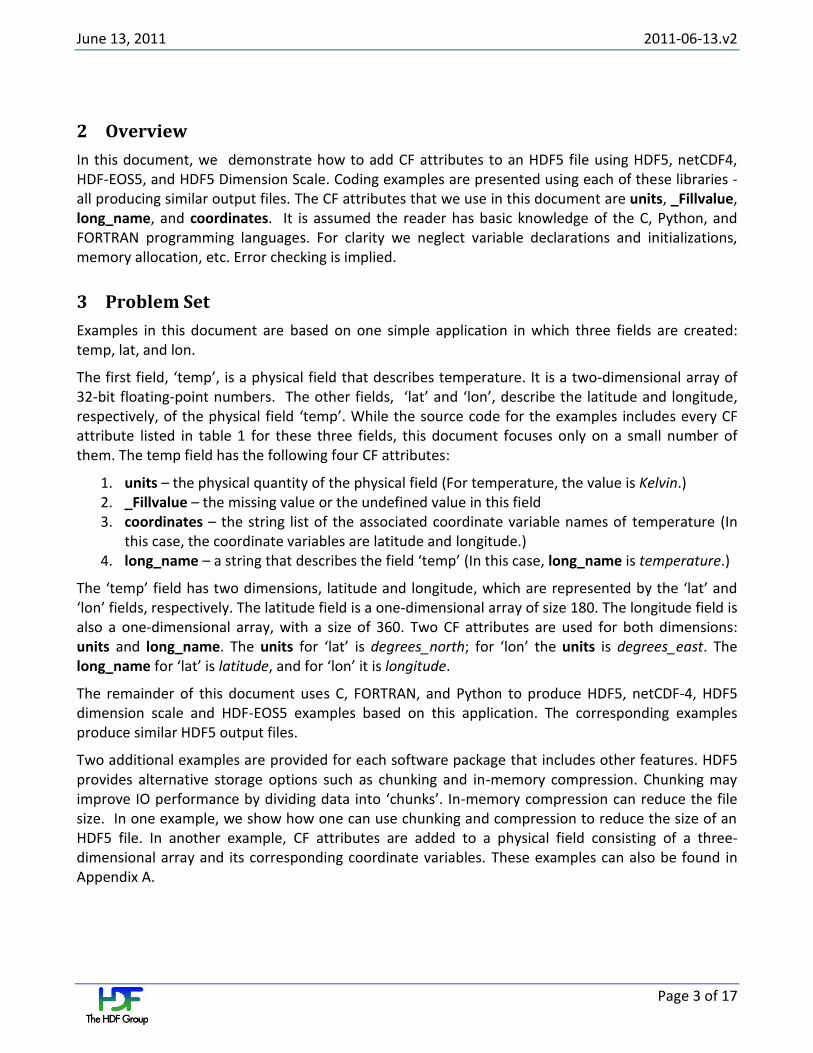
2 Overview
In this document, we demonstrate how to add CF attributes to an HDF5 file using HDF5, netCDF4, HDF-EOS5, and HDF5 Dimension Scale. Coding examples are presented using each of these libraries - all producing similar output files. The CF attributes that we use in this document are units, _Fillvalue, long_name, and coordinates. It is assumed the reader has basic knowledge of the C, Python, and FORTRAN programming languages. For clarity we neglect variable declarations and initializations, memory allocation, etc. Error checking is implied.
3 Problem Set
Examples in this document are based on one simple application in which three fields are created: temp, lat, and lon.
The first field, ‘temp’, is a physical field that describes temperature. It is a two-dimensional array of 32-bit floating-point numbers. The other fields, ‘lat’ and ‘lon’, describe the latitude and longitude, respectively, of the physical field ‘temp’. While the source code for the examples includes every CF attribute listed in table 1 for these three fields, this document focuses only on a small number of them. The temp field has the following four CF attributes:
1. units – the physical quantity of the physical field (For temperature, the value is Kelvin.) 2. _Fillvalue – the missing value or the undefined value in this field 3. coordinates – the string list of the associated coordinate variable names of temperature (In
this case, the coordinate variables are latitude and longitude.) 4. long_name – a string that describes the field ‘temp’ (In this case, long_name is temperature.)
The ‘temp’ field has two dimensions, latitude and longitude, which are represented by the ‘lat’ and ‘lon’ fields, respectively. The latitude field is a one-dimensional array of size 180. The longitude field is also a one-dimensional array, with a size of 360. Two CF attributes are used for both dimensions: units and long_name. The units for ‘lat’ is degrees_north; for ‘lon’ the units is degrees_east. The long_name for ‘lat’ is latitude, and for ‘lon’ it is longitude.
The remainder of this document uses C, FORTRAN, and Python to produce HDF5, netCDF-4, HDF5 dimension scale and HDF-EOS5 examples based on this application. The corresponding examples produce similar HDF5 output files.
Two additional examples are provided for each software package that includes other features. HDF5 provides alternative storage options such as chunking and in-memory compression. Chunking may improve IO performance by dividing data into ‘chunks’. In-memory compression can reduce the file size. In one example, we show how one can use chunking and compression to reduce the size of an HDF5 file. In another example, CF attributes are added to a physical field consisting of a three-dimensional array and its corresponding coordinate variables. These examples can also be found in Appendix A.
June 13, 2011 2011-06-13.v2
Page 4 of 17
4 HDF5
4.1 Introduction
Hierarchical Data Format (HDF) is a model for managing and storing large amounts of numeric data efficiently4. An HDF5 file contains a collection of objects and has a structure that is very similar to a UNIX file system. There are two primary types of objects: groups and datasets. Groups are similar to a UNIX directory. Each group has zero or more objects and can include other groups. Datasets are analogous to UNIX files, which contain the actual data. The reader should note that this paper does not give details about the HDF5 APIs. As the reader is expected to be familiar with HDF5, all HDF5 code sections are meant to be used as a reference for the other packages and will have very brief explanations.
4.2 Programming Examples
In this section, we demonstrate how to add CF attributes to an HDF5 file using HDF5. The following coding examples are provided with the assumption that the reader has a basic knowledge of the C, FORTRAN, and Python programming languages.
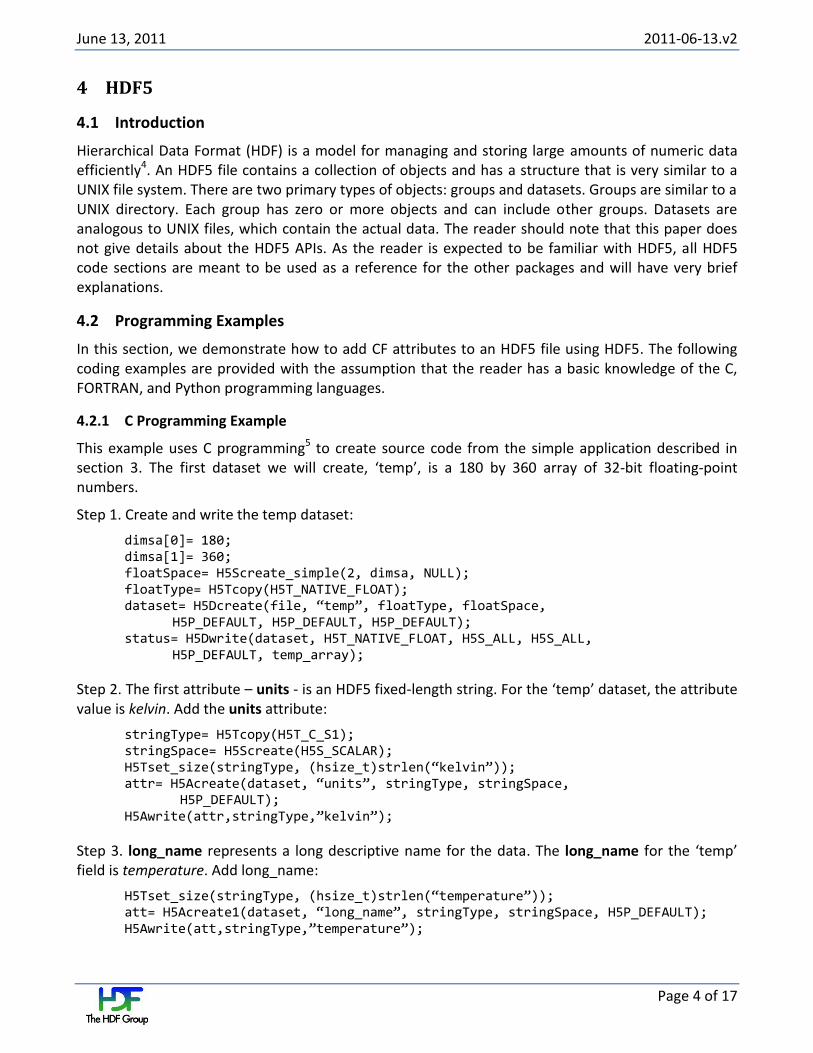
4.2.1 C Programming Example
This example uses C programming5 to create source code from the simple application described in section 3. The first dataset we will create, ‘temp’, is a 180 by 360 array of 32-bit floating-point numbers.
Step 1. Create and write the temp dataset:
dimsa[0]= 180; dimsa[1]= 360; floatSpace= H5Screate_simple(2, dimsa, NULL); floatType= H5Tcopy(H5T_NATIVE_FLOAT); dataset= H5Dcreate(file, “temp”, floatType, floatSpace, H5P_DEFAULT, H5P_DEFAULT, H5P_DEFAULT); status= H5Dwrite(dataset, H5T_NATIVE_FLOAT, H5S_ALL, H5S_ALL, H5P_DEFAULT, temp_array);
Step 2. The first attribute – units - is an HDF5 fixed-length string. For the ‘temp’ dataset, the attribute value is kelvin. Add the units attribute:
stringType= H5Tcopy(H5T_C_S1); stringSpace= H5Screate(H5S_SCALAR); H5Tset_size(stringType, (hsize_t)strlen(“kelvin”)); attr= H5Acreate(dataset, “units”, stringType, stringSpace,
H5P_DEFAULT); H5Awrite(attr,stringType,”kelvin”);
Step 3. long_name represents a long descriptive name for the data. The long_name for the ‘temp’ field is temperature. Add long_name:
H5Tset_size(stringType, (hsize_t)strlen(“temperature”)); att= H5Acreate1(dataset, “long_name”, stringType, stringSpace, H5P_DEFAULT); H5Awrite(att,stringType,”temperature”);
June 13, 2011 2011-06-13.v2
Page 5 of 17
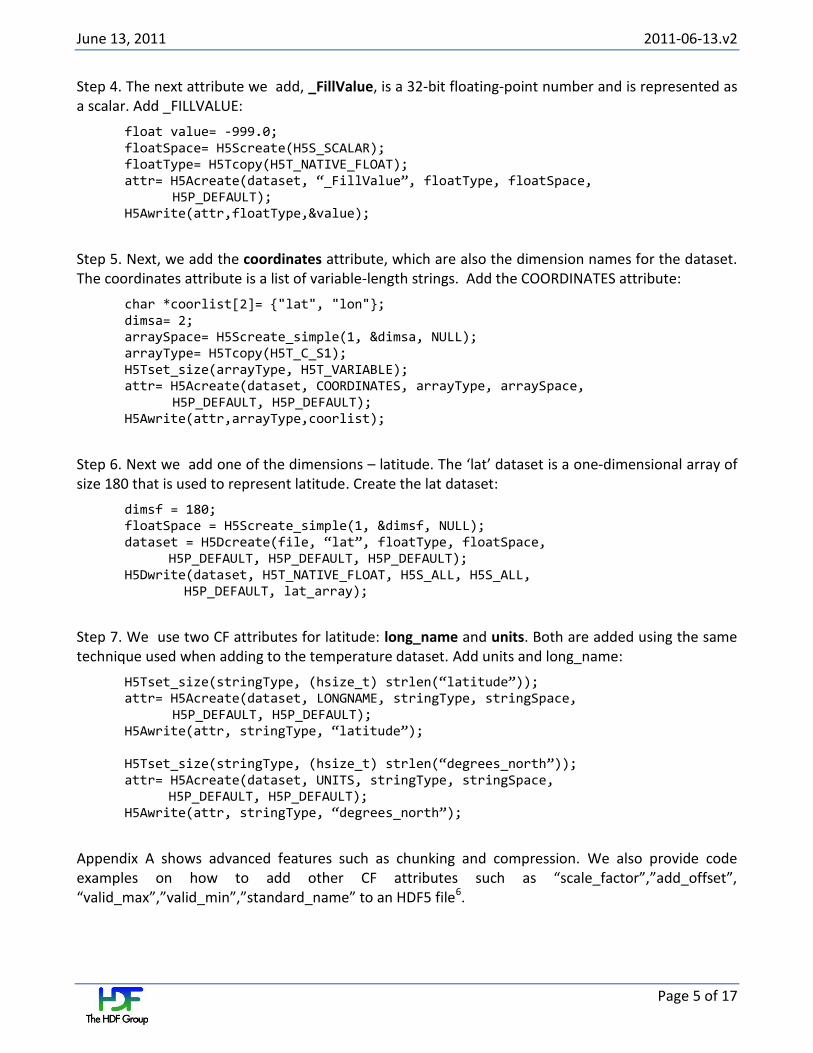
Step 4. The next attribute we add, _FillValue, is a 32-bit floating-point number and is represented as a scalar. Add _FILLVALUE:
float value= -999.0; floatSpace= H5Screate(H5S_SCALAR); floatType= H5Tcopy(H5T_NATIVE_FLOAT); attr= H5Acreate(dataset, “_FillValue”, floatType, floatSpace,
H5P_DEFAULT); H5Awrite(attr,floatType,&value);
Step 5. Next, we add the coordinates attribute, which are also the dimension names for the dataset. The coordinates attribute is a list of variable-length strings. Add the COORDINATES attribute:
char *coorlist[2]= {"lat", "lon"}; dimsa= 2;
arraySpace= H5Screate_simple(1, &dimsa, NULL); arrayType= H5Tcopy(H5T_C_S1); H5Tset_size(arrayType, H5T_VARIABLE); attr= H5Acreate(dataset, COORDINATES, arrayType, arraySpace, H5P_DEFAULT, H5P_DEFAULT); H5Awrite(attr,arrayType,coorlist);
Step 6. Next we add one of the dimensions – latitude. The ‘lat’ dataset is a one-dimensional array of size 180 that is used to represent latitude. Create the lat dataset:
dimsf = 180; floatSpace = H5Screate_simple(1, &dimsf, NULL); dataset = H5Dcreate(file, “lat”, floatType, floatSpace, H5P_DEFAULT, H5P_DEFAULT, H5P_DEFAULT); H5Dwrite(dataset, H5T_NATIVE_FLOAT, H5S_ALL, H5S_ALL, H5P_DEFAULT, lat_array);
Step 7. We use two CF attributes for latitude: long_name and units. Both are added using the same technique used when adding to the temperature dataset. Add units and long_name:
H5Tset_size(stringType, (hsize_t) strlen(“latitude”)); attr= H5Acreate(dataset, LONGNAME, stringType, stringSpace, H5P_DEFAULT, H5P_DEFAULT); H5Awrite(attr, stringType, “latitude”); H5Tset_size(stringType, (hsize_t) strlen(“degrees_north”)); attr= H5Acreate(dataset, UNITS, stringType, stringSpace, H5P_DEFAULT, H5P_DEFAULT); H5Awrite(attr, stringType, “degrees_north”);
Appendix A shows advanced features such as chunking and compression. We also provide code examples on how to add other CF attributes such as “scale_factor”,”add_offset”, “valid_max”,”valid_min”,”standard_name” to an HDF5 file6.
June 13, 2011 2011-06-13.v2
Page 6 of 17
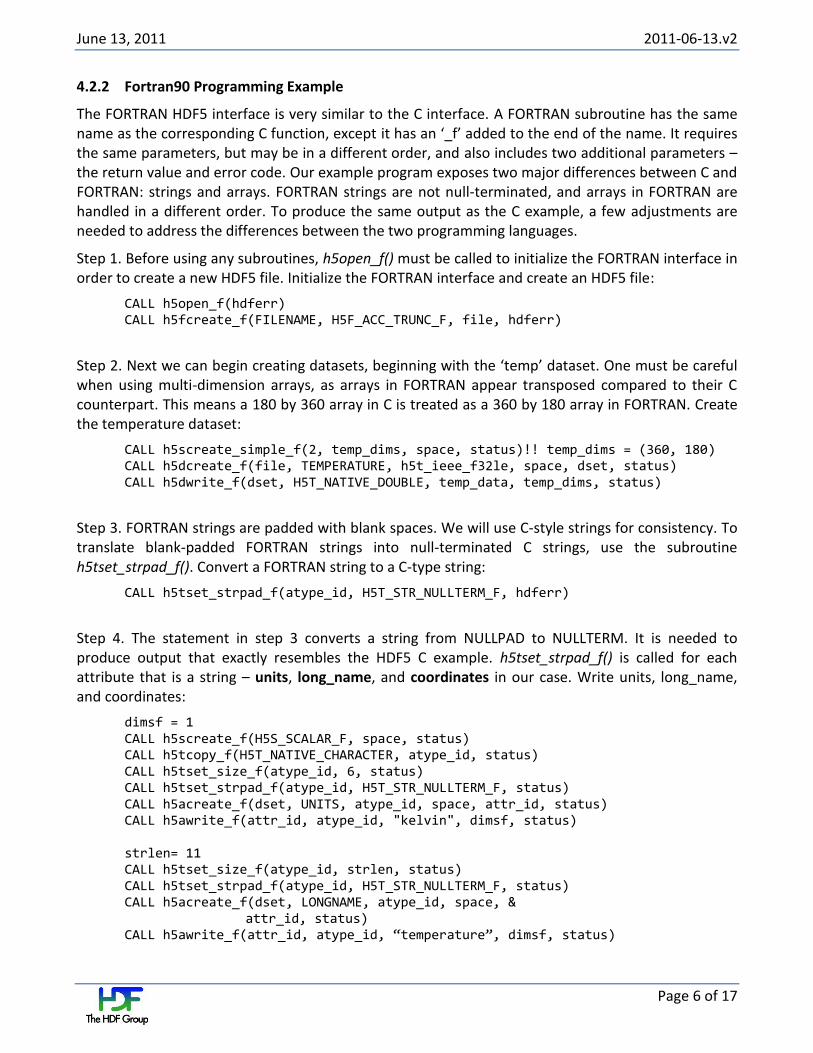
4.2.2 Fortran90 Programming Example
The FORTRAN HDF5 interface is very similar to the C interface. A FORTRAN subroutine has the same name as the corresponding C function, except it has an ‘_f’ added to the end of the name. It requires the same parameters, but may be in a different order, and also includes two additional parameters – the return value and error code. Our example program exposes two major differences between C and FORTRAN: strings and arrays. FORTRAN strings are not null-terminated, and arrays in FORTRAN are handled in a different order. To produce the same output as the C example, a few adjustments are needed to address the differences between the two programming languages.
Step 1. Before using any subroutines, h5open_f() must be called to initialize the FORTRAN interface in order to create a new HDF5 file. Initialize the FORTRAN interface and create an HDF5 file:
CALL h5open_f(hdferr) CALL h5fcreate_f(FILENAME, H5F_ACC_TRUNC_F, file, hdferr)
Step 2. Next we can begin creating datasets, beginning with the ‘temp’ dataset. One must be careful when using multi-dimension arrays, as arrays in FORTRAN appear transposed compared to their C counterpart. This means a 180 by 360 array in C is treated as a 360 by 180 array in FORTRAN. Create the temperature dataset:
CALL h5screate_simple_f(2, temp_dims, space, status)!! temp_dims = (360, 180) CALL h5dcreate_f(file, TEMPERATURE, h5t_ieee_f32le, space, dset, status) CALL h5dwrite_f(dset, H5T_NATIVE_DOUBLE, temp_data, temp_dims, status)
Step 3. FORTRAN strings are padded with blank spaces. We will use C-style strings for consistency. To translate blank-padded FORTRAN strings into null-terminated C strings, use the subroutine h5tset_strpad_f(). Convert a FORTRAN string to a C-type string:
CALL h5tset_strpad_f(atype_id, H5T_STR_NULLTERM_F, hdferr)
Step 4. The statement in step 3 converts a string from NULLPAD to NULLTERM. It is needed to produce output that exactly resembles the HDF5 C example. h5tset_strpad_f() is called for each attribute that is a string – units, long_name, and coordinates in our case. Write units, long_name, and coordinates:
dimsf = 1 CALL h5screate_f(H5S_SCALAR_F, space, status) CALL h5tcopy_f(H5T_NATIVE_CHARACTER, atype_id, status) CALL h5tset_size_f(atype_id, 6, status)
CALL h5tset_strpad_f(atype_id, H5T_STR_NULLTERM_F, status) CALL h5acreate_f(dset, UNITS, atype_id, space, attr_id, status)
CALL h5awrite_f(attr_id, atype_id, "kelvin", dimsf, status)
strlen= 11 CALL h5tset_size_f(atype_id, strlen, status) CALL h5tset_strpad_f(atype_id, H5T_STR_NULLTERM_F, status) CALL h5acreate_f(dset, LONGNAME, atype_id, space, & attr_id, status) CALL h5awrite_f(attr_id, atype_id, “temperature”, dimsf, status)
June 13, 2011 2011-06-13.v2
Page 7 of 17
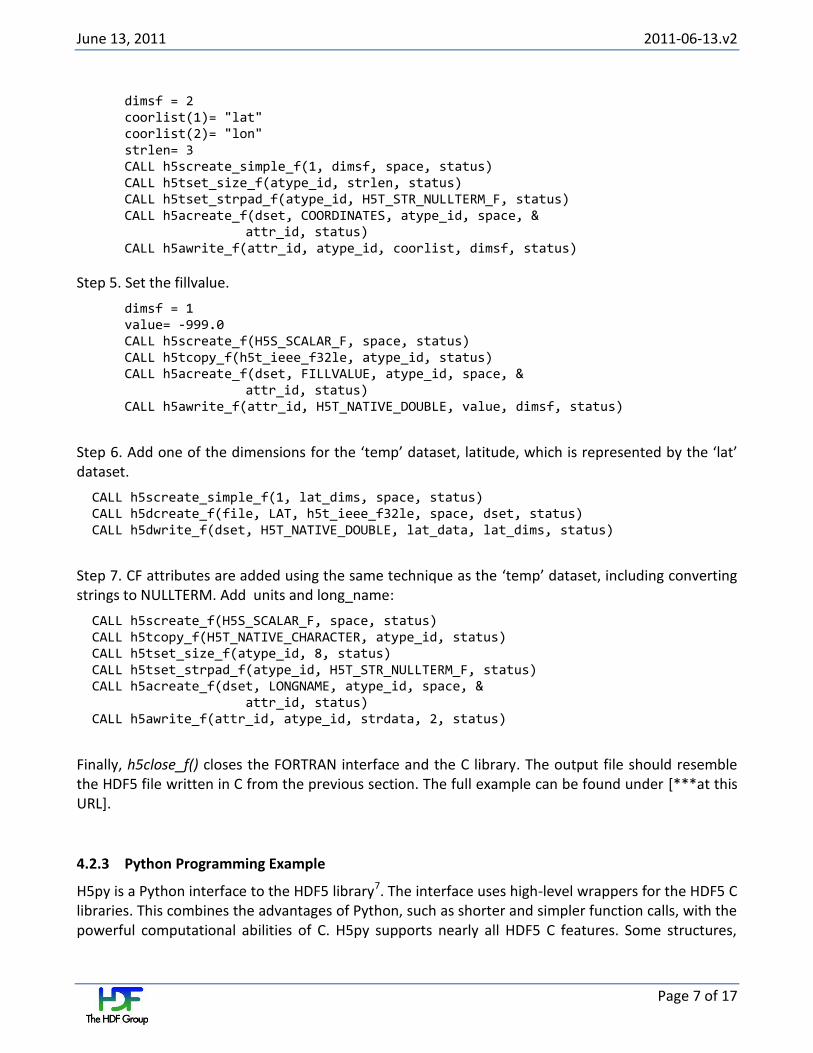
dimsf = 2 coorlist(1)= "lat" coorlist(2)= "lon" strlen= 3 CALL h5screate_simple_f(1, dimsf, space, status)
CALL h5tset_size_f(atype_id, strlen, status) CALL h5tset_strpad_f(atype_id, H5T_STR_NULLTERM_F, status) CALL h5acreate_f(dset, COORDINATES, atype_id, space, & attr_id, status) CALL h5awrite_f(attr_id, atype_id, coorlist, dimsf, status)
Step 5. Set the fillvalue.
dimsf = 1 value= -999.0
CALL h5screate_f(H5S_SCALAR_F, space, status) CALL h5tcopy_f(h5t_ieee_f32le, atype_id, status) CALL h5acreate_f(dset, FILLVALUE, atype_id, space, & attr_id, status) CALL h5awrite_f(attr_id, H5T_NATIVE_DOUBLE, value, dimsf, status)
Step 6. Add one of the dimensions for the ‘temp’ dataset, latitude, which is represented by the ‘lat’ dataset.
CALL h5screate_simple_f(1, lat_dims, space, status) CALL h5dcreate_f(file, LAT, h5t_ieee_f32le, space, dset, status) CALL h5dwrite_f(dset, H5T_NATIVE_DOUBLE, lat_data, lat_dims, status)
Step 7. CF attributes are added using the same technique as the ‘temp’ dataset, including converting strings to NULLTERM. Add units and long_name:
CALL h5screate_f(H5S_SCALAR_F, space, status) CALL h5tcopy_f(H5T_NATIVE_CHARACTER, atype_id, status) CALL h5tset_size_f(atype_id, 8, status) CALL h5tset_strpad_f(atype_id, H5T_STR_NULLTERM_F, status) CALL h5acreate_f(dset, LONGNAME, atype_id, space, & attr_id, status) CALL h5awrite_f(attr_id, atype_id, strdata, 2, status)
Finally, h5close_f() closes the FORTRAN interface and the C library. The output file should resemble the HDF5 file written in C from the previous section. The full example can be found under [***at this URL].
4.2.3 Python Programming Example
H5py is a Python interface to the HDF5 library7. The interface uses high-level wrappers for the HDF5 C libraries. This combines the advantages of Python, such as shorter and simpler function calls, with the powerful computational abilities of C. H5py supports nearly all HDF5 C features. Some structures,

June 13, 2011 2011-06-13.v2
Page 8 of 17
such as numeric variable-length datatypes, are not supported as of version 1.3.1. H5py requires numpy, is an open source library that adds scientific computing functionality to python8. The following code uses h5py version 1.3.1 with numpy version 1.2.1.
In addition to h5py, the numpy module must be loaded. Arrays, data structures, and some h5py function parameters are dependent on numpy.
Step 1. Use the required headers:
import h5py import numpy
Step 2. Use h5py to create an HDF5 file for writing. After using numpy to create and initialize the temperature array, create the first dataset, ‘temp’, and write the array. Create an HDF5 file and declare the temperature dataset:
file = h5py.File ("cf_example.h5", 'w') . . . temp_dset = file.create_dataset ('temp', data=temp_array)
Step 3. Fixed-length strings are easily added as attributes using h5py. String length and datatype are not needed, as Python recognizes both. Add long_name and units attributes:
temp_dset.attrs["long_name"] = "temperature" temp_dset.attrs["units"] = "kelvin"
Step 4. Strings in Python are padded with spaces by default. The statement below uses set_strpad() to convert a string from NULLPAD to NULLTERM. It is needed to produce output that resembles the HDF5 C example. Convert the Python string to a C-style string:
temp_dset.attrs.create('long_name', data="temperature", dtype=nullterm)
Step 5. To write a list of variable-length strings similar to the C example, first use h5py to declare a variable-length datatype. After setting the type to string, use the object as the datatype argument in the attrs.create() function. Write coordinates attribute as a string list:
vlen = h5py.special_dtype (vlen = str) temp_dset.attrs.create ('coordinates', data = ['lat', 'lon'], dtype=vlen)
Step 6. Numerical data should be handled differently. Figure 4.6 shows two ways of setting the fillvalue. Set the fillvalue:
temp_dset.attrs["_FillValue"]= -999.0 temp_dset.attrs.create ('_FillValue', data=-999.0, dtype ='f')
Step 7. Although both lines of code set the fillvalue to be the floating-point number -999.0, the second line is preferred for our example. To imitate the style of the C example, we must explicitly declare attributes that contain floating point data. Otherwise, Python uses the default setting, and

June 13, 2011 2011-06-13.v2
Page 9 of 17
the data is written as the 64-bit. The ‘lat’ dataset is added in figure 4.21 using the same technique as the ‘temp’ dataset. Add lat dataset and CF attributes:
lat_dset = file.create_dataset ('lat', data = lat_array) lat_dset.attrs["long_name"] = "latitude" lat_dset.attrs["units"] = "degrees_north"
Step 8. Unlike C and FORTRAN, datasets and attributes do not need to be ‘closed’. Although h5py tries to close all objects on exit, including files, traditional python programming practices should be observed. Close the Python file:
file.close
The source code for the Python example should be significantly smaller than both C and FORTRAN. Adding CF attributes to an existing file in Python extends the source code by a few lines. Advanced features such as chunking and compression are demonstrated in Appendix A.
5 Network Common Data Form (netCDF)
5.1 Introduction
Network Common Data Form (netCDF) is an interface to a library of functions that stores and retrieves array-based data9. It is meant to allow creation, access, and sharing of data that is self-describing and portable. There are two netCDF formats that are used today – netCDF3 and netCDF4. The netCDF4 library extends netCDF3 and includes additional features such as chunking and compression. It is built on the HDF5 library and uses HDF5 for storage and performance.
5.2 Programming Examples
In this section, we demonstrate how to add CF attributes to an HDF5 file using netCDF4. The following coding examples are provided with the assumption that the reader has a basic knowledge of the C and FORTRAN programming languages.
5.2.1 C Programming Example
A netCDF4 example is created based on the simple application described in section 3. The HDF5 output file is similar to the HDF5 file produced from the previous example. It is intended to demonstrate the use of netCDF4 to add CF attributes to an HDF5 files. The code is written using netCDF4-1.1 with HDF5 and zlib enabled.
A netCDF4 application can be converted to generate netCDF-4/HDF5 files by adding the NC_NETCDF4 flag to nc_create.
Step 1. Create the netCDF4/HDF5 file
int ncid; nc_create(FILE_NAME, NC_NETCDF4|NC_CLOBBER, &ncid)
June 13, 2011 2011-06-13.v2
Page 10 of 17
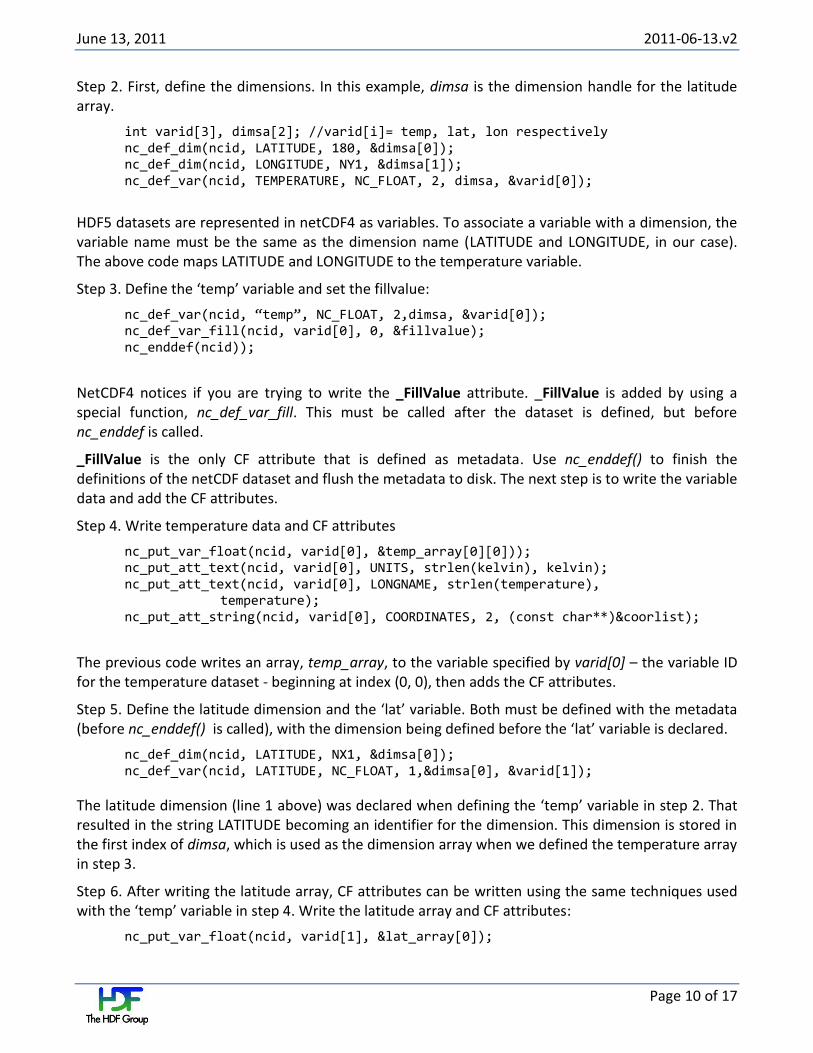
Step 2. First, define the dimensions. In this example, dimsa is the dimension handle for the latitude array.
int varid[3], dimsa[2]; //varid[i]= temp, lat, lon respectively nc_def_dim(ncid, LATITUDE, 180, &dimsa[0]);
nc_def_dim(ncid, LONGITUDE, NY1, &dimsa[1]); nc_def_var(ncid, TEMPERATURE, NC_FLOAT, 2, dimsa, &varid[0]);
HDF5 datasets are represented in netCDF4 as variables. To associate a variable with a dimension, the variable name must be the same as the dimension name (LATITUDE and LONGITUDE, in our case). The above code maps LATITUDE and LONGITUDE to the temperature variable.
Step 3. Define the ‘temp’ variable and set the fillvalue:
nc_def_var(ncid, “temp”, NC_FLOAT, 2,dimsa, &varid[0]); nc_def_var_fill(ncid, varid[0], 0, &fillvalue); nc_enddef(ncid));
NetCDF4 notices if you are trying to write the _FillValue attribute. _FillValue is added by using a special function, nc_def_var_fill. This must be called after the dataset is defined, but before nc_enddef is called.
_FillValue is the only CF attribute that is defined as metadata. Use nc_enddef() to finish the definitions of the netCDF dataset and flush the metadata to disk. The next step is to write the variable data and add the CF attributes.
Step 4. Write temperature data and CF attributes
nc_put_var_float(ncid, varid[0], &temp_array[0][0])); nc_put_att_text(ncid, varid[0], UNITS, strlen(kelvin), kelvin); nc_put_att_text(ncid, varid[0], LONGNAME, strlen(temperature), temperature); nc_put_att_string(ncid, varid[0], COORDINATES, 2, (const char**)&coorlist);
The previous code writes an array, temp_array, to the variable specified by varid[0] – the variable ID for the temperature dataset - beginning at index (0, 0), then adds the CF attributes.
Step 5. Define the latitude dimension and the ‘lat’ variable. Both must be defined with the metadata (before nc_enddef() is called), with the dimension being defined before the ‘lat’ variable is declared.
nc_def_dim(ncid, LATITUDE, NX1, &dimsa[0]); nc_def_var(ncid, LATITUDE, NC_FLOAT, 1,&dimsa[0], &varid[1]);
The latitude dimension (line 1 above) was declared when defining the ‘temp’ variable in step 2. That resulted in the string LATITUDE becoming an identifier for the dimension. This dimension is stored in the first index of dimsa, which is used as the dimension array when we defined the temperature array in step 3.
Step 6. After writing the latitude array, CF attributes can be written using the same techniques used with the ‘temp’ variable in step 4. Write the latitude array and CF attributes:
nc_put_var_float(ncid, varid[1], &lat_array[0]);
June 13, 2011 2011-06-13.v2
Page 11 of 17
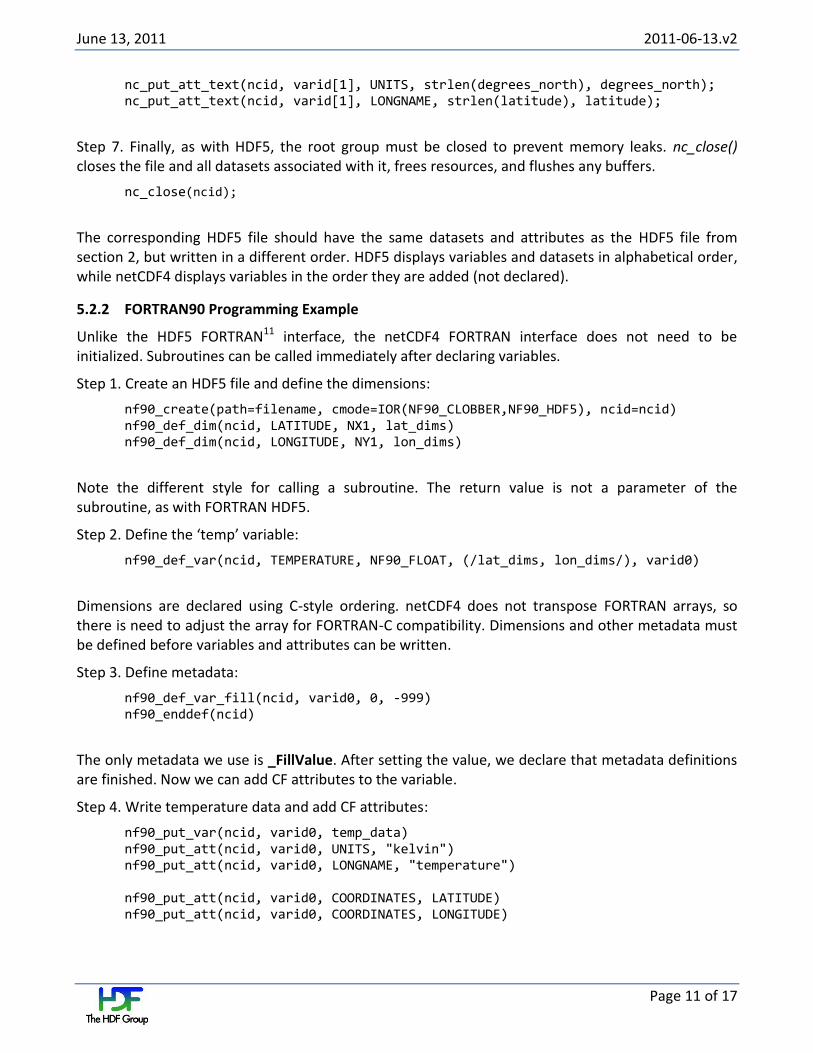
nc_put_att_text(ncid, varid[1], UNITS, strlen(degrees_north), degrees_north); nc_put_att_text(ncid, varid[1], LONGNAME, strlen(latitude), latitude);
Step 7. Finally, as with HDF5, the root group must be closed to prevent memory leaks. nc_close() closes the file and all datasets associated with it, frees resources, and flushes any buffers.
nc_close(ncid);
The corresponding HDF5 file should have the same datasets and attributes as the HDF5 file from section 2, but written in a different order. HDF5 displays variables and datasets in alphabetical order, while netCDF4 displays variables in the order they are added (not declared).
5.2.2 FORTRAN90 Programming Example
Unlike the HDF5 FORTRAN11 interface, the netCDF4 FORTRAN interface does not need to be initialized. Subroutines can be called immediately after declaring variables.
Step 1. Create an HDF5 file and define the dimensions:
nf90_create(path=filename, cmode=IOR(NF90_CLOBBER,NF90_HDF5), ncid=ncid) nf90_def_dim(ncid, LATITUDE, NX1, lat_dims)
nf90_def_dim(ncid, LONGITUDE, NY1, lon_dims)
Note the different style for calling a subroutine. The return value is not a parameter of the subroutine, as with FORTRAN HDF5.
Step 2. Define the ‘temp’ variable:
nf90_def_var(ncid, TEMPERATURE, NF90_FLOAT, (/lat_dims, lon_dims/), varid0)
Dimensions are declared using C-style ordering. netCDF4 does not transpose FORTRAN arrays, so there is need to adjust the array for FORTRAN-C compatibility. Dimensions and other metadata must be defined before variables and attributes can be written.
Step 3. Define metadata:
nf90_def_var_fill(ncid, varid0, 0, -999) nf90_enddef(ncid)
The only metadata we use is _FillValue. After setting the value, we declare that metadata definitions are finished. Now we can add CF attributes to the variable.
Step 4. Write temperature data and add CF attributes:
nf90_put_var(ncid, varid0, temp_data) nf90_put_att(ncid, varid0, UNITS, "kelvin") nf90_put_att(ncid, varid0, LONGNAME, "temperature") nf90_put_att(ncid, varid0, COORDINATES, LATITUDE) nf90_put_att(ncid, varid0, COORDINATES, LONGITUDE)
June 13, 2011 2011-06-13.v2
Page 12 of 17
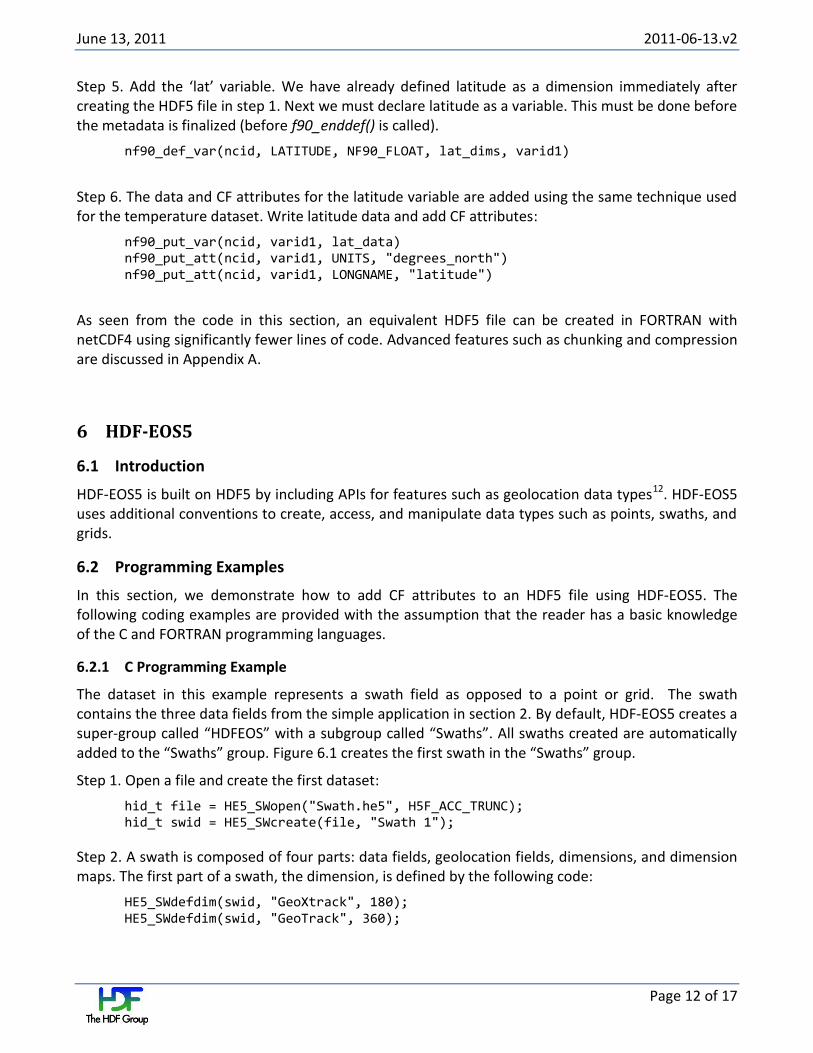
Step 5. Add the ‘lat’ variable. We have already defined latitude as a dimension immediately after creating the HDF5 file in step 1. Next we must declare latitude as a variable. This must be done before the metadata is finalized (before f90_enddef() is called).
nf90_def_var(ncid, LATITUDE, NF90_FLOAT, lat_dims, varid1)
Step 6. The data and CF attributes for the latitude variable are added using the same technique used for the temperature dataset. Write latitude data and add CF attributes:
nf90_put_var(ncid, varid1, lat_data) nf90_put_att(ncid, varid1, UNITS, "degrees_north") nf90_put_att(ncid, varid1, LONGNAME, "latitude")
As seen from the code in this section, an equivalent HDF5 file can be created in FORTRAN with netCDF4 using significantly fewer lines of code. Advanced features such as chunking and compression are discussed in Appendix A.
6 HDF-EOS5
6.1 Introduction
HDF-EOS5 is built on HDF5 by including APIs for features such as geolocation data types12. HDF-EOS5 uses additional conventions to create, access, and manipulate data types such as points, swaths, and grids.
6.2 Programming Examples
In this section, we demonstrate how to add CF attributes to an HDF5 file using HDF-EOS5. The following coding examples are provided with the assumption that the reader has a basic knowledge of the C and FORTRAN programming languages.
6.2.1 C Programming Example
The dataset in this example represents a swath field as opposed to a point or grid. The swath contains the three data fields from the simple application in section 2. By default, HDF-EOS5 creates a super-group called “HDFEOS” with a subgroup called “Swaths”. All swaths created are automatically added to the “Swaths” group. Figure 6.1 creates the first swath in the “Swaths” group.
Step 1. Open a file and create the first dataset:
hid_t file = HE5_SWopen("Swath.he5", H5F_ACC_TRUNC); hid_t swid = HE5_SWcreate(file, "Swath 1");
Step 2. A swath is composed of four parts: data fields, geolocation fields, dimensions, and dimension maps. The first part of a swath, the dimension, is defined by the following code:
HE5_SWdefdim(swid, "GeoXtrack", 180); HE5_SWdefdim(swid, "GeoTrack", 360);
June 13, 2011 2011-06-13.v2
Page 13 of 17
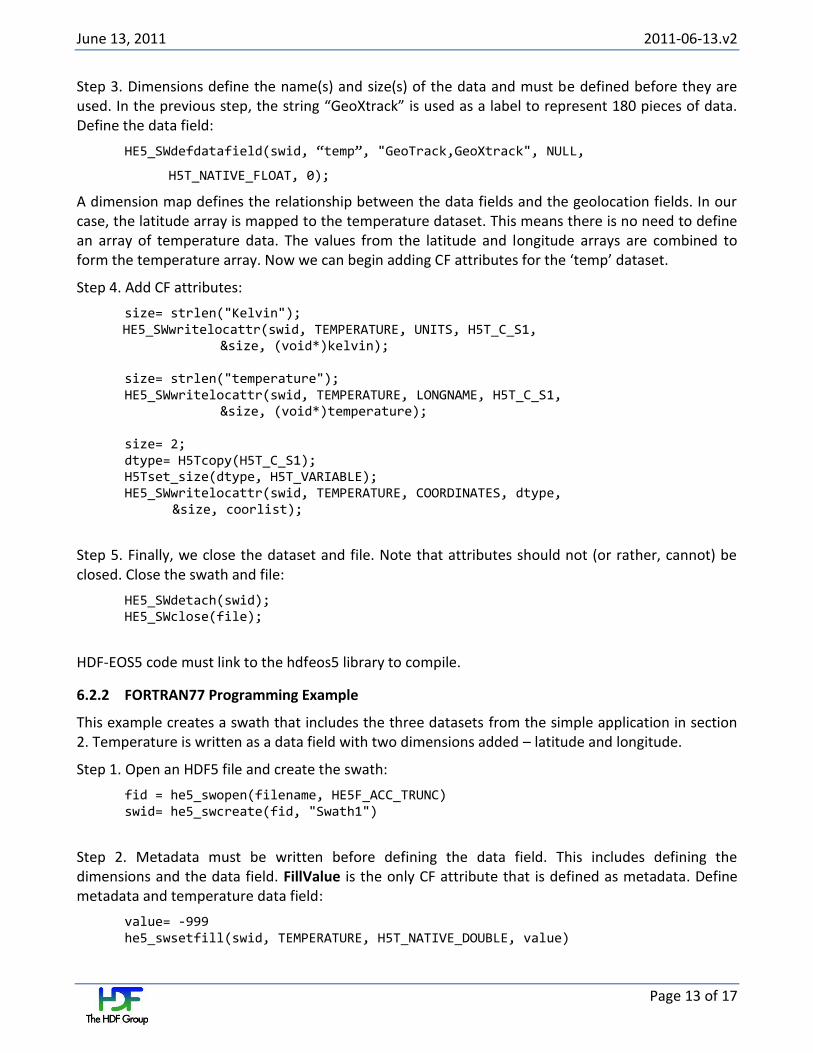
Step 3. Dimensions define the name(s) and size(s) of the data and must be defined before they are used. In the previous step, the string “GeoXtrack” is used as a label to represent 180 pieces of data. Define the data field:
HE5_SWdefdatafield(swid, “temp”, "GeoTrack,GeoXtrack", NULL,
H5T_NATIVE_FLOAT, 0);
A dimension map defines the relationship between the data fields and the geolocation fields. In our case, the latitude array is mapped to the temperature dataset. This means there is no need to define an array of temperature data. The values from the latitude and longitude arrays are combined to form the temperature array. Now we can begin adding CF attributes for the ‘temp’ dataset.
Step 4. Add CF attributes:
size= strlen("Kelvin"); HE5_SWwritelocattr(swid, TEMPERATURE, UNITS, H5T_C_S1,
&size, (void*)kelvin);
size= strlen("temperature"); HE5_SWwritelocattr(swid, TEMPERATURE, LONGNAME, H5T_C_S1,
&size, (void*)temperature);
size= 2; dtype= H5Tcopy(H5T_C_S1);
H5Tset_size(dtype, H5T_VARIABLE); HE5_SWwritelocattr(swid, TEMPERATURE, COORDINATES, dtype,
&size, coorlist);
Step 5. Finally, we close the dataset and file. Note that attributes should not (or rather, cannot) be closed. Close the swath and file:
HE5_SWdetach(swid); HE5_SWclose(file);
HDF-EOS5 code must link to the hdfeos5 library to compile.
6.2.2 FORTRAN77 Programming Example
This example creates a swath that includes the three datasets from the simple application in section 2. Temperature is written as a data field with two dimensions added – latitude and longitude.
Step 1. Open an HDF5 file and create the swath:
fid = he5_swopen(filename, HE5F_ACC_TRUNC) swid= he5_swcreate(fid, "Swath1")
Step 2. Metadata must be written before defining the data field. This includes defining the dimensions and the data field. FillValue is the only CF attribute that is defined as metadata. Define metadata and temperature data field:
value= -999 he5_swsetfill(swid, TEMPERATURE, H5T_NATIVE_DOUBLE, value)

June 13, 2011 2011-06-13.v2
Page 14 of 17
he5_swdefdim(swid, LATITUDE, NX1) he5_swdefdim(swid, LONGITUDE, NY1)
he5_swdefdfld(swid, TEMPERATURE, "GeoTrack,GeoXtrack", " ", & HE5T_NATIVE_DOUBLE, 1)
Step 3. Add the remaining CF attributes to the temperature data field:
strlen= 6 he5_swwrlattr(swid, TEMPERATURE, UNITS, &
HE5T_NATIVE_CHAR, strlen, "kelvin")
strlen= 11 he5_swwrlattr(swid, TEMPERATURE, LONGNAME, &
HE5T_NATIVE_CHAR, strlen, "temperature")
strlen= 3 he5_swwrlattr(swid, TEMPERATURE, COORDINATES, &
HE5T_NATIVE_CHAR, strlen, "lat") he5_swwrlattr(swid, TEMPERATURE, COORDINATES, &
HE5T_NATIVE_CHAR, strlen, "lon")
Step 4. Define the latitude dimension and write the corresponding array.
start = 0 stride = 1 array_size = 180 he5_swdefgfld(swid, LATITUDE, LATITUDE, &
" ", HE5T_NATIVE_FLOAT, HE5_HDFE_NOMERGE) he5_swwrfld(swathid, LATITUDE, start, stride, &
array_size, lat_array)
Step 5. The same techniques used to add CF attributes to the temperature dataset is used for the latitude dataset. Add CF attributes:
strlen= 6 he5_swwrlattr(swid, LATITUDE, UNITS, &
HE5T_NATIVE_CHAR, strlen, "kelvin") strlen= 11 he5_swwrlattr(swid, LATITUDE, LONGNAME, &
HE5T_NATIVE_CHAR, strlen, "temperature")
The output file should resemble the file from the HDF-EOS5 C output file in the previous section.
7 HDF5 Dimension Scales
7.1 Introduction
HDF5 Dimension scales are HDF5 datasets with additional metadata and are associated with the dimension(s) of a dataset. Although a dimension scale shows the relationship to a dataset, it is completely independent of the dataset(s) and does not have to match the datatype. Dimension scales
June 13, 2011 2011-06-13.v2
Page 15 of 17
can be used to represent the relationship between the dimensions and coordinates of a netCDF4 variable. This example generates the same datasets and attributes as the netCDF4 example in section 2, but uses the HDF5 dimension scale API – which is included with the HDF5 library. The source code from the HDF5 example in section 1 is used, while adding a few functions from the dimension scale API14.
7.2 Programming Example
For this example, we use multiple dataset handles as opposed to re-using one handle in the previous sections. When using the dimension scale API, dataset handles cannot be reused. There must be at least two unique datasets.
Step 1. Declare a dataset as a dimension scale:
hid_t dataset[3]; //dataset[i]= temp, lat, lon datasets, respectively . . .
H5DSset_scale(dataset[1], “lat”);
With dataset[1] being the latitude dataset, the previous code adds the CLASS and NAME attributes and sets NAME to “lat”.
Step 2. Attach the dimension scale:
H5Dsattach_scale(dataset[0], dataset[1], 0); H5Dsattach_scale(dataset[0], dataset[2], 1);
The H5DSattach_scale function attaches a dimension scale at a given index. The function requires a handle for both the source and destination datasets. This means at least two dataset handles are required when using the dimension scale API.
This code example also results in the ‘temp’ dataset having a new attribute, DIMENSION_LIST, which contains a list of attached datasets (latitude and longitude, in our case). The attribute is automatically added when datasets are attached.
Since the dimension scale API is included with HDF5, the same compiling technique – h5cc - can be used to produce an HDF5 file. The corresponding HDF5 file should produce the same output as the HDF5 file generated from the original HDF5 code. It should also have similar data as the netCDF4 file, but generate a slightly different file. While netCDF4 displays variables in the order they are added (not declared), HDF5 displays variables and datasets in alphabetical order.
8 Summary
CF is the standard for netCDF data, although it is based on metadata design in general. CF metadata uses attribute values to provide a description of what the data represents, and the properties of the data. CF attributes are used to explain the data written in the dataset. Some of the attributes, such as units, are self-explanatory. Others are not as easily derived from their names, such as _FillValue, which represents the number that will appear if a dataset is missing a value or if a value is undefined. Some attributes are mandatory, while others are optional, and some can be user-created non-

June 13, 2011 2011-06-13.v2
Page 16 of 17
standard attributes. With a basic knowledge of any software package mentioned in this document, one can easily add CF attributes to an HDF5 file, thus providing a better description of the data.
Appendix A: Advanced Features
1. Chunking
Chunking increases computational speed by operating on pieces of data individually. Data is partitioned into fixed-sized rectangular-shaped ‘chunks’.
The following code creates a dataset that is similar, but much larger, than the example code used in this document. Chunking is enabled to compensate for the time required to operate on the large amount of data.
float temp_array[1800][3600]; . . . dimsc[0]= 900; dimsc[1]= 1800;
dataprop= H5Pcreate(H5P_DATASET_CREATE); H5Pset_chunk(dataprop,2,dimsc); dataset= H5Dcreate1(file, TEMP, floatType, floatSpace, dataprop); H5Dwrite(dataset, H5T_NATIVE_FLOAT, H5S_ALL, H5S_ALL, H5P_DEFAULT, temp_array);
The data is divided into 900x1800 sized ‘chunks’ and stored in the file. Each chunk is treated as an atomic object – a single chunk can be accessed and edited individually in a single I/O operation. If the number of array dimensions increases over time, the increase in computation speed is very small. This is one way to improve performance.
2. Compression
Compression reduces the file size by using fewer bits to represent data. Chunking is required to use compression. This is because compression is applied to each chunk individually. See the previous section for information about chunking. HDF5 supports multiple compression methods. In our example, we use the GZIP compression method.
float temp_array[1800][3600]; dimsc[0]= 900;
dimsc[1]= 1800; dataprop= H5Pcreate(H5P_DATASET_CREATE); H5Pset_chunk(dataprop,2,dimsc); H5Pset_deflate(dataprop,1); dataset= H5Dcreate1(file, TEMP, floatType, floatSpace, dataprop); H5Dwrite(dataset, H5T_NATIVE_FLOAT, H5S_ALL, H5S_ALL, H5P_DEFAULT, temp_array);
Sample code can be found [***at this address].

June 13, 2011 2011-06-13.v2
Page 17 of 17
3. Three-Dimensional Data
The following code example creates a three-dimensional dataset for radiation measurement.
float rad_array[NX1][NY1][NZ1]; . . . dimsa[0]= NX1;
dimsa[1]= NY1; dimsa[2]= NZ1; floatSpace= H5Screate_simple(3, dimsa, NULL); dataset= H5Dcreate2(file, RADIATION, floatType, floatSpace, H5P_DEFAULT, H5P_DEFAULT, H5P_DEFAULT);
H5Dwrite(dataset, H5T_NATIVE_FLOAT, H5S_ALL, H5S_ALL, H5P_DEFAULT, rad_array);
With the radiation dataset, an extra dimension can be added in addition to latitude and longitude. The sample code can be found [***at this address].
References
1. http://cf-pcmdi.llnl.gov/documents/cf-conventions/1.5/cf-conventions.pdf 2. http://ferret.wrc.noaa.gov/noaa_coop/coop_cdf_profile.html 3. NetCDF Climate and Forecast Metadata Convention. “CF metadata,” http://cf-pcmdi.llnl.gov 4. The HDF Group. “What is HDF5,” http://www.hdfgroup.org/HDF5/whatishdf5.html 5. The HDF Group. “HDF5 API Specification Reference Manual,"
http://www.hdfgroup.org/HDF5/doc/RM/RM_H5Front.html 6. *** URL of code with all CF attributes 7. Google Groups. “h5py” http://code.google.com/p/h5py 8. SciPy.org. “NumPy User Guide” http://docs.scipy.org/doc/numpy/user/index.html#user 9. Unidata. “The NetCDF Users’ Guide,” http://www.unidata.ucar.edu/software/netcdf/docs/netcdf 10. Unidata. “NetCDF C Interface Guide,”
http://www.unidata.ucar.edu/software/netcdf/docs/netcdf-c.html 11. Unidata. “NetCDF FORTRAN90 Interface Guide,”
http://www.unidata.ucar.edu/software/netcdf/docs/netcdf-f90 12. NASA. “HDF-EOS Library User’s Guide Volume 1: Overview and Examples,”
http://newsroom.gsfc.nasa.gov/sdptoolkit/docs/HDF-EOS_UG.pdf 13. NASA. “HDF-EOS Library User’s Guide Volume 2: Function Reference Guide,”
http://newsroom.gsfc.nasa.gov/sdptoolkit/docs//HDF-EOS_REF.pdf 14. The HDF Group. “H5DS: HDF5 Dimension Scales,”
http://www.hdfgroup.org/HDF5/doc/HL/RM_H5DS.html