Accounting handbook
30
Dominique Nichols Accounting Manual Accounts * Payable * Payroll * Reports *Accounts * Receivable Contents Accounts Payable.........................................................1 New Vendor Creation....................................................1 Invoice Entry..........................................................1 Write a check..........................................................3 United Healthcare......................................................3 Guardian Insurance.....................................................3 Credit Cards...........................................................4 Credit Card Reconciliation.............................................5 Speedway Credit Card...................................................5 Weekly Bank Reconciliations............................................6 Monthly bank reconciliations...........................................7 Monthly cash flow statement- Excel Version.............................7 Monthly cash flow statement – Access...................................9 Setup a new account.....................................................10 Expense account.......................................................10 Capital asset account.................................................10 Current liability account.............................................11 Long term liability account...........................................11 Enter a new item -Employee............................................11 Expenses that are used on a regular basis can be made into an item in QuickBooks for easy reference. They are set to a specific cost code that is tied to the profit and loss........................................11 Payroll.................................................................11 Page |
-
Upload
dominique-nichols -
Category
Documents
-
view
24 -
download
0
Transcript of Accounting handbook

Dominique Nichols
Accounting Manual
Accounts * Payable * Payroll * Reports *Accounts * Receivable
ContentsAccounts Payable.............................................................................................................1
New Vendor Creation....................................................................................................1
Invoice Entry.................................................................................................................1
Write a check................................................................................................................3
United Healthcare.........................................................................................................3
Guardian Insurance.......................................................................................................3
Credit Cards..................................................................................................................4
Credit Card Reconciliation.............................................................................................5
Speedway Credit Card...................................................................................................5
Weekly Bank Reconciliations.........................................................................................6
Monthly bank reconciliations.........................................................................................7
Monthly cash flow statement- Excel Version.................................................................7
Monthly cash flow statement – Access..........................................................................9
Setup a new account......................................................................................................10
Expense account.........................................................................................................10
Capital asset account..................................................................................................10
Current liability account..............................................................................................11
Long term liability account..........................................................................................11
Enter a new item -Employee.......................................................................................11
Expenses that are used on a regular basis can be made into an item in QuickBooks for easy reference. They are set to a specific cost code that is tied to the profit and loss....................................................................................................................................11
Payroll............................................................................................................................11
Setup a new employee in QuickBooks.........................................................................11
Setup a new employee or subcontractor in Paychex...................................................12
Setup a new 1099 subcontractor in Paychex..............................................................12
P a g e |

How to do payroll........................................................................................................13
Enter a payroll W-2 on the Excel Spreadsheet- Non-Exempt (not salary)....................13
Enter a payroll W-2 on the Excel Spreadsheet- Exempt (salary).................................14
Enter a payroll W-2 on the Excel Spreadsheet-1099 Subcontractors..........................15
1099 Brokered Trucking..............................................................................................16
W-2 in Paychex............................................................................................................16
Enter payroll 1099 individual subcontractors direct deposit.......................................16
Reports...........................................................................................................................17
Job cost report.............................................................................................................17
Export job cost report to Excel to sort paid and unpaid..............................................18
Unpaid bills detail........................................................................................................19
Accounts Receivable.......................................................................................................19
Monthly Pay Applications............................................................................................19
Open invoice reports...................................................................................................20
P a g e |

Accounts PayableNew Vendor Creation
a. Locate the following on the invoice or about the new vendori. Name of the vendor ii. Address to mail the check iii. Phone numbersiv. Contact information
b. On the vendor home screen locate the “New Vendor” button at the top left of the screen and click that button
c. Enter the company name at the first location. This section decides where the vendor will be listed in alphabetical order on the main vendor screen.
i. Enter a number 1 (1 – ) if the new company is a 1099 individual subcontractor or employee for reimbursements. List the person’s name as Last name, First name
ii. Enter a number 2 (2 - ) if the new company is a 1099 brokered trucking company
d. Re-enter the company name and completely fill out the vendor information with as much detail that is available.
e. 1099 Subcontractors only i. Click on the second tab to the left of the screen for payment
information. Enter the vendor’s name as it should appear on the check.
ii. Click on the third tab to the left of the screen for tax information. Enter the vendor’s Social Security number or their Federal EIN.
f. Save and Close
Invoice Entry a. Locate the following on the paper invoice
i. Name of the companyii. Invoice numberiii. Date of invoice
b. Enter the information on the invoice in QuickBooks i. Date is the date of the invoiceii. Ref No is the invoice numberiii. Amount due is the total amount of the bill less any previously
recorded amounts. For instance, if you have a bill for $120.00 that is from 2 months of trash pickup charges that bill will have a
P a g e |

current section and a past due section. Here we only put in the monthly amount due in order for the total amount due to the vendor to match both the vendor’s systems and ours.
iv. Memo is the location to where the bill is in reference, location of the job. If there is no job associated with the equipment (a shovel that will be used on all job sites) that would be attributed to the shop.
v. Expense verses Item1. Theses needed to be entered line by line in order to mirror
the statement as much as possible.2. Expenses are for general parts that have not been
specifically identified in the system. These will be cost of goods sold (20) or overhead (30).
3. Items are for specifically identified parts listed in the system. Generally this will only be used for payroll items where employees and subcontractors have set rates. These items are tied to a cost of goods sold or overhead account.
vi. Amount this is the line amount on the bill. By entering the total amount of the bill in the “Amount Due” location each amount that is placed on the individual line will reduce the next line item by that amount. This will allow the user to have a check figure to ensure that the invoice in balanced with the statement.
vii. In the memo line write what the item description is off of the invoice.
viii. Customer job is the same information as in the first memo line describing what job the item was purchased for use. If there is not job and the item is an overhead cost attribute the cost to either the shop or office depending on the function.
ix. Class is the same as the customer job, except when dealing with capital leases and trucking. In trucking jobs the customer job will be the customer (and where applicable and known the exact job) and the class will be trucking. Capital leases will be discussed in a later section.
x. Save & close
P a g e |

Write a checka. Checks are written any time cash is removed from the system. Even if
the means the cash is removed is by wire transfer, ach, or debit card transaction.
b. Select the correct bank account to remove the money from. i. Payroll – used to pay employeesii. Contractor – used to pay subcontractors 1099 individuals and
brokered trucksiii. Operating – used to pay all bills not associated with payroll or
subcontractingiv. Savings – used as a saving account/reserve. Typically this account
is only used to transfer money to and from. c. Select the company you are paying with the check, vendor from the
dropdown in the “check to” section
United HealthcareUnited Healthcare is SEU’s health insurance provider; the insurance is ACA compliant.
Insurance is deducted on the 10th of the month from the operating account.
Employees pay 35% of their health insurance and the company pays 65%.
a. After the first of the month go to the balance sheet in the current liabilities section and locate the Healthcare line and make a note of that amount and write it on the bill. This section is where the employee deduction for health insurance is recorded.
b. From the total bill subtract the employee’s contribution (amount on the balance sheet). The remaining amount is the employer contribution. The amount should be approximately 65% of the total bill.
c. On the Friday before the insurance is deducted from the account write a check for the amount of the bill.
P a g e |
Make note of day receivedMake note of who recived
Receive invoice
Record date of invoiceRecord amount of invoiceRecord job invoice is attributed too
Enter invoice
Mid-monthEnd-of-monthMid-month after month end
Generate reports to
confirm invoices

a. Memo line: month of the health insuranceb. First line of expenses: Healthcare; amount: found on the balance sheetc. Second line of expenses: 30: health insurance
d. Save and close
Guardian InsuranceGuardian is SEU’s dental, vision, short term disability, long term disability, and life insurance provider.
SEU pays 100% of the short term disability, long term disability, and life insurance.
The dental and vision costs are between .60 and 5.50 depending on marital status. Contact Benefits Administrator for current rates.
Guardian is deducted on the 1st of the month.
a. On the last Friday before the 1st of the month go to the balance sheet in the current liabilities section and locate the Dental and Vision lines and make a note of that amount and write it on the bill. This section is where the employee deduction for dental and vision is recorded.
b. From the total bill subtract the employee’s contribution (amount on the balance sheet). The remaining amount is the employer contribution. Do this step for both the dental and vision portion.
c. On the Friday before the insurance is deducted from the account write a check for the amount of the bill.
a. Memo line: month of the deductionb. First, dental insurance section and list the employee contribution
(expense: dental)c. Second, complete the amount for dental (expense: 30: health insurance)d. Third, vision insurance section and list the employee contribution
(expense: vision)e. Fourth, complete the amount for vision (expense: 30: health insurance)f. Short term disability amountg. Long term disability amounth. Life insurance amount
d. Save and close
Credit Cardsa. Monthly credit card statements from Heartland for 5 credit cardsb. Go to LIST>CHART OF ACCOUNTSc. Select the credit card you will be entering the information
i. Mark Corbinii. James Gardneriii. Tyrone Ware
P a g e |

iv. Robert Oliverv. Office
d. This will take you the journal entry information for that credit card. Take note of the current balance on the card.
e. Begin to enter the transactions as listed exactly on the statement. f. Right click on the transaction section, this section will be blank. Then
from the dropdown menu select edit.g. This will bring you to a screen where you can enter the credit card
transaction information. i. Enter the payee (vendor) who charged the credit card. If the full
information for the payee is not available from previous transactions or from the statement. Use enough information that you can recognize who the charge is too for reference later.
ii. Enter the date of the charge iii. Enter the amount of the chargeiv. Memo: if you know what job the purchase is in reference too.
(Hint: look for credit card receipts to help.)v. Enter the type of expense: cost of goods sold (20) or overhead
(30) that best matches the product description. I.e. Rental equipment
vi. Confirm that the amount listed on the transaction line matches the statement.
vii. Enter the customer job and class attributed to the charge. If there is no customer associated with this transaction it will be a cost of the office or shop. Entering this will help track overhead expenses.
viii. Save and Closeh. Repeat the above steps i-viii until all transactions are listed in
QuickBooks and your balance matches the statement.i. Repeat for all credit cards
Credit Card Reconciliationa. After all credit card information has been entered for all cards they
need to be reconciled.b. On the QuickBooks home screen select Reconciliation from the lower
right screenc. Select the credit card you are going to reconcile first.d. Enter the statement date, ending balance, and finance chargesi. Finance charges will go to overhead bank chargesii. Interest charges will go to overhead interest
P a g e |

e. Go through the statement and select all of the charges in QuickBooks matching the statement and then do the same for any payments or credits made on the card
f. This process should be relatively simple if the user has already balanced the statement on entering.
g. Once there is a $0.00 balance in the lower right of the screen select reconcile.
h. QuickBooks will ask if you want to print a summary and detail of the reconciliation. Select yes.
i. Attach the credit card statement and the QuickBooks statement along with any receipts for the file.
Speedway Credit Carda. Logon to Speedway account b. Download the invoice and an excel spreadsheet of all the transactions
for that invoice.c. Download the QuickBooks Import File. This will directly import all of the
Speedway credit card information into QuickBooks. From there you will only need to assign what truck to attribute the charges.
d. In order to determine what trucks the transaction is related cross-reference that dollar amount and date with the excel spreadsheet. The excel spreadsheet will include what truck was fueled. List that truck number in the class list.
e. Exception to the rule Truck 208: the exception is for the truck listed as 208 on the excel spread sheet. That card is used for the office and is used for multiple trucks. The front desk will have the receipts for that those transactions in order to match them correctly in the system by way of the class list.
f. After all transactions are confirmed and entered in the system reconcile the account.
g. Refer to credit card reconciliation for process
Weekly Bank Reconciliationsa. These reconciliations are meant to on a weekly basis tie all outstanding
transactions to the banking records. It also helps track automatic payments debited from the account and debit card purchases.
b. Find the banking folder then go the latest dated listed of excel spreadsheet. This should have all outstanding transactions in QuickBooks that have not been processed through the bank yet. I.e.
P a g e |

Checks that are in the mail or upcoming automatic payments that have not been deducted from the account.
c. At the top of the page confirm the amount listed in QuickBooks is correct and update if necessary
d. Find the bank balance on the printed balance sheet that Mark gives you and enter that in the bank balance field
e. The spreadsheet will calculate the different that should be outstandingf. Below that section there will be a list of all outstanding transactions
that are entered in QuickBooks, but had not hit the bank as of the last statement. Compare the bank transactions with those listed on the sheet and remove any transactions that have or are coming through. This will give you the outstanding balance.
g. The outstanding balance is reflected up top and compared against the QuickBooks and bank balances if the number is a $0.00 you are in balance, if not proceed to the next step.
h. Go into QuickBooks and see if there have been any checks written since the balance that have not been cashed if so list them. Also, check the bank balance sheet to see if there have been any debit card transactions that have not been recorded in QuickBooks. I.e. the debit card was used to purchase material or an automatic payment was made, but was not recorded yet.
i. Once you have updated your list in Excel of everything still outstanding and updated QuickBooks for any debit or automatic payments make sure that you “sum” formula encompasses all of those transactions. The sum of all outstanding should equal the figure of the difference between the bank and QuickBooks.
Monthly bank reconciliationsa. There will be 4 bank account statement that arrive between the 5th and
10th of the month from Heartland bank. Make a copy of each statement to use as your working copy.
b. In QuickBooks on the “Home Screen” in the lower right corner there will be a “reconciliations” icon, select it.
c. Select the bank account to reconcile from the drop down listd. Fill in the statement close date and the ending balance listed on your
statement.e. If there are any finance charges or interest charges listed on the
statement list that as well and assign it to the appropriate chart of account. See Chart of Accounts description
P a g e |

f. Select Ok to proceed to the reconciliationg. Begin by selecting all transactions that match the bank statement
place a check mark in pencil on the bank statement by all selected transactions.
h. Repeat this process through the different sections of the bank statement i. Checksii. Wire Transfersiii. Debit Transactions
h. After all transactions have been selected that amount should match the section on the bank statement
i. Next move the deposit section of the statement and select all transactions for that month’s deposits.
j. When completed the amounts should show a $0.00. Since, there is a weekly reconciliation that is done this process should go fairly quick.
k. Print the summary and detail of the reconciliation. Attach to the bank statement copy and place all supporting documentation with the statement in an envelope. Label with the bank account information and month/year
l. Repeat for all bank statements.
Note: the payroll account is different in that all direct deposit transactions are deducted from the payroll account in a lump sum. This lump sum will be the total of all direct deposits for that week, but in QuickBooks they will all be labelled separately.
Monthly cash flow statement- Excel Versiona. After all the bank reconciliations are completed a monthly cash flow
statement is done b. There is an internal cash flow statement saved in the Dropbox on an
Excel spreadsheet. Each month has its own column. Open this document.
c. Go to QuickBooks to the reports tabi. Reports>Banking>Check Detailii. Select the previous month date range, this will list all checks, debit
transactions, wire transfers, and automatic payments for the month.
iii. Export the record> top of the screen select export (Excel Icon)> Export to new worksheet>Export to new workbook>Export
P a g e |

iv. This will cause the spreadsheet to be opened in Excel listing the transactions.
v. Select the entire page (right click select all)vi. Create filters for the information. Then only select the bank
accounts and blanks.vii. Select the bank account lines and blank lines then deleteviii. Go back to the filter and select all, this will leave you with the
transactions that compromised all of the outflows of cashix. Make a duplicate tabx. For the first tab only keep the cost of goods expenses (coded with
a 20). Total those expenses.xi. The second tab only keep the overhead costs (coded with a 30)xii. Go back to the internal cash flow statement. For the cost of goods
enter the number that was on the first spreadsheet. Then copy the list of all overhead account types.
xiii. Go to the spreadsheet with all the overhead costs and paste the text only
xiv. Then create a column next to all of the overhead transactions and categorize them according to the list from the internal cash flow. For instance, all payroll related items including taxes and healthcare should be applied to payroll and all expenses relating to the trucks should be applied to auto.
xv. Use a “sumif” formula to add all of the transactions for each expense type
1. =sumif([range to search],”name expense”,[sum range])2. Example: =sumif(A2:A1000,”auto”,c2:c1000)3. The previous month’s cash flow data will have the formulas
already completed. Copy and paste the formulas into the new workbook and update the correct ranges.
xvi. After all of the expenses have been totaled complete the process by confirming that the total expenses listed equal the total overhead expenses. Remove any loan payments from the overhead expense section and move to the financing section of the cash flow statement. (See the bottom of the previous month’s data for an example.)
xvii. Copy the totals from that data sheet you have been completing and paste them into the cash flow data worksheet column for the month in question. (Paste the values only.)
P a g e |

d. For the next step pull a deposit detail report for the period in questions. i. Reports>banking>deposit detail>date range of the previous
month>export to Excel.ii. In Excel select the entire document>apply filters>select all lines
EXCEPT BANK ACCOUNTS> select all of the remaining lines>deleteiii. The remaining information will only be the bank account depositsiv. Add the deposits v. Take that amount and put it on the deposit line in the cash flow
statement.e. At the bottom of the worksheet there will be totals of all cash deposits
minus cash outflows to get the ending cash balance. Confirm that the ending amount is the same as on the balance sheet for the total bank account amounts.
Monthly cash flow statement – Accessa. After all the bank reconciliations are completed a monthly cash flow
statement is done b. There is an internal cash flow statement saved in the Dropbox on an
Excel spreadsheet. Each month has its own column. Open this document.
c. Go to QuickBooks to the reports tabi. Reports>Banking>Check Detailii. Select the previous month date range, this will list all checks, debit
transactions, wire transfers, and automatic payments for the month.
iii. Export the record> top of the screen select export (Excel Icon)> Export to new worksheet>Export to new workbook>Export
iv. This will cause the spreadsheet to be opened in Excel listing the transactions
d. In Excel select all and select the “Filter” button. Then remove all “blanks” and all bank account number lines.
a. This is done by unselecting all of the option in the filter section then only selecting the accounts and blanks.
b. Then select the remaining row and delete.e. In Excel remove the first 2 rows of the spreadsheet. Then remove
the first columns of the spreadsheet leaving the type, account, and amount. Remove the columns in between that are blank.
f. Sort from A-Z from the account drop down
P a g e |

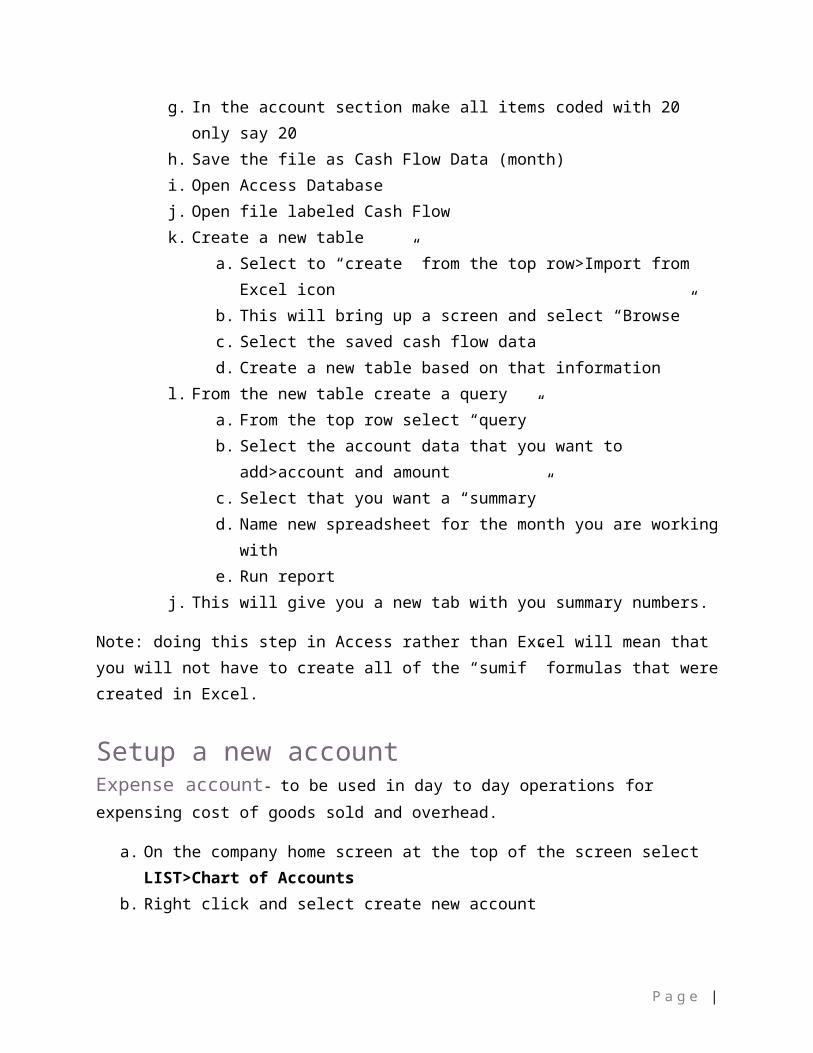
g. In the account section make all items coded with 20 only say 20h. Save the file as Cash Flow Data (month)i. Open Access Database j. Open file labeled Cash Flowk. Create a new table
a. Select to “create” from the top row>Import from Excel iconb. This will bring up a screen and select “Browse”c. Select the saved cash flow datad. Create a new table based on that information
l. From the new table create a querya. From the top row select “query” b. Select the account data that you want to add>account and
amountc. Select that you want a “summary”d. Name new spreadsheet for the month you are working withe. Run report
j. This will give you a new tab with you summary numbers.
Note: doing this step in Access rather than Excel will mean that you will not have to create all of the “sumif” formulas that were created in Excel.
Setup a new accountExpense account- to be used in day to day operations for expensing cost of goods sold and overhead.
a. On the company home screen at the top of the screen select LIST>Chart of Accounts
b. Right click and select create new accountc. Select Expense account and if the account will be Cost of Goods Sold
or Overheada. Expense accounts are coded with a “20” for cost of goods sold or
“30” for overhead.b. Name the account with a descriptive name I.E. Subcontractorsc. If there is a main account that this new account should be
referenced into select that the expense should be part of a group. I.E. 1099 Laborers are a sub group of subcontractor payroll.
d. Save
P a g e |

Capital asset account - to be used for a capital asset that will be shown on the balance sheet in the asset section. The other half of the equation will be the creation of a long term liability. The asset will be written down yearly on a straight line deprecation schedule with a 10% salvage value.
a. From the top row select Lists>Chart of accounts
Current liability account – to be used for current liabilities of 1 year or less that need to be booked. This could be short term leased equipment or credit cards.
Long term liability account – to be used when a liability will be carried on the books for longer than a year. This account will be the second half of the asset creation transaction. Every time there is a payment made the account is written down only by the principle amount of the loan and the interest should be expensed.
Enter a new item -Employee Expenses that are used on a regular basis can be made into an item in QuickBooks for easy reference. They are set to a specific cost code that is tied to the profit and loss
a. From the top bar in QuickBooks select Lists>Items Lista. This will open up a list of items already in the system
b. To create an Employee or 1099 subcontractor Item right click and select “new”c. The item’s name is the employee’s name (first last)d. It will be a sub account of either employees or subcontractore. Select the appropriate cost of goods sold depending on the persons job
classificationa. Managerb. Operatorc. Laborer
f. Description: manager, operator, laborerg. Save and close
PayrollSetup a new employee in QuickBooks
a. Select “Employee” from the home screenb. Select “Add new employee”c. Enter the person’s name last name first name (even though it says first
last)d. Complete all the information available on the first screen
P a g e |

a. Name b. Addressc. phone numberd. social security number e. date of birth f. marital statusg. race.
e. Next go to the next tab and complete the name on the check information: first name last name
f. Tax settings: even though we do not use QuickBooks to track taxes we should still be entering the information as a fall back system.
a. Tab 1: From the W-4 form i. complete if the person is single, married, or married
withholding at the single rateii. enter in the deductions the employee has listed on their W-
4b. Tab 2: From the State withholding form
i. complete if the person is single, married, or married withholding at the single rate
ii. enter in the deductions the employee has listed on their state form
c. Tab 3: This is the additional deductions tab for Columbus City Tax (2.5% as of 7/2015). SEU does not deduct for the individual school districts.
g. Save and Close
Setup a new employee or subcontractor in Paychexa. Log into Paychex onlineb. On the top of the page select “employee”c. On the right side of the screen there will be a “+” sign to add the
person. Select if they are an employee or a subcontractor.d. Completely fill out all possible information
i. Nameii. address iii. date of birthiv. social security numberv. phone numbervi. Ratevii. Exempt status (salary or not)
P a g e |
viii. Direct deposit information (if applicable)ix. Healthcare deductions
e. Save and close
Setup a new 1099 subcontractor in Paychexa. Log into Paychex onlineb. On the top of the page select “employee”c. On the right side of the screen there will be a “+” sign to add the
person. Select if they are an employee or a subcontractor.d. Completely fill out all possible information
i. Nameii. address iii. date of birthiv. social security numberv. phone numbervi. Ratevii. Direct Deposit
f. Save and close
How to do payrollThe difference between employees, 1099 individuals, and 1099 broker trucking companies.
Employees- have taxes withheld, health insurance, dental, vision, short term, long term, and life benefits.
1099- does not have taxes withheld and has no benefits and is paid a flat rate for all hours worked, except when on prevailing wage
1099 brokered trucking company- paid on a weekly basis for trucking invoices that are provided at least 3 weeks prior
Enter a payroll W-2 on the Excel Spreadsheet- Non-Exempt (not salary)
a. Go to the DropBox>Finance>Payroll>W-2>select the newest Excel file for W-2 payroll
b. The first page of the Excel spreadsheet is a summary sheet that has the total hours worked and the gross amount of the paycheck
P a g e |

c. Get the manual timesheet of the first person on the spreadsheet d. Update the week ending datee. For each day of the week match the hours worked to the written
timesheet.a. If the employee writes the actual hours they worked I.E.
7:00 am to 5:00 pm that would be 7:00 and 17:00. b. If the employee only lists the hours worked that day put
that number in the cell I.E. 8f. Then list the locations the employee worked that day. If the
employee worked more than 1 location, but only put 1 set of times divide the time equally between the 2 sites.
g. If the employee took a lunch list the lunch break taken that day on the corresponding line
h. The total hours worked for that day will be listed in the same row
i. The last column of the spreadsheet keeps a running total of the hours worked up to that day. (day before time plus that day’s total hours)
j. For all non-salary employees the first 40 hours are regular time and any hours worked over 40 hours will be regular time times 1.5 (time and a half)
k. Any hours worked on a prevailing wage site must be paid at the prevailing wage rate.
a. Overtime rate is calculated: (base rate times 1.5) plus health and welfare minus any company paid health benefits
l. At the bottom of the spreadsheet there is a check figure sections
m. Total all non-prevailing wage hours up to 40 and multiply by appropriate rate
n. Total all prevailing wage hours up to 40 and multiply by appropriate rate
o. All hours over 40 that are not prevailing wage add up and multiply by the correct overtime rate
p. All prevailing wage hours should be totaled and multiplied by the correct overtime factor for prevailing wage.
q. Repeat for each employee
P a g e |

Enter a payroll W-2 on the Excel Spreadsheet- Exempt (salary)a. Go to the DropBox>Finance>Payroll>W-2>select the newest
Excel file for W-2 payrollb. The first page of the Excel spreadsheet is a summary sheet that
has the total hours worked and the gross amount of the paycheck
c. Get the manual timesheet of the first person on the spreadsheet d. Update the week ending datee. For each day of the week match the hours worked to the written
timesheet.i. If the employee writes the actual hours they worked I.E. 7:00
am to 5:00 pm that would be 7:00 and 17:00. ii. If the employee only lists the hours worked that day put that
number in the cell I.E. 8f. Then list the locations the employee worked that day. If the
employee worked more than 1 location, but only put 1 set of times divide the time equally between the 2 sites.
g. If the employee took a lunch list the lunch break taken that day on the corresponding line
h. The total hours worked for that day will be listed in the same rowi. The last column of the spreadsheet keeps a running total of the
hours worked up to that day. (day before time plus that day’s total hours)
j. Salary employees are paid their flat salary for the week unless they are on a prevailing wage site. i. All hours worked on a prevailing wage site are paid with the
standard 40 hour at regular time and over 40 at 1.5 times the regular rate.
ii. Follow the W-2 steps for regular and overtime iii. Use the check figures below to confirm the correct hours and
wages
Enter a payroll W-2 on the Excel Spreadsheet-1099 Subcontractors
a. Go to the DropBox>Finance>Payroll>W-2>select the newest Excel file for 1099-payroll
b. The first page of the Excel spreadsheet is a summary sheet i. This has the total hours worked ii. The gross amount of the paycheck and net amount
P a g e |

iii. On the left side of the spreadsheet is to be used to balance the Paychex totals for the week
c. Get the manual timesheet of the first person on the spreadsheet d. Update the week ending datee. For each day of the week match the hours worked to the written
timesheet.a. If the employee writes the actual hours they worked I.E.
7:00 am to 5:00 pm that would be 7:00 and 17:00. b. If the employee only lists the hours worked that day put
that number in the cell I.E. 8f. Then list the locations the employee worked that day. If the
employee worked more than 1 location, but only put 1 set of times divide the time equally between the 2 sites.
g. If the employee took a lunch list the lunch break taken that day on the corresponding line
h. The total hours worked for that day will be listed in the same rowi. The last column of the spreadsheet keeps a running total of the
hours worked up to that day. (day before time plus that day’s total hours)
j. 1099 Subcontractor are paid a flat rate for all hours worked except on a prevailing wage site
a. Any hours worked on a prevailing wage site must be paid at the prevailing wage rate.
b. Overtime rate is calculated: (base rate times 1.5) plus health and welfare minus any company paid health benefits
k. At the bottom of the spreadsheet there is a check figure sectionsa. Total all non-prevailing wage hours up to 40 and
multiply by appropriate rateb. Total all prevailing wage hours up to 40 and multiply by
appropriate rate c. All prevailing wage hours over 40 hours should be
totaled and multiplied by the correct overtime factor for prevailing wage.
l. Repeat for each employee
P a g e |

1099 Brokered TruckingThese are put in the system as a regular invoice, but paid on a regular basis. There is a 3 week lead time on all invoices to ensure that SEU was paid for the service from trucking companies.
W-2 in Paychexa. On the Paychex home screen select to “start payroll” in the bottom right
corner
b. Select “ok” for non-memorized transactions
c. Print all Excel spreadsheets out and attach to the correct hand written timesheet
d. Select the first W-2 employee
e. Enter the hours worked
f. Non – Exempt employees add the correct hours and if needed rate (prevailing wage)
i. Regular hours – 40 or lessii. Overtime hours (non-exempt employees)iii. Prevailing wage rates
e. Exempt employees – 40 hours only, exempt when prevailing wage is applicable
f. Saveg. Click on the check icon to confirm that the amount on the spreadsheet
matchesh. Select the back to payroll icon
Enter payroll 1099 individual subcontractors direct deposita. On the Paychex home screen select to “start payroll” in the bottom right
corner
b. Select “ok” for non-memorized transactions
c. Print all Excel spreadsheets out and attach to the correct hand written timesheet
d. Select the first 1099 Subcontractor
e. Enter the hours worked
f. All hours will be at their standard flat rate with the exception of any prevailing wage locations.
g. Save
h. Click on the check icon to confirm that the amount on the spreadsheet matches
i. Select the back to payroll icon
P a g e |

ReportsJob cost report
i. On the top of the screen in QuickBooks select Reports>Job Costing>Job Cost Detail
ii. This will pull up all of the month’s transactions for all jobs. iii. In the upper left corner select “Customize”iv. Select the second tab labeled “filter”v. From the selection menu on the left scroll down to “name”
a. This will bring up a second menu to the right select the drop downb. Select “multiple names” from the list. This will bring up a new list of all
customers.c. Select the customer you want to know job cost details
vi. On the first tab select the date range for the time period you are examining. You can also select “all” for all job expenses.
vii. After you select the date range go down to the selection menu and scroll down till you find “paid” select it. This will tell you what expenses have been paid and what has not.
viii. Export to Excel See Below
Export job cost report to Excel to sort paid and unpaida. On the top of the report select “export” b. Select either new workbook, update existing worksheet, or existing workbook
i. New workbook: worksheet will be a completely new workbook
P a g e |
Tracking ExpensesRecord invoice dateRecord invoice amountRecord invoice jobTrack payroll according to job
Mid-monthGenerate job costing reportsPaid expenses per jobUnpaid expenses per jobLabor and material expenses per job
Report job costing for billingProject ManagerProject Administrator
End of monthAnalyze monthly job cost and billingAnalyze paid verses unpaid expensesAnalyze labor and material costs
Mid-month after month endAnalyze possible unaccounted for expensesReport possible un-billed expenses to Project Manager for clarification

ii. Update existing worksheet: this is from an existing workbook that has the same data that needs to be updated
iii. Existing workbook: this is a new worksheet in an existing workbook selected from the “browse” menu
c. Export the data and the Excel spreadsheet will open with the information from QuickBooks
d. Remove all “empty” columns from the spreadsheete. Select the entire document, then filter the information based on what you goal is
i. To sort select from the main screen Sort & Filters>Filterii. This will create a dropdown menu for all columns
f. Select the date column dropdown and sort by date. Then select all the cells in the column and format them to read the month only
i. Top row select “more number formats” from the dropdown or the arrow in the lower right corner.
ii. At the bottom of the selection box on the left side of the new screen select custom
iii. In the edit field type “mmmm” for monthiv. Save
g. From this point you can pull job cost reports based on the month, vendor and month, and vendor only depending on how you decide to continue sorting
h. After you decide what type of report you need to total select the entire group of information.
i. From the top row go to Data>Subtotal>follow the prompts that will create subtotals for the information that you need.
Unpaid bills detail Unpaid bills detail will list all outstanding bills in order of A-Z per vendor.
a. From the top of the screen in QuickBooks>Reports>Vendor>Unpaid bills details
b. This will open all unpaid billsc. Export to Excel in a new worksheet and workbookd. Format the page to fit all columns on 1 sheet of paper
i. For 1099 subcontractors to confirm that the total entered into the system matches your Excel summary sheet delete all line that are not related to the 1099 subcontractors. That total should match your total on the Excel summary sheet.
ii. For the Brokered trucking companies delete all lines not related to brokered trucks. From there find what is the next week to be paid and delete all lines not within that week. This will be the total to select in QuickBooks.
P a g e |

Accounts ReceivableMonthly Pay Applications
a. Beginning on the 15th of the month, or as required by the contract, submit the Excel spreadsheet with the percent to completion for each line item to the general contractor representative designated. Using the following data:
i. Information from the field for actual percent to completion ii. Information from job costing reports
b. Upon submission to the general contractor they will go through the pay application Excel spreadsheet to determine if they agree with the percent to completion on the line items and either accept or reject the pay application.
c. Any line item percent to completion not accepted by the general contractor request information as to why it was not accepted. Either continue negotiating with the general contractor in order to come to an acceptable completion rate or use their percentage.
d. Once the application is accepted by the general contractor enter the information into QuickBooks with accepted amounts and correct retainage.
i. Retainage is an amount specified in the contract to withhold to the subcontractor as a guarantee of the work. It is held to completion or until specified in the contract.
ii. It is deducted from the total of the pay application and will be a negative on the invoice.
iii. The retainage is held on the balance sheet as an asset.e. Once the invoice is entered with the correct retainage there will be an invoice
number assigned. Enter the invoice number on the top of the pay application Excel spreadsheet.
f. Save the invoice in QuickBooks and save the pay application and send back to the general contractor with the invoice number and signed by notary.
Open invoice reportsa. In QuickBooks on the top row go to Reportsb. From reports go to customers a menu will open go to Open invoicesc. This will give a list of all open invoices and their totals by customers.d. They will be in order according to the date. Anything over 20th should have a call
made to the general contractor for information to ensure that all waivers and paperwork is completed.
P a g e |