Doing the Right Thing Developing Engaging and Effective Gift Shop Procedures
Upload
brandon-holdenCategory
view
217download
0
8/10/2019 ABT Shop Safety Rules and Procedures
http://slidepdf.com/reader/full/abt-shop-safety-rules-and-procedures 1/34
11
UC DAVIS - WCAE
ABT SAFETY(2014)
SHOP GENERAL SAFETY RULES
AND SAFE OPERATIONAL RULESOF
SHOP EQUIPMENT

8/10/2019 ABT Shop Safety Rules and Procedures
http://slidepdf.com/reader/full/abt-shop-safety-rules-and-procedures 2/34
2
CONTENTS: TITLE PAGE
--------------------------------------------------------------- -----------SHOP GENERAL SAFETY RULES 3
SAFE OPERATION OF:VERTICAL BAND SAW 5
IRON WORKER 6
SLIP – ROLL FORMING MACHINE 7
PEDESTAL OR BENCH GRINDER 8
VERTICAL BELT AND DISK SANDERS 9
SHEET METAL BREAK 10
SHEET METAL SHEAR 11
DRILL PRESS 12
ARC WELDING SAFE OPERATIONAL RULES 13 COMPRESSED GAS CYLINDER HANDLING SAFETY 16 OXY-ACETYLENE WELDINGSAFETY RULES 17
OXYACETYLENE WELDING/CUTTING OPERATIONAL 19PROCEDURE
COMPREHENSIVE EYES, HAIR AND BODY PROTECTION RULES 28
8/10/2019 ABT Shop Safety Rules and Procedures
http://slidepdf.com/reader/full/abt-shop-safety-rules-and-procedures 3/34
3
SHOP GENERAL SAFETY RULES 1. SAFETY GLASSES MUST BE WORN AT ALL TIMES IN THE SHOP !
2. Proper attire: long pants, and no open toed shoes, must be worn in the shop at all times.Long hair must be tied back. Don’t wear jewelry (bracelets, rings, necklaces, watches,dangling earrings, etc.) around moving equipment. If you show up to lab in shorts and/orsandals you will not be allowed in the shop.
3. If you are unsure of how to use a machine, ask the instructor or one of the T ’s for help . There are a number of different machines and tools in the shop (some with postedoperational instructions) and we do not expect you to know how to use them all. On the
first day of lab you will be shown how to use most of the machines but, it may be a whilebefore you put the knowledge into practice and you may forget. Please do not hesitate toask.
4. Things break especially, when you are learning how to use them. If something breaks, tellone of the TA’s, so we can fix or replace it.
5. When using hand held power grinder , work outside (preferred) or in the open area of theshop and mind where your sparks land .
6. Welding, cutting, and grinding processes heat up metal. Always be aware before you grab
a piece of metal on the table or out of the scrap bucket. While you are welding, yourgloves protect you from being burned by sparks and radiant light burns. Burnt gloves donot allow you to pick up very hot metal . The heat will soak through welding gloves andburn you. Always use pliers to pick up your metal.
7. Personal music players are not allowed, and cell phone conversations or text messaging must not occur in the lab.
8. Fire doors should be kept closed, as is posted on the door.
8/10/2019 ABT Shop Safety Rules and Procedures
http://slidepdf.com/reader/full/abt-shop-safety-rules-and-procedures 4/34
4
9. Do not run extension cords through personnel doors. Do not allow extension cords to lie inpuddles of water. Do not plug extension cords in series. Fully retract cord reels beforeusing.
10. Do not place items on the floor in front of fire extinguishers, fire alarm pull stations, or
circuit breaker panels. 11. Never use compressed air guns to clean clothing and hair.
12. Never indulge in horseplay in the shop areas.13. Never eat or drink in the shop.
14 . Do not operate power tools unless at least two people are in the shop area and can see andhear each other.
15 . Keep fingers clear of the point of operation of machines by using special tools or devices,such as, push sticks, hooks, pliers, etc. Never use a rag near moving machinery.
16. In case of any injury , no matter how slight , report it .
17 . If you have not worked with a particular material before, check the materials safety datasheet (MSDS) for any specific precautions to be taken while working with the material. Also,ask before cutting any unusual material.
18 . Check the condition of power cords and plugs on portable tools before using them. Do notuse a tool that has a worn or damaged power cord/plug. Report it.
19 . When you are done with your work, turn off your machine, return your tools, and puteverything in right order and condition for the next user .
20. At the end, clean up your machine, work table, and surrounding area. A dirty shop leads toaccidents. Someone can slip on debris and electrode stubs or can trip over extension cords,
when left lying around.

8/10/2019 ABT Shop Safety Rules and Procedures
http://slidepdf.com/reader/full/abt-shop-safety-rules-and-procedures 5/34
5
SAFE OPERATION OF VERTICAL BAND SAW Band saw is a general purpose saw used for cutting straight or miter cuts up to45º. If you are careful measuring your part, the saw is accurate to 1/32 of aninch and the finish cut is of good quality.
1 Follow the general shop safety rules when operating any of the power tools
2. Place the stock to be cut in the clamp in a way to minimize length of cut , and push the clamp all the way forward until itcontacts the metal.
3. Set the blade upper guide so that it is about 1/4” above the stock to be cut.
4. With the hand turning wheel to the right of the saw, run the blade up to the piece to be cut.
5. Measure from the outer face of the blade to the end of the metal and adjust to the desired dimension. This will take thesaw-curf into account.
6. Turn the clamping screw handle in until it tightens and secures the stock .
7. Adjust the force on the auto feed mechanism , and the blade speed, based on the material type and thickness, and also the coolant flow (if available).
8. Make sure the blade is not in contact with stock. Then, turn the saw on . Run the blade up until it contacts the metal andstart cutting it with manual feed.
9. Engage the automatic feed.
10. Never place hands or fingers directly in line with the blade.
11. When the saw has cut through the metal, turn the saw off and return it to the starting position.
12. To cut in an angle , release the locking device and tip the body until the desired angle is reached. Then, re-lock the lever. The saw body is heavy. If you do not think you can support the body on your own, ask for help.
13. Clean up the table and area around the saw when you are done and return the band saw body to the upright position, if you have moved it to an angle.

8/10/2019 ABT Shop Safety Rules and Procedures
http://slidepdf.com/reader/full/abt-shop-safety-rules-and-procedures 6/34
6
SAFE OPERATION OF IRON WORKER
Iron worker is used for high speed cutting of thick steel parts that do not require anice finish, such as parts to be welded. It will shear flat and angle bars and alsopunch holes. Size is specified by tonnage (10 to 120 tons typical range of sizes).
1 Follow the general shop safety rules when operating any of the power tools .
2. Using the hole punch requires special instruction, ask before using this function.
3. For cutting, measure your required metal piece and mark it with a scribe or soap stone.
4. Slide the metal under the clamp and look between the clamp and the cutting edge. Properlysupport the long pieces.
5. Sight down the cutting edge and line up the mark with it.
6. Adjust the guard on the shear to barely touch the material before shearing.
7. Do not hold the material during punching or shearing.
8. Turn the machine on.
9. Press and hold the foot pedal until the metal is cut, then release the pedal.
10. Turn off the machine and clean up any scrap on or around the shear.
8/10/2019 ABT Shop Safety Rules and Procedures
http://slidepdf.com/reader/full/abt-shop-safety-rules-and-procedures 7/34
7
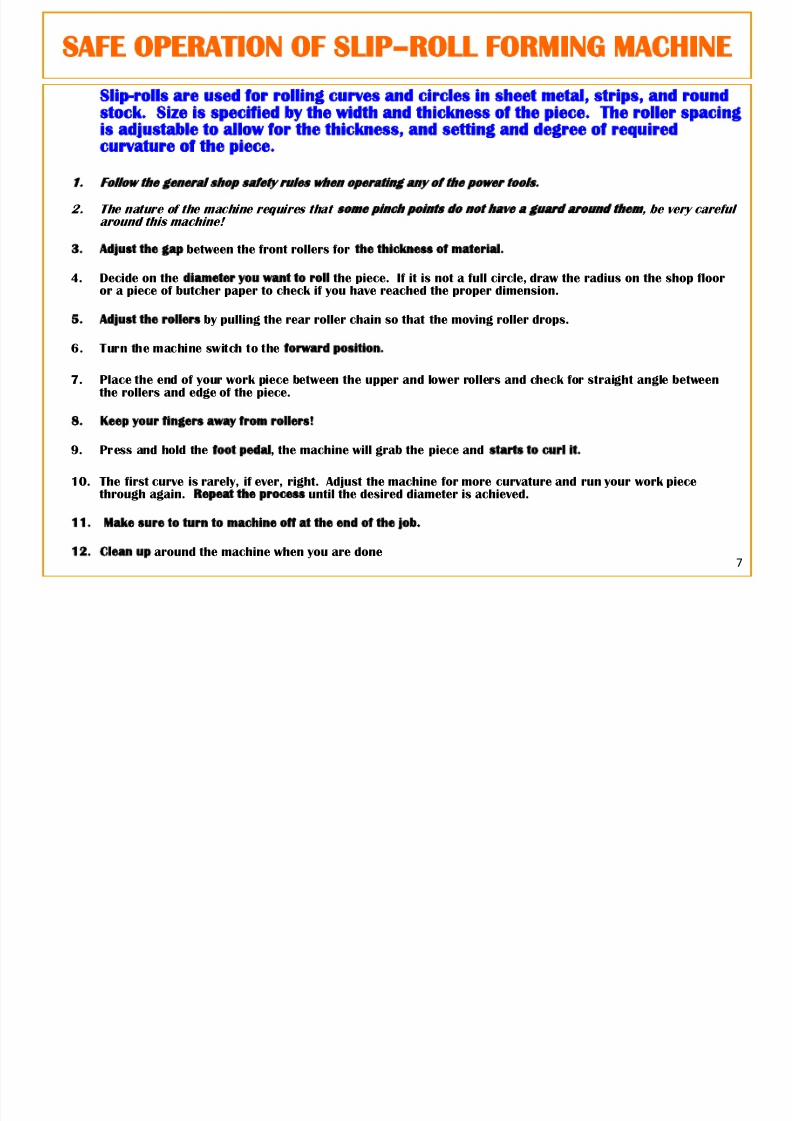
SAFE OPERATION OF SLIP – ROLL FORMING MACHINE Slip-rolls are used for rolling curves and circles in sheet metal, strips, and roundstock. Size is specified by the width and thickness of the piece. The roller spacingis adjustable to allow for the thickness, and setting and degree of requiredcurvature of the piece.
1 Follow the general shop safety rules when operating any of the power tools
2. The nature of the machine requires that some pinch points do not have a guard around them , be very carefularound this machine!
3. Adjust the gap between the front rollers for the thickness of material.
4. Decide on the diameter you want to roll the piece. If it is not a full circle, draw the radius on the shop flooror a piece of butcher paper to check if you have reached the proper dimension.
5. Adjust the rollers by pulling the rear roller chain so that the moving roller drops.
6. Turn the machine switch to the forward position.
7. Place the end of your work piece between the upper and lower rollers and check for straight angle between the rollers and edge of the piece.
8. Keep your fingers away from rollers
9. Press and hold the foot pedal , the machine will grab the piece and starts to curl it.
10. The first curve is rarely, if ever, right. Adjust the machine for more curvature and run your work piece through again. Repeat the process until the desired diameter is achieved.
11. Make sure to turn to machine off at the end of the job.
12. Clean up around the machine when you are done

8/10/2019 ABT Shop Safety Rules and Procedures
http://slidepdf.com/reader/full/abt-shop-safety-rules-and-procedures 8/34
8
SAFE OPERATION OF PEDESTAL OR BENCH GRINDER
Pedestal grinder is used to remove metal quickly without high accuracy. A fine gritwheel can also be used to sharpen the tools. Grinder size is specified by the
diameter of the new grinding wheel. Most grinders have two wheels: A rough(coarse) wheel and a finishing (fine) wheel.
1 Follow the general shop safety rules when operating any of the power tools
2. Never grind aluminum . It will clog the wheel. A clogged wheel becomes a heat generator and could explode!
3. Never grind while wearing gloves. They can get caught and pulled into the spinning wheel.
4. Avoid using pliers to hold your work piece while grinding. They do not allow you to hold the work piece flatagainst the tool rest.
5. Do not walk away from the grinder while it is running.
6. Before turning the grinder on, inspect the wheel for cracks, chips, uneven or glazed surfaces. Dress the wheelas required for removing irregularities. Check that the tool rest is positioned horizontally and is adjusted to1/8” maximum distance from the face of the wheel.
7. Stand to the side of the grinder when turning on the machine to keep oneself out of harm’s way, in case the wheel disintegrates.
8. Grind only on the front surface (top) of the wheel (in most instances).
9. Place your work piece flat on the tool rest and apply even pressure with your work piece against the spinning wheel. Move the work piece uniformly across the wheel face, so you do not grind a groove into the wheel face.
10. The work piece will get hot! Have a can of water near by to cool it down.
11. When you are done, clean up the area around the grinder.
8/10/2019 ABT Shop Safety Rules and Procedures
http://slidepdf.com/reader/full/abt-shop-safety-rules-and-procedures 9/34
9
SAFE OPERATION OF BELT AND DISK SANDERS
Belt sander is a general purpose finishing tool for sanding metal (includingaluminum), plastic, or wood. It gives a smoother finish than the pedestal grinder.Belts of differing grit are available for different jobs; the higher the grit number,the finer the sanding action.
1 Follow the general shop safety rules when operating any of the power tools
2. Never grind while wearing gloves They can get caught and pulled into the moving belt.
3. Avoid using pliers to hold your work piece while grinding, they do not allow you to hold the work piece flat against the tool rest.
4. Do not walk away from the sander while it is running.
5. Do not sand pieces that are 3/4” or less wide , unless a push shoe or some other means ofsupporting the piece is used.
6. For disk sanders , use only the half of the disc that is rotating toward the work table(downstroke side).
7. Ensure that the distance between a circular sander and the edge of the table is not greaterthan ¼ inch
8. To operate, turn the sander on. Place your work piece flat on the tool rest and apply evenpressure with your work piece against the moving belt. Move the work piece across the belt so you do not cut it or wear out one section.
9. The work piece will get hot Have a can of water near by to cool the work piece.
10. Clean up the area around the sander, when you are done.

8/10/2019 ABT Shop Safety Rules and Procedures
http://slidepdf.com/reader/full/abt-shop-safety-rules-and-procedures 10/34
10
SAFE OPERATION OF SHEET METAL BREAK
Sheet metal break is a machine for bending and folding thin metalsheets. Size for manually operated units is specified by bendinglength and thickness of sheet metal.
1 Follow the general shop safety rules when operating any of the power tools
2. The maximum capacity of the larger sheet metal break in the WCAE for regular steel is 14gauge. If you are not sure how thick your metal is, MEASURE IT
3. Adjust the break for both the thickness of material and the radius of curvature of thebend.
4. Measure and mark your metal (at least two points) with marker or scribe.
5. Line up your marks with the upper die in the machine.
6. Clamp the upper die down on the work piece with the handles at the end of the machine.
7. Check the straight angle of bend with a combination square.
8. Pick up on the pivoting lower die and bend the metal to the desired angle.
9. Release the lower die then the upper die. Remove your work piece and double check yourangle.
10.Keep the dies separated, after you are done.
8/10/2019 ABT Shop Safety Rules and Procedures
http://slidepdf.com/reader/full/abt-shop-safety-rules-and-procedures 11/34
11
SAFE OPERATION OF SHEET METAL SHEAR
Sheet metal shear is used to make long straight cuts on thin metal. Theyare sized by the blade width and thickest piece of mild steel the shear canhandle.
1 Follow the general shop safety rules when operating any of the power tools
2. Make sure the metal you want to cut is within the capacity of the shear. The shear in theWCAE will cut up to 12 gauge mild steel. If you are not sure how thick your metal is,MEASURE IT
3. The shear will only cut one piece of metal at a time . Do not stack pieces to save time.
4. Lay out your metal and mark it with a scribe.
5. Slide the metal under the clamp and look between the clamp and the cutting edge. Sightdown the cutting edge and line up the mark with it. You can also adjust the cutting length
by using the sliding “fence” properly on the carrying rods.6. Turn the machine on.
7. Press and hold the foot pedal until the metal is cut, then release the pedal.
8. You may leave the machine on, if you have multiple cuts.
9. Turn off the machine and clean up any scrap behind the shear.
8/10/2019 ABT Shop Safety Rules and Procedures
http://slidepdf.com/reader/full/abt-shop-safety-rules-and-procedures 12/34
12
SAFE OPERATION OF DRILL PRESS Drill press is used to cut holes by providing rotary motion to drill bits or other typesof hole-cutting tools. It could be used for metal, wood, and plastics provided, theright cutting tool and rpm is used.
1 Follow the general shop safety rules when operating any of the power tools
2. The thinner the material, the more likely the bit will grab it, do not drill larger than a half inch hole in sheet metal! Thinmaterials should be punched or use Step Drill for safer operation.
3. Measure your work and mark where you want the hole. Center punch the mark.
4. Select the proper drill size and properly tighten it into the drill chuck.
5. Remove the chuck key immediately, and put it away.
6. Clamp the work so the center of the drill bit lands on the center punch mark.
7. Adjust the drill to the proper RPM for the size of drill bit and the type of material you are using. See the chart next to thedrill press for proper speed.
8. Adjust the vertical distance between the tip of drill bit and work piece. You should maintain a clearance between the tip andhighest point of the work piece or vise.
9. Turn on the drill and intermittently apply an even pressure to the arbor until the hole is drilled. In this case, chips shouldbreak in small pieces.
10. When you are done, turn off the drill press. Wait until the chuck comes to a complete stop on its own, before removing thebit. Do not slow the chuck with your hand!
11. Put your bit back in its proper location.
12. Clean up the table and floor around the drill press.
13. If you are using a free moving vise, the handle should locate in the left side to prevent possible hazard. This is true for along piece as well.
8/10/2019 ABT Shop Safety Rules and Procedures
http://slidepdf.com/reader/full/abt-shop-safety-rules-and-procedures 13/34
13
ARC WELDING SAFE OPERATING RULES
I. PRE-USE ACTIVITIES:1.Thoroughly review and understand information provided in the arc-
welding operator’s manual with particular attention given todescriptions of safety procedures. Read all warning labels andinstruction manuals and remove all potential fire hazards from thewelding area.
2. Locate the nearest fire extinguisher in the area.
3. Be sure that there is adequate ventilation available when welding in confinedareas. The recommended area for welding should contain at least 10,000 cubicfeet for each welder. The recommended ceiling height is no less than 16 feet.
4. Before using, always inspect the input power cord, grounding connections, welding cables, and welding gun or electrode holder for damage or disrepairand assure the welding machine frame is grounded properly.
5. If any cords, cables, connections, and/or other mechanisms fail the pre-useinspection, notify your supervisor and remove the welding equipment fromservice by attaching a red tag that states “DO NOT USE.” Complete red tag withappropriate information.

8/10/2019 ABT Shop Safety Rules and Procedures
http://slidepdf.com/reader/full/abt-shop-safety-rules-and-procedures 14/34
14
II. OPERATING PRECAUTIONS:1. When using arc-welding equipment, always wear a welding hood with safety
glasses , fire-resistant gauntlet gloves, rubber-soled shoes, leather apron, andappropriate protective clothing (non-synthetic fiber). Eye protection requires atleast a No.10 lens shade for arc welding. Use hearing protection during noisy
welding tasks. A rule of thumb: If you can see skin from the neck down then youare not wearing enough protective clothing.
2. Before starting the arc-welding warn the people around you for protecting cover
3. Never use wet arc-welding equipment or perform arc welding in wet or damp locations.
4. Do not look at the arc Looking at an arc for an extended period of time without a weldinghelmet may result in flash burn.
5. While the output from the welder is limited by code to reduce the chances of a fatal electricshock , you can still get an unpleasant jolt , if you are not careful. Consider the followingprecautions:
• Use well insulated electrode holders and cables.•
Make sure that the welding cables are dry and free of grease and oil.• Keep welding cables away from power supply cables.• Wear dry hole-free gloves .• Do not touch electrical connections, wires, or other electrically charged machine parts.• Do not weld while your gloves or your clothing is wet. Never change the electrodes with
bare hands or wet gloves .• Do not grab the electrode and ground at the same time with your bare hands.
8/10/2019 ABT Shop Safety Rules and Procedures
http://slidepdf.com/reader/full/abt-shop-safety-rules-and-procedures 15/34
15
6. Always conduct arc welding in well ventilated areas. Avoid breathing welding fumes.
7. Do not arc weld on coated metals (galvanized, lead, or cadmium plated steel) unless the coating iscompletely removed from the area to be welded and the welding area is well ventilated.
8. Do not arc weld where flying sparks can reach flammable materials. Keep flammable materials atleast 35 feet from arc welding operations.
9. Remove combustible items, such as matches or a lighter, from your pockets and leave them in your backpack before beginning to arc weld. Make sure a fire blanket and extinguisher are presentin the arc-welding work area.
10. When stick welding, always take the electrode out of the electrode holder before putting the holderon the table so it does not arc to the table.
11. Do not hand a classmate or the T ’s your work until it has been cooled off in one of the waterbuckets.
12. Do not switch the polarity of the machine while it is under operating load, it can lead to machinedamage and can burn the person that moved the switch.
13. Always keep compressed gas cylinders away from arc-welding work areas. Never arc weld on acompressed gas cylinder
14. Never dip hot electrode holders in water .
15. Avoid having electrode cables wrap around your body when arc welding.
16. When possible, use vises or clamps to secure work pieces while arc welding.
8/10/2019 ABT Shop Safety Rules and Procedures
http://slidepdf.com/reader/full/abt-shop-safety-rules-and-procedures 16/34
16
COMPRESSED GAS CYLINDER HANDLING SAFETY
A gas cylinder or tank is a pressure vessel used to store gases at
high pressure. 1. Do not move any compressed gas cylinders unless they have the safety cap on them. If they
happen to fall over without the protective cap, the valve could break off turning the tank intoa projectile.
2. Always securely strap compressed gas cylinders to the wall or cart, where they will be used.
3. Do not use oil, grease, or pipe fitting compounds on compressed oxygen equipment. Thesematerials may readily ignite and burn in the presence of oxygen.
4. Do not force connections that do not fit. Oxygen fittings are usually a right handed thread while fuel fittings are usually a left handed thread.
5. Do not use a compressed gas cylinder without a pressure reducing regulator.
6. Pressure gauges contain a small brass tube which fills with the compressed gas when thecylinder valve is turned on. These brass tubes have been known to fatigue and break. When they do, they send pieces of shrapnel out the front of the gauge. Therefore, it is important that you always stand to the side of any cylinder when opening the valve.
7. The valve on an acetylene cylinder must never be opened more than 1 turn to facilitate quickclosing in case of an emergency.
8. Never use acetylene at a gauge pressure of over 15 psi . Above this pressure, the acetylenecould spontaneously explode without an ignition source.

8/10/2019 ABT Shop Safety Rules and Procedures
http://slidepdf.com/reader/full/abt-shop-safety-rules-and-procedures 17/34
17
OXY-ACETYLENE WELDING SAFETY RULES
Acetylene and Oxygen (compressed in cylinders) are used to weld or cut
Metal. A welding or cutting torch and other accessories are needed1. Secure oxygen and acetylene cylinders to prevent them from falling.
2. Make sure oxygen does not come in contact with oil or grease . No lubrication of theoxyacetylene apparatus is ever required!
3. Never use oxygen as a substitute for compressed air, as it vigorously accelerates combustion.
4. Do not force connections when setting up the welding apparatus.5. Make sure that no one is in front of cylinder valves when "cracking" them, to prevent injury
from blowing dust/grit.
6. Make sure that no one is in front of cylinder gas regulators when turning them on, to preventinjury from flying glass if the regulator explodes.
7. Check all apparatus connections with oil-free soap suds (such as Ivory) after initial hookup of
cylinders to gas regulators.8. Always wear approved goggles when welding.
9. Wear protective clothing and gloves when welding.
10. Use only a friction lighter or a fixed flame when lighting the torch.
11. Never use acetylene working pressures in excess of 15 PSI , as acetylene gas is highly
unstable at higher pressures.
8/10/2019 ABT Shop Safety Rules and Procedures
http://slidepdf.com/reader/full/abt-shop-safety-rules-and-procedures 18/34
18
12. Keep cylinders away from open fire or extreme heat (i.e., lighted torch).
13. Keep the area between your work and the cylinder regulators open, such that you may reach the regulatorsquickly in an emergency.
14. If not using the apparatus within one-half hour, shut down the apparatus and release all pressure in thehoses.
15. Keep a working fire extinguisher readily available.
16. When welding brass, bronze, or galvanized iron, ensure adequate ventilation to prevent inhalation of fumes.
17. When cutting or welding materials coated with lead (or lead-based paint), an airline mask should be worn.
18. Do not heat, cut, or weld on containers that hold or once held combustible materials, until they have beencleaned and safe-guarded. (i.e., fuel tanks, etc.).
19. Open all hollow parts before welding, to allow venting of heated air.
20. Protect hoses from the torch flame, sparks, and molten metal.
21. Store extra cylinders out of the work area. Do not store oxygen and acetylene cylinders in same locations.
22. Keep the work area clear of combustible materials.
23. Never use a worn or patched hose.
24. Cool or mark such work "HOT" so that others will not touch it and get burned. Be careful not to scald yourself from the steam produced when quenching. It is generally best not to quench brazed joints, because thediffering rates of thermal expansion between the joint and the parent metal could cause cracks to form.

8/10/2019 ABT Shop Safety Rules and Procedures
http://slidepdf.com/reader/full/abt-shop-safety-rules-and-procedures 19/34
19
OXYACETYLENE WELDING/CUTTINGOPERATIONAL PROCEDURE
I. PREPARATION:
1. Assemble all of the materials needed to make the weld. Thisincludes parts, oxyacetylene welding and cutting apparatus, clamps,safety mask, gloves, outfits, and filler rod.
2. Clean the parts to be welded to remove any oil, rust, or othercontaminants. Use a wire brush if needed to remove any rust.
3. Assemble and fix the parts in place. The pieces need to be stable fora good weld line.
4. Use the related chart to select the nozzle size for the thickness ofmaterial you plan to use for welding.
• Nozzles come in a variety of sizes, from 000 (for a very small flame, typically used for thin materials) to upwards of 3 (for a large flameneeded for thick materials).
• Larger nozzles produce larger flames and in general, are moreappropriate for thicker material.
•
Choosing the right size nozzle becomes easier with more experience.

8/10/2019 ABT Shop Safety Rules and Procedures
http://slidepdf.com/reader/full/abt-shop-safety-rules-and-procedures 20/34
20
5. Clean the nozzle. Carbon deposits can build up on the nozzles which interfere with flame quality and cause backfiring.
– The cleaning tool has a wide flat blade (with a file-like surface) which isused to clean carbon deposits on the exterior of the nozzle. – Use it to scrape any deposits from the flat face of the tip. – Use the wire-like files to clean the interior of the nozzle. – Pick the largest wire which will fit inside the nozzle and the scrape the
edges of the hole to remove any carbon buildup.
6. Attach the nozzle to the gas feed line by hand. Don't over-torque - the nozzle and hose fitting are both made of brass which doesn'tstand up well to abuse. A snug, finger tight fit is the sufficient.
7. Check the pressure levels in the oxygen and acetylene tanks. There should be at least 50 PSI in the acetylene tank. Theoxygen tank can be used until it is completely empty.
– Notice that the oxygen used in OAW is not for human consumption. Itcontains contaminants that could be unhealthy if taken in largequantities.

8/10/2019 ABT Shop Safety Rules and Procedures
http://slidepdf.com/reader/full/abt-shop-safety-rules-and-procedures 21/34
21
II. LIGHTING THE FLAME:
1. Use the chart to select the recommended amount of acetylene and oxygen pressure for the thickness of material you are going to weld.
2. Open the main valve on the acetylene tank <1/2 turn . This charges the pressure regulator at the top of the tank.
3. Open the pressure regulator valve on the acetylene tank (turn clockwise to open) and adjust the pressure in the acetylene line to the right pressure ( normally, 5 PSI ). Do not pressurizethe acetylene over 15 PSI. It will explode.
4. Open the acetylene pin valve on the handle of the welding tool, letting acetyleneescape. Tweak the pressure regulator valve until the regulator pressure is constant at 5PSI. Close the acetylene pin valve.
5. Stay aside and open the main valve on the oxygen tank. Turn the valve until it is fully open(until it stops turning).
6. Open the pressure regulator valve on the oxygen tank (turn clockwise to open) and adjust thepressure in the oxygen line to the right pressure (normally, 10 PSI).
7. Open the oxygen pin valve on the handle of the welding tool, letting oxygen escape. Tweak thepressure regulator valve until the regulator pressure is constant at 10 PSI. Close the oxygenpin valve.
8. Slightly open the acetylene valve (~1/8 turn), until you can just barely hear acetyleneescaping.
9. Make sure there is no body or anything flammable in the path of the nozzle. Use the striker toignite the acetylene. The flame should be yellow and will give off a lot of soot.

8/10/2019 ABT Shop Safety Rules and Procedures
http://slidepdf.com/reader/full/abt-shop-safety-rules-and-procedures 22/34
22
III. ADJUSTING THE FLAME:
1. Open the acetylene valve further and watch the flame near the nozzle tip. Add more
acetylene until the flame is just about to separate from the tip. (The flame willseparate from the tip of the nozzle if you add too much acetylene.) If so, reduce the flow until the flame reattaches to the tip, and then open the valve again to the near-separation point.
2. Slightly open the oxygen pin valve. If the flame goes out, turn off both gases and tryagain. DO NOT try and ignite the flame with both oxygen and acetylene pin valvesopen. As the oxygen is added the flame will turn bluish in color.
3. The blue flame will be divided into 3 different color regions: A long yellowish tip, ablue middle section, and a whitish-blue intense inner section. There are three typesof flames as described below:
– Neutral flame - This type of flame is the one you will use most often in the shop. It is called“neutral” because it has no chemical effect upon the metal during welding. It is achieved by mixingequal parts oxygen and acetylene and is witnessed in the flame by adjusting the oxygen flow until
the middle blue section and inner whitish-blue parts merge into a single region. – Reducing or carburizing flame - If there is excess acetylene, the whitish-blue flame will be larger
than the blue flame. This flame contains white hot carbon particles which may be dissolved during welding. This “reducing” flame will remove oxygen from iron oxides in steel.
– Oxidizing flame - If there is excess oxygen, the whitish-blue flame will be smaller than the blue flame. This flame burns hotter. A slightly oxidizing flame is used in brazing, and a more stronglyoxidizing flame is used in welding certain brasses and bronzes.

8/10/2019 ABT Shop Safety Rules and Procedures
http://slidepdf.com/reader/full/abt-shop-safety-rules-and-procedures 23/34
23
IV. WELDING:
1. Put on a dark face shield or goggle (minimum, #4 lenses) to protect your eyes from thelight of the flame. Make sure you have on long sleeves and all natural fibers. You can
wear a leather welding jacket and/or gloves if it makes you feel more comfortable.
2. Apply the flame to the assembled parts to begin heating. Pieces should be first tack welded together at the both ends. Use the region of the flame near the tip of the bluishinner region.
3. The metal will begin to glow. Continue heating both parts being welded until a small poolof welded metal appears near the edge of each of the parts. You must get molten pools onboth parts simultaneously to create the weld. It may require adding more heat to one side than the other, and takes some practice.
4. After the molten pools have formed on both sides of the weld, use the flame to gently stir the two pools together to form the tack weld. This takes a little practice.
5. After the two pools have joined at the ends, start from one end (normally, right side), forma new molten pool, and slowly move the flame along the weld line, lengthening the pool byusing metal from both parts. A gentle, circular, swirling motion will help mix the moltenmetal from both sides as the puddle is lengthened. This process is highly dependent on
the materials and part geometries being welded. Practice, long enough to get bettercontrol.
6. Continue this process until the entire weld line is complete.
7. Once you're done, turn off the flame. Close the oxygen valve first, and then the acetylene valve. Notice that welded parts can remain hot for a long time.
8/10/2019 ABT Shop Safety Rules and Procedures
http://slidepdf.com/reader/full/abt-shop-safety-rules-and-procedures 24/34
24
V. BACKFIRING:
•
Improper operation of the torch may cause the flame togo out with a loud snap or pop. This is called backfire.
• Backfiring can be caused by:
–
Touching the tip against your work piece – Overheating the tip – Operating the torch at other than recommended gas pressures
– A loose tip, or head or by a dirty tip.
• The first thing to do is to turn the gas valves in the torchoff, remove the cause, check all the connections, and tryrelighting the torch.
8/10/2019 ABT Shop Safety Rules and Procedures
http://slidepdf.com/reader/full/abt-shop-safety-rules-and-procedures 25/34
25
VI. CUTTING:
1. Use the chart to select the recommended amount of acetylene and oxygenpressure, and also the right size of cutting tip for the thickness of material you are going to cut.
2. Mount the cutting attachment on the torch assembly.
3. Draw a cutting line on the piece you want to cut with a soap stone and clamp
it securely and appropriately to a table.4. Adjust the oxygen regulator to the required working pressure.
5. Adjust the Acetylene to the required working pressure.
6. Open the oxygen valve at the base of the torch body completely. Turn theacetylene valve on about a quarter turn, and use your striker to light the flame. Make sure the torch is pointing away from you and any burnablematerial.
7. Add fuel by opening the acetylene fuel valve until the flame jumps off the tipand then close it until it jumps back.
8/10/2019 ABT Shop Safety Rules and Procedures
http://slidepdf.com/reader/full/abt-shop-safety-rules-and-procedures 26/34
26
8. Open the mixing valve on the top of the torch until you here aslight hissing sound. The blue cones shouldn’t jump when youuse the cutting valve. If it does you will open the mixing valve alittle more.
• If you are right handed you will start at the left side of the material or if youare left handed you will start at the right side of the material.
9. Hold the tip of the torch so that the blue cones are about 1/8inch from the metal. Hold the torch there until a puddle begins
to form and then use your thumb to open the cutting valve so that it blows the molten metal out of the cutting path.
10. Move slowly across the metal following your soap stone line andmaking sure to go slow enough to keep the cut going, but fastenough that your cut doesn’t weld itself back together.
11. After making your cut, release the cutting valve, close theacetylene valve, and then close the oxygen mixing valve in order
to extinguish the flame.
12. When you are completely finished with the torch you will need to
shut down the rigs.
8/10/2019 ABT Shop Safety Rules and Procedures
http://slidepdf.com/reader/full/abt-shop-safety-rules-and-procedures 27/34
27
VII. SHUTTING DOWN AND CLEANING UP:
• WHEN YOU'RE COMPLETELY FINISHED WELDING AND ARE READY TO QUIT FOR THE DAY, YOU’LL NEED TO FIRST, PROPERLY SHUTDOWN THE APPARATUS AS FOLLOW AND THEN AND CLEAN UP:
1. With the flame extinguished and the pin valves closed, close the main valve on the oxygen tank. It should be firmly seated at the bottom.
2. Open the oxygen pin valve to bleed off all of the oxygen in the regulator and feed line. Close the pin valve once the feed line pressure has gone to zero.
3. Fully back out the oxygen regulator valve so there is no pressure in the line. DONOT close the valve, as this will pressurize the line once the tank is open again.In the case of the acetylene, if it is pressurized over15 PSI it may explode! If
you are not sure about doing this properly, ask for help.
4. Repeat steps 1 through 3 for the acetylene line.
5. Return all of the tools to their proper storage places and coil the feed linesaround the handle on the gas cylinder cart. Do not remove the nozzle from the
feed line. The feed lines should always have a nozzle attached to preventaccidental damage to the threads used to attach the nozzle.

8/10/2019 ABT Shop Safety Rules and Procedures
http://slidepdf.com/reader/full/abt-shop-safety-rules-and-procedures 28/34
28
III. APPENDIX
28
COMPREHENSIVE HAIR,EYE AND BODY
PROTECTION RULES
8/10/2019 ABT Shop Safety Rules and Procedures
http://slidepdf.com/reader/full/abt-shop-safety-rules-and-procedures 29/34
2929
COMPREHENSIVE HAIR, EYE AND BODY PROTECTION RULES
I. EYE PROTECTION:1) All instructors, staff, shop users, and visitors must wear eye protection that meets the
ANSI Z-87.1-1989 standard while in the different shop areas, except for office andbreak room areas. Standard safety glasses are posted at each entrance door forusers and visitors.
2) For people who wear corrective glasses, eye protection must be of the type that can be worn over glasses. Prescription-ground safety lenses may be substituted if theyprovide equivalent protection and if side shields are attached to the glasses frame.
3) All shop staff, users, and visitors who are welding or viewing these activities must wearproper eye and face protection from the radiation produced by welding. Standard
welding goggles or helmets will be provided at the related areas.
a. ARC WELDING OR ARC CUTTING OPERATIONS REQUIRE THE USE OF WELDING HELMETS WITH AN APPROPRIATE FILTER LENS.
b. GOGGLES WITH FILTER PLATES OR TINTED GLASS ARE REQUIRED FOR GAS WELDING ORCUTTING OPERATIONS.
4) Safety glasses are essential for portable hand grinding/cutting operations andstationary grinding machines. Depending on your specific activity, you may alsorequire full face shield protection.
8/10/2019 ABT Shop Safety Rules and Procedures
http://slidepdf.com/reader/full/abt-shop-safety-rules-and-procedures 30/34
3030
II. HAIR AND BODY PROTECTION:
THE FOLLOWING SECTIONS EXPLAIN IN DETAIL THE IMPORTANT ISSUES WHICHSHOULD BE REGARDEDFOR HAIR AND BODY PROTECTION IN A SAFE SHOP WORKING ENVIRONMENT:
1) HAIR: If hair is touching the shoulders, it must be tied back and preferably into abun that will not unravel. A cap or hat is recommended but not required. A pony
tail that flops forward past the neck must be rolled up or otherwise kept securely
behind the head. In certain situations, dropping it down the back of your shirt maybe acceptable. Long hair over the forehead past the eyes may also be a hazard,and a hat or head band would be recommended or even required. A good numberof our shop staff have witnessed or know directly of a hair entanglement incidentsomewhere.
2) PANTS: Long pants must be worn while in the shop and when working with anymachine tools or equipment, sheet metal or metal scraps, and welding equipment.
3) SHOES: Non-shop staff, faculty, and students must wear closed-toed shoes when working with any machine tools or equipment, hand tools, sheet metal or metalscraps, and welding equipment. All shop staff are furnished annually with steel-
toed shoes, and are expected to wear these shoes while working in the shop areas.
8/10/2019 ABT Shop Safety Rules and Procedures
http://slidepdf.com/reader/full/abt-shop-safety-rules-and-procedures 31/34
3131
4) SLEEVES: Long sleeves are not recommended around rotating machinery.Many machine shops require short sleeve attire without the option for longsleeves. BAE allows long sleeves, but the sleeves may *not* be loose,unbuttoned, or beyond the wrist. Floppy sleeve cuffs are likely to get hookedon a lathe chuck, a mill cutter, or drill chuck. Ideally, you should roll up your sleeves to the elbows. An unbuttoned cuff that is folded back just oncemay be an even greater danger than buttoned. Jackets with elastic cuffs and
tight sleeves reduce the likelihood of entanglement. Shop staff may stop you from working if they determine your work is dangerous.
Tank-top or sleeve-less shirts are not allowed. Especially in the steel rackand sheet metal areas, there are significant risks of cuts and scrapes. In
the machining and welding areas, there is greater risk of hot chips or slagor grindings coming in contact with or lodging inside the shirt, which canstartle and/or burn you.
5) SHOP COAT: Appropriate type and size of shop coat is required for weldingand is not needed otherwise. It should be pointed out that UN-
TUCKED/UNZIPPED shop coats, jackets, and shirts present risk in the shop,especially when you lean over or into a lathe, mill, drill press, pedestal wire
wheel, and so forth. Unzipped coats can swing into rotating or movingmachine parts, especially if you lean into the machine or if an air fan isrunning or compressed air is blown in the vicinity. Snug fitting t-shirts and
tighter button down shirts and blouses are ok. Dresses or other looseclothing cannot be worn while operating machinery.

8/10/2019 ABT Shop Safety Rules and Procedures
http://slidepdf.com/reader/full/abt-shop-safety-rules-and-procedures 32/34
3232
6) APRON: Wearing apron is common in machine shops, and isaccepted and often recommended. It protects clothing fromcoolant and chips, and provides convenient storage pockets formeasures and markers, and when is properly tied it keeps clothingaway from rotating parts.
7) GLOVES: Gloves are a valuable type of personal protectiveequipment BUT they can also easily lead to entanglement. Wear
appropriate gloves when welding or handling sharp materials butremove them before starting any machine. This applies to ALLgloves, be they leather, cotton, latex, nitrile, fingerless style,etc. Each seemingly thin glove can wrap up and pull a hand inenough to badly injure it.
8) SCARVES: Scarves around the neck are prohibited. Head scarvesof any sort must be tied in back and no part of it must be able tocome forward past the neck and hanging on the chest. Largescarves that may be part of clothing attire are best managed byuse of a machinist's apron or very properly fitting coat with correctsleeve length and cuff tightness.
8/10/2019 ABT Shop Safety Rules and Procedures
http://slidepdf.com/reader/full/abt-shop-safety-rules-and-procedures 33/34
3333
9) WATCHES: Watches can catch on rotating or linearly movingmachine parts. If you are lucky the band will break, and if youare not then serious injury is likely. There are plenty of clockson the walls of our shops and there is no need for a watch.
10) RINGS: Rings are forbidden when working around machinery,especially rotating machinery. If your ring gets caught, you willlikely suffer a broken, flesh-stripped one.
11) BRACELETS: Clearly unacceptable are loose or tight metal andleather bracelets, but also unacceptable are any plastic,silicone, string, bead, or other wrist wraps, whether they areloose or tight fitting. If you have a medically required bracelet,
then a tight fitting sleeve might be appropriate depending on the task.
12) NECKLACES: Neck chains that dangle forward (with or withoutpendants), and also neck ties are not allowed. Neck chains areallowed if they are "choker" style, meaning they are fairly snugaround the neck. They are also allowed if the shirt/blouse isbuttoned up to the neck or is "crew neck" style. V-neck shirtsare inadequate to hold back a long necklace.

8/10/2019 ABT Shop Safety Rules and Procedures
http://slidepdf.com/reader/full/abt-shop-safety-rules-and-procedures 34/34
3434
13) EARRINGS: Stud earrings around machinery are fine, but anyearrings around welding probably are not fine. Very smallhoop earrings are fine around machinery, but anythingdangling more than one inch or so is not fine.
14) RESPIRATORY PROTECTION: Welding operations must beconducted with good ventilation. The movable welding fumehoods must be used whenever welding is occurring inside theshop areas.
15) MACHINE GAURDS: Machine guards provided for the operatorsafety must be in place whenever the machine is operated.Guards or shields removed for maintenance must be replacedbefore the machine is used again.
16) BACK PROTECTION: Shop staff and users must not attempt tolift more than 50 pounds unassisted, and should ask others
to help in lifting any heavy tool, material, attachment, orequipment. Use appropriate lifting techniques, hoist, fork
trucks, and other lifting devices as needed to protect back
i j i