A Mine Mount Minute
2
A Mine Mount Minute … Weathering laser engraved wood to make it look like a random stone wall is an easy and fun process. The coloring and applications of this technique can be used on a variety of material, but we think it works best on engraved wood textures. The first step I do is to spray a coat of Rust-oleum light gray primer. Be sure to paint both sides of the wood to help minimize the warping that can happen from the moisture of the primer. Start by spraying the back of the texture, allowing it to dry for about 10 minutes. Make sure there is proper ventilation. You can speed up this step by using a hairdryer. Once it dries to the touch, flip it over so that the textured side faces up. Spray it with a coat of primer, too. Allow to dry to the touch. Now you need to pick what kind of rock coloration you will want for the textures. If you are unsure, look at real stone walls. Photos are a great source for inspiration. It’s hard to beat the real thing to get it “right”. I used a few different browns and tans, as well as a couple gray tones darker than the primer. Funny story… The day after I painted the foundation for the finished models you see in these photos, I was walking down the street and noticed a bridge crossing a little stream that had the same coloring as the foundation I completed the night before. An example of life copying art. Here’s a rundown of the craft paint colors that I used; 1. Black 2. Nutmeg Brown 3. Dark Gray 4. Hazey Gray (actual spelling) 5. Antique White 6. Suede 7. Golden Brown You can mix these colors to achieve different values in the same color family. It makes the stones look more natural.
Transcript of A Mine Mount Minute
A Mine Mount Minute … Weathering laser engraved wood to make it look like a random stone wall is an easy and fun process. The
coloring and applications of this technique can be used on a variety of material, but we think it works best on
engraved wood textures.
The first step I do is to spray a coat of Rust-oleum light gray
primer. Be sure to paint both sides of the wood to help
minimize the warping that can happen from the moisture of
the primer. Start by spraying the back of the texture,
allowing it to dry for about 10 minutes. Make sure there is
proper ventilation. You can speed up this step by using a
hairdryer. Once it dries to the touch, flip it over so that the
textured side faces up. Spray it with a coat of primer, too.
Allow to dry to the touch.
Now you need to pick what kind of rock coloration you
will want for the textures. If you are unsure, look at real
stone walls. Photos are a great source for inspiration. It’s
hard to beat the real thing to get it “right”. I used a few
different browns and tans, as well as a couple gray tones
darker than the primer.
Funny story… The day after I painted the foundation
for the finished models you see in these photos, I
was walking down the street and noticed a bridge
crossing a little stream that had the same coloring as
the foundation I completed the night before. An
example of life copying art.
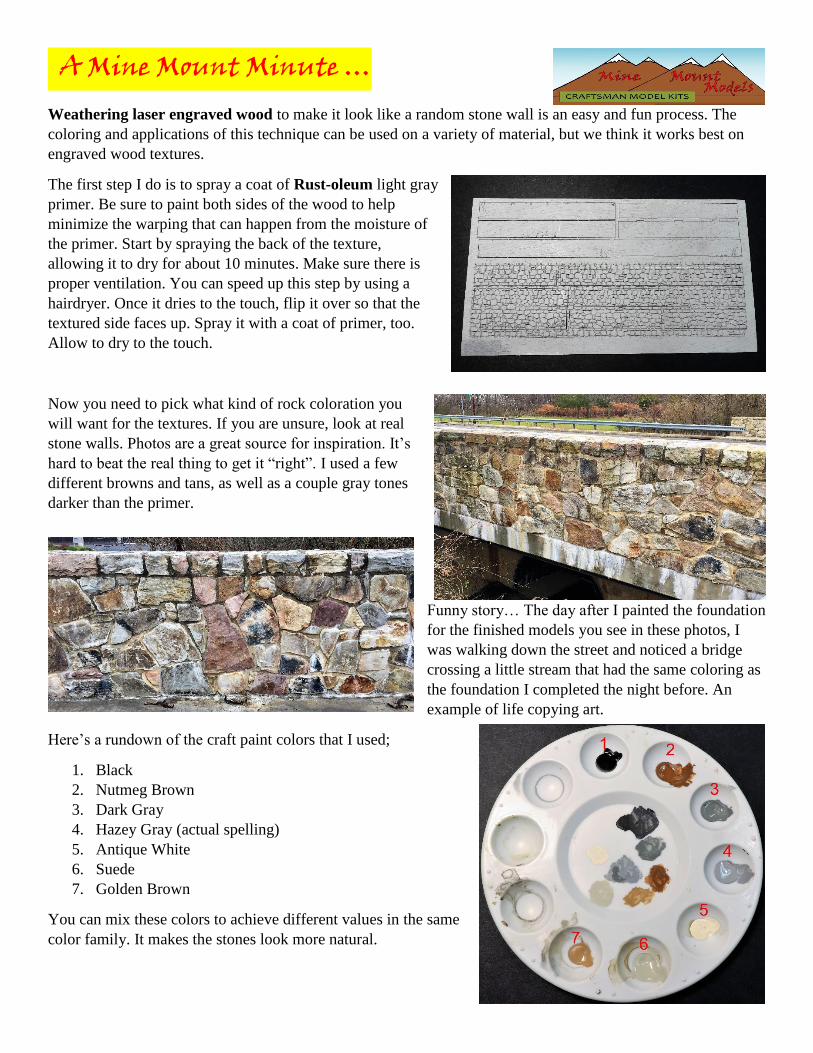
Here’s a rundown of the craft paint colors that I used;
1. Black
2. Nutmeg Brown
3. Dark Gray
4. Hazey Gray (actual spelling)
5. Antique White
6. Suede
7. Golden Brown
You can mix these colors to achieve different values in the same
color family. It makes the stones look more natural.

Apply a random pattern of the colors you have
chosen on the stone textures. There is no right or
wrong way to space the different colors. Each stone
should have a predominant color, but if some of the
other colors bleed over, it’s no big deal. It helps tie
together and naturalize the stone. The colors look
vibrant and overwhelming, but they will be toned
down in the next step.
To achieve the look of mortar and blend all the
colors together, I use a lightweight spackling
compound. DAP brand Fast’N Final is the one
I prefer. Apply it by gently rubbing it on with
your finger. Press it into the recesses of the
engraved texture. Quickly wipe off the extra
spackle that is sitting on the top surface of the
stone. You do not want it to start setting up and
cover all the color you applied earlier. I heard
this mortar technique from Jimmy Simmons on
The Scotty Mason Podcast years ago. It’s the
best one I have come across and love sharing it.
You can follow this with thin washes of India ink and isopropyl alcohol. Apply it to the base of the foundation
walls to simulate dirt that has kicked up on the stones. It can also tone down the white mortar is you find them
too bright.
You can change the tone and look
of the stone by using a different
primer base color, like brown,
white, or even black. Change up
the craft paint colors, as well. Try
all gray tones or mix in some red
tones to some of the colors shown
above. It can really change the look
of the stone, simulating stone from
different regions of the world.
Larger sheets of the laser engraved random stone texture, as well as other textures,
are available from Mine Mount Models. Check them out on
www.minemountmodels.com.