A JBoss Developer Studio Hibernate Tutorial · Hibernate Tutorial A JBoss Developer Studio...
44
Hibernate Tutorial A JBoss Developer Studio Hibernate Tutorial by Ben Red Hat Clare
Transcript of A JBoss Developer Studio Hibernate Tutorial · Hibernate Tutorial A JBoss Developer Studio...

Hibernate Tutorial
A JBoss Developer
Studio Hibernate Tutorial
by Ben Red Hat Clare


Draft Draft
iii
Preface ............................................................................................................................. v
1. Document Conventions .......................................................................................... v
1.1. Typographic Conventions ............................................................................ v
1.2. Pull-quote Conventions ............................................................................... vi
1.3. Notes and Warnings .................................................................................. vii
2. We Need Feedback! ............................................................................................ viii
1. Introduction ................................................................................................................. 1
1.1. Tutorial Overview ................................................................................................ 1
1.2. Intended Audience .............................................................................................. 1
2. Maven Integration ........................................................................................................ 3
2.1. Prerequisites ...................................................................................................... 3
2.2. Plugin Installation ................................................................................................ 4
2.2.1. Existing Installations and the Corresponding Plugin Versions ...................... 6
2.2.2. JBoss Developer Studio Welcome Screen ................................................. 7
3. Maven Archetypes and Project Creation ..................................................................... 9
3.1. Maven Project Creation ....................................................................................... 9
3.2. The Default POM .............................................................................................. 12
4. Console Application Development ............................................................................. 15
4.1. The Maven Console .......................................................................................... 15
4.2. Project Configuration ......................................................................................... 15
4.2.1. Editing the Project Name and URL .......................................................... 16
4.2.2. Adding Dependencies ............................................................................. 17
4.3. The Event Class ............................................................................................... 21
4.3.1. Creating the Source Folder ..................................................................... 21
4.3.2. Creating the Class ................................................................................. 21
4.3.3. Configuring Event as a JavaBean ........................................................... 22
4.3.4. The Identifier and Hibernate Persistence ................................................. 23
4.3.5. Event Mapping File ................................................................................ 23
4.4. Hibernate Configuration ..................................................................................... 23
4.4.1. The Configuration File ............................................................................ 23
4.4.2. Session Factory View ............................................................................. 23
4.4.3. Setting Hibernate Properties ................................................................... 23
4.5. The Session Factory Utitlity ............................................................................... 23
4.5.1. Utility Classes ........................................................................................ 24
4.5.2. Packaging Classes ................................................................................. 24
4.5.3. The Session Factory Utitlity Class ........................................................... 24
4.6. The Data Source .............................................................................................. 24
4.6.1. Configuring MySQL ................................................................................ 24
4.6.2. Starting the Server ................................................................................. 24
4.6.3. Testing .................................................................................................. 24
4.6.4. Configuring the Hibernate User ............................................................... 24
4.6.5. Shutting Down the Server ....................................................................... 24
4.7. Working with Events ......................................................................................... 24
4.7.1. Event Manager Class ............................................................................. 24

Hibernate Tutorial Draft
iv
4.7.2. Create and Store Events ........................................................................ 24
4.7.3. Listing Events ........................................................................................ 24
4.8. The Employee Class ......................................................................................... 25
4.8.1. Mapping the Employee Class .................................................................. 25
4.8.2. Create and Store an Employee ............................................................... 25
5. Hibernate Associations and Collections .................................................................... 27
5.1. Unidirectional Associations ................................................................................ 27
5.1.1. Employee/Event ..................................................................................... 27
5.1.2. Mapping the Association ......................................................................... 27
5.1.3. Implementing the Association .................................................................. 27
5.2. Bi-Directional Associations ................................................................................. 27
5.2.1. Defensive Link Management ................................................................... 27
5.2.2. Hibernate Bi-directional Associations ....................................................... 27
5.3. Value Type Collections ...................................................................................... 28
5.3.1. The Email Address Set ........................................................................... 28
5.3.2. The Element Property ............................................................................ 28
5.3.3. The Table Schema ................................................................................. 28
5.3.4. Add an Address to an Employee ............................................................. 28
6. Web Application Development ................................................................................... 29
6.1. Overview .......................................................................................................... 29
6.2. Event Manager Servlet ...................................................................................... 29
6.2.1. Resolve Imports ..................................................................................... 29
6.2.2. Presentation ........................................................................................... 29
6.2.3. Processing ............................................................................................. 29
6.3. The Deployment Descriptor ............................................................................... 29
7. Web Application Deployment .................................................................................... 31
7.1. Setting Up Server Instances .............................................................................. 31
7.2. Server Targeting ............................................................................................... 31
7.3. Deployment and Testing .................................................................................... 31
7.3.1. EAP 4.3.0 .............................................................................................. 31
7.3.2. EAP 5.0.0 .............................................................................................. 31
A. Revision History .......................................................................................................... 33
Index ............................................................................................................................... 35

Draft Draft
v
Preface
1. Document Conventions
This manual uses several conventions to highlight certain words and phrases and draw attention
to specific pieces of information.
In PDF and paper editions, this manual uses typefaces drawn from the Liberation Fonts [https://
fedorahosted.org/liberation-fonts/] set. The Liberation Fonts set is also used in HTML editions if
the set is installed on your system. If not, alternative but equivalent typefaces are displayed. Note:
Red Hat Enterprise Linux 5 and later includes the Liberation Fonts set by default.
1.1. Typographic Conventions
Four typographic conventions are used to call attention to specific words and phrases. These
conventions, and the circumstances they apply to, are as follows.
Mono-spaced Bold
Used to highlight system input, including shell commands, file names and paths. Also used to
highlight keycaps and key combinations. For example:
To see the contents of the file my_next_bestselling_novel in your current
working directory, enter the cat my_next_bestselling_novel command at the
shell prompt and press Enter to execute the command.
The above includes a file name, a shell command and a keycap, all presented in mono-spaced
bold and all distinguishable thanks to context.
Key combinations can be distinguished from keycaps by the hyphen connecting each part of a
key combination. For example:
Press Enter to execute the command.
Press Ctrl+Alt+F1 to switch to the first virtual terminal. Press Ctrl+Alt+F7 to
return to your X-Windows session.
The first paragraph highlights the particular keycap to press. The second highlights two key
combinations (each a set of three keycaps with each set pressed simultaneously).
If source code is discussed, class names, methods, functions, variable names and returned values
mentioned within a paragraph will be presented as above, in mono-spaced bold. For example:
File-related classes include filesystem for file systems, file for files, and dir
for directories. Each class has its own associated set of permissions.
Proportional Bold
This denotes words or phrases encountered on a system, including application names; dialog
box text; labeled buttons; check-box and radio button labels; menu titles and sub-menu titles. For
example:

Preface Draft
vi
Choose System → Preferences → Mouse from the main menu bar to launch
Mouse Preferences. In the Buttons tab, click the Left-handed mouse check
box and click Close to switch the primary mouse button from the left to the right
(making the mouse suitable for use in the left hand).
To insert a special character into a gedit file, choose Applications →
Accessories → Character Map from the main menu bar. Next, choose Search
→ Find from the Character Map menu bar, type the name of the character in the
Search field and click Next. The character you sought will be highlighted in the
Character Table. Double-click this highlighted character to place it in the Text
to copy field and then click the Copy button. Now switch back to your document
and choose Edit → Paste from the gedit menu bar.
The above text includes application names; system-wide menu names and items; application-
specific menu names; and buttons and text found within a GUI interface, all presented in
proportional bold and all distinguishable by context.
Mono-spaced Bold Italic or Proportional Bold Italic
Whether mono-spaced bold or proportional bold, the addition of italics indicates replaceable or
variable text. Italics denotes text you do not input literally or displayed text that changes depending
on circumstance. For example:
To connect to a remote machine using ssh, type ssh [email protected]
at a shell prompt. If the remote machine is example.com and your username on
that machine is john, type ssh [email protected].
The mount -o remount file-system command remounts the named file
system. For example, to remount the /home file system, the command is mount
-o remount /home.
To see the version of a currently installed package, use the rpm -q package
command. It will return a result as follows: package-version-release.
Note the words in bold italics above username, domain.name, file-system, package, version and
release. Each word is a placeholder, either for text you enter when issuing a command or for text
displayed by the system.
Aside from standard usage for presenting the title of a work, italics denotes the first use of a new
and important term. For example:
Publican is a DocBook publishing system.
1.2. Pull-quote Conventions
Terminal output and source code listings are set off visually from the surrounding text.

Draft Notes and Warnings
vii
Output sent to a terminal is set in mono-spaced roman and presented thus:
books Desktop documentation drafts mss photos stuff svn
books_tests Desktop1 downloads images notes scripts svgs
Source-code listings are also set in mono-spaced roman but add syntax highlighting as follows:
package org.jboss.book.jca.ex1;
import javax.naming.InitialContext;
public class ExClient
{
public static void main(String args[])
throws Exception
{
InitialContext iniCtx = new InitialContext();
Object ref = iniCtx.lookup("EchoBean");
EchoHome home = (EchoHome) ref;
Echo echo = home.create();
System.out.println("Created Echo");
System.out.println("Echo.echo('Hello') = " + echo.echo("Hello"));
}
}
1.3. Notes and Warnings
Finally, we use three visual styles to draw attention to information that might otherwise be
overlooked.
Note
Notes are tips, shortcuts or alternative approaches to the task at hand. Ignoring
a note should have no negative consequences, but you might miss out on a trick
that makes your life easier.
Important
Important boxes detail things that are easily missed: configuration changes that
only apply to the current session, or services that need restarting before an update

Preface Draft
viii
will apply. Ignoring a box labeled 'Important' won't cause data loss but may cause
irritation and frustration.
Warning
Warnings should not be ignored. Ignoring warnings will most likely cause data loss.
2. We Need Feedback!
You should over ride this by creating your own local Feedback.xml file.

Chapter 1. Draft
1
Introduction
1.1. Tutorial Overview
This tutorial is an extension of a Hibernate tutorial written by Michael Gloegl. The original tutorial
has been modified to serve as an introduction to application development using JBoss Developer
Studio (JBDS), Maven and Hibernate. The topics covered include:
• JBDS/Maven integration;
• the development of command line applications;
• the development and deployment of web applications;
• database connectivity and table association mapping using hibernate;
• Integrated Development Environment (IDE) development techniques.
By the end of the tutorial the reader will have attained an awareness of the tools available for
the development of web applications, be introduced to some of the features that form a part of
the JBoss Enterprise Application Platform and will be in a position to confidently develop small
scale applications with the aid of JBDS. The resultant application is presented as a single page to
minimise the amount of code required to generate the application and to serve as a brief overview
of web application development using JBDS.
1.2. Intended Audience
This tutorial has been written with the beginning developer in mind, although developers with
experience in Eclipse and Maven may find it useful as a revision exercise and as a single point
of access to further reference material.
It would be beneficial for the reader to have a basic knowledge of Java, Java web development,
relational databases and Structured Query Language (SQL). Links to detailed information are
provided throughout the text and it is recommended that these are read while progressing through
the tutorial.

2

Chapter 2. Draft
3
Maven IntegrationJBoss Developer Studio is configured with the required plugins to enable the development of a
variety of JBoss projects. Projects may also be built using a build tool such as Ant provided that
the required build tool is installed on the user's system.
Given the popularity of Maven amongst developers as a build tool and project management tool,
the following tutorial will be built using Maven and will use the Maven standard web application
archetype as a basis for development.
Maven Reference
A detailed Maven guide is available which serves as both a reference
and an introduction to Maven. Maven: The Definitive Guide is available for
download from http://www.sonatype.com/products/maven/documentation/book-
defguide and included as an M2Eclipse plugin option. It is recommended that
readers with limited exposure to Maven read this guide prior to proceeding with
this tutorial.
2.1. Prerequisites
This tutorial has been configured on the basis of the following installations:
• JBoss Developer Studio 3.0.0
• Java Developer Kit (JDK) 1.6.0_16
• Maven 2.2.1
• Subversion 1.6.4
• MySQL 5.1.41
Installation instructions for each product can be obtained from the following sources:
JBoss Developer Studio
http://www.redhat.com/docs/en-US/JBoss_Developer_Studio/
JDK
http://java.sun.com/javase/downloads/index.jsp
Maven
http://maven.apache.org/
Chapter 2. Maven Integration Draft
4
Subversion
http://subversion.tigris.org/
MySQL
http://dev.mysql.com/doc/
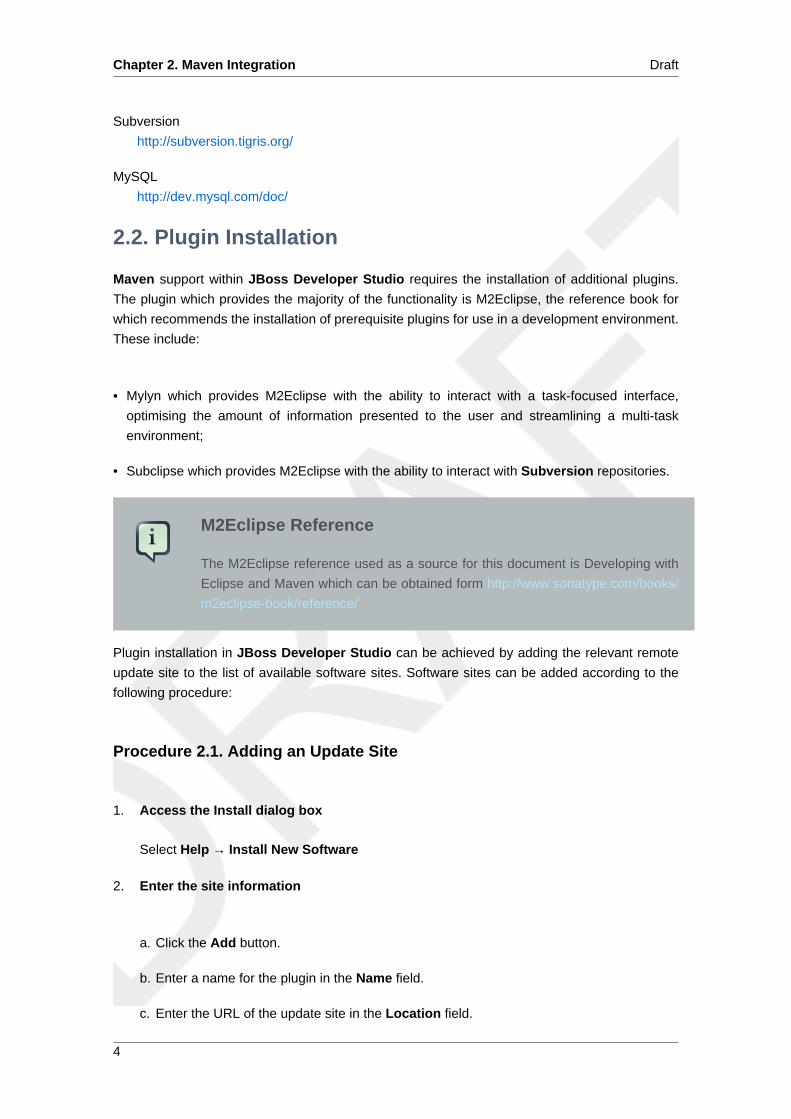
2.2. Plugin Installation
Maven support within JBoss Developer Studio requires the installation of additional plugins.
The plugin which provides the majority of the functionality is M2Eclipse, the reference book for
which recommends the installation of prerequisite plugins for use in a development environment.
These include:
• Mylyn which provides M2Eclipse with the ability to interact with a task-focused interface,
optimising the amount of information presented to the user and streamlining a multi-task
environment;
• Subclipse which provides M2Eclipse with the ability to interact with Subversion repositories.
M2Eclipse Reference
The M2Eclipse reference used as a source for this document is Developing with
Eclipse and Maven which can be obtained form http://www.sonatype.com/books/
m2eclipse-book/reference/
Plugin installation in JBoss Developer Studio can be achieved by adding the relevant remote
update site to the list of available software sites. Software sites can be added according to the
following procedure:
Procedure 2.1. Adding an Update Site
1. Access the Install dialog box
Select Help → Install New Software
2. Enter the site information
a. Click the Add button.
b. Enter a name for the plugin in the Name field.
c. Enter the URL of the update site in the Location field.

Draft Plugin Installation
5
3. Add the site
Once the entered details have been verified, click the OK button to begin the installation.
The plugin details are retrieved by JBoss Developer Studio and the available plugins will
be displayed in the main window of the Install dialog box including any Optional plugins.
4. Select the plugins
a. Choose the required plugins and any Optional plugins listed by clicking the relevant
checkboxes. Sub-items can be selected or deselected as required.
b. Click the Next button.
5. Review the plugins
a. The plugins to be installed will be displayed.
b. Choose the Next button to continue the installation or the Back button to revise the
selection.
6. Review the licenses
a. Read the license information presented on the screen and agree to the terms of the licence
by clicking on the I accept radio button.
b. Choose the Finish button to complete the installation or the Back button to revise the
selection.
7. Note any security warnings
a. Read the security warning. Click the Details button to obtain further details if required.
b. Once satisfied that the software is safe to install, click the OK button to accept the
installation.
8. Restart JBoss Developer Studio
When prompted, it is recommended to restart JBoss Developer Studio by clicking the Yes
button.
Unsigned Software
The installation of plugins often involves unsigned content for which the validity
of the software cannot be established. There are risks associated with the use of
unsigned software and it is recommended that users acquaint themselves with the
risks prior to finalising the installation.

Chapter 2. Maven Integration Draft
6
2.2.1. Existing Installations and the Corresponding Plugin
Versions
It is important to obtain the correct plugin version corresponding to the installed version of Eclipse,
upon which JBoss Developer Studio is based, and the installed versions of any supporting
software such as Subversion.
2.2.1.1. Eclipse Version
The Eclipse version can be obtained by the following procedure:
Procedure 2.2. Obtaining the Eclipse version
1. Access the Installation Details dialog
a. Select Help → About JBoss Developer Studio
b. Click the Installation Details button.
2. Obtain the feature details
a. Click the Features tab.
b. Under the Provider column, scroll to the eclipse.org entries.
c. Select the row corresponding to Eclipse Platform under the Feature Name column.
The Eclipse version is displayed under the Version column of the table or in the main display
area of the Installation Details dialog.
2.2.1.2. Supporting Software Versions
Determining the version number of the majority of applications such as Subversion or Maven can
be achieved by typing svn --version or mvn --version at a command prompt. Although not
required for determining plugin versions, the Java installation version can be obtained by typing
java -version.
2.2.1.3. Determining the Correct Update Sites
Once the correct version numbers have been established for Eclipse and Subversion, details
regarding the correct plugin version can be obtained from the relevant plugin project site. In this
instance, those sites are:
Mylyn
http://www.eclipse.org/mylyn/

Draft JBoss Developer Studio Welcome Screen
7
Subclipse
http://subclipse.tigris.org/
M2Eclipse
http://m2eclipse.sonatype.org/
2.2.1.4. Resultant Update Site URLs
The procedure listed in Adding an Update Site would be completed for each required plugin.
Based on plugin installations for Subversion 1.6.4 and JBoss Developer Studio 3.0.0 - which
uses the Eclipse 3.5.1 IDE - the correct update site URLs to be entered in Step 2 of Adding an
Update Site are:
Mylyn
http://download.eclipse.org/tools/mylyn/update/e3.4
Subclipse
http://subclipse.tigris.org/update_1.6.x
M2Eclipse
http://m2eclipse.sonatype.org/update-dev or http://m2eclipse.sonatype.org/
update
Potential Plugin Errors
The update site used for M2Eclipse was the development build http://
m2eclipse.sonatype.org/update-dev due to errors returned when creating a Maven
webapp archetype project following the installation of release build plugins. The
release build update site, http://m2eclipse.sonatype.org/update/, may be suitable
once the development updates have been incorporated into the release build.
2.2.2. JBoss Developer Studio Welcome Screen
Following the initial installation of JBoss Developer Studio and the installation of some plugins,
the user will be presented with the Overview page of the Welcome screen page set. This page
provides links to information pertaining to the use of JBoss Developer Studio and additional web
resources. Closing the Welcome page or clicking on the Workbench icon takes the user to the
JBoss Developer Studio Workbench. Once closed, the Welcome screen can be accessed from
within the JBoss Developer Studio Workbench by selecting Help → Welcome.
Once the required plugins have been installed and JBoss Developer Studio has been restarted,
a new project can be created from the Workbench. Close the Welcome screen or click the
Workbench icon to begin the tutorial.

8

Chapter 3. Draft
9
Maven Archetypes and Project
CreationThe Maven Archetype plugin can be used to create a default project as a foundation for a new
application. We will create a project based on the Maven simple web app archetype and add the
source folders required to develop the application.
3.1. Maven Project Creation
Once the Welcome screen has been closed, a new project can be created from the Workbench.
The available projects types will be dependant on the installed plugins. The procedure to create
a Maven project is as follows:
Procedure 3.1. Creating a Maven Project
1. Access the New Project dialog
Select File → New → Project.
2. Access the New Maven Project dialog
a. Select Maven from the New Project dialog.
b. Select Maven Project from the expanded list of project types.
3. Accept the default project name and location
From the New Maven Project dialog, click the Next button, accepting the defaults. Note that
the Creat a simple project checkbox is not selected as an archetype will be selected from
the next screen.
4. Select an Archetype
The user will be presented with a variety of project archetypes to select from based on the
Catalog selected. The Catalog defaults to Nexus Indexer in this instance.
Maven Archetypes and Indexer Catalogs
Refer to http://www.sonatype.com/products/maven/documentation/book-
defguide and http://www.sonatype.com/books/m2eclipse-book/reference/ for
details regarding Maven archetypes, the Nexus Indexer and the use of indexer
catalogs.

Chapter 3. Maven Archetypes a... Draft
10
a. Navigate to the row corresponding to a GroupId of org.apache.maven.archetypes, an
ArtifactId of maven-archetype-webbapp and a corresponding Version of 1.0.
b. Click the Next button to procced.
Indexer Download
The display of the available archetypes may take some time as they are
generated by the downloaded Nexus Indexer file. The Updating indexes
progress will be displayed in the message bar at the bottom right of the display.
Once the download is complete, it may be necessary to click the Back button
followed by the Next button to reload the file.
5. Define the Maven coordinates
Maven identifies a particular project and its relation to other projects by its coordinates. Maven
coordinates are defined by the set comprised of the groupId, artifactId, packaging and version.
a. Enter the GroupId and ArtifactId as org.hibernate.tutorials and hibernate-tutorial
respectively.
b. Edit the Version number to 1.0.0-SNAPSHOT. The Package field will auto-complete based
on a combination of the GroupId and the ArtificatId.
c. Click the Next button to proceed.
Maven Coordinate Packaging
The Packaging which constitutes a part of the project coordinates will default to
war in this instance as a webapp archetype was selected. The auto-completed
Package refers to the GroupId-ArtifactId combination.
6. Review the project
Following a brief configuration period, a default project will be created according to the
structure depicted in Figure 3.1, “JBoss Developer Studio Maven Webapp Project ”

Draft Maven Project Creation
11
Figure 3.1. JBoss Developer Studio Maven Webapp Project
RE-READ AND CHECK THE FOLLOWING:
The points to note in regard to the project structure include:

Chapter 3. Maven Archetypes a... Draft
12
• The src/main/resources folders collectively form a package which will house the project
resources such as hibernate configuration files. Further packages will be created to accomodate
java source files including the main servlet.
• The webapp folder or deployment directory, accessible by clicking the src+main folders
respectively contains the WEB-INF and META-INF folders. Once the project is completed this
directory will be packaged into the war file which can then be deployed to the server. For web
applications, html and jsp files are placed in the webbapp folder of the application. Similarly,
style sheets (css files) would be dropped in the webbapp folder or in a subdirectory created
by the user.
• The WEB-INF directory contains the web.xml file and lib directory. The web.xml file specifies
the configuration and deployment information for the web components of the project. The
lib directory contains the additional jar libraries required by the application which are not
packaged with the targeted server.
• The META-INF directory contains the meta information describing the contents of any
packaged archives (jar or war files). The default content is the MANIFEST.MF file describing
files contained within the web archive (war file).
• Information about the project is contained within the Project Object Model POM. The pom.xml
file specifies the project coordinates, configures plugins and declares the project dependencies.
Maven executes against an effective pom.xml comprising the defined POM, any parent POM,
a super POM and any user-defined settings.
Later in the tutorial, the pom.xml file will be modified to specify further dependencies. The web.xml
will be modified to specify the web application url. A styles.css file will be produced to render
the styles for the application.
Command Line Project Generation
A new Maven project can be created by using the Maven Archetype plugin
and specifying the generate goal from the command line. This is achieved by
following the plugin:goal syntax. For example, a webapp can be created by
entering mvn archetype:generate at the command line and selecting archetype #18
when prompted. See http://www.sonatype.com/products/maven/documentation/
book-defguide for more details.
3.2. The Default POM
Example 3.1. The Default POM
<project xmlns="http://maven.apache.org/POM/4.0.0"

Draft The Default POM
13
xmlns:xsi="http://www.w3.org/2001/XMLSchema-instance"
xsi:schemaLocation="http://maven.apache.org/POM/4.0.0
http://maven.apache.org/maven-v4_0_0.xsd">
<modelVersion>4.0.0</modelVersion>
<groupId>org.hibernate.tutorials</groupId>
<artifactId>hibernate-tutorial</artifactId>
<packaging>war</packaging>
<version>1.0.0-SNAPSHOT</version>
<name>hibernate-tutorial Maven Webapp</name>
<url>http://maven.apache.org</url>
<dependencies>
<dependency>
<groupId>junit</groupId>
<artifactId>junit</artifactId>
<version>3.8.1</version>
<scope>test</scope>
</dependency>
</dependencies>
<build>
<finalName>hibernate-tutorial</finalName>
</build>
</project>
The default pom.xml file declares the following elements:
<project>
this is the top-level element declared in all Maven pom.xml files;
<modelVersion>
the object model version used by the POM;
<groupid>, <artifactId>, <packaging>, <version>
the Maven coordinates used to identify the project;
<name>
the display name used for the project;
<url>
a url associating the project with a web site;
<dependencies>
the list of dependencies, which currently consists of a single dependency;
<build>
the build configuration, which currently declares the final name for the project. This can include
declarations to target a specific JDK for the Maven Compiler plugin or to instruct Maven to
continue with a build in the event of test failures.

Chapter 3. Maven Archetypes a... Draft
14
Junit
JUnit is a testing framework which provides functionality to test the classes that
comprise a project. It is used in Test Driven Development and can be used to
highlight redundencies resulting from project modifications. The JUnit web site is
located at http://www.junit.org/.

Chapter 4. Draft
15
Console Application DevelopmentThe application will initially be developed as a command line application with output displayed to
the Maven console to list the results of database actions and monitor errors. The main class will
then be modified to produce the EventManager servlet.
4.1. The Maven Console
Maven builds projects according to a "build lifecycle". The default Maven lifecycle supports
building a project from an initial project validation, through compilation, testing and ending in the
deployment of the final build. The user has the option to define a particular lifecycle which will
result in a build of the project up to the defined lifecycle phase. Each phase within the build lifecycle
may be associated with one or more plugin goals.
When run from a command prompt, information pertaining to each phase of the build is output
to the terminal. The information displayed includes downloads from the Maven repository and
compilation errors.
JBoss Developer Studio enables the user to display a number of views in the Views Panel. The
Console view displays output equivalent to that displayed to the terminal when executing Maven
from a command prompt. The Console can be displayed according to the following procedure:
Procedure 4.1. Displaying the Console View
1. Access the Show View dialog
Select Window → ShowView → Other
2. Select the Console View
a. Double-click the General folder
b. Click the Console icon.
c. Click the OK button.
The Console view will be displayed in the View Panel situated at the bottom of screen.
4.2. Project Configuration
Following a review of the project, the pom.xml file can be edited to include the required
dependencies. To edit, expand the project in the PackageExplorer panel as depicted in
Figure 3.1, “JBoss Developer Studio Maven Webapp Project ” and double click on the pom.xml
file. The user is presented with the interface as shown in Figure 4.1, “POM Overview Form”

Chapter 4. Console Applicatio... Draft
16
Figure 4.1. POM Overview Form
The user has the option to edit the pom.xml file using the Overview and Dependencies forms,
accessed by clicking on the appropriate tab, or by editing the pom.xml file directly. The pom.xml
tab can be accessed by clicking the >><num>+Show List icon.
The procedures presented in the following sections outline the steps involved in configuring the
project following the initial setup:
4.2.1. Editing the Project Name and URL
The name of the project and the web site that the project is associated with can be edited as in
Edit the Project Name and URL:
Procedure 4.2. Edit the Project Name and URL
1. Edit the details in the Overview form
a. Click on the Overview tab.
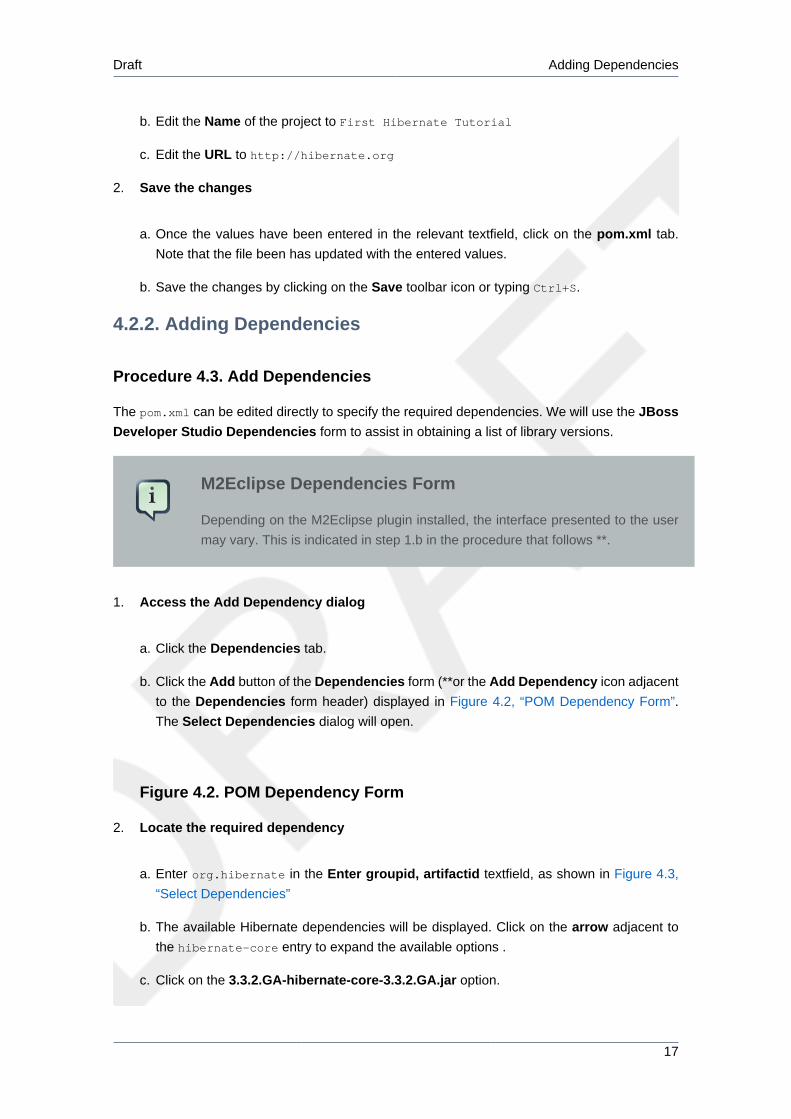
Draft Adding Dependencies
17
b. Edit the Name of the project to First Hibernate Tutorial
c. Edit the URL to http://hibernate.org
2. Save the changes
a. Once the values have been entered in the relevant textfield, click on the pom.xml tab.
Note that the file been has updated with the entered values.
b. Save the changes by clicking on the Save toolbar icon or typing Ctrl+S.
4.2.2. Adding Dependencies
Procedure 4.3. Add Dependencies
The pom.xml can be edited directly to specify the required dependencies. We will use the JBoss
Developer Studio Dependencies form to assist in obtaining a list of library versions.
M2Eclipse Dependencies Form
Depending on the M2Eclipse plugin installed, the interface presented to the user
may vary. This is indicated in step 1.b in the procedure that follows **.
1. Access the Add Dependency dialog
a. Click the Dependencies tab.
b. Click the Add button of the Dependencies form (**or the Add Dependency icon adjacent
to the Dependencies form header) displayed in Figure 4.2, “POM Dependency Form”.
The Select Dependencies dialog will open.
Figure 4.2. POM Dependency Form
2. Locate the required dependency
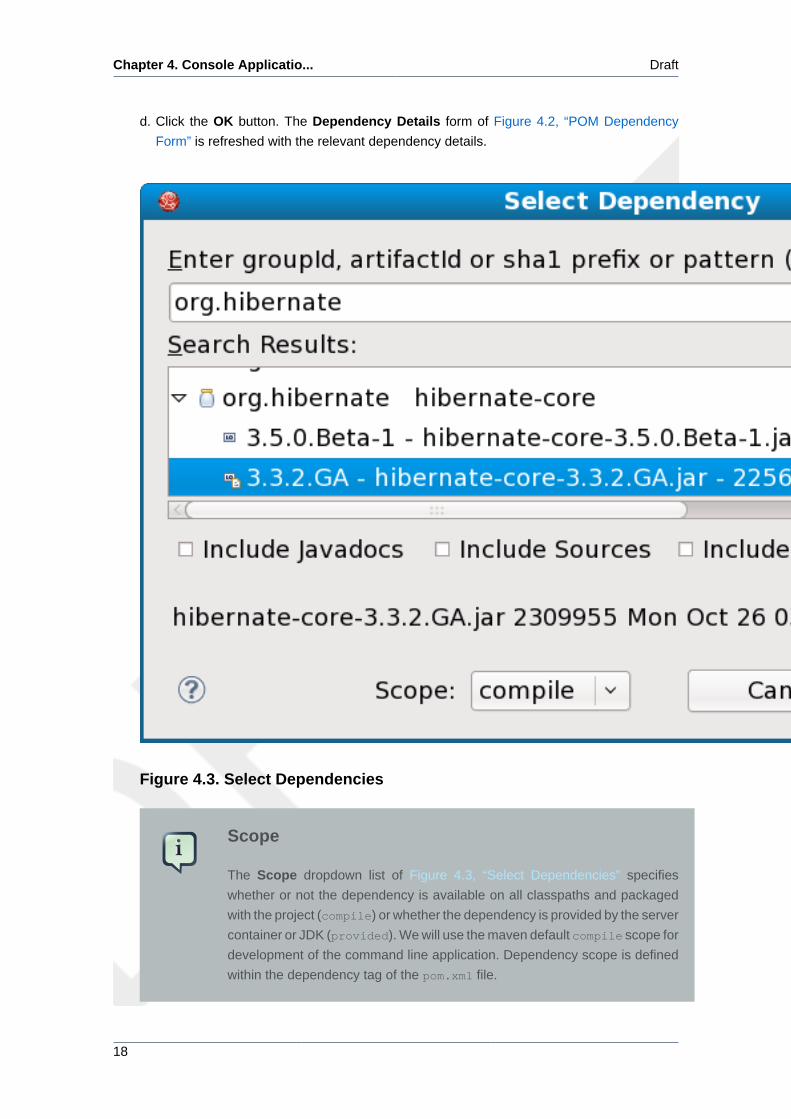
a. Enter org.hibernate in the Enter groupid, artifactid textfield, as shown in Figure 4.3,
“Select Dependencies”
b. The available Hibernate dependencies will be displayed. Click on the arrow adjacent to
the hibernate-core entry to expand the available options .
c. Click on the 3.3.2.GA-hibernate-core-3.3.2.GA.jar option.
Chapter 4. Console Applicatio... Draft
18
d. Click the OK button. The Dependency Details form of Figure 4.2, “POM Dependency
Form” is refreshed with the relevant dependency details.
Figure 4.3. Select Dependencies
Scope
The Scope dropdown list of Figure 4.3, “Select Dependencies” specifies
whether or not the dependency is available on all classpaths and packaged
with the project (compile) or whether the dependency is provided by the server
container or JDK (provided). We will use the maven default compile scope for
development of the command line application. Dependency scope is defined
within the dependency tag of the pom.xml file.

Draft Adding Dependencies
19
3. Save the changes
Save the project as in the Edit the Project Name and URL procedure above and inspect the
updated pom.xml file.
4. View the dependency graph
The hibernate-core-3.3.2.GA.jar is dependant on further library files. Click on the
Dependency Graph tab to display a graphic which traces the dependency hierarchy as
shown in Figure 4.4, “JBoss Developer Studio Maven Webapp Project ”

Chapter 4. Console Applicatio... Draft
20
Figure 4.4. JBoss Developer Studio Maven Webapp Project
These libraries are also listed under Maven Dependencies in the Package Explorer

Draft The Event Class
21
4.3. The Event Class
This section introduces the Event class. Employees will attend Events which, in the context of
this tutorial, could be training courses, inductions, workshops or meetings. The class will be set
up in JBoss Developer Studio and the available tools and forms will be used to configure the
class and associated mapping files.
4.3.1. Creating the Source Folder
Maven adopts a "convention over configuration" approach to projects in that source code,
resources, tests and distributable archives are located in pre-defined directories. This elimates
the need to configure the project and tell the compiler where to find and store the project files.
The maven Web-app project archetype is configured with a src/main/resources folder which
is used to store project resources such as the hibernate configuration file. Under the Maven
convention, source code (*.java) is located in src/main/java by default. Prior to creating the
Event.java class, create the source folder according to the following procedure:
Procedure 4.4. Creating a Source Folder
1. Access the New Source Folder dialog
a. Right click the project from the Package Explorer View.
b. Select New → Source Folder
2. Enter the Path
a. Enter src/main/java in the Folder textfield of the New Source Folder dialog.
b. Click the Finish button. The Package Explorer will display the src/main/java folder under
the hiberante-tutorial project name.
4.3.2. Creating the Class
Once the source folder is created, create the Events class:
Procedure 4.5. Creating a Class
1. Access the New Java Class dialog
a. Right click the source folder from the Package Explorer View.

Chapter 4. Console Applicatio... Draft
22
b. Select New → Class
2. Enter the Package and class Name
Java source files begin with a "package package_Name;" declaration identifying the source
file with a particular package. This is useful to avoid namespace clashes and to define the
scope of accessibility for classes within the same or different packages.
a. Enter org.hibernate.tutorial.domain in the Package textfield of the New Java Class
dialog.
b. Enter Event in the Name textfield of the New Java Class dialog.
3. Create and inspect the class
Click the Finish button. The org.hibernate.tutorial.domain package will be displayed in the
Package Explorer. The Event.java class will be displayed under this package and will be
opened in the Editor panel ready to be modified.
4.3.3. Configuring Event as a JavaBean
The Event.java class will be structured according to the JavaBean convention. This type of class
includes private member variables and public getters and setters which are used as an interface
to the private members. This results in the ability to maintain a consistent interface while permitting
changes in the underlying data structure.
Private Member Variables.
Procedure 4.6. Adding Private Member Variables
1. Enter the id, title and date
Enter the following in the Event.java class"
private Long id;
private String title;
private Date date;
2. Import Required Classes
Using an IDE such as JBoss Developer Studio provides the user with the ability to obtain
contextual help. Once the "private Date date;" member is declared, the IDE editor will
highlight this line as containing an error (x) and underline the affecting type declaration. In
this instance, the relevant Date class has not been declared in a import class_Name;
declaration.

Draft The Identifier and Hibernate Persistence
23
a. Position the mouse pointer over the underlined Date type declaration. A number of options
are presented to the user in the form of a list.
b. Click on Import 'Date' (java.util). The required import declaration is generated by the
editor. The Date class, which forms part of the java.util package, will be imported when
the project is compiled.
Member Variable Access - Set and Get.
• Generate the Getters and Setters
Right clicking on the editor panel reveals an extensive menu.
a. Select Source → Generate Getters and Setters
b. Expand the date, id and title options by clicking on the arrow next to each label.
c. The getMethod() and setMethod() accessor methods may be selected for each private
member variable. Select all six methods by clicking on the appropriate checkboxes.
d. The Access Modifier section of the dialog will default to public. Click the OK button to
generate the methods.
The Zero Argument Constructor.
4.3.4. The Identifier and Hibernate Persistence
Edit the setId() modifier Speel here about persistence.................
4.3.5. Event Mapping File
The Event Mapping File
4.4. Hibernate Configuration
4.4.1. The Configuration File
4.4.2. Session Factory View
4.4.3. Setting Hibernate Properties
4.5. The Session Factory Utitlity

Chapter 4. Console Applicatio... Draft
24
4.5.1. Utility Classes
4.5.2. Packaging Classes
4.5.3. The Session Factory Utitlity Class
4.6. The Data Source
4.6.1. Configuring MySQL
4.6.2. Starting the Server
4.6.3. Testing
4.6.4. Configuring the Hibernate User
4.6.5. Shutting Down the Server
4.7. Working with Events
4.7.1. Event Manager Class
4.7.2. Create and Store Events
4.7.2.1. Maven Run Configuration
4.7.2.2. Console Output
4.7.3. Listing Events
4.7.3.1. Maven Run Configuration
4.7.3.2. Console Output

Draft The Employee Class
25
4.8. The Employee Class
4.8.1. Mapping the Employee Class
4.8.2. Create and Store an Employee

26

Chapter 5. Draft
27
Hibernate Associations and
CollectionsThis is a test paragraph
5.1. Unidirectional Associations
This is a test paragraph in a section
5.1.1. Employee/Event
This is a test paragraph in a section
5.1.2. Mapping the Association
This is a test paragraph in a section
5.1.3. Implementing the Association
This is a test paragraph in Section 2
5.2. Bi-Directional Associations
5.2.1. Defensive Link Management
5.2.1.1. The Event Side
5.2.1.2. The Employee Side
5.2.1.3. Working the Link
5.2.2. Hibernate Bi-directional Associations
5.2.2.1. The Inverse Attribute
5.2.2.2. List Event Participants
5.2.2.3. List Employee Events

Chapter 5. Hibernate Associat... Draft
28
5.3. Value Type Collections
5.3.1. The Email Address Set
5.3.2. The Element Property
5.3.3. The Table Schema
5.3.4. Add an Address to an Employee
Chapter 6. Draft
29
Web Application DevelopmentThis is a test paragraph
6.1. Overview
This is a test paragraph in a section
6.2. Event Manager Servlet
This is a test paragraph in a section
6.2.1. Resolve Imports
This is a test paragraph in a section
6.2.2. Presentation
This is a test paragraph in a section
6.2.2.1. Styles
This is a test paragraph in a section
6.2.3. Processing
This is a test paragraph in a section
6.3. The Deployment Descriptor

30

Chapter 7. Draft
31
Web Application DeploymentThis is a test paragraph
7.1. Setting Up Server Instances
This is a test paragraph in a section
7.2. Server Targeting
This is a test paragraph in a section
7.3. Deployment and Testing
This is a test paragraph in a section
7.3.1. EAP 4.3.0
This is a test paragraph in a section
7.3.2. EAP 5.0.0
This is a test paragraph in a section

32

Draft Draft
33
Appendix A. Revision HistoryRevision History
Revision 0 Mon Feb 01 2010 BenClare<[email protected]>
Generation of material relating to Maven configuration and initial project set up.

34

Draft Draft
35
IndexFfeedback
contact information for this manual, viii

36