pediatrics.wustl.edu › ... › WUPS-User-Guide.docx...667 · Web view Faculty Achievement Tool -...
26
WUPS User Guide Page 1
Transcript of pediatrics.wustl.edu › ... › WUPS-User-Guide.docx...667 · Web view Faculty Achievement Tool -...

WUPS User Guide Page 1

WELCOMEThe Washington University Profile System (WUPS) is a web-based application for managing faculty information. This information will be used for Curriculum Vitae, Faculty Pages, Lab Pages, Biosketches, and Clinician Education Portfolios (CEP). This first release is focused on CV information, Faculty Pages and Lab Pages. Future releases will address Biosketches and CEP information.
New UsersFor employees that are not in the profile system, please have your administrator submit an Account Request for WUPS access.
Accessing WUPSThe application can be accessed through Citrix or directly through your web browser. The web address (URL) is https://WUPS.wustl.edu/
You will need to enter your Windows username, password and domain to access the application.
WUPS User Guide Page 2

Role Based Access
FacultyFaculty users will be immediately taken to their profile page and can grant or remove access to other personnel to manage their profile.
To Grant Access
Click the gear icon in the upper right portion of the screen. Click Security in the settings module. Enter the username that you would like to give access. Click Grant Permission next to the user’s name. Optionally close the security window by clicking the Close Button at the bottom of the panel). Click the Profile Name at the top of the page to return to the profile page.
To Remove Access Click the gear icon in the upper right portion of the screen. Click Security in the settings module. Make sure the Security tab is selected. Under Current Editors, Click Remove Permission next to the users name. Optionally close the security window by clicking the Close Button at the bottom of the panel). Click the Profile Name at the top of the page to return to the profile page.
AdministratorsAdministrators will be immediately taken to the most recently used profile page and can update profiles that have been delegated by the faculty or their delegate(s).
To manage faculty profile Click the People icon in the upper right portion of the screen. Select the faculty member from the list of faculty you have been given access to. Optionally close the people window (Click the Close Button at the bottom of the panel).
Helpful Tips
Paste - Click Ctrl + V Copy – Click Ctrl + C To get back to profile section from themes, click the name heading next to the image. Session times out after 20 minutes
Editing Profile dataUsers can access each section of the application by clicking on the appropriate profile data section located on the left hand side of the screen. The following areas on this document outline instructions for accessing and updating the data for each section.
WUPS User Guide Page 3
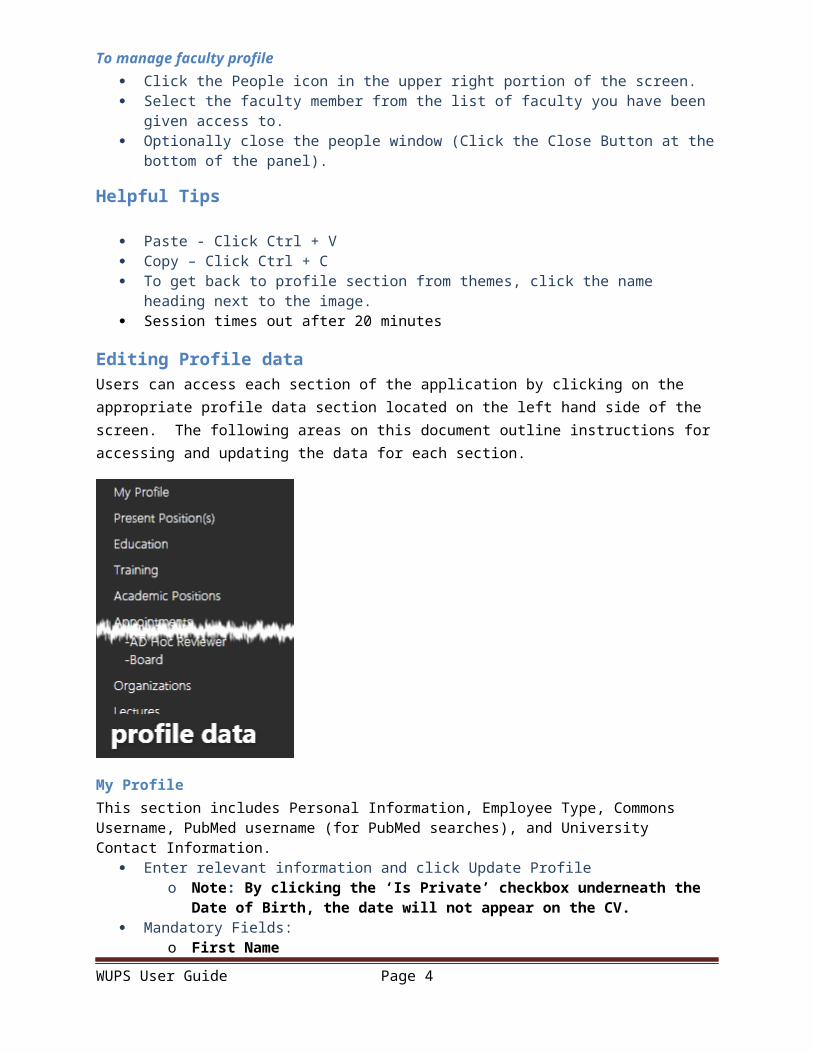
My Profile This section includes Personal Information, Employee Type, Commons Username, PubMed username (for PubMed searches), and University Contact Information.
Enter relevant information and click Update Profileo Note: By clicking the ‘Is Private’ checkbox underneath the Date of Birth, the date will
not appear on the CV. Mandatory Fields:
o First Nameo Last Nameo Employee Type
Present Position(s)The present position is entered in the Academic Positions section (see Academic Positions on page 8). Enter any past or present academic or teaching positions in this module.
EducationEnter any degrees earned in this module. This section will appear in Education and Training on the CV.
WUPS User Guide Page 4

Add an Education item Click the Add Education button. The Add/Edit Education screen will appear. Enter relevant information and click Save. Mandatory Fields:
o Degreeo Institutiono Date Graduated
Edit an Education item Click the Edit button next to the list item that you want to update. The Add/Edit Education screen will appear. Enter relevant information and click Save.
Remove an Education item Click the Remove button next to the education item on the list.
Copy an Education item Click the Copy button next to the item The Add/Edit Education screen will appear. The institution name will be copied to the screen. Modify fields as needed and Click Save.
TrainingEnter any residency or training received in this module. The training section will appear in Education and Training on the CV.
Add a Training item Click the Add Training button. The Add/Edit Training screen will appear Enter relevant information and click Save.
o If you’re currently in this training, leave the ‘Ended’ date blank and click the show ‘Pres’ on CV checkbox.
WUPS User Guide Page 5

Mandatory Field:o Title/Description
Edit a Training item Click the Edit button next to the list item that you want to update. The Add/Edit Training screen will appear. Enter relevant information and click Save.
o If you’re currently in this training, leave the ‘Ended’ date blank and click the show ‘Pres’ on CV checkbox.
Remove a Training item
Click the Remove button next to the training item on the list.
Copy a Training item Click the Copy button next to the Training item to copy. The Add/Edit Training screen will appear. The Institution and Location will be copied. Modify fields as needed and Click Save.
Academic Positions Enter any present position(s) and previous academic positions in this module. These positions will appear in the Academic Positions and Employment sections on the CV.
Add an Academic Position Click the Add Academic Position button. The Add/Edit Academic Position screen will appear. Enter relevant information and click Save.
o Clicking the Current Position checkbox sets that position as the Present Positiono If you’re currently in this position, leave the ‘To’ date blank and click the show ‘Pres’
on CV checkbox.o As a shortcut, click the Wash U link to automatically populate the Institution, City, and
State/Country. Mandatory Field:
o Position Title
Edit an Academic Position Click the Edit button next to the list item that you want to update. The Add/Edit Academic Position screen will appear. Enter relevant information and click Save.
o Clicking the Current Position checkbox sets that position as the Present Position
WUPS User Guide Page 6

o If you’re currently in this position, leave the ‘To’ date blank and click the show ‘Pres’ on CV checkbox.
o As a shortcut, click the Wash U link to automatically populate the Institution, City, and State/Country.
Remove an Academic Position Click the Remove button next to the academic position item on the list.
Copy an Academic Position Click the Copy button next to the position item to copy. The Add/Edit Academic Position screen will appear. All data will be copied except the Position Title. Enter the New Position Title, modify other fields as needed and Click Save.
AppointmentsUse this section to enter any of the following 4 appointment types (National, Study Section, Local, University, Hospital, and Scientific Advisory Board). These subheadings will appear under the Appointments and Committees heading on the CV.
Add an Appointment Click the appropriate section button (Hospital, University, NIH Study Section or Scientific
Advisory Board). Click the Add button for the section The Add/Edit screen will appear. Enter relevant information and click Save.
o If the appointment has not ended, leave the ‘Appointment End Date’ blank and click the show ‘Pres’ on CV checkbox.
Mandatory Field:o Appointment Name
Edit an Appointment Click the Edit button next to the list item that you want to update. The Add/Edit screen will appear. Enter relevant information and click Save.
o If the appointment has not ended, leave the ‘Appointment End Date’ blank and click the show ‘Pres’ on CV checkbox.
WUPS User Guide Page 7

Remove an Appointment Click the Remove button next to the appointment item on the list.
CommitteesUse this section to enter any of the following 2 committee types (Thesis, Scholarship Oversight). These subheadings will appear under the Appointments and Committees heading on the CV.
Add a Committee Click the appropriate section button (Thesis, Scholarship Oversight). Click the Add Thesis/SOC button. The Add/Edit Thesis and Scholarship Oversight Committees screen will appear. Enter relevant information and click Save.
o If you’re currently in this committee, leave the ‘End Date’ blank and click the show ‘Pres’ on CV checkbox.
Mandatory Fields:o Student/Fellow nameo Advisor’s name
Edit a Committee Click the appropriate section button (Thesis, Scholarship Oversight). Click the Edit button next to the list item that you want to update. The Add/Edit Thesis and Scholarship Oversight Committees screen will appear. Enter relevant information and click Save.
o If you’re currently in this committee, leave the ‘End Date’ blank and click the show ‘Pres’ on CV checkbox.
Remove a Committee Click the Remove button next to the committee item on the list.
CertificationsUse this section to enter any of the following 3 certification types (Board, License, and Certification). These subheadings will appear under the Licensure and Certifications heading on the CV.
WUPS User Guide Page 8

Add a Certification Click the appropriate section button (Board, License, or Certification). Click the Add button for the section. The Add/Edit screen will appear. Enter relevant information and click Save.
o If the certification has not expired, leave the ‘Expires On’ blank and click the show ‘Pres’ on CV checkbox.
Edit a Certification Click the appropriate section button (Boards, Licenses, or Certifications). Click the Edit button next to the list item that you want to update. The Add/Edit screen will appear. Enter relevant information and click Save.
o If the certification has not expired, leave the ‘Expires On’ blank and click the show ‘Pres’ on CV checkbox.
Remove a Certification Click the Remove button next to the certification item on the list.
Military ServiceEnter any military service commitments in this module. This item will appear in the military service heading in the CV.
Add a Military Service item
Click the Add Military Service button. The Add/Edit Military Service screen will appear. Enter relevant information and click Save.
o If the service item has not ended, leave the ‘Ending’ date blank and click the show ‘Pres’ on CV checkbox.
Mandatory Field:o Rank
Edit a Military Service item Click the Edit button next to the list item that you want to update. The Add/Edit Military Service screen will appear. Enter relevant information and click Save.
o If the service item has not ended, leave the ‘Ending’ blank and click the show ‘Pres’ on CV checkbox.
WUPS User Guide Page 9

Remove a Military Service item Click the Remove button next to the military service item on the list.
HonorsEnter any honors or awards in this module. This item will appear under the Honors and Awards section in the CV.
Add a Honors and Awards item Click the Add An Honor button The Add/Edit Honor screen will appear. Enter relevant information and click Save.
o If this item is ongoing, leave the ‘Continuous through’ date blank and click the show ‘Pres’ on CV checkbox.
Mandatory Field:o Honor Title
Edit a Honors and Awards item Click the Edit button next to the list item that you want to update. The Add/Edit Honor screen will appear. Enter relevant information and click Save.
o If this item is ongoing, leave the ‘Continuous through’ blank and click the show ‘Pres’ on CV checkbox.
Remove a Honors and Awards item Click the Remove button to remove the Honor and Award from the list.
Copy a Honors and Awards item Click the Copy button next to the Honors and Awards item. The Add/Edit Honor screen will appear. The Honor Title will by copied. Modify fields as needed and Click Save.
PatentsEnter any patents in this module. This item will appear under the Patents section in the CV.
WUPS User Guide Page 10

Add a Patent item Click the Add Patent button The Add/Edit Patent screen will appear. Enter relevant information and click Save. Mandatory Field:
o Patent Title
Edit a Patent item Click the Edit button next to the list item that you want to update. The Add/Edit Patent screen will appear. Enter relevant information and click Save.
Remove a Patent item Click the Remove button to remove the Patent from the list.
EditorialsUse this section to enter any of the following 3 editorial responsibilities (Reviewer, Ad Hoc Reviewer, and Board sections). These subheadings will appear under the Editorial Responsibilities heading on the CV.
Add Editorial Responsibilities item Click the appropriate section button (Reviewer, Ad Hoc Reviewer, Board). Click the Add button. The Add/Edit screen will appear. Enter relevant information and click Save.
o If the item is ongoing, leave the ‘End Date’ blank and click the show ‘Pres’ on CV checkbox.
Mandatory Field:o Periodical Name
WUPS User Guide Page 11

Edit Editorial Responsibilities item Click the appropriate section button (Reviewer, Ad Hoc Reviewer, Board). Click the Edit button next to the list item that you want to update. The Add/Edit screen will appear. Enter relevant information and click Save.
o If the item is ongoing, leave the ‘End Date’ blank and click the show ‘Pres’ on CV checkbox.
Remove Editorial Responsibilities item Click the Remove button to remove the Editorial Responsibility from the list.
OrganizationsUse this section to enter any societies or organizations. These items will be placed in the Professional Societies and Organizations section in the CV.
Add Organization item Click the Add Organization button. The Add/Edit Organizations screen will appear. Enter relevant information and click Save.
o If the affiliation continues, leave the ‘Ending Date’ blank and click the show ‘Pres’ on CV checkbox.
Mandatory Field:o Organization Name
Edit Organization item Click the Edit button next to the list item that you want to update. The Add/Edit Organizations screen will appear. Enter relevant information and click Save.
o If the affiliation continues, leave the ‘Ending Date’ blank and click the show ‘Pres’ on CV checkbox.
Remove Organization item Click the Remove button to remove the Organization item from the list.
LecturesUse this section to enter any lectures or appearances. Items will be placed under the Major Invited Lectures and Appearances heading in the CV.
WUPS User Guide Page 12

Add Lectures and Apearances item Click the Add Major Invited Lecture button. The Add/Edit Major Invited Lectures screen will appear. Enter relevant information and click Save. Mandatory Field:
o Lecture/Event Title
Edit Lectures and Apearances item Click the Edit button next to the list item that you want to update. The Add/Edit Major Invited Lectures screen will appear. Enter relevant information and click Save.
Remove Lectures and Apearances item Click the Remove button to remove the Lectures and Apearances item from the list.
ConsultingUse this section to enter any consulting relationships or board memberships. Items will be placed under the Consulting Relationships or Board Memberships heading in the CV.
Add Consulting item Click the Add Relationship or Membership button. The Add/Edit Relationships and Memberships screen will appear. Enter relevant information and click Save.
o If the item has not ended, leave the ‘Ending’ field blank and click the show ‘Pres’ on CV checkbox.
Mandatory Field:o Title/Position held
Edit Consulting item Click the Edit button next to the list item that you want to update. The Add/Edit Relationships and Memberships screen will appear. Enter relevant information and click Save.
o If the item has not ended, leave the ‘Ending’ field blank and click the show ‘Pres’ on CV checkbox.
WUPS User Guide Page 13

Remove Organization item Click the Remove button to remove the Relationship or Membership item from the list.
GrantsUse this section to add any current or completed grants. Items will appear under the Research Support section in the CV.
Add Research Support item Click the appropriate section button (Current, Completed). Click the Add Support button. The Add/Edit Grants screen will appear. Enter relevant information and click Save. Mandatory Fields:
o Agency Nameo Title
Edit Research Support item Click the Edit button next to the list item that you want to update. The Add/Edit Grants screen will appear. Enter relevant information and click Save.
Remove Research Support item Click the Remove button to remove Research Support from the list.
View/Add Award Tracker Data Click the View Award Tracker Data button. A new screen will appear that lists all grants that have not been imported in the WUPS
application. Click the Add button next to the item. The item will be removed from the screen and import into the research support list. When completed, click the Done button to get back to the Research Support screen.
Note Award Tracker is a data entry aid.
o Not all grants listed are necessarily required. Use existing CV as guide.o Some additional editing may be required.o This feature does not update the Award Tracker database.
WUPS User Guide Page 14

The No Cost Extension (NCE) checkbox will force the grant to be listed under Current. You can check or uncheck this as needed.
TraineesUse this section to document any current and past Trainees. These items will be under the Current Trainees and Past Trainees sections in the CV.
Add Trainee item
Click the appropriate section button (Current, Past). Click the Add Trainee button. The Add/Edit Trainee screen will appear. Enter relevant information and click Save. Mandatory Fields:
o Trainee name and degree
Edit Trainee item Click the appropriate section button (Current, Past). Click the edit button next to the item you want to update The Add/Edit Trainee screen will appear. Enter relevant information and click Save.
Remove Trainee item Click the Remove button to remove the Trainee from the list.
Clinical ResponsibilitiesUse this section to enter any clinical responsibilities. The items will appear in the Clinical Responsibilities section in the CV.
Add a Clinical Responsibility item Click the Add Responsibility button. The Add/Edit Clinical Responsibilities screen will appear. Enter relevant information and click Save.
o If this item is ongoing, leave the ‘End Date’ field blank and click the show ‘Pres’ on CV checkbox.
Mandatory Field:o Clinical Role/Title
WUPS User Guide Page 15

Edit a Clinical Responsibility item Click the edit button next to the item you want to update The Add/Edit Clinical Responsibilities screen will appear. Enter relevant information and click Save.
o If this item is ongoing, leave the ‘End Date’ field blank and click the show ‘Pres’ on CV checkbox.
Remove a Clinical Responsibility item Click the Remove button to remove the Clinical Responsibility from the list.
Copy a Clinical Responsibility item Click the Copy button next to the Clinical Responsibility item. The Add/Edit Clinical Responsibilities screen will appear. The Department/Office and Institution/Facility will by copied. Modify fields as needed and Click Save.
Teaching DutiesEnter any teaching duties or responsibilities in this section. Items will appear in the Teaching Responsibilites section in the CV.
Add a Teaching Duty item Click the Add Teaching Duty button. The Add/Edit Teaching Duties screen will appear. Enter relevant information and click Save.
o If this item is ongoing, leave the ‘End Date’ field blank and click the show ‘Pres’ on CV checkbox.
Mandatory Fields:o Role/Functiono Title/Course
Edit a Teaching Duty item Click the edit button next to the item you want to update. The Add/Edit Teaching Duties screen will appear. Enter relevant information and click Save.
o If this item is ongoing, leave the ‘End Date’ field blank and click the show ‘Pres’ on CV checkbox.
Remove a Teaching Duty item Click the Remove button to remove the Teaching Duty from the list.
Copy a Teaching Duty item Click the Copy button next to the Teaching Responsibility item. The Add/Edit Teaching Duties screen will appear. The Role/Function item will by copied. Modify fields as needed and Click Save.
WUPS User Guide Page 16

PublicationsEnter any peer reviewed publications in this section. Items will appear in the Publications section in the CV.
Add a Publication Click the Add Publication button. The Add/Edit Publication screen will appear. If the PubMedId is known perform the steps below in bold
o Enter the Id in the PubMed Id field. o Click Import from Pubmed.o The data will appear in the appropriate fields.
Enter/Change any relevant information and click Save. Mandatory Field:
o Title
Edit a Publication Click the edit button next to the item you want to update. The Add/Edit Publication screen will appear. Enter relevant information and click Save.
Remove a Publication item Click the Remove button to remove the Publication from the list.
Import Publication(s) from PubMed Click the Import Publication button. Import publications if the PubMed Id is known.
o Add each PMID in the PMID Import Listo Click Importo The view will return to the Publications list and each found item will appear in the list.
Import publications if the PubMed Id is not known. Follow the ‘Steps to import from PubMed:”
o Click the ‘Here’ link in Step 1.o Search using your author name.o Review the results, selecting the articles you want to import. Leaving none selected
will select all articles.o Use the Display Settings link to open a menu.o Under the format list, click the PMID List radio button and click Apply.o Select all the PMIDs (Ctrl + A), Copy (CTRL + C) them, then Paste (Ctrl + V) them into
the PMID Import List text box. Click the Import button and you are done!
Add Italic WordThis function gives the user the ability to italicize words on the printed document from the title entry.
WUPS User Guide Page 17

Go to the publications section in the profile data. Select the publication from the publication list by clicking the Edit button. The Add/Edit Publication screen will appear. Highlight the word in the title field that you want italicized. Click the Add Italic Word button. The next time the CV is shown/printed, the word will be
italicized.
Manage ItalicsThis function gives the user the ability to manage the italicize words list.
Add a New Italicized Word Go to the publications section in the profile data. Select the publication from the publication list by clicking the Edit button. The Add/Edit Publication screen will appear. Click the Manage Italics button. The Manage Italic Items list will appear. Enter the word in the field provided at the bottom of the screen. Click Add.
Remove an Italicized Word. Go to the publications section in the profile data. Select the publication from the publication list by clicking the Edit button. The Add/Edit Publication screen will appear. Click the Manage Italics button. The Manage Italic Items list will appear. Click the Remove button next to the appropriate word.
Other PublicationsEnter any invited publications, books, book chapters, and abstracts in this section. Items will appear in the one of the headings (Invited Publications, Books, Book Chapters, Abstracts) section in the CV.
Add an Other Publication
Click the appropriate section button (Invited Publications, Books, Book Chapters, Abstracts).
Click the Add button. The Add/Edit screen will appear. If the PubMedId is known perform the steps below.
o Enter the Id in the PubMed Id field. o Click Import from Pubmed.o The data will appear in the appropriate fields.
Enter/Change any relevant information and click Save. Mandatory Field:
o Title
WUPS User Guide Page 18

Edit a Publication Click the edit button next to the item you want to update. The Add/Edit screen will appear. Enter relevant information and click Save.
Remove a Publication item Click the Remove button to remove the Publication from the list.
Import Publication(s) from PubMed Click the Import Publication button. Import publications if the PubMed Id is known.
o Add each PMID in the PMID Import Listo Click Importo The view will return to the Publications list and each found item will appear in the list.
Import publications if the PubMed Id is not known. Follow the ‘Steps to import from PubMed:”
o Click the ‘Here’ link in Step 1.o Search using your author name.o Review the results, selecting the articles you want to import. Leaving none selected
will select all articles.o Use the Display Settings link to open a menu.o Under the format list, click the PMID List radio button and click Apply.o Select all the PMIDs (Ctrl + A), Copy (CTRL + C) them, then Paste (Ctrl + V) them into
the PMID Import List text box. Click the Import button and you are done!
Add Italic WordThis function gives the user the ability to italicize words on the printed document from the title entry.
Go to the publications section in the profile data. Select the publication from the publication list by clicking the Edit button. The Add/Edit Publication screen will appear. Highlight the word in the title field that you want italicized. Click the Add Italic Word button. The next time the CV is shown/printed, the word will be
italicized.
Manage ItalicsThis function gives the user the ability to manage the italicize words list.
Add a New Italicized Word Go to the publications section in the profile data. Select the publication from the publication list by clicking the Edit button. The Add/Edit Publication screen will appear. Click the Manage Italics button. The Manage Italic Items list will appear. Enter the word in the field provided at the bottom of the screen. Click Add.
WUPS User Guide Page 19

Remove an Italicized Word. Go to the publications section in the profile data. Select the publication from the publication list by clicking the Edit button. The Add/Edit Publication screen will appear. Click the Manage Italics button. The Manage Italic Items list will appear. Click the Remove button next to the appropriate word.
Web Settings Part of the web profile, these items determine how (and if) your name appears in the directory and the title of your faculty bio page.
Enable Website Directory Check the box to be listed in the faculty directory.
Website Directory Display Name Enter how your name should appear in the faculty directory.
Website Bio Page Display Name Enter your name as it should appear at the top of your faculty bio page.
Divisions & Departments Part of the web profile, these items include the primary and secondary divisions.
WUPS User Guide Page 20

Add a Division Enter all or part of the division name in the search field and click Find. Click on the appropriate department-division and click Add Association
Remove a Division Click the Remove button to remove the division from your profile.
Mark a Division as Primary Click the Primary button next to the primary division. Primary will appear in parenthesis next to the division.
Personal StatementsPart of the web profile, these items include clinical and research interests and Search Engine Optimization Tags.
Update Clinical Interests Click the Edit button next to Clinical Interests. Update the information in the space available. Click the Save icon.
Update Research Interests Click the Edit button next to Research Interests. Update the information in the space available. Click the Save icon.
Print/Save/Email CVUsers have the ability to print, save as a Microsoft Word or PDF document, and email the CV. To access these functions, click the Cvitae link in the documents section on the lower left portion of the screen. The options will appear above the displayed document.
WUPS User Guide Page 21

Print the CV Click the Print CV button above the displayed document.
Save CV as MS Word or PDF document Click the appropriate button under the “save CV as:” statement.
Email CV Enter the email address in the text box provided and click the Send button.
Change ThemeUsers have the ability to change the theme associated with their own personnel desktop for the profile system.
Click the Theme link located in the settings section located in the upper right portion of the screen.
If the settings section is not visible, click the gear located in the upper right portion of the screen.
Ensure the Theme Settings tab is selected on the screen Click one of the Background Colors or Images from the screen. Click Save Theme.
WUPS User Guide Page 22