4th grade Science Fair - lewistown.k12.mt.us
26
4 th grade Science Fair Highland Park Elementary School 2017-2018 Student Name: ________________________________ Teacher: _____________________________________
Transcript of 4th grade Science Fair - lewistown.k12.mt.us

4th grade
Science Fair
Highland Park Elementary School
2017-2018
Student Name: ________________________________
Teacher: _____________________________________
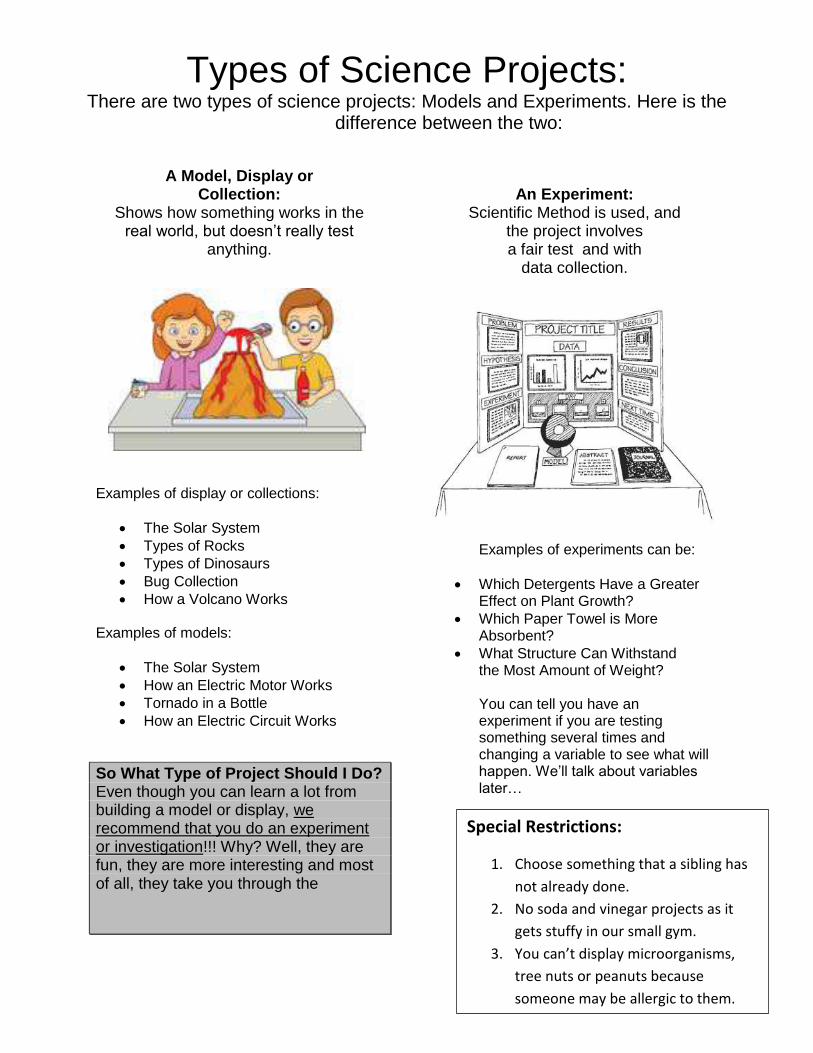
Types of Science Projects: There are two types of science projects: Models and Experiments. Here is the
difference between the two:
A Model, Display or Collection:
Shows how something works in the real world, but doesn’t really test
anything.
Examples of display or collections:
The Solar System
Types of Rocks
Types of Dinosaurs
Bug Collection
How a Volcano Works Examples of models:
The Solar System
How an Electric Motor Works
Tornado in a Bottle
How an Electric Circuit Works
So What Type of Project Should I Do? Even though you can learn a lot from building a model or display, we recommend that you do an experiment or investigation!!! Why? Well, they are fun, they are more interesting and most of all, they take you through the
An Experiment:
Scientific Method is used, and the project involves a fair test and with
data collection.
Examples of experiments can be:
Which Detergents Have a Greater Effect on Plant Growth?
Which Paper Towel is More Absorbent?
What Structure Can Withstand the Most Amount of Weight? You can tell you have an experiment if you are testing something several times and changing a variable to see what will happen. We’ll talk about variables later…
Special Restrictions:
1. Choose something that a sibling has
not already done.
2. No soda and vinegar projects as it
gets stuffy in our small gym.
3. You can’t display microorganisms,
tree nuts or peanuts because
someone may be allergic to them.

Steps to Success
Use your Science Journal
Use your Science Journal that you already have at school. This notebook will contain rough drafts of
everything about your science fair project. A complete notebook is critical in keeping all of your important
information organized.

Step 1: Choose a General Topic to Study and
Explain – this step will be done in science class in January. Your topic can be anything that interests you! Think about the things you enjoy doing or
hobbies that you have. What kind of science is your favorite? Is there a particular type of
scientist you’d like to be when you grow up?
Behavioral and Social Sciences*: Human and animal behavior, social and
community relationship –psychology, sociology, anthropology, archaeology, learning,
perception, urban problems, public opinion surveys, educational testing, etc.
Biochemistry*: The chemistry of life processes – molecular biology, molecular
genetics, enzymes, photosynthesis, blood chemistry, protein chemistry, food chemistry,
metabolism, and hormones.
Biology (including Microbiology and Zoology): The study of the anatomy,
physiology, and processes of living things - bacteriology, virology, protozoology, fungi,
yeast, animal development, pathology, physiology, systematics. REMEMBER: You can’t
display microorganisms because someone may be allergic to them!
Botany: The study of plant life – agriculture, agronomy, horticulture, forestry, plant
taxonomy, plant physiology, plant pathology, plant genetics, hydroponics, algae, etc.
Chemistry: The study of the nature & composition of matter, and the laws
governing it – physical chemistry, organic chemistry, inorganic chemistry, materials,
plastics, fuels, pesticides, metallurgy, soil chemistry, etc. You may test some consumer
products here.

Earth, Space & Environmental Sciences: (Earth Science) The Study of Earth’s
structure and processes. - geology, mineralogy, physical oceanography, meteorology,
seismology, geography, topography. (Space Science) – astronomy, star visibility,
astrological computations. You can’t test planets, star, or the moon – no solar systems
please. (Environmental Science) – The study of interactions among physical, chemical, and
biological components of the environment – air, water, and land pollution sources and their
control, ecology, waste disposal, impact studies, etc.
Engineering: Technology projects that directly apply scientific principles to
manufacturing and practical uses – civil, mechanical, aeronautical, chemical, electrical,
photographic, sound, automotive, marine, heating and refrigeration, transportation, etc.
Math and Computer Science: Probability, statistics, applied math and analysis,
artificial intelligence, algorithms, databases, programming languages, operating systems,
networking, computer graphics, etc.
Medicine and Health*: The study of diseases and health of humans and animals –
medicine, dentistry, pharmacology, pathology, veterinary medicine, nutrition, sanitations,
pediatrics, allergies, speech and hearing, etc.
Physics: The study of matter, energy, and forces – states of matter, thermal
energy, chemical energy, radiant energy, electricity, sound waves, light waves, conductors,
insulators, gravity, magnetism, forces, simple machines, friction, etc.
*BE CAREFUL: When working with humans or animals you must get PRIOR approval from
your teacher. NO HUMANS OR ANIMALS MAY BE HURT DURING THE PROJECT!

Step 2: Begin Doing Research– this step will be done in
Science class in January.
Find books, magazine articles, Internet sites, news articles, as well as professionals and other
people and information to help you learn about your topic. Researching a topic will help you
realize what questions you have and will eventually lead you to your testable question for your
experiment. Your research will prove to the teachers that you’ve taken time to learn about a
topic and have developed questions based on your new knowledge. You need a minimum of
one and a maximum of three sources of information for your research. All three should not
be Internet sites. You need at least ten facts recorded in complete sentences. Use a variety
of materials and follow all the directions below:
1. Keep notes in your Science Journal showing the NEW things you’ve learned about
your topic. A great way to keep notes is to divide your paper into two columns as
shown below:
New Facts I’ve Learned LIST 10 or more! Questions I Have…
1. 1.
2. 2. 2.
3. 3. 3.
4. 4. 4.
2. Record the following information from your resources on your Bibliography sheet:
a. Books: title, author, page numbers, publisher, and publication date
b. Magazines: magazine title, volume number, title of the article, and page numbers
c. Encyclopedia: name of the encyclopedia, copyright date, volume
d. Interview with an expert: name, title, business, and date of interview
e. Internet: website address, name of site

Step 3: Write a Research Summary– this step will be
done in science class in January.
Using your research from Step 2, neatly write a one-page research summary on your topic.
This research summary will help your teachers understand your topic and will let them know
you’ve become an expert in this field. The information included in the summary will show
what led to your testable question.
You must draft this research summary in your Science Journal.
Your research summary should include:
Paragraphs organized by subject using facts you’ve gathered
Complete sentences and correct grammar
Correct spelling
References: List the books, magazines, newspapers, Internet sites, and other
resources you used to learn about your topic using your Bibliography sheet.
*If typing, you must use Times New Roman 12 point font and single spacing.
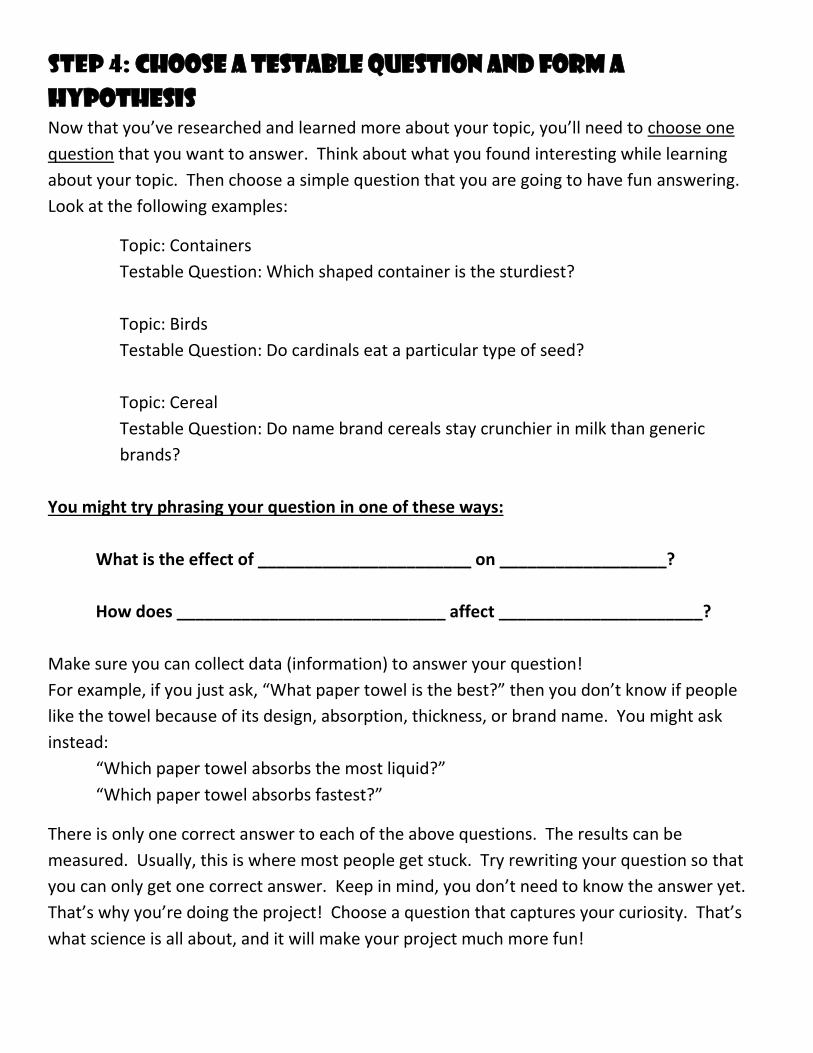
Step 4: Choose a Testable Question and Form a
Hypothesis Now that you’ve researched and learned more about your topic, you’ll need to choose one
question that you want to answer. Think about what you found interesting while learning
about your topic. Then choose a simple question that you are going to have fun answering.
Look at the following examples:
Topic: Containers
Testable Question: Which shaped container is the sturdiest?
Topic: Birds
Testable Question: Do cardinals eat a particular type of seed?
Topic: Cereal
Testable Question: Do name brand cereals stay crunchier in milk than generic
brands?
You might try phrasing your question in one of these ways:
What is the effect of _______________________ on __________________?
How does _____________________________ affect ______________________?
Make sure you can collect data (information) to answer your question!
For example, if you just ask, “What paper towel is the best?” then you don’t know if people
like the towel because of its design, absorption, thickness, or brand name. You might ask
instead:
“Which paper towel absorbs the most liquid?”
“Which paper towel absorbs fastest?”
There is only one correct answer to each of the above questions. The results can be
measured. Usually, this is where most people get stuck. Try rewriting your question so that
you can only get one correct answer. Keep in mind, you don’t need to know the answer yet.
That’s why you’re doing the project! Choose a question that captures your curiosity. That’s
what science is all about, and it will make your project much more fun!

Step 5: Design an Experiment
Decide how you’re going to answer your question. What experiment can you design to help
you answer your question? See the information about the Scientific Method in your
handbook. Use the following guidelines to help you design your experiment:
Write your procedures or directions very clearly. Anyone should be able to read your
directions and repeat exactly what you did. This means including specific amounts (in
metric units), times, and types of materials.
Test your experiment at least three times in exactly the same way. If you only get the
result one time, it could just be a fluke. Scientists must demonstrate that the results of
their experiments are repeatable. In order to be eligible for higher levels of
competition, you must show proof of at least three trials. The project doesn’t have to
turn out as you predicted, but the results should be consistent.
Your materials must stay the same throughout your entire investigation. The only
exception would be if you were changing something on purpose for your experiment.
For example, you can’t use one brand of potting soil for one group of plants and another
brand for the second group UNLESS you are testing to see the effect of different types of
potting soil.
Keep in mind that it is not a good idea to use yourself as a test subject. Your opinions
might influence the way you act or think. Keep the role of the scientist and choose
others to participate in your experiment.
Follow the Scientific Method.
Develop a way to collect your data. You may want to create a chart to display your
data. This step is important. Here is an example:
Trial 1 Trial 2 Trial 3
Brand Time in seconds to absorb 5
ml of water
Brand Time in seconds to absorb 5
ml of water
Brand Time in seconds to absorb 5
ml of water
Brand X Brand X Brand X
Brand Y Brand Y Brand Y
Brand Z Brand Z Brand Z
*Note: This is a good place to check your work against the rubric in your handbook.
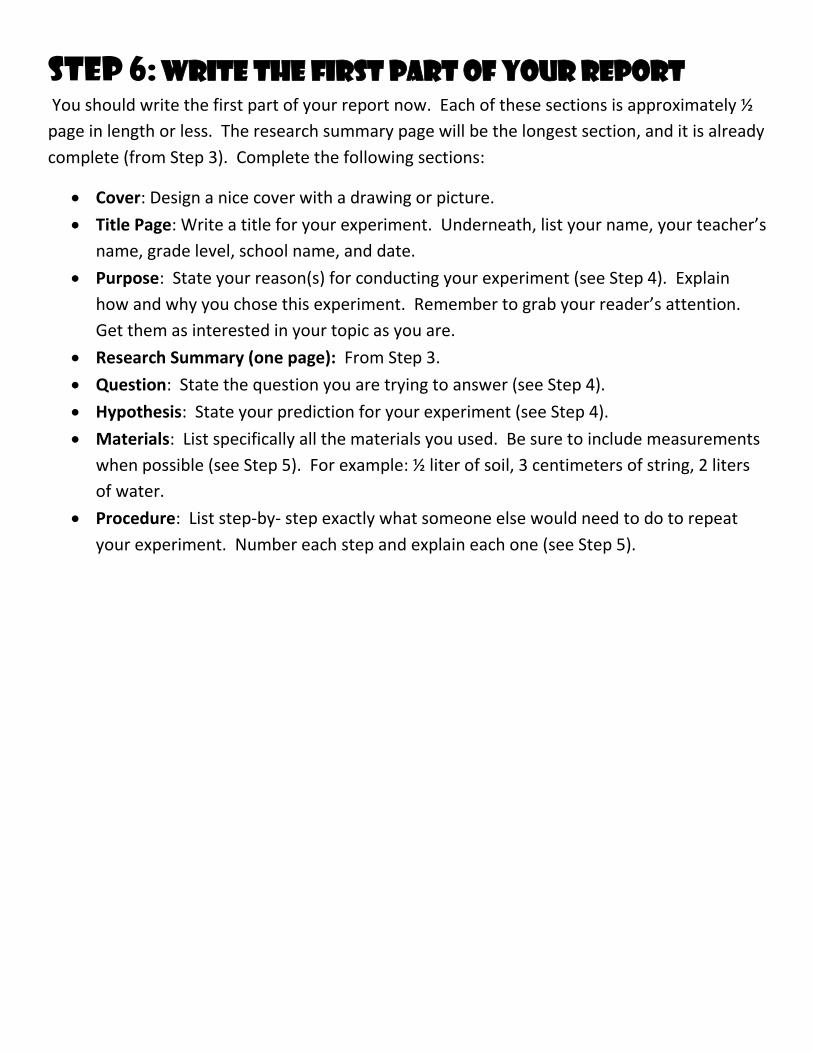
Step 6: Write the First Part of Your Report
You should write the first part of your report now. Each of these sections is approximately ½
page in length or less. The research summary page will be the longest section, and it is already
complete (from Step 3). Complete the following sections:
Cover: Design a nice cover with a drawing or picture.
Title Page: Write a title for your experiment. Underneath, list your name, your teacher’s
name, grade level, school name, and date.
Purpose: State your reason(s) for conducting your experiment (see Step 4). Explain
how and why you chose this experiment. Remember to grab your reader’s attention.
Get them as interested in your topic as you are.
Research Summary (one page): From Step 3.
Question: State the question you are trying to answer (see Step 4).
Hypothesis: State your prediction for your experiment (see Step 4).
Materials: List specifically all the materials you used. Be sure to include measurements
when possible (see Step 5). For example: ½ liter of soil, 3 centimeters of string, 2 liters
of water.
Procedure: List step-by- step exactly what someone else would need to do to repeat
your experiment. Number each step and explain each one (see Step 5).

Science Fair Written Report Format
First part of report is due 2/20/18
Final Report due 3/13/18
Include page numbers on each page of your paper. Each page should be labeled with the name of the section except for
the Title Page. All other pages should be titled with the name of each section.
The final order of your Science Fair written report should be:
1 – Cover
2 – Title Page
Your project’s title should be centered several inches below the top of the page. Your name, grade, and date should be
listed in the lower right hand corner.
3 – Research Summary – DONE IN CLASS
Include your research summary here.
This should be no more than one page.
Grammar and spelling count.
4 - Purpose/Research Question and Hypothesis
State these in one or two sentences each.
The purpose of my experiment is to find out…
Explain how and why you chose this experiment. Include important background information that relates to your topic. Remember to grab your reader’s attention. Get them as interested in your topic as you are.
I predict, or I think, or I believe________because_________.
Grammar and spelling count.
5 - Materials and Procedures
List materials vertically and be specific. Use materials’ names and exact amounts.
Explain your procedures step by step, in sequential order. Use appropriate measurements and units when necessary. Drawings/sketches/pictures help make your method more clear, so include them. If you constructed any materials or equipment, explain them here. Include safety information and multiple trials of your experiment to demonstrate a good sample size.
Grammar and spelling count.

6 - Observations/Results/Data
Present your results neatly in paragraph form to show evidence of your findings. You must also include a chart, graph, table, and photos. Make sure they are well organized, understandable, and properly labeled.
Grammar and spelling count.
7 - Conclusion
Write this section after you have finished preparing your results. Briefly summarize your results in the past tense. Restate your hypothesis in the present tense and tell how your data supported or did not support your hypothesis. Give your interprentation of your results and discuss their significance. Don’t hesitate to mention difficulties you had or mistakes you made. Include other information that relates to your project that you obtained through research. You may want to include one or two suggestions for what the next experiment might be (related to your experiment) based on your results.
Grammar and spelling count.
8 - Acknowledgements
Thank the people who helped you with your project and what they helped you with.
9 - Bibliography
List any books, articles, websites, or other sources you used or got information from for your project. Make sure they are listed in alphbetical order and use the appropriate format.

Step 7: Conduct the Experiment
Keep very accurate notes of everything you do in your Science Journal. Include what you see,
measurements you take, and questions that arise during your experiment. Log the date
beside everything you write. Use these other ideas to work toward an outstanding project:
Take photos and/or draw pictures of each step for your Science Journal and Display
Board. This will not only help you remember what happened, but will help the judges
see what you really did. Keep in mind, you do not want to be in the photographs. Take
pictures of objects with which you are working instead.
Log and date all observations in your Science Journal. You may also include
measurements and other questions that arise while you are experimenting. Make sure
they go in your Science Journal.
Charts and graphs will help you stay organized. Record the originals in your Science
Journal. When you make final drafts, they will look impressive on your display board.
Take your time and do as many trials as necessary. The more trials you complete, the
more convincing your results will be.
You must conduct each trial the exact same way three times.
Record all results.

The Scientific Method Overview of the Scientific Method
The Scientific Method is a process for experimentation that is used to explore observations and answer questions.
Scientists use the Scientific Method to search for cause and effect relationships in nature. In other words, they
design an experiment so that changes to one item cause something else to vary in a predictable way. Just as it does
for a professional scientist, the Scientific Method will help you to focus your science fair project question, construct
a hypothesis, design, execute, and evaluate your experiment.
Steps of the Scientific Method
Ask a Question: The Scientific Method starts when you ask a question about something that you
observe: How, What, When, Who, Which, Why, or Where?
In order for the Scientific Method to answer the question, it must be about something that you can
measure, preferably with a number.
Do Background Research: Rather than starting from scratch in putting together a plan for answering
your question, you want to be a savvy scientist using library and Internet research to help you find the
best way to do things and insure that you don't repeat mistakes from the past.
Construct a Hypothesis: A hypothesis is an educated guess about how things work:"If _____[I do this]
_____, then _____[this]_____ will happen."
You must state your hypothesis in a way that you can easily measure. Of course, your hypothesis should
be constructed in a way to help you answer your original question.
Test Your Hypothesis by Doing an Experiment: Your experiment tests whether your hypothesis is
true or not true. It is important for your experiment to be a fair test. You conduct a fair test by making
sure that you change only one factor, or variable, at a time while keeping all other conditions the same.
You should also repeat your experiments several times to make sure that the first results weren't just an
accident.
Analyze Your Data and Draw a Conclusion: Once your experiment is complete, you collect your data
and analyze them to see if your hypothesis is true or not true.
Scientists often find that their hypothesis was not true, and in such cases they will construct a new
hypothesis starting the entire process of the Scientific Method over again. Even if they find that their
hypothesis was true, they may want to test it again in a new way.
Communicate Your Results: To complete your science fair project you will communicate your results
to others in a final report and a display board. Professional scientists do the same thing by publishing
their final report in a scientific journal or by presenting their results on a poster at a scientific meeting.

The Scientific Variables
Your investigation should test only one thing. You want to control your experiment so that little differences don’t
interfere with your results.
Anything that could change the way your experiment turns out is called a variable. The key to a good experiment
is keeping all the variables the same except for the one you’re testing.
The ONE VARIABLE you purposely change and test is called the independent variable. If you are testing the
differences in plant growth with different colored light bulbs, the different colored lights will be the independent
variable.
All the variables you plan on keeping the same for the project are called your controlled variables. You’ll want to
be very careful to make sure as many parts of your experiment as possible are the same. For example, you’d want
to give the plants the same amount and same kind of water. If you gave one plant distilled water and the other tap
water, you won’t be sure if the light bulbs or the water made the difference in the plant growth. Anything you can
control and make the same during your investigation is great!
The last variable is the dependent variable. This is the effect, or what happened, when you used your independent
variable (the cause). The dependent variable changes because of what you did in your experiment. For example,
the dependent variable in the plant experiment is how much the plants grew. You would measure the plant growth
(the dependent variable) in response to your light bulbs (the independent variable).

Step 8: Draw Conclusions
Your conclusions sum up your project. You should include the following information:
Tell what happened. Consider reporting the following:
o I observed…
o When I, ____ _____ happened.
o In my first trial…
Did your results support your hypothesis? If they did, state this fact in your writing. If
they didn’t, state what you learned. Explain why you think the experiment turned out
as it did.
What did you learn about your topic by completing this experiment? Would this
information be of help to anyone? For example, maybe you learned that plants do grow
better under a certain kind of light. This information would be helpful to business
owners who grow plants.
What questions did you have while you were experimenting? Did your results make you
wonder about how changing something in your experiment might make a difference?
Did you find that you were curious about another part of your topic once you started
investigating?
What worked and what didn’t work in your experiment? What could have been
improved? Would your results have been stronger if you had collected more data?
Once you’ve decided on all the information you would like to include in your conclusions, use
this information to write this section of your report.

Step 9: Finish Writing the Report
Complete the last sections of your report:
Observations: What did you see, smell, feel, and/or hear? Do not give opinions at this
point. Only state the facts. Use the information you recorded in your Science Journal to
write this part. All of your observations are facts that can be proven. These
observations will be listed according to trial, number, or day.
Results/Data: Use the information in your Science Journal to create graphs, charts, and
tables. Your Results/Data section should reflect how the data changed/didn’t change
(see Step 7 from your experiment).
Conclusions: Use your rough draft from Step 8 to write this section.
Acknowledgements: On this page, thank your parents, teachers, other adults or people
for helping you complete your project. You’ll want to explain what they did to help you
during this process. For example, maybe your mom helped you set up your experiment,
or your neighbor, the vet, met with you and gave you information on birds.

Step 10: Prepare for Your Presentation The oral presentation is a short 10 minute talk describing your project. It is also a chance for you to answer questions and show the knowledge you have gained through research and experimentation. It’s recommended that your experiment materials not take up more space than the board allows. It should be able to fit in the small space in front of the board. Feel free to use technology in your presentation. Just keep in mind that simply showing a slide show isn’t a presentation. You must do the presenting, but you can use technology as an aid. Please keep in mind that Wi-Fi is not always available.
Use the following outline as a guide: My name is________________________________________________. The title of my project is_______________________________________________________________________________________. I became interested in doing this project because___________________________________________________________ ___________________________________________________________________________________________________________________. MY PURPOSE: The question I asked was______________________________________________________________________ __________________________________________________________________________________________________________________. MY MATERIALS: I gathered___________________________________________________________________________________ ___________________________________________________________________________________________________________________.
MY PROCEDURES: I used these steps________________________________________________________
___________________________________________________________________________________________________
___________________________________________________________________________________________________.
I repeated this procedure_______________times to make certain that my results were fair.
MY RESULTS (WHAT HAPPENED) was_______________________________________________________
____________________________________________________________________________________________________
____________________________________________________________________________________________________.
MY CONCLUSION (WAS YOUR HYPOTHOSIS CORRECT OR INCORRECT):__________________
_____________________________________________________________________________________________________.
REMEMBER: Everyone you talk to will be interested in what you did. They just want
to hear more about it and listen to your ideas. Think of presenting as showing off
your hard work!

Step 11: Design the Display
Your display is a summary of your project. Neither your classmates nor teachers were with
you when you carried out your experiment. Your display board will help them understand
what you did. Include the same sections as your report, but don’t put as much information on
your board. Summarize each section. You’ll want each section clearly labeled and placed on
the board in a logical sequence. Your board should tell the story of your experiment from left
to right and top to bottom, just like a book.
Your display should be free standing, neat, organized, and informational. You do not want to
start your display the night before it is due! Be sure to use colors that stand out and lettering
that can be easily read. Your display board may be of any color of your choosing.
Your report will be in front of your display for the public to read. Show off all of your hard
work!
**Measurement guidelines: Displays are restricted to 28 inches X 40 inches and will be
PROVIDED FOR YOUR STUDENT courtesy of PTO. The board will be sent home with your child in
the first part of February.
Results/Data/Observations
Pictures of
Procedures
Pictures of
Materials
Your Name
and
acknowl-
ledgements
Purpose

Student’s Name ___RUBRIC SAMPLE______________________ Teacher’s Name ______________________
Project Title _________________________________________________________________________
________Written Report (50 points)
10 - There is a cover and title page, purpose, testable question, and hypothesis.
10 - The paper includes a research summary and report (10-15 facts and 1-3 sources).
10 - Specific Materials, Exact Procedures, Observations, and Conclusions are clearly stated.
5 - Acknowledgements are included.
5 - The handwriting is neat and legible with few or no grammar and spelling mistakes.
10 - Graphs, tables, charts, diagrams and/or photos are included to support the results and data.
_______Project Board (50 points)
10 - The display demonstrates organization and is correctly labeled. It reads in order like a book.
10 - The display is colorful, eye-catching, and easy to read from several feet away (large font size) and is not in pencil.
10 - The display is neat, grammatically correct, no misspelled words, and grade appropriate.
10 - The display includes the steps of the scientific method: Purpose, Question, Hypothesis, Materials, Procedure, Results, Conclusion and Research. Does your conclusion state if your hypothesis was true or not?
10 – Photos and data are included (charts, graphs, photos of experiment and, or materials, etc.).
______ Scientific Inquiry (50 points)
10 - The experiment shows originality and creativity.
20 - The project demonstrates the use of the scientific method: Purpose, Question, Hypothesis, Procedure, Results and Conclusion. (Does the conclusion state if it proves or disproves the hypothesis)?
10 - The experiment is well planned and thought out, and it’s obvious from notes.
10 - There is only one independent variable.
______ Evident Knowledge Gained - Presentation (20 points)
5 - The student demonstrates a clear understanding of his or her topic, the Scientific Method, & variables.
5 - The project demonstrates creativity and critical thinking.
5 - The conclusion is correct based on the student’s results.
5 - The student can tell if his/her results prove or disproves his/her hypothesis.

________Oral Presentation (20 points)
5 - The student can give the presentation mostly from memory using note cards for minimal help.
5 - The talk is well organized and relates to the topic.
5 - The student provides answers in complete sentences with no ums, well, uhs, etc.
5 - The student makes good eye contact, is easy to understand, and speaks loud enough to hear.
________Time and Effort (10 points)
5 - Apparent time and student effort has been put into this project.
5 - Student demonstrates a good attitude and effort presenting project.
Subtotal of project points:_______/200 Points
Point deductions for late submissions: _______ (1 point deducted for each day late)
10 point addition for parent attending Science Fair Parent Meeting on January 4th:_______
FINAL GRADE: ________/200 Total Points
Grades are teacher graded using a rubric, and the Science Fair is NOT a sanctioned event.
___Outstanding: 200 points or more
___1st Place: 199-175 pts.
___2nd Place: 174-150 pts.
___3rd Place: 149-125pts.
Purple Participation ribbon is awarded if 124 points or less.
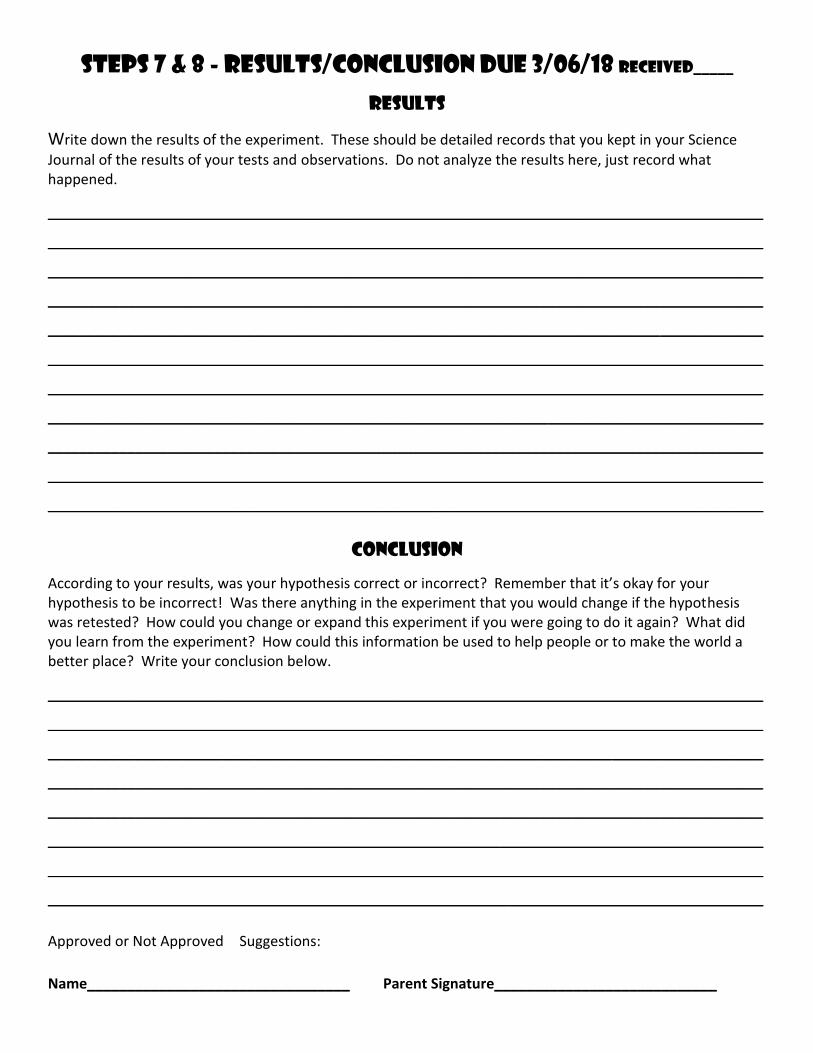
Steps 7 & 8 - Results/Conclusion Due 3/06/18 Received_____
Results
Write down the results of the experiment. These should be detailed records that you kept in your Science
Journal of the results of your tests and observations. Do not analyze the results here, just record what happened.
__________________________________________________________________________________________
__________________________________________________________________________________________
__________________________________________________________________________________________
__________________________________________________________________________________________
__________________________________________________________________________________________
__________________________________________________________________________________________
__________________________________________________________________________________________
__________________________________________________________________________________________
__________________________________________________________________________________________
__________________________________________________________________________________________
__________________________________________________________________________________________
Conclusion
According to your results, was your hypothesis correct or incorrect? Remember that it’s okay for your hypothesis to be incorrect! Was there anything in the experiment that you would change if the hypothesis was retested? How could you change or expand this experiment if you were going to do it again? What did you learn from the experiment? How could this information be used to help people or to make the world a better place? Write your conclusion below.
__________________________________________________________________________________________
__________________________________________________________________________________________
__________________________________________________________________________________________
__________________________________________________________________________________________
__________________________________________________________________________________________
__________________________________________________________________________________________
__________________________________________________________________________________________
__________________________________________________________________________________________
Approved or Not Approved Suggestions:
Name_________________________________ Parent Signature____________________________

STEP 5: Experiment Design DUE 02/13/17 RECEIVED_____
Materials List materials you will need to conduct your experiment. Make sure to give specific measurements and amounts. Example: 1. 2 milliliters of soil per plant 2. 5 ½ centimeters of string
Materials:
Procedure:
How will you test your question? For each step, write specific directions. Use the back of this paper if you need more space.
Step 1:
Step 2:
Step 3:
Step 4:
Step 5:
Step 6:
Step 7: List more steps on the back if needed.
My Independent Variable: The one thing that you change on purpose & test in your experiment is: __________________________________________ ___________________________________________________________ My Controlled Variables: The things in your experiment that you keep the same are: ____________________________________________________
Approved or Not Approved – Suggestions:
Name__________________________________ Parent Signature_________________________________
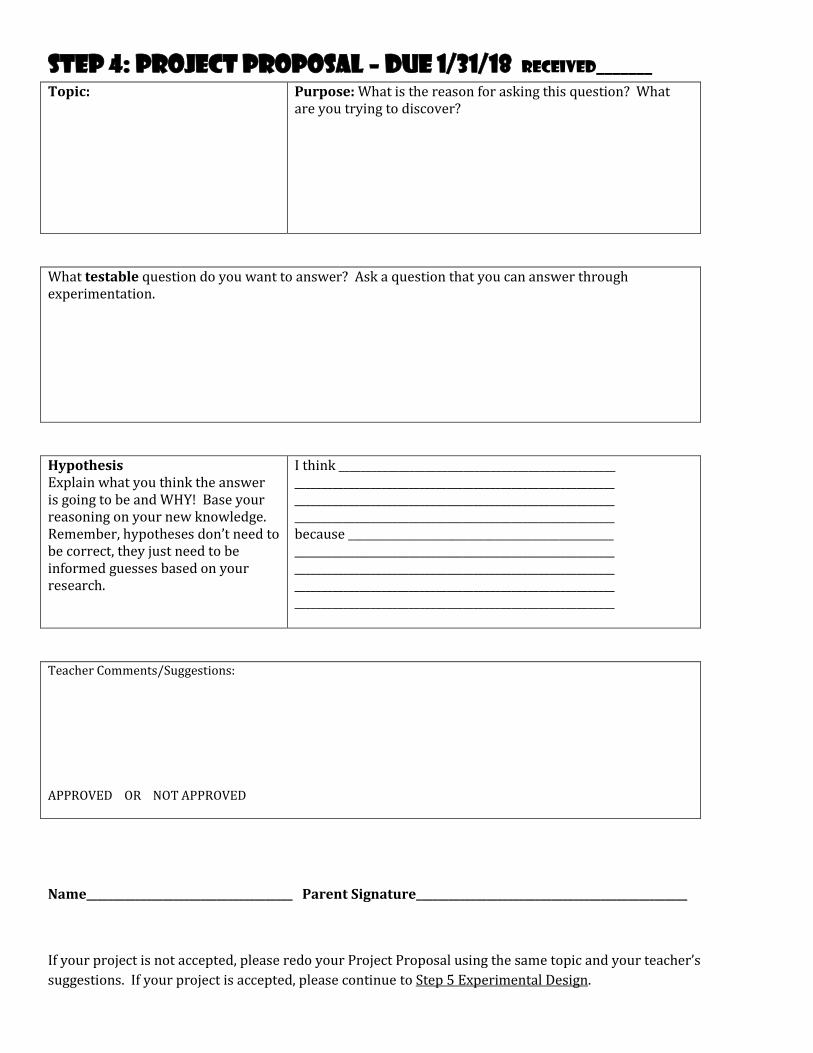
Step 4: Project Proposal – DUE 1/31/18 RECEIVED_______
Topic:
Purpose: What is the reason for asking this question? What are you trying to discover?
What testable question do you want to answer? Ask a question that you can answer through experimentation.
Hypothesis Explain what you think the answer is going to be and WHY! Base your reasoning on your new knowledge. Remember, hypotheses don’t need to be correct, they just need to be informed guesses based on your research.
I think ___________________________________________________ ___________________________________________________________ ___________________________________________________________ ___________________________________________________________ because _________________________________________________ ___________________________________________________________ ___________________________________________________________ ___________________________________________________________ ___________________________________________________________
Teacher Comments/Suggestions:
APPROVED OR NOT APPROVED
Name______________________________________ Parent Signature__________________________________________________
If your project is not accepted, please redo your Project Proposal using the same topic and your teacher’s
suggestions. If your project is accepted, please continue to Step 5 Experimental Design.

Project Timeline 2017-2018
The following is a list of due dates for each section or step of the project. Careful planning is needed as falling
behind makes everything more difficult. It is better to work ahead of the due dates in case problems arise.
EACH DAY LATE RESULTS IN ONE POINT DEDUCTION FROM YOUR TOTAL POINTS!
KEEP THIS IN A SAFE PLACE AND REFER TO IT OFTEN!
Due Date Assignment
01/12/18
Parent SIGNED confirmation of handbook slip AND Step 1 Project Topic.
01/31/18
Steps 2 & 3: Background research about your topic. This includes listing at least ten to fifteen facts, and citing one to three sources (completed in class). Step 4: Project Proposal WITH your parent signature.
2/13/18
Step 5: Experiment Design
02/20/18 Step 6: First Part of your report.
3/06/18
PLAN AHEAD! Perform your experiment at home (at least three times) and record what happens. Please have adult supervision when experimenting and always think safety first! Step 7 & 8: Results and Conclusion from experiment.
3/13/18 Step 9: Final Written Report
3/19/18
Step 10: Oral Presentation is given in front of classmates today. Step 11: Display Board Step 12: FINAL PROJECT DUE! Projects graded today.
3/20/18 SCIENCE FAIR in Highland Park Gym Mrs. Jensen & Mrs. Vaughn
3/21/18 SCIENCE FAIR in Highland Park Gym Mrs. Weichel & Mr. Robins
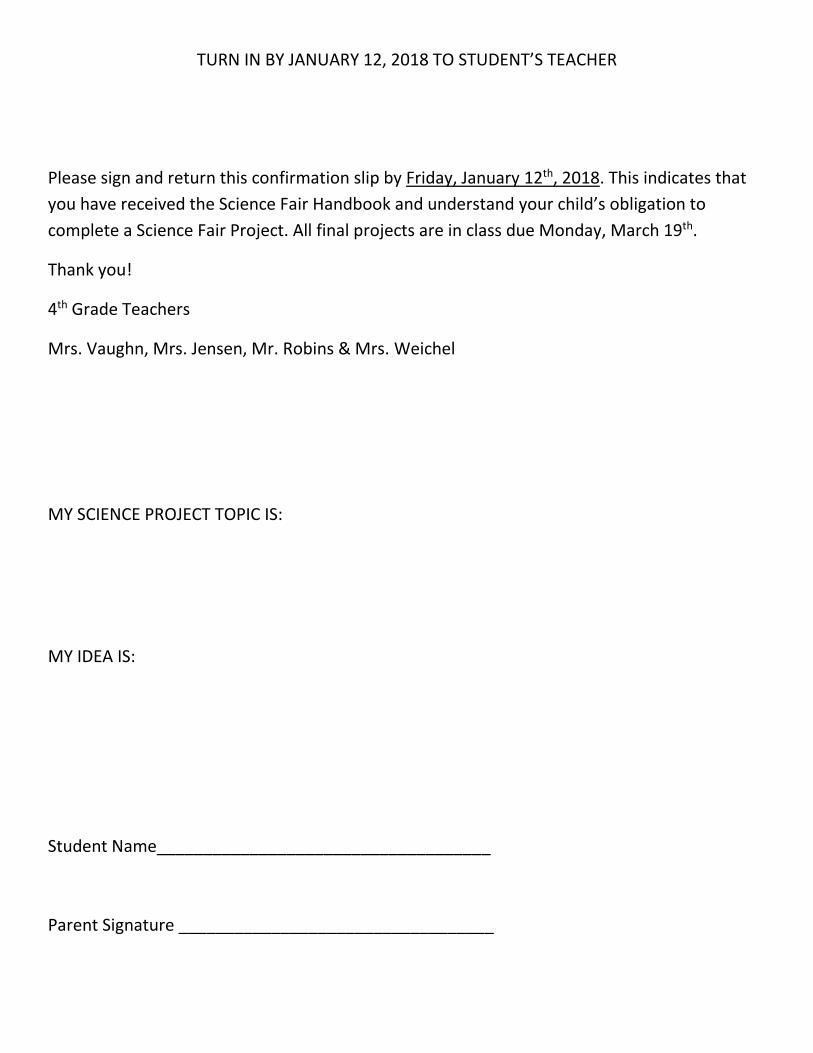
TURN IN BY JANUARY 12, 2018 TO STUDENT’S TEACHER
Please sign and return this confirmation slip by Friday, January 12th, 2018. This indicates that
you have received the Science Fair Handbook and understand your child’s obligation to
complete a Science Fair Project. All final projects are in class due Monday, March 19th.
Thank you!
4th Grade Teachers
Mrs. Vaughn, Mrs. Jensen, Mr. Robins & Mrs. Weichel
MY SCIENCE PROJECT TOPIC IS:
MY IDEA IS:
Student Name____________________________________
Parent Signature __________________________________