
360º Flush Mount Ceiling PIR Light Controller · 360º Flush Mount Ceiling PIR Light Controller...
12
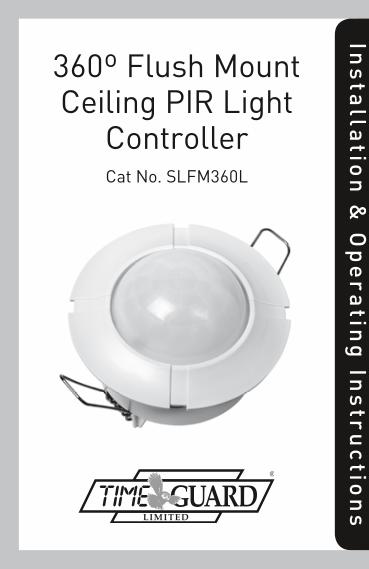
Installation & Operating Instructions 360º Flush Mount Ceiling PIR Light Controller Cat No. SLFM360L
Transcript of 360º Flush Mount Ceiling PIR Light Controller · 360º Flush Mount Ceiling PIR Light Controller...
Ins
talla
tion
& O
pe
ratin
g In
stru
ctio
ns
360º Flush Mount Ceiling PIR Light
ControllerCat No. SLFM360L

1 2
A
C
B
Lens Mask
Less sensitive
Mor
e sen
sitiv
e
3600
Side View
Top View
Wiring cover
Factory fittedbridge wireREMOVED
L1 L N E
SwitchedLoadOUT
Factory fittedbridge wire
Levering area
Time On setting
Lux -Dusk/Dawn
setting
Mains Supply IN
2.5m
6m
Cable clamps x2
Locators
Locatingspringspulledback
Locatingsprings fitted position
Sensor
Levering area
D
E
F
G
Restrict longdetection
Restrictshortdetection
Restrictdetectiondirectlyundersensor
L1 L N E
SwitchedLoadOUT
Mains Supply IN
IntroductionTheSLFM360Lutilisespassiveinfraredtechnologytodetectheat radiation of moving human bodies. Upon detection, the attached lighting load will illuminate for a user-determined time period. An integral daylight sensor ensures all day or night-only operation.
Important Information: Light Pollution and considerate LightingPleasebeawareoftheannoyanceover-lightinganareacancauseto your immediate neighbours. Light pollution caused by incorrectly installing a unit or over-lighting an area can be limited by carefully considering the location and position of your unit before installation.
The light spread on all halogen floodlights can be reduced by angling the floodlight downwards on the mounting bracket. This will also concentrate the light on your property and limit the potential inconvenience of the light shining into your neighbours windows etc.
PleaseseeSelectingaLocationforinformationonchoosingthe optimum location for any security light controlled by this unit.

2 3
A
C
B
Lens Mask
Less sensitive
Mor
e sen
sitiv
e
3600
Side View
Top View
Wiring cover
Factory fittedbridge wireREMOVED
L1 L N E
SwitchedLoadOUT
Factory fittedbridge wire
Levering area
Time On setting
Lux -Dusk/Dawn
setting
Mains Supply IN
2.5m
6m
Cable clamps x2
Locators
Locatingspringspulledback
Locatingsprings fitted position
Sensor
Levering area
D
E
F
G
Restrict longdetection
Restrictshortdetection
Restrictdetectiondirectlyundersensor
L1 L N E
SwitchedLoadOUT
Mains Supply IN
In the above illustration:• 4corecablemaybeused• Thereisnoexternaljunctionbox• Abridgeisprovided,pre-wiredto
bridge across live supply from AC mains to the output load via the contacts.
In the above illustration:• TheL1L2terminalsareusedto
control a DC load or if the load uses a different phase or voltage supply from the AC mains in.
• Factoryfittedbridgemustberemoved to isolate L1 & L2 terminals from AC mains in.

3 4
Parts included• PIRSensorunit.• Instructionmanual.Pleasekeepsafeforfuturereference.• AccessoryPack.Includeswiringcover,2xcableclamps,4xclamp
screws and 1 x lens mask sticker. Tools and parts needed
Tools and parts needed• 3coreflexiblecable.• Electric/hand-helddrill&bits.• 75mmor3inchdiameterholecutter.• TerminalorElectriciansscrewdriver.• Smallphilipsscrewdriver.• Wirecutters.• Suitablemainsinterconnectcable.
This product is suitable for indoor use only. Connected load must not exceed maximum 2400W Incandescent/Halogen, 500W Fluorescent or 150W CFL/Low Energy. LED lamps <10W lamps, Max. 10. LED lamps >10W <32W, max 5. sets.
Do not attempt to install if you are suffering from nausea or dizzy spells or on medication with similar side effects.
Not suitable for use with discharge lighting.
Selecting a locationThe motion detector has a number of detection zones, at various vertical and horizontal angles as shown (see diagram A).
A moving human body needs to cross/enter one of these zones to activate the sensor. The best all-round coverage is achieved with the unit mounted at the optimum height of 2.5m.
Careful positioning of the sensor will be required to ensure optimum performance. See diagram A detailing detection range and direction.

4 5
ThesensorismoresensitivetomovementACROSSitsfieldofvisionthantomovementdirectlyTOWARDS(seediagramB).ThereforepositiontheunitsothatthesensorlooksACROSSthelikelyapproachpath.
Avoid positioning the sensor where there are any sources of heat in the detection area (extractor fans,tumble dryer exhausts etc.) including opposite any other light sources such as other security lights. Reflectivesurfaces(i.e.poolsofwaterorwhite-paintedwalls)andoverhanging branches may cause false activation under extreme conditions.
During extreme weather conditions the motion sensor may exhibit unusual behaviour. This does not indicate a fault with the sensor. Once normal weather conditions return, the sensor will resume normal operation.
InstallationIMPORTANT
Switch off the electricity at the fuse box by removing the relevant fuse or switching off the circuit breaker before proceeding with
the installation. We recommend this unit be fitted by a qualified electrician. Install in accordance with wiring and current
buildingregulations.Pleasereadtheinstructionscarefully.
After choosing a suitable location (see previous section) install the unit as follows:
Theunitissuitableforconnectiontoa230Vac50Hzelectricitysupply. It is suggested that 3-core round flexible cable of 1 sq. mm gauge is used. An internal switch should be installed to switch the power to the unit On & OFF. This allows the sensor to be easily switched off when not required or for maintenance purposes and allows it to be conveniently brought into manual override.
Removethewiringcoverfromthesensorbydepressingthecatch on the side and lifting it clear of the twin locators opposite the catch (see diagram G).

5 6
Mark the position of the 75mm diameter locating hole centre taking care to avoid ceiling joists and other obstructions within the 75mm diameter. Drill a pilot hole to take the centre shaft of the hole cutter. Use the hole cutter to cut the required hole.
ConnectionTHEREARE2POSSIBLECONNECTIONSCENARIOS
1. Standard connection. See Diagram E.
The factory fitted ‘bridge’ wire must not be removed.
Connect the 3 or 4 core mains supply cable to the terminal block on the unit as follows:-
NEUTRAL(Blue) N EARTH(Green/Yellow) LIVE(Brown) L
Connect the fourth core (lighting live) of the four core cable (if used) to the L1 terminal block or the second 3 core cable (from the lighting) to L1 (brown), n (blue) and E (green/yellow).
2. Switching DC loads or loads which use a different phase or voltage supply from the AC mains. See Diagram F. Remove the factory fitted bridge wire. Connect the 3 core mains supply cable to the terminal block on the unit as follows:-
NEUTRAL(Blue) N EARTH(Green/Yellow) LIVE(Brown) L
Connect the load in series with the load supply between L1 and L2 terminals.

6
PleasenotethatthefunctionofL1andL2canbeviewedasasimpleunconnectedswitchcontrolledbythePIRsensorelectronics.
When wiring is complete, set the two adjustment controls on the side of the unit (diagram D) to the following positions:
TIME – Fully anti-clockwise.
DUSK – Fully clockwise.
Pushbackthelocatingsprings(diagramE)andfeedtheunitintotheceiling void via the 75mm hole. The locating springs will now fold back andholdtheSLFM360Linplace.
Setting upWalk Test Procedure
TIME – Fully anti-clockwise.
DUSK – Fully clockwise.
The unit will now operate during daytime as well as at night, illuminating the lamp for approx. 5 seconds each time. This allows testing to be carried out to establish the best position for the sensor.
The lamp will immediately illuminate as the unit goes through its ‘warm-up’ period. After approximately 1 – 2 minutes the lamp will extinguish. Try to remain outside the detection area during the warm-up period. Walk around the sensor to establish the detection area. The sensor will detect within an approximately six metre diameter circle from the centre of the sensor location. As you cross a detection ‘zone’ the lamp will illuminate. now stand still until the lamp extinguishes (this should take approx. 5 seconds).
Start moving again. As you cross each ‘zone’ the lamp will illuminate.
Repeattheabove,walkingatvariousdistancesandanglestotheunit.This will help you to to confirm the detection pattern.

7 8
Masking the Sensor LensTo reduce the sensor coverage, preventing detection in unwanted areas, mask the sensor lens using the lens mask sticker supplied (see diagram C). For your information, the centre section of the lens covers short range detection, and the outer edge of the lens covers long range. Mask the sensor to suit your installation.
Setting Up for Automatic OperationWhen walk tests are complete, the unit can be adjusted for automatic operation :
To access the controls use a knife or thin flat blade screwdriver to gently lever (see diagram E) the unit clear of the ceiling. Hold in position against the spring pressure while making adjustments.
The TIME setting controls how long the unit remains illuminated following activation & after all motion ceases. The minimum time (fully anti-clockwise) is approx. 5 seconds, whilst the maximum time (fully clockwise) is approx. 18 minutes. Set the control to the desired setting between these limits.
The DUSK control determines the level of darkness required for the unit to start operating. The setting is best achieved by the procedure below:
Set the DUSK control knob fully anti-clockwise. The unit will now start operating at dusk.
If you require the light to activate earlier, wait until the ambient light level reaches the level of darkness at which you wish the lamp to become operative, SLOWLY (a small step at a time) rotate the control in a clockwise direction until a point is reached where the lamp illuminates in response to a hand moving below the unit. Leave the control set at this point.

8 9
At this position, the unit should become operative at approximately the same level of darkness each evening. Observe the operation of the unit. If the unit is starting to operate too early (i.e. when it is quite light), adjust the control slightly anti-clockwise. If the unit starts to operate too late (i.e. dusk), adjust the control slightly clockwise.
Continue to adjust until the unit operates as desired.
Once the unit is set up as desired, refit the top cover by aligning the arrows shown on diagram E and twisting clockwise until cover is secure.
Manual Override ModeThe light can be switched On for longer time periods by use of the Manual Override Mode. This can be activated at night by using the internal wall switch or circuit breaker. Switch the internal wall switch twice (OFF/On, OFF/On) within 2 seconds.
The unit will now illuminate continuously until dawn or until it is switched back into Detection Mode.
To return to Detection Mode switch the internal wall switch OFF and then back On again within 1 second.
Problem• LampstaysONallthe
time at night.
• PIRkeepsactivatingforno reason (at random).
SolutionCoverPIRlenswithathickcloth. If the light turns out, check detection area for heat or reflective source. If the light stays On, check wiring. See Section 3.
Turn off at the internal wall switch. Leave for 30 seconds and turn On again. Leave for at least 18 minutes. If light activates, check area for false activation from heat, wind or reflective source.
Troubleshooting guide

9 10
Problem• PIRsensorwillnot
operate at all.
• ThePIRsensorwillnotoperate at night.
• Unitactivatesduringthedaytime
• PIRcoverageispoor/sporadic
• Detectionrangevariesfrom day to day
SolutionCheck that the power is switched On at the power supply or internal wall switch. Turn OFF the power to the unit and check the wiring connections. Check the lamp. If the lamp has failed, replace. Ensure that the lamp is seated correctlyinthelampholder.Pleasenotethat the unit will not detect through glass. (e.g. in a glazed porch).
The level of ambient light in the area may be too bright to allow operation at the current DUSK setting. During the of darkness, adjust the DUSK control slowly clockwise until the lamp illuminates. Refertoprevioussectionformoredetails.
Adjust the DUSK Control setting anti-clockwise to lower the level of ambient light required for activation.
Unit may be poorly located. See previous section – ‘Selecting a Location’ and re-locate the unit.
PIRdetectorsareinfluencedby climatic conditions. The colder the ambient temperature, the more effective the sensor will be. You may need to make seasonal adjustments to the detector head position to ensure trouble-free operation all year round.

10
Technical specificationsDetectionRange: Upto6metresdiameter(3mRadius)
at mounting height of 2.5m
DetectionAngle: 360º
PowerSupply: 230VAC~50Hz
Maximum Switchable Load: 2400W Incandescent/Halogen, 500W Fluorescent, 150W CFL/Low Energy. LED lamps <10W Lamps, max 10. LED lamps >10W <32W, max 5 sets. Not suitable for discharge lighting. 75W Fan
Time On Adjustment: 5 seconds – 18 minutes
Dusk Level Adjustment: Day & night or night only operation
EnvironmentalProtection: IP44(suitableforoutdooruse)
EC Directives: Conforms to current EC Directives
3 Year GuaranteeIn the unlikely event of this product becoming faulty due to defective material or manufacture within 3 years of the date of purchase, please return it to your supplier in the first year with proof of purchase and it will be replaced free of charge. For the second and third years or any difficulty in the first year telephone the helpline on 020 8450 0515.
note: A proof of purchase is required in all cases. For all eligible replacements (where agreed by Timeguard) the customer is responsible forallShipping/PostagechargesoutsideoftheUK.AllShippingcosts are to be paid in advance before a replacement is sent.

7
Zerofour – October 2013
67.058.496 (issue 2)
Timeguard Limited. Victory Park, 400 Edgware Road,
London NW2 6NDSales Office: 020 8452 1112
or email [email protected]
For a product brochure please contact:
For assistance with the product please contact:
or email [email protected]
HELPLINE020 8450 0515