2012 SUMMER CAMP CURRICULUM - Making Art History€¦ · 2012 SUMMER CAMP CURRICULUM SESSION 1 :...
22
2012 SUMMER CAMP CURRICULUM SESSION 1 : ART - i - Facts ! #!$%& ' ($ )*+,(-!./($ (0 .#) 1($$)1./($& 2).3))$ !-. 4 !-1#!)(,(56 .#-(75# #/&.(-6
Transcript of 2012 SUMMER CAMP CURRICULUM - Making Art History€¦ · 2012 SUMMER CAMP CURRICULUM SESSION 1 :...

2012 SUMMER CAMPCURRICULUMSESSION 1 : ART - i - Facts !"#!$%&"'"($")*+,(-!./($"(0".#)"1($$)1./($&2).3))$"!-."4"!-1#!)(,(56".#-(75#"#/&.(-6

2012 SUMMER CAMPCURRICULUM
SESSION 1 : ART - i - Facts
Introduction:
A HANDS - ON EXPLORATION OF THE CONNECTIONSBETWEEN ART & ARCHAEOLOGY THROUGH HISTORY
Curriculum and Publication Developed, Designed, and Implemented byDENISE LIBERI
Photography byELYSE BRADY, JENNIFER JORDAN, AND DENISE LIBERI
The curriculum developed for the St. Augustine Art Association’s week-long ART-i- facts Summer Camp focuses on the connections between art and archaeology. These three
hands -on lessons were designed for and implemented with a mixed group of thirty students
in grades 1 - 6, but are easily adaptable for use with younger and older students.
These lesson plans were developed in coordination with the opening of a new
permanent collection at the St. Augustine Art Association – an exhibit commemorating the
426th anniversary of the attack on the City of St. Augustine by Sir Francis Drake. The
collection includes artifacts found under the St. Augustine Art Association in a recent
archeological excavation including many ceramic items.
online: www.staaa.org or by phone: 904.824.2310
Lesson 1: WHAT WE LEAVE BEHIND ........................................................................... pg 1 Lesson 2: SHOEBOX DIG ................................................................................................. pg 4 Lesson 3: CERAMIC OLIVE JARS ................................................................................. pg 11
WORKS CITED ...................................................................................................................... pg 19
Table of Contents:

Art-i-facts Curriculum | St. Augustine Art Association !"
""
"
SUBJECT: Visual Art MEDIUM: colored pencil GRADES: 1 – 6 (adaptable to all grade levels) TIME: approx. 1.25 hrs
OVERVIEW:
This lesson serves as an introduction to the science of archaeology. Through group discussion and a hands-on drawing project, students will become familiar with basic archaeological concepts by reflecting on the material possessions the students may leave behind for future archeologists to find.
OBJECTVES:
Students will… • learn to answer the question “What is archaeology?” • recognize the cultural context of artifacts • understand how artifacts become “clues” for archaeologists in solving the mysteries of ancient
life • create drawing that illustrate the material possessions the students may leave behind • reflect on the art they have created
TERMS:
• artifact - an object formed by humans, particularly one of interest to archaeologists • composition - an arrangement of the elements of art using the principles of art to express the
artist’s idea • culture - the customs, beliefs, arts, and way of life of a group of people • drawing - an artwork consisting of lines and shapes/forms sketched on paper with materials
such as pencils, pens, chalk, pastels • subject - what an artwork is about
NATIONAL STANDARDS:
Visual Arts – Making Connections between Visual Arts and Other Disciplines Visual Arts – Understanding the Visual Arts in Relation to History and Cultures English – Communication Skills World History – Era 6: The Emergence of the First Global Age 1450 – 1770
WHAT WE LEAVE BEHIND

Art-i-facts Curriculum | St. Augustine Art Association #"
MATERIALS:
• pencil/eraser • colored pencil • white drawing paper
""
DISCUSSION: (10 min)
Have students sit quietly with their eyes closed while you read the following passage out loud. Encourage them to think of the answers to your questions quietly to themselves until the passage is finished. Then call on the students one by one to share their responses with the group.
“Close your eyes and pretend you are in your room. What do you see? Chances are you see books, magazines, toys, and clothing. These items are material possessions, the things you own in life. How many of these things do you think you’ll have in twenty years? What will happen to the rest of the stuff? Most material possessions eventually end up in the trash can and then get hauled off to a landfill many miles from where you live to slowly decay. Why? As you know, toys break, clothes become too small, and stuff that was cool when you were younger becomes very uncool. We live in a disposable culture where most things are thrown away.
This disposable culture we live in is nothing new. One million years ago it was the same. Even the earliest humanlike creatures that roamed the earth had a few possessions, including tools made of rock. What do you think happened when a stone tool broke, or when a spear was thrown and lost?
Since material possessions have existed, people have been losing them, leaving them, and throwing them away. In a nutshell, archaeology is the science of finding and studying material possessions lost or discarded in the past.”
*adapted from Archaeology for Kids by Richard Panchyk
ARTMAKING: (approx. 1 hour)
- In their sketchbooks or on a blank piece of paper, have students make a list of at least ten of their material possessions that might be found by future archaeologists. Encourage them to think of items that would not decompose or breakdown easily like jewelry, a trophy, or a plastic toy.
- Have students consider:
• How would these items look after being buried in the ground for many years? Would they be whole or perhaps missing pieces, tarnished, decomposed, or decayed?
• What clues would these artifacts give future archaeologists about your life and culture? • What could future archaeologists mistake these “artifacts” for?
- With pencil only, have each student create a composition on a sheet of white drawing paper, including drawings of their ten material possession “artifacts.” For varied results, have students pick either to draw these “artifacts” in their room in their current condition or underground in various states of deterioration.
- Once the pencil drawings are completed, have students add color to their drawings with colored pencils.
ACTIVITY

Art-i-facts Curriculum | St. Augustine Art Association !"
ADAPTATION SUGGESTIONS:
FOR YOUNGER STUDENTS (Grades K-5):
This lesson can be easily adjusted for younger elementary grades. Work as a group, instead of individually, making a composite list of material possession “artifacts” on the board. Also, using larger paper and drawing materials (or crayons) accommodates the developing fine motor skills of young students.
FOR OLDER STUDENTS (Grades 6-12):
This lesson can be easily adjusted for middle and high school students. Have students complete two drawings – a “before” drawing of their material possessions as they are now and an “after” drawing of their material possessions as an archaeologist would find them in 1,000 years. A more in-depth writing component can also be added to this lesson, having students write about how each of their material possessions would serve as a clue into their daily life and culture.
"
What We Leave Behind Sierra Smith, Age 8
STAAA ART–i -facts Summer Camp, 2012 "" ""
Art-i-facts Curriculum | St. Augustine Art Association $"
""
"
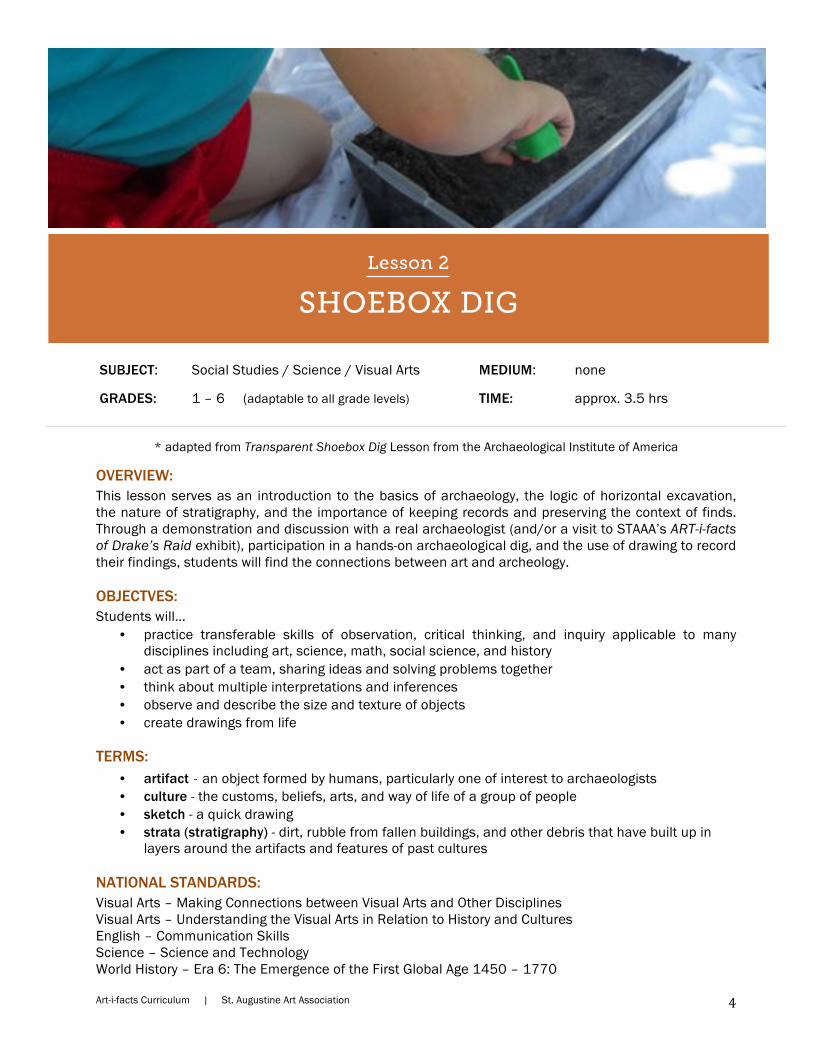
SUBJECT: Social Studies / Science / Visual Arts MEDIUM: none GRADES: 1 – 6 (adaptable to all grade levels) TIME: approx. 3.5 hrs
* adapted from Transparent Shoebox Dig Lesson from the Archaeological Institute of America
OVERVIEW:
This lesson serves as an introduction to the basics of archaeology, the logic of horizontal excavation, the nature of stratigraphy, and the importance of keeping records and preserving the context of finds. Through a demonstration and discussion with a real archaeologist (and/or a visit to STAAA’s ART-i-facts of Drake’s Raid exhibit), participation in a hands-on archaeological dig, and the use of drawing to record their findings, students will find the connections between art and archeology.
OBJECTVES:
Students will… • practice transferable skills of observation, critical thinking, and inquiry applicable to many
disciplines including art, science, math, social science, and history • act as part of a team, sharing ideas and solving problems together • think about multiple interpretations and inferences • observe and describe the size and texture of objects • create drawings from life
TERMS:
• artifact - an object formed by humans, particularly one of interest to archaeologists • culture - the customs, beliefs, arts, and way of life of a group of people • sketch - a quick drawing • strata (stratigraphy) - dirt, rubble from fallen buildings, and other debris that have built up in
layers around the artifacts and features of past cultures
NATIONAL STANDARDS:
Visual Arts – Making Connections between Visual Arts and Other Disciplines Visual Arts – Understanding the Visual Arts in Relation to History and Cultures English – Communication Skills Science – Science and Technology World History – Era 6: The Emergence of the First Global Age 1450 – 1770
SHOEBOX DIG

Art-i-facts Curriculum | St. Augustine Art Association %"
PREPARATION:
In preparing shoebox digs, the teacher will need to acquire a transparent shoebox sized container for each group of three to four students. Each box will be filled with layers composed of sand, soil, and birdseed (*see materials list) to help students recognize changes in strata as they excavate. Each layer should be at least an inch deep, thick enough to be identified by students before they dig though it accidentally. Depending on the number of students and teams, filling the boxes and cleaning up afterward may take more than an hour. Excavating, recording, and discussing will take several hours.
Each layer will be filled with a variety of “artifacts” (*see materials list.) The easiest way to proceed is to complete the lowest layer of dirt in all boxes in the same way, with similar artifacts, then move up to the next layer. The layers should be packed down quite tightly to resemble the compact soil of a real dig as closely as possible.
Try to be as creative as possible with the artifacts buried within each layer. Plan ahead by thinking about what the students can infer about the objects. What connections can be made about their placement in relation to each other? What clues can they give about a culture’s beliefs and behavior? For example, sequins or beads placed in a circle around a plastic skeleton may point to a civilization with distinct burial traditions for their dead. Also, breaking a cheap, decorative plate into large pieces to be buried in the layers (may need to sand edges if shards are sharp) can be a fun reconstruction exercise. Have each group bring their piece to the front of the class and try to reassemble the plate pieces like a puzzle.
MATERIALS:
SHOEBOX CONTAINERS
These containers can be found at most dollar stores. The transparency of the containers is important for students to visually understand the concept of stratigraphy.
• transparent shoebox sized plastic containers (1 for every three or four students) LAYERS
Sand, soil, and birdseed are intended to provide a variety of colors and textures to help students recognize changes in strata as they excavate. These materials can be easily substituted with various alternatives that may be more readily available in your area such as red clay, perlite, sugar crystals, etc. as long as a variety in color and texture is present within the three layers.
• sand, not too fine and dusty (approx. 10 cups for every shoebox)
• soil (approx. 10 cups for every shoebox)
• bird seed (approx. 10 cups for every shoebox) ARTIFACTS
There are endless possibilities for materials to serve as artifacts within your shoebox dig. The best artifacts are cheap, recycled, or collected. Be creative! Artifact materials may be collected after dig for re-use, but students absolutely love being able to take them home.
List of suggestions:
• coins - fake, real, or chocolate • miniature dollhouse items – dinnerware, tools, etc. • small plastic bugs • a variety of beads • fake “gems” • small plastic skulls or skeletons (easy to find around Halloween) • broken ceramics (SAND EDGES IF SHARP!)

Art-i-facts Curriculum | St. Augustine Art Association &"
EXCAVATION TOOLS:
• palette knives or spoons • large containers for excavated dirt • paintbrushes for removing dirt from artifacts • small plastic bags or containers for holding excavated artifacts • small sieves (optional) • pencils/erasers • colored pencils • Field Notes worksheet for each student (pg 9)
*Note: although the dig will be executed in teams, each student should have their own Field Notes worksheet to make sketches and observations individually
""
"
DISCUSSION:
An archeologist from the St. Augustine Archaeological Association visited students in STAAA’s ART-i-facts Summer Camp, facilitating a demonstration, discussion, and Q & A session. She explained and let the students handle real tools archaeologists use everyday, explained how actual archeological excavations are carried out, and introduced the concept of stratigraphy. Additionally, the students were able view and to handle authentic artifacts that were excavated from the dig directly under the St. Augustine Art Association’s north wing and other excavations around the city, including cannon balls, ceramic olive jar fragments, smoking pipes, and sewing needles.
Although you may not have the opportunity to have an archeologist visit your classroom in person, you are encouraged to schedule a FREE class visit to the St. Augustine Art Association to experience the new ART-i-facts of Drake’s Raid exhibit tour. The exhibit includes examples of professionally reconstructed artifacts depicting daily life during the time of Drake’s raid, precious charcoal unearthed in the burn layer at the archeological site directly under STAAA’s north wing, a teaching quilt explaining the concept of stratigraphy, and a video of archaeologist Carl Halbirt describing the excavation.
For more information about scheduling a FREE school tour, please connect with us
online: www.staaa.org or by phone: 904.824.2310
Additionally, you may refer to the guide to Basics of Archaeology for Simulated Dig Users, published online for classroom use by the Archaeological Institute of America here:
http://www.archaeological.org/pdfs/education/digs/Digs_basics.pdf
ACTIVITY

Art-i-facts Curriculum | St. Augustine Art Association '"
PROCEDURE / ARTMAKING: (approx. 2.5 hours)
DIVIDE STUDENTS INTO TEAMS (of 4 or less) AND PREPARE TO DIG
-Remind students… • that archaeologists do not quickly dig just to “find things,” but rather take their time to interpret
a culture and way of life.
• of the importance of accurate recording on Field Notes worksheet. Even very young children should attempt to record and draw the site and finds as well as they can. On a real dig, everything is destroyed as it is uncovered, so precise recording is extremely important.
• of the importance of working as a team. Teams who work together find artifacts more easily, record their findings more accurately, and come up with better inferences about cultures.
• to dig horizontally, noticing changes between layers, and excavating one layer at a time. When they notice a change in a layer or encounter artifacts, students should dig more slowly, removing small amounts of soil horizontally, rather than digging deeper in one area which can disturb placement of other artifacts.
REVIEW FIELD NOTES WORKSHEET (pg 9)
• Complete Section 1 of Field Notes Worksheet together, having students fill out allotted areas for Archaeologist’s Name, Team Name, Team Members, Date, and Location (for example “St. Augustine Art Association” or “Ms. Smith’s Classroom.”)
• Review Section 2 of Field Notes Worksheet together, making sure that students understand where and how to record their information correctly in the allotted areas for Layer, Type of Soil, Artifact, Number, Observation, Sketch and Comments. Students can use Comments area to infer about the culture who left the artifacts, or write about any other ideas/reflections they have during the excavation process. Show a completed worksheet if necessary for comprehension. This is the time to make sure all questions are answered before dig begins.
DIG!
Students will be extremely anxious about starting this step. Give them adequate space and time to enjoy and learn from the process together. They will naturally begin to ask each other questions and compare their findings with other teams. Simple guidance with the Field Notes worksheet, and reminders to stay in their seats and work together as a team may be helpful in making the dig run more smoothly.
REFLECTION: (no more than 10 mins for younger students and 20 mins for older students)
After dig is completed and cleaned up, engage students in a casual, out loud group discussion about the dig. Calling on students one by one to share reflections on their findings, ideas, inferences, and obstacles.
- Have students answer:
"
• What can we infer about the people who left these artifacts behind? What did they wear, eat, or do? What was their daily life like? What was important to them?
• Which group lived in the area first? Which layer is the earlier layer?
• What would happen if an archaeologist dug quickly and deeply, mixing up the layers?
• What other kinds of artifacts would you expect to find if you conducted a dig in a nearby area?

Art-i-facts Curriculum | St. Augustine Art Association ("
- Have older students (Grades 6 – 12) additionally consider:
"
• What would happen to the stratigraphy of an area if there were an earthquake? What other natural or unnatural events could disturb an area before excavation? What clues may be present to suggest an area has been disturbed?
• What did you notice about the artifacts in different layers that would suggest a change within the same culture rather than a change to a different culture?
ADAPTATION SUGGESTIONS:
FOR YOUNGER STUDENTS (Grades K-5):
This lesson can be easily adjusted for younger elementary grades. Use larger and less artifacts and be more hands-on in helping students record their observations on the Field Notes worksheet.
FOR OLDER STUDENTS (Grades 6-12):
This lesson can be easily adjusted for middle and high school students. Use smaller and more artifacts and be less hands-on in helping students record their observations on the Field Notes worksheet. A writing element or additional drawings can supplement the dig in efforts to make a more rich experience for advanced students. Students can write about the artifacts they found as “clues” and infer about the culture that left them behind. They can make drawings of the people and life of the long- lost civilization they discovered.
Stratigraphy Learning Quilt on display at STAAA (detail) Archaeologist Mischa Johns discusses her excavation under the Created by fiber artist Mary Rhopa la Ciera. north wing of STAAA (directly under where students are seated.)
7 year old Rosie carefully removes a layer of soil during Lydia and Troupe sift for artifacts during their shoebox her shoebox dig at STAAA’s ART-i-facts Summer Camp. dig at STAAA’s ART-i-facts Summer Camp.

Section 1:
Layer: Type of Soil:
Section 2:
!"#$!%&'&()*+,*-.!/% 0!+%
+%!/-.!/% '&#!+)&.
+%!/-/%/1%"*
!"+)2!#+ .3/1%" &1*%"4!+)&. *5%+#$
&1*%"4!+)&. *5%+#$
&1*%"4!+)&. *5%+#$
.3/1%"!"+)2!#+
.3/1%"!"+)2!#+
#&//%.+*

Layer: Type of Soil:
!"#$%!&# '()*+" ,*-+".!#$,' -/+#&0
,*-+".!#$,' -/+#&0
,*-+".!#$,' -/+#&0
'()*+"!"#$%!&#
'()*+"!"#$%!&#
&,))+'#-

Art-i-facts Curriculum | St. Augustine Art Association !!"
SUBJECT: Visual Arts MEDIUM: Clay GRADES: 1 – 6 (adaptable to all grade levels) TIME: approx. 7.5 hrs total
(3 classroom sessions)
OVERVIEW:
This lesson serves as an introduction to creating functional works of art out of clay, specifically using the basic coil pot method. Through an investigation of historical ceramics from a variety of cultures and a hands-on project creating their own olive jars, students will find the connections between art and archaeology.
OBJECTVES:
Students will… • learn about the history, form, and function of Spanish colonial olive jars • become familiar with a variety of ceramics from different cultures with a range of functions,
shapes, and designs • draw a sketch as a plan for a final product • understand the concepts of coil pottery • construct their own coil pots (olive jars)
TERMS:
• artifact - an object formed by humans, particularly one of interest to archaeologists • carve - to cut away parts from a block of wood, stone, or other hard materials. • ceramics - the art of making objects from clay and hardening them with fire • clay - a soft, moist material used to create artworks such as sculpture and pottery • coil - a rope-like shape that has been rolled from clay or other such material • craftsmanship - skill, knowledge and neatness resulting in expert workmanship • culture - the customs, beliefs, arts, and way of life of a group of people • detail - a small part of an artwork
CERAMIC OLIVE JARS

Art-i-facts Curriculum | St. Augustine Art Association !#"
• functional - designed with a useful purpose in mind • potter - an artist who makes pottery • scoring - a method for attaching separate pieces of clay together properly by making
crosshatched or “X” shaped marks • slab - a method of making pottery in which a flat piece of clay is cut into shapes which are
joined together to form an object • slip - watery clay in a creamy consistency used with scoring to join two pieces of clay • texture - the way a surface looks and feels, such as smooth, rough, or bumpy • three-dimensional - having height, width, and thickness
NATIONAL STANDARDS:
Visual Arts – Understanding and Applying Media, Techniques, and Processes Visual Arts - Making Connections between Visual Arts and Other Disciplines Visual Arts - Understanding the Visual Arts in Relation to History and Cultures World History – Era 6: The Emergence of the First Global Age 1450 - 1770
MATERIALS:
This lesson is designed for use with self-hardening clay for greater ease and adaptability. It can easily be completed in a traditional art room setting with kiln-fire clay using the proper firing and bisquing procedures.
***** STUDENTS SHOULD NEVER EAT OR DRINK OUT OF THEIR OLIVE JARS ***** DUE TO THE UNCERTAIN NATURE OF ALL MATERIALS
CLAY
• self – hardening clay (approx. one 6” x 6” x 6” chunk per student) (try AMACO ® Marblex)
POTTERY TOOLS
If you do not already have these materials, refer to the blog post below published online by The Teaching Palette, which gives simple tutorials on how to create your own inexpensive DIY pottery tools for your classroom:
http://theteachingpalette.com/2011/09/08/diy-clay-tools/
• fishing line or wire clay cutter (1 for each student) • needle tool (1 for each student) • ribbon tool (1 for each student) • rolling pin (at least 1 for every three students) • cup with diameter of approx. 4” (at least 1 for every three students)
for tracing base shape of pot
PAINT
• a variety of colors of acrylic or tempera paint • clear matte or gloss acrylic spray sealer (approx. 1 can for every 10 students)
(try MOD PODGE ® Clear Acrylic Sealer) • small paintbrushes • containers for water and paint
SETUP AND CLEANUP
• newspaper and tape for covering tables • rags or paper towels • smocks • 5 gallon buckets for cleanup (at least 2)

Art-i-facts Curriculum | St. Augustine Art Association !)"
ADDITIONAL MATERIALS
• Olive Jar Template (pg 17/18) (1 for each student) • pencil/eraser (1 for each student) • colored pencils (1 for each student) • visual examples of a variety of ceramics from different cultures with a range of functions, shapes, and designs
Due to the drying time of clay and paint, this activity is split into three sessions intended to be carried out during three consecutive days.
DAY 1 : Class Discussion and Sketch Exercise (approx. 1.5 hrs.)
DISCUSSION:
- Discuss and show visual examples of the Spanish colonial olive jar in regards to history, form and function. (see Olive Jar Template on pg 17/18)
- Inform students that they will be constructing their own olive jars.
- Explain that the first step of the process will be to use the Olive Jar Template to create individual sketches, planning the designs and colors they would like to add to their olive jar once constructed.
- Discuss and show visual examples of a variety of ceramics from different cultures with a range of functions. Students in the STAAA’s ART-i-facts Summer Camp got the opportunity to see the real, professionally reassembled Spanish colonial olive jar on display at the St. Augustine Art Association. You are encouraged to schedule a FREE class visit to the St. Augustine Art Association to experience the new ART-i-facts of Drake’s Raid exhibit tour, which includes artifacts found under the St. Augustine Art Association in a recent archeological excavation including many ceramic items.
For more information about scheduling a FREE school tour, please connect with us
online: www.staaa.org or by phone: 904.824.2310
ARTMAKING:
Students will use the Olive Jar Template (pg 17/18) to create individual sketches, planning the designs and colors they would like to add to their olive jar once constructed. For varied results, students should be given the freedom to use mixed colors and designs inspired by any culture, or directly from their imagination. Make sure that visual examples are available to them during this step. -Have students start sketch with pencil only, adding color with colored pencils after designs are fully laid out.
DAY 2 : Olive Jar Construction (approx. 3 hours) This section of the Ceramic Olive Jar lesson tends to be fairly messy. It is suggested that tables be
covered with newspaper, students wear smocks, and have easy access to rags/paper towels and a clay-appropriate sink or cleaning station (see TIPS FOR CLEANING UP CLAY on pg 16)
ACTIVITY

Art-i-facts Curriculum | St. Augustine Art Association !"#
DEMONSTRATION / ARTMAKING:
It is essential that the steps for making coil pots are demonstrated correctly and clearly to students before they begin their own construction.
PART I : CREATING BASE FOR OLIVE JAR
• STEP 1 – ROLL SLAB AND CUT OUT BASE - Using the rolling pin, flatten clay to a consistent
thickness of around !” to ".”
- Using the approx. 4” diameter cup as a template, trace a circle in the clay with the needle tool, cutting all the way through the clay.
- Peel off 4” circle. Keep some excess clay slab moist and flattened to use in PART III : ADDING DETAILS.
PART II : ROLLING AND ATTATCHING COILS
• STEP 2 - CREATE COIL “SNAKES”
- To make each coil “snake,” compress a wad of clay
into a ball of approx. 2” in diameter. Using light, even pressure, begin to roll the ball at one end while moving your hands down the length to the other end. You will see your clay ball turning into a cylinder, thinning and growing longer. Aim for a coil approx. !” in diameter. It may take practice for students to get the hang of making coils with the correct and consistent thickness. Encourage them to not get frustrated, simply rolling the clay back into a ball and starting again if they make a mistake.
• STEP 3 – SCORE, SLIP, AND ATTACH FIRST COIL Scoring is an essential method for attaching separate pieces of clay together properly. - Using the needle tool, make crosshatched or “X”
shaped marks along the underside of the first coil as well as on top perimeter of the circular slab base.
Slip , or clay glue, is watery clay in a creamy consistency used with scoring to join two pieces of clay. - Dip one finger in water, and run it over scored areas
on coil and circular slab base.
- Attach coil, lightly pinching the coil with one finger into the circular slab base.

Art-i-facts Curriculum | St. Augustine Art Association !%"
• STEP 4 – SHAPE POT BY ADDING MORE COILS
- Using the score and slip method for attaching,
continue creating coils and wrapping them on top of the existing pot. As each coil runs out, attach a new coil directly against the end of the previous coil and blend them together with your fingers.
- Placing a coil directly on top of the coil below it will make a straight–sided pot. Instead, place each coil slightly on the outside edge of the coil below it, letting the pot gradually flare open as it grows taller. Continue adding coils on the outward edge, until half of desired height is reached, approx. 4”.
- Start placing each coil slightly on the inside edge of
the coil below it, letting the pot gradually close, until it reaches its desired height. Make sure not to completely close in your pot, leaving at least a small opening at the top. At this point, your pot should have final olive jar shape.
• STEP 5 – SMOOTH OUT EDGES
- Add thick slip (! water, ! clay) to the outside of the pot, rubbing and flattening with fingers until entire surface is free of bumps and cracks. Fill all of the spaces in between coils.
PART III : ADDING DETAILS • STEP 6 – ADD DESIGNS
- Using the sketch created yesterday on the Olive Jar
Template as a guide, start adding designs and details to individualize the olive jar. Designs can be carved into the existing clay using the pottery tools, and/or cut out of the extra pieces of rolled clay. Remember to use the score and slip method when attaching any two pieces of clay.

Art-i-facts Curriculum | St. Augustine Art Association !&"
PART IV: DRYING
- Leave pots uncovered to dry overnight.
TIPS FOR CLEANING UP CLAY ************** CLAY AND OTHER CERAMIC MATERIALS SHOULD NEVER GO DOWN YOUR DRAIN! **************
Clay will eventually clog your plumbing and often contains environmentally unfriendly chemicals that can be hard for sewage systems to clean out.
Set up a station in a centrally located position with two 5 gallon buckets filled ⅔ of the way with water. In the first bucket, rinse off tools and hands. Rinsing in the second bucket will catch almost all remaining particles. Within a few days, clay particles will sink to the bottom of buckets, separating from the water, allowing re-use of the remaining clay. After water and clay has separated, carefully remove water with a cup and pour out, then bag clay.
Newspaper table covers can be thrown directly in the garbage.
DAY 3: PAINTING (approx. 2 hrs.)
This section of the Ceramic Olive Jar lesson tends to be fairly messy. It is suggested that tables be covered with newspaper, students wear smocks, and have easy access to rags/paper towels and a sink.
PART V : ADDING COLOR
- Using small paintbrushes, have students carefully paint the interior and exterior of the pots with the colors of their choice. Some colors may need two coats if clay is not covered completely
Remind students that their pots are very fragile at this point and should be handled with care. Also remind students about proper paintbrush use and cleanup procedures.
PART IV : ADDING GLAZE This step should be completed by an adult, in a ventilated outdoor area due to the nature of spray sealer.
- Lightly spray the interior and exterior of each olive jar
***** STUDENTS SHOULD NEVER EAT OR DRINK OUT OF THEIR OLIVE JARS ***** DUE TO THE UNCERTAIN NATURE OF ALL MATERIALS
ADAPTATION SUGGESTIONS:
FOR YOUNGER STUDENTS (Grades K-5):
This lesson can be easily adjusted for younger elementary grades. Younger students will generally need more individualized, hands – on guidance while making their pots. Have students participate with making the demo pot, helping teacher directly with each step of the process.
FOR OLDER STUDENTS (Grades 6-12):
This lesson can be easily adjusted for middle and high school students. Older students will need less individualized, hands–on guidance while making their pots. Encourage them to add handles, tops, or any other more advanced decorations to supplement their coil pot.

!"#$%&'(#$)*+$,*-#.$/*01$-%$-"#$-'2#$%3$-"#$45*6'."$0%&%6'7*-'%6$%3$82#+'0*$90'+0*$:;<<$=:><<?@
!"#$%&'(#$)*+$A#-.$'-.$6*2#$3+%2$'-.$%&'(#$=$&'1#$."*5#?$B&'(#$)*+.$*&.%$"*(#$*$."%+-$6#01$*6,$,%6C-$=$."*5#,$2%C-"?
B&'(#$ )*+.$ *+#$ 0%22%6&D$ +#3#++#,$ -%$ *.$ -"#$ E-C55#+F*+#G$ %3$-"#'+$ -'2#H$ 2%.-$ 0%22%6&D$ C.#,$ *.$ ."'55'6A$ *6,$ .-%+'6A$0%6-*'6#+.?
!"#$%
!&'()*"'%

Art-i-facts Curriculum | St. Augustine Art Association !*"
Students in the STAAA’s ART-i-facts Summer Camp look at and Rosie , age 7, scores and slips her clay as she adds touch a variety of ceramic shards from different cultures. another layer of coils to her olive jar.
Andrea, age 9, smoothes the exterior of her olive jar. Thomas, age 6, adds details to his olive jar.
Marley, age 9, shows off her olive jar after Day 2. Completed olive jar by Alexa, age 7.
Finished olive jars. Olive jars on display at STAAA’s 2012 Kid’s Art Exhibit.

Art-i-facts Curriculum | St. Augustine Art Association #+"
Works Cited
Andrilk, Hillary. "DIY Clay Tools | The Teaching Palette." DIY Clay Tools. The Teaching Palette.
Web. 23 Aug. 2012. <http://theteachingpalette.com/2011/09/08/diy-clay-tools/>.
Brown, Shelby. "Basics of Archaeology for Simulated Dig Users." Archaeological Institute of
America. Web. 20 Aug. 2012.
<http://www.archaeological.org/pdfs/education/digs/Digs_basics.pdf>.
Brown, Shelby. "Shoebox Dig." Archaeological Institute of America. Web. 20 Aug. 2012.
<http://www.archaeological.org/pdfs/education/digs/Digs_shoebox.pdf>.
"Curriculum." San Diego Museum of Art. Web. 23 Aug. 2012.
<http://www.sdmart.org/education/curriculum>.
"Elementary Art - Glossary." Elementary Art - Glossary. Cypress - Fairbanks ISD. Web. 16 Aug.
2012. <http://www.cfisd.net/dept2/curricu/elart/Glossary.htm>.
"Fine Arts Standards." Education World: U.S. Education Standards / National Standards.
Web. 16 Aug. 2012.
<http://www.educationworld.com/standards/national/index.shtml>.
"Making A Coil Pot." How to Make a Coil Pot. Lakeside Pottery. Web. 23 Aug. 2012.
<http://www.lakesidepottery.com/Pages/Pottery-tips/Making-a-clay-coiled-pot-
Lakeside-Pottery-Tutorial.htm>.
Panchyk, Richard. "What Is Archaeology?" Introduction. Archaeology for Kids: Uncovering the Mysteries of Our Past : 25 Activities. Chicago: Chicago Review, 2001. Xi-Xiii. Print.