
125 AMP BATTERY LOAD TESTER - Northern Tool Test identifies excessive starter current draw, which...
7
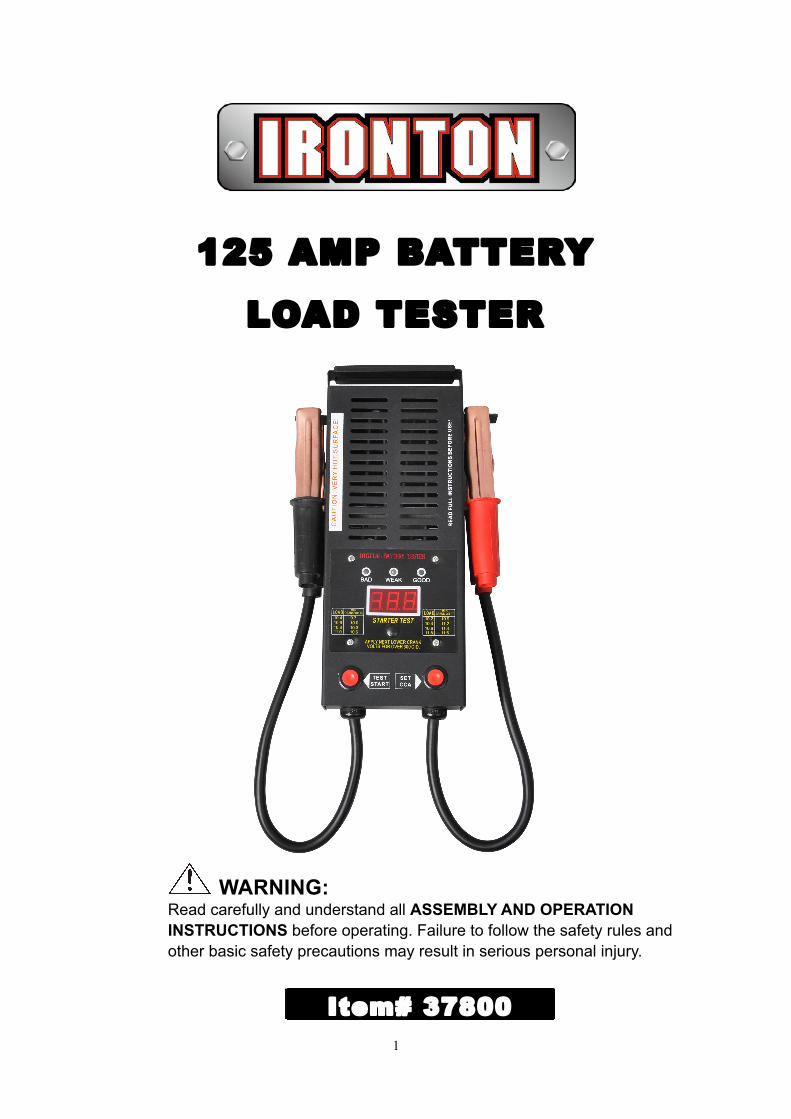
1 125 AMP BATTERY LOAD TESTER WARNING: Read carefully and understand all ASSEMBLY AND OPERATION INSTRUCTIONS before operating. Failure to follow the safety rules and other basic safety precautions may result in serious personal injury. Item# 37800
-
Upload
nguyenthuy -
Category
Documents
-
view
221 -
download
0
Transcript of 125 AMP BATTERY LOAD TESTER - Northern Tool Test identifies excessive starter current draw, which...
1
125 AMP BATTERY
LOAD TESTER
WARNING:
Read carefully and understand all ASSEMBLY AND OPERATION INSTRUCTIONS before operating. Failure to follow the safety rules and other basic safety precautions may result in serious personal injury.
Item# 37800

2
Thank you very much for choosing a Ironton product! For future reference, please
complete the owner’s record below:
Model: _______________ Purchase Date: _______________
Save the receipt, warranty and these instructions. It is important that you read the entire
manual to become familiar with this product before you begin using it.
This battery tester is designed for certain applications only. The distributor cannot be responsible for issues arising from modification. We strongly recommend this machine not be modified and/or used for any application other than that for which it was designed. If you have any questions relative to a particular application, DO NOT use the machine until you have first contacted the distributor to determine if it can or should be performed on the product.
For technical questions please call 1-800-222-5381.
TECHNICAL SPECIFICATIONS
Capability 12V DC battery tester with charging system output
Load Test Capacity 125 Amps; 200-1000 Cold Cranking Amps (CCA)
Digital LED Display Analog, 0-16V DC (maximum)
Test Cycle 5 seconds per test with 1 minute cool down; up to 3 tests in 5
minutes
Overall Dimensions 11-1/2” L x 7” W x 3-1/4” D
Features 5S auto cutoff and CCA set
GENERAL SAFETY RULES
WARNING: Read and understand all instructions. Failure to follow all
instructions listed below may result in serious injury.
CAUTION: Do not allow persons to operate or assemble this battery tester
until they have read this manual and have developed a thorough understanding of
how the battery tester works.
WARNING: The warnings, cautions, and instructions discussed in this
instruction manual cannot cover all possible conditions or situations that could
occur. It must be understood by the operator that common sense and caution are factors
which cannot be built into this product, but must be supplied by the operator.
SAVE THESE INSTRUCTIONS
3
IMPORTANT SAFETY CONSIDERATIONS
SPECIFIC SAFETY PRECAUTIONS
1. Keep your work area clean and well lit. Cluttered benches and dark areas invite
accidents.
2. Do not operate power tools in explosive atmospheres, such as in the presence of
flammable liquids, gases, or dust. Power tools create sparks, which may ignite the
dust or fumes.
3. Keep bystanders, children, and visitors away while operating a power tool.
Distractions can cause you to lose control. Protect others in the work area from debris
such as chips and sparks. Provide barriers or shields as needed.
4. Do not force the tool. Use the correct tool for your application. The correct tool will do
the job better and safer at the rate for which it is designed.
5. Do not use the power tool if the Power Switch does not turn it on or off. Any tool that
cannot be controlled with the Power Switch is dangerous and must be replaced.
6. Store idle tools out of reach of children and other untrained persons. Tools are
dangerous in the hands of untrained users.
7. Maintain tools with care. Keep clean. Do not use a damaged tool. Tag damaged tools
“ Do not use” until repaired.
8. Tool service must be performed only by qualified repair personnel. Service or
maintenance performed by unqualified personnel could result in a risk of injury.
9. Maintain labels and nameplates on this tool. These carry important information. If
unreadable or missing, contact us for a replacement.
10. Always wear ANSI approved safety impact eye goggles and heavy work gloves when
using this tool. Using personal safety devices reduce the risk for injury. Safety impact
eye goggles and heavy work gloves are available from us.
11. Maintain a safe working environment. Keep the work area well lit. Make sure there is
adequate surrounding workspace. Always keep the work area free of obstructions,
grease, oil, trash, and other debris. Do not use this tool in areas near flammable
chemicals, dusts, and vapors. Do not use this product in a damp or wet location.
12. People with pacemakers should consult their physicians before using this product.
Electromagnetic fields in close proximity to a heart pacemaker could cause
interference to or failure of the pacemaker.
13. Caution is necessary when near the coil, spark plug cables, or distributor of a running
engine. The engine should always be off if adjustments are to be made of the
distributor.
14. When connecting the Battery Cables to the battery, avoid creating sparks — always
connect and disconnect clamps exactly as described in rule number 15 below,
especially when the battery is being charged. Explosive gases are created during
charging. Sparking could also damage the vehicle’s electrical system.
15. Be certain of the test battery polarity before connecting the test Cable Clamps. The
red Cable Clamp (A) goes to the positive terminal of the battery. The black Cable

4
Clamp (B) goes to the negative terminal of the battery.
16. When placing the Battery Tester in the vehicle (on the frame, engine, or fender), take
special care that the metal housing of the Battery Tester does not come in contact with
either terminal of the battery or other electrical connections.
17. Do not drop the Battery Tester, as it may affect proper operation.
18. Do not smoke or have open flames near the battery.
19. Reversing Battery Tester Cable Clamps on the battery will damage the tester.
20. Do not connect the Battery Tester to the battery while the battery is being charged.
Turn the engine off before connecting.
21. Do not touch the cooling vents on the Battery Tester after testing the battery. They
become very hot.
OPERATION
CAUTION: This Battery Tester becomes very hot during use. Touching it
will result in serious burns.
Testing the Battery
Note: The temperature of the battery will affect the testing data. It will test lower when
cold than when warm. Never test or charge a frozen battery.
CAUTION: Wear rubber gloves (not included) whenever working with the
Battery Tester or batteries.
Note: Before any testing, make sure to clean the battery contacts.
1. Make sure the vehicle is not running. Connect the red (+) Clamp (A) to the
positive (+) terminal post on the battery. Connect the black (-) Clamp (B) to the negative (-)
terminal post on the battery. If it is less than 12V on a 12V battery, disconnect the battery
and recharge before testing, check your battery CCA first, then adjust the Set CCA button
(E) to correspond with the CCA of the battery. Push the CCA button (increments of 100)
until the CCA that matches your battery appears. (This machine can test battery under
1000CCA, If reaching 999 CCA , LED Window (D) will display “AAA” .)
2. Check the Battery Tester Led Window (D) to determine effectiveness of charge.
If the Battery Tester does not register and no display is seen, double check that the

5
Clamps are connected to the proper terminal posts. Make certain a clean connection has
been made between the Clamps and terminal posts.
3. Push and release the Test Start button(C), a solid and consistent measurement is
indicated by the Battery Tester. Within five seconds, read the LED Window display. Do not
test more than three times in a five minute period. Allow one minute for cool down
between tests.
Note: If a battery does not have the charge expected, have a qualified technician
check the specific gravity. There may be an electrical drain or charging system trouble. If
charging does not raise the specific gravity, you may have a defective battery.
Additional Operation Information
Analyzing test results by color display: The Battery Tester will measure battery
output/charge in two ways. The three lights above the LED Window (D ) will indicate a
color telling you the general condition of the battery.
4. If the battery is without significant charge, charge it and check it again under load.
The battery should measure 75% of Open-Circuit Voltage. 75% can be considered fully
charged. If the charging rate reaches at least 75%, but fails to reach 75% during the load
test, it needs replacing. Refer to the table below for 12 Volt battery percentages:
5. When test is complete, remove Black Clamp (-) from battery first; then remove
Red Clamp (+).
Testing the Charging System-Alternator/ Regulator Output:
WARNING: When testing a system in a car/truck, the vehicle must be on a flat,
dry surface.
The transmission must be in park and the emergency brake engaged.
1. Connect the red (+) Clamp to the positive (+) terminal post on the battery.
Connect the black (-) Clamp to the negative (-) terminal post on the battery.
2. With the engine off, check the Battery Tester LED Window (D) to determine
effectiveness of charge. Without using the Test Start Button. If the Battery Tester does not
register and no display is seen, double check that the Clamps are connected to the proper
terminal posts. Make certain a clean connection has been made between the Clamps and
terminal posts.
Red = Bad, No Charge, or Completely Discharged
Yellow = Weak, Needs Recharging
Green = Good or Normal – Has Existing Charge
Open Circuit Voltage (V): Less than 11.7V 12V 12.2V 12.4V 12.4V +
Battery Charge Percentage 0% 20% 50% 75% 100%
6
3. Start the engine and let it run. Do not using the Test Start Button, observe the
voltage readout when the engine speed reaches between 1200 to 1500 RPM (normal idle
speed). Once you push the Test Start Button (C), then tester will into charging system
mode.
4. Note meter reading with all electrical accessories off. One of three conditions will
apply:
a) Voltage less than 13.5 volts indicates faulty alternator.
b) Voltage between 13.5 volts and 15 volts indicates charging system is good.
c) Voltage over 15 volts indicates faulty voltage regulator.
5. When charging system test is complete, remove Black Clamp (-) from battery first;
then remove Red Clamp (+).
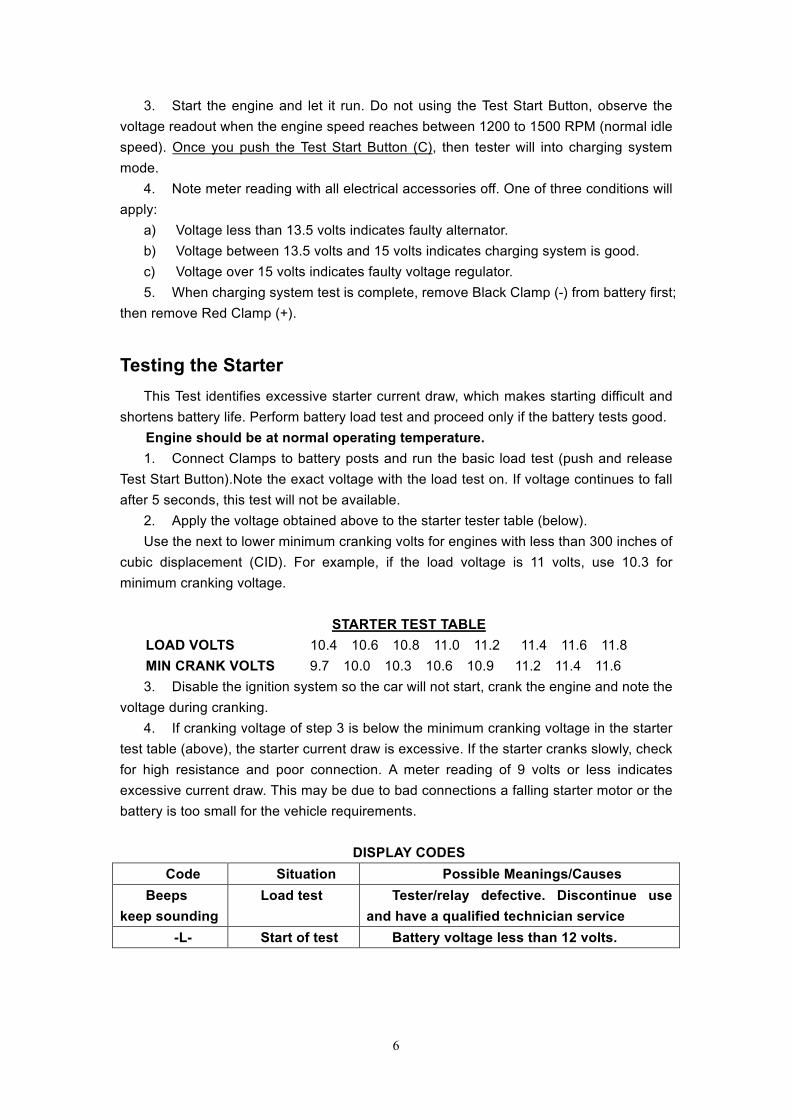
Testing the Starter
This Test identifies excessive starter current draw, which makes starting difficult and
shortens battery life. Perform battery load test and proceed only if the battery tests good.
Engine should be at normal operating temperature.
1. Connect Clamps to battery posts and run the basic load test (push and release
Test Start Button).Note the exact voltage with the load test on. If voltage continues to fall
after 5 seconds, this test will not be available.
2. Apply the voltage obtained above to the starter tester table (below).
Use the next to lower minimum cranking volts for engines with less than 300 inches of
cubic displacement (CID). For example, if the load voltage is 11 volts, use 10.3 for
minimum cranking voltage.
STARTER TEST TABLE
LOAD VOLTS 10.4 10.6 10.8 11.0 11.2 11.4 11.6 11.8
MIN CRANK VOLTS 9.7 10.0 10.3 10.6 10.9 11.2 11.4 11.6
3. Disable the ignition system so the car will not start, crank the engine and note the
voltage during cranking.
4. If cranking voltage of step 3 is below the minimum cranking voltage in the starter
test table (above), the starter current draw is excessive. If the starter cranks slowly, check
for high resistance and poor connection. A meter reading of 9 volts or less indicates
excessive current draw. This may be due to bad connections a falling starter motor or the
battery is too small for the vehicle requirements.
DISPLAY CODES
Code Situation Possible Meanings/Causes
Beeps
keep sounding
Load test Tester/relay defective. Discontinue use
and have a qualified technician service
-L- Start of test Battery voltage less than 12 volts.

7
WARRANTY
One-year limited warranty
Distributed by:
Northern Tool + Equipment Co., Inc.
Burnsville, Minnesota 55306
NorthernTool.com
Made in China