11.6 MasterControl Creator-Reviser Manual · 11.6 MasterControl Creator-Reviser Manual 3...
118
11.6 MasterControl Creator-Reviser Manual
Transcript of 11.6 MasterControl Creator-Reviser Manual · 11.6 MasterControl Creator-Reviser Manual 3...

11.6 MasterControl Creator-Reviser Manual


i
Table of Contents
1. MasterControl General Features ________________________________________________________________ 1 MasterControl Application Suite Introduction 1 Customer Center 1 Corporate Site 1 Logging In to MasterControl Portal 1 MasterControl Navigation Methods 3 Getting Around in MasterControl Portal 3 MasterControl Portal Navigation Menu 3 Portal Search 3 Toolbar Search 3
Simple 3 Basic 4 Advanced 5 File Searches 6
2. My MasterControl Menu _______________________________________________________________________ 7 My MasterControl 7 My Tasks 7
What Can I Do with My Tasks? 7 Viewing Signed Active Tasks 8 Changing Route Users 8 Tracking Task Details 10 Viewing the Collaboration Workspace (Mobile) 10
My Links 11 What Can I Do With My Links? 11 Managing Home Page Links 12 Creating a Link from a Template 13 Current Home Page 13 Word Integration Overview 15 Sharepoint Integration Overview 15
Start Task 16 Starting a Packet Task 16 Starting a Form Task 18 Starting an Advanced Packet 19 Linking Advanced Packet Tasks 21 Starting a Scheduled Task 22
Tracking 26 Tracking Overview 26 What Can I Do with Tracking? 26 Locating a Task 27 Stopping, Restarting, and Aborting Tasks 29 Locating Classic Forms 29
My Recent 30 My Recent Error! Bookmark not defined.
My Files 30 My Files Error! Bookmark not defined.
My Organizers 31 My Organizers Error! Bookmark not defined.
My Training Folder 32 What Can I Do with My Training Folder? 32 Adding Training Attachments 32 Taking Exams 32
My Settings 33

Table of Contents
ii
My Settings Error! Bookmark not defined. Change Passwords 33 Security Questions 33 Out of Office 34 E-mail Import 35 E-mail Notifications 36 My Rules 37 Manage Virtual Folders 38 Choosing a Time Zone 39 Help Message Settings 39
My Languages 40 My Languages 40
Analytics 40 Reports 40 Creating Dashboards 40 Creating a Dataset Profile 40
My Subscriptions 41 My Subscriptions Error! Bookmark not defined.
3. InfoCards __________________________________________________________________________________ 43 InfoCard Overview Error! Bookmark not defined. InfoCard Tabs 43
Information Tab 43 Training Tab 46 Controlled Copies Tab 47 Attachments & Links Tab 49 Custom Fields Tab 51 History Tab 51 Status Tab 52 Versions Tab 54 Other Tabs 54
Working with InfoCards 54 Working with InfoCards Error! Bookmark not defined. InfoCard List Page 55 Placing Documents in a Vault 55 Editing InfoCards 60 Mass Replace 60 Copying InfoCard Files 62 Deleting InfoCards 62 InfoCard Autoload 63 Finding InfoCards 63 Viewing an Electronic File 64 Checking InfoCards Out and In 65 Viewing InfoCard Audit Trails 66 InfoCard Quick Approval 67 InfoCard Quick Revision 68 Document Review 68
4. MasterControl Audit _________________________________________________________________________ 71 MasterControl Audit Overview 71 Audit Workspace Tabs 71
Creating an Audit InfoCard 71 Audit Workspace Information Tab 71 Audit Workspace Documentation Tab 72 Audit Workspace Observations Tab 74 Audit Workspace Checklist Tab 77

11.6 MasterControl Creator-Reviser Manual
iii
Audit Schedule 78 Viewing the Audit Schedule 78 Viewing Conflicting Audits 79 Using the Audit Calendar 79
Audit Routes 81 Issuing Audit Responses 82
Responding to Response Task 83 Resending Responses 85
Adding a Holiday 87 Scoring an Audit 87 Using Create Document Functionality 87 Initiating Actions 88
5. MasterControl Documents ____________________________________________________________________ 91 MasterControl Documents Overview 91 MasterControl Approval Workflows Overview 91
MasterControl Approval Workflows Overview Error! Bookmark not defined. Sign Off Tasks 91
Organizer Overview 92 Organizer Overview Error! Bookmark not defined. Creating Organizers 92 Adding Organizer Folders 94 Adding Projects to Organizers 94 Deleting Steps 95 Adding InfoCards to an Organizer 95 Copying an Organizer 95 Filtering Access View of Organizers 95 Viewing Organizers and Organizer Files 96 Searching for InfoCards in Organizers 97 Performing Document Level Actions in Organizers 97 Adding Virtual Folders to Organizers 97 Viewing InfoCards from an Organizer 98 Opening an Organizer in an Independent Browser 98 Organizer Reports 98 Taxonomy Organizers 99
Explorer Overview 99 Using Explorer 99
6. MasterControl Portal _______________________________________________________________________ 105 MasterControl Portal Overview 105
7. MasterControl Process______________________________________________________________________ 107 MasterControl Process Overview 107 Processing Form Tasks 107
Processing Form Tasks Error! Bookmark not defined. Performing Form Tasks 107
8. MasterControl Training ______________________________________________________________________ 109 MasterControl Training Overview 109 Processing Training Tasks 109
Processing Training Tasks Error! Bookmark not defined. What Can I Do with Training Tasks? 109 Supervisors 111 Verifiers 112


1
MasterControl General Features
MasterControl Application Suite Introduction
Welcome to MasterControl! Our primary goal is to help make you and your company successful through the use of the MasterControl solutions. This help file provides an overview of the system functionality for all MasterControl modules. The following online sources provide additional information about MasterControl services:
Customer Center
MasterControl's Customer Center is where we listen to your input into MasterControl releases. Is there an enhancement you would like to see in MasterControl? You can request it here. Interact with other MasterControl customers, manage your MasterControl account, view release notes, report bugs, and access the knowledge base as well.
www.mastercontrolcustomers.com
If you do not know your username and password for the Customer Center, you may contact MC Tech Support to have them create an account for your company.
Corporate Site
MasterControl's corporate site provides you with a complete overview of the company's activities, partnerships and projects. News releases, downloads and testimonials are all available here.
www.mastercontrol.com
On-Demand Training: Introduction to MasterControl
Logging In to MasterControl Portal
The main login screen is the first entry point into MasterControl Portal. The login performs all of the initial security and licensing verifications for the system. To log in to MasterControl Portal, you must have a user ID and a login password. If you did not receive or have forgotten your user ID or password, please contact your System Administrator.
To log in, do the following:
1. Open Internet Explorer or Mozilla Firefox.
Note: Using any version of Internet Explorer older than 9 will trigger a message stating that you need to upgrade your browser for optimum performance.
2. Open the MasterControl Portal Login page by clicking the appropriate bookmark in the browser's Favorites menu. You can also click the MasterControl Portal icon on the desktop.

MasterControl General Features
2
MasterControl Portal Login Page
3. If the Company field displays, type your company name (or the company you will be logging in under) in the Company field (only appears if your company utilizes multiple databases).
4. In the User ID field, type the User ID that was assigned to you by the System Administrator.
5. Type your login password in the Login Password field. All login passwords are encrypted using a proprietary encryption method.
Depending on your system configuration, the system might prompt you to enter and confirm a new password the first time that you log in. Enter the passwords as instructed, and then click the Save button to save the new login password.
If you have forgotten your password, click the Forgot your password? link. See Security Questions for more information.
Note: The Login Password field is case-sensitive, meaning that you must use uppercase or lowercase letters exactly as you or the System Administrator entered them in the password setup screen. If you attempt to enter a password while the Caps Lock button is on, you will see a message indicating that the Caps Lock is enabled.
6. When finished, click the Log In button. The MasterControl Portal Home Page will appear. You can also view the MasterControl Portal Home Page by clicking the MasterControl icon in the application header.
Note: All passwords and electronic signatures are masked when typed in, and encrypted during any transaction in which they are utilized.
Note: MasterControl Portal is best viewed on computers with 1024x768 screen resolution.

11.6 MasterControl Creator-Reviser Manual
3
MasterControl Navigation Methods
Getting Around in MasterControl Portal
Getting around in MasterControl Portal is as easy as clicking a link in a Web page. When you first log in to MasterControl Portal, you are taken to the MasterControl Portal Home Page. This page contains the main navigation menu and shows important Web links and custom messages.
MasterControl Portal Navigation Menu
MasterControl's navigation menus provide you with easy access to common MasterControl functions. They include the My MasterControl menu, a Portal search field, and the navigation menu for whichever modules have been installed. Mouse over the name of the module to see the menu for that module. Click the name of the module for a landing page which describes and provides links to some of the basic functions of that module.
Portal Search
The Portal search function allows you to search the entire portal from one location. Simply type a word or phrase into the Search field located in the upper right of the page and click Go. Results are organized by module in folders for easy navigation of application-wide searches.
For a more specific search, the word "Search" next to the search field is also hyperlinked. Clicking on it will open a search window with the Simple, Basic and Advanced search tabs (see Toolbar Search).
Toolbar Search
The Search button is located in the toolbar of every InfoCard list page. It features three different search methods: Simple, Basic, and Advanced.
Simple
The Simple search provides you with a single field. Whatever value you enter in that field will be compared against all searchable fields. If you enter two terms in the search field, the search will return all results that match either term. For example, in a system that contained documents entitled "Sysadmin Training" and "Process Training", doing a search for "Sysadmin Training" would return both documents. Simple search can be either Optimized or Non-Optimized (see Configuring List Page Settings for more information).
Simple search will search for data in the following InfoCard fields:
Document Number
Revision
Version
Title
Notes
File Name
Created
Released
Effective
Expires
Moved to Phase

MasterControl General Features
4
Simple Search Tab
To retrieve an InfoCard using Simple Search:
1. Click an InfoCard list from the main navigation menu.
2. Click the Search button in the toolbar.
3. Select Simple.
4. Enter search data. Adding an asterisk to the search data creates a wildcard search.
5. Click the Submit Search button.
To clear the search fields, click the Clear button.
Note: A maximum of 50 characters can be entered in the search field. If you enter white space or a wild card asterisk as part of the search data, these will be stripped from the search.
Basic
The Basic search allows you to search on the same data fields used to create a new InfoCard. These are context sensitive to the list page from which the search was started. You may use an asterisk as a wildcard character; in addition, a trailing wildcard will be added to the end of each value entered. The search is an “AND” Search, meaning only results that match all the supplied values will be returned.

11.6 MasterControl Creator-Reviser Manual
5
Basic Search Tab
To retrieve an InfoCard using Basic Search:
1. Click an InfoCard list from the main navigation menu.
2. Click the Search button in the toolbar.
3. Select Basic.
4. Enter search data. Adding an asterisk to the search data creates a wildcard search.
5. Click the Submit Search button.
To clear the search fields, click the Clear button.
Note: The database treats an underscore ("_") as a single character wildcard. Wrapping the underscore with square brackets ("[ _ ]") searches for the underscore character.
Advanced
The Advanced search allows you to select a field, select an operator, and then enter a value to be searched in that field.

MasterControl General Features
6
Advanced Search Tab
To retrieve an InfoCard using Advanced Search:
1. Click an InfoCard list from the main navigation menu.
2. Click the Search button in the toolbar.
3. Select Advanced.
4. Enter search data. Adding an asterisk to the search data creates a wildcard search.
5. To create another row, click the New ( ) icon.
6. Click the Submit Search button.
To clear the search fields, click the Clear button.
Note: Selecting Is Null or Is Not Null in the Operator list will cause the Value field to disappear.
Note: The database treats an underscore ("_") as a single character wildcard. Wrapping the underscore with square brackets ("[ _ ]") searches for the underscore character.
File Searches
The Field drop-down list features options that allow you to search based on the files attached to InfoCards.
Attached File - Searching on this option will produce a list of InfoCards whose attached filenames contain the value you enter.
Full Text Search - This option conducts a search for text in the main file attached to the InfoCard.
On the Forms list page, Advanced Search has the capability to search on specific form fields. Form templates appear in the drop-down list and when you select one, that template's fields become available for filtering. If Event Management is installed, you can also search on EventCard fields.
Note: Process-specific searches offer other search options like Form Fields, EventCard Fields, and InfoCard Fields to be chosen in the drop-down list.
Note: Lists of InfoCards returned on a search will remain sorted in the order you choose across pages and from one session to the next.
Note: By default, the list pages return only InfoCards that belong to vaults for which you have rights.

11.6 MasterControl Creator-Reviser Manual
7
My MasterControl Menu
My MasterControl
The My MasterControl menu is located on the left side navigation menu. My MasterControl is intended to give ready access to the areas of the system that are accessed the most. Items in this menu include My Tasks, My Links, Start Task, Tracking, My Recent, My Files, My Organizers, My Training Folder, My Settings, My Languages, Analytics and a Log Out link.
My Tasks
What Can I Do with My Tasks?
Overview
MasterControl has replaced the old “In” box on your desk with a handy repository for all the tasks that require your attention. This is the My Tasks page, where you open the forms you need to complete, access the collaboration workspace for documents that need your revision, or sign off on any task requiring your approval.
My Tasks provides easy access to all your pending tasks.
My Tasks Workspace
Typical Scenarios
How will you know when a task has been changed since the last time you worked on it? Check your task list; the tasks with bolded titles are new or have changes made by another user that you’ll want to look at.
Note: Please refer to MasterControl’s online help for a table of icons and their actions.
More Details
For more in-depth information on how these actions apply to other areas of MasterControl, see the following topics:
What Can I Do with Tracking?
What Can I Do in the Collaboration Workspace?
What Can I Do with Training Tasks?
Performing Form Tasks

My MasterControl Menu
8
Modifying Steps
Creating a Dependency from My Tasks
Changing Route Users
Tracking Task Details
What Can I Do with Training Tasks?
Viewing Signed Active Tasks
Overview
The Signed Active Tasks area is where you can view inprocess tasks which you've signed off on. Here you can take any actions available to you in the Action column. This allows you to revisit and edit any form as long as other collaborators on the step have not signed off.
Signed Active Tasks
The toolbar allows you to visit Pending Tasks and tells you how many Tasks Pending Revisit you have in your queue.
Changing Route Users
If configured, a Modify Step icon may appear next to tasks in your Pending Tasks list. This allows the approver to select the users that will be involved on certain step(s) of the route. The Modify Step feature permits the routes to be even more flexible, allowing different users to be selected after the task has been launched.
Note: Deleted, disabled and View Only users and roles will appear on the Available list.

11.6 MasterControl Creator-Reviser Manual
9
Modify Step Page

My MasterControl Menu
10
To modify next step users, do the following:
1. Click the Modify Step icon next to the task name in the My Tasks page.
2. Select the users you want to be involved in the current step of the route in the Available Users frame.
Note: If you are the System Administrator or the route owner, you will be able to change any step in the route. If you are a "Leader" or "Modify Step" user, you will be able to change the current step in MasterControl Documents, or the current and next step in MasterControl Process.
3. Click the > button to add users to the Normal, Modify Step or Add Only lists.
Note: In collaboration tasks, a collaboration leader may decide that additional users may need leader rights so they can add InfoCards, replace main InfoCard files, etc. For this reason, all collaboration leaders have the right to add and remove normal users and leader users from a collaboration step. If you add someone as a Normal user, they can only perform the task and not add or remove users from the step. If you add someone as a Modify Step user, they may add or remove users from the step. If you add someone as an Add Only user, they may add users to the step, but cannot remove anyone (including themselves).
4. Click the Save button.
Tracking Task Details
Clicking the Details icon next to any of the tasks that display task information in the Tracking Report section. This section displays the task contents and allows you to see the electronic files and InfoCards that are attached. You can also view the route steps that the task is currently on, as well as the current step of the route.
Note: Users may have their User ID or name changed while they are on a step of an in-process route. If this is the case, Task Details will display the user's information according to what it was at the time the user took any action on the route. If the user signed off on a step with one ID or name, and that ID or name was later changed, the user name will display as a hyperlink. Clicking this link will show what the user's information was at the time they signed off, as well as what it is now.
Click the Print icon in the toolbar to print the information in the Tracking Report. All information contained in the iframe will print.
Viewing the Collaboration Workspace (Mobile)
The collaboration workspace is view-only in mobile. You can view the files in the collaboration, the comments, and the members of the collaboration. You are also able to leave comments.
You can view the document in the collaboration workspace the same way you can in other parts of mobile (see Viewing and E-mailing Documents). Mobile's collaboration workspace displays the latest redline of the document.
To leave a comment:
1. Select the black Add Comment bar to expand the Comment field.
2. Enter text in the field.
3. Select the Add Comment button.

11.6 MasterControl Creator-Reviser Manual
11
Collaboration Workspace
My Links
What Can I Do With My Links?
Overview
My Links is a links section that provides quick access to different landing pages or actions within the MasterControl system. You can access, create and manage private links on your own home page. Users with appropriate rights can also create and enable public links that all users can add to their home pages. Users may also add the pre-made links from module landing pages to their home pages; however, users may only access those links for which they have corresponding rights. See the rights pages in the Definition of System Rights chapter to determine which rights are required for which links.
Typical Scenarios
The list page is good place to start. It contains pre-made links to virtually every function in MasterControl. If you do a lot of work in the BOM module, you can add the Create BOM link found on the Home Page Links list page to your home page. Then, every time you log in to MasterControl, you can bypass navigating to the BOM module and create a new BOM immediately simply by clicking the link. An alternative is to configure the BOM list page as your home page so that it is the first page that opens when you log in to MasterControl.
Maybe you want quick access to MasterControl's customer services. There are three pre-made links on the Home Page Links list page: MasterControl Customer Forum, MasterControl Customer Website, and MasterControl Online Training.
Make sure you check the list page for links you will find useful, but don't limit yourself to what is found there. You can also add outside links to your home page. Let's say you frequently consult a website of industry standards. With the link to that site on your home page, going there just got a lot faster.
You can download MasterControl's integration with Word from My Links as well.
More Details
My Links is where you compile links to the places you visit most. To find out more details, see:
Managing Home Page Links
Creating a Link from a Template
Current Home Page
Word Integration Overview
Sharepoint Integration Overview

My MasterControl Menu
12
Required Rights
Create Links from Templates
Create Public Links
Manage Premade Links
For a complete list of Portal rights, see MasterControl Portal Rights.
Note: Please refer to MasterControl’s online help for a table of icons and their actions.
Managing Home Page Links
This page allows you to create, edit, delete, make available or make unavailable the links on your home page (see Current Home Page for more information on creating links).
To create a new link:
1. Click Manage Links from the My Links section of the My MasterControl menu.
2. Click New.
Create Home Page Links page
2. Select a link type from the Link Type drop-down list. If you select External, a field will appear in which you can enter the URL.
3. Enter a title for the link in the Link Title field.
4. Enter a description of the link in the Link Description field.
5. Under Link Accessibility, select Private to prevent other users from seeing the link, or Public to allow others to see it.
6. Under Link Image, choose an image for the link from the Select Existing Image drop-down list, or add a new one by browsing for it in the Upload New Image field.
7. Click Save.
Saving a link will add it to the Home Page Links list page, where you can add it to your home page, make it unavailable but still present on the list, or delete it.
To edit a link you created:
1. Click the Edit icon next to the Web link you want to modify. The Edit Web Link page appears.
2. Modify the fields you want to change.

11.6 MasterControl Creator-Reviser Manual
13
3. Click Save.
To delete a link:
1. Click the Delete icon next to the link you want to remove. A message appears to confirm the deletion.
2. Click OK to remove the link from the list, or the Cancel button to keep the link.
To make a link available or unavailable:
1. Click the Make Available or Make Unavailable icons. A message appears confirming the action.
2. Click OK to make the link available or unavailable.
To add a link to your homepage:
1. Click the Add Link to Home Page icon .
2. Complete the fields as seen in Current Home Page.
3. Click Save.
Creating a Link from a Template
You may create a link from the Home Page Links page using a Process template, allowing you to create links to launch specific Process tasks. This requires the Create Links from Templates right.
To create a link to launch a process:
1. Create a new link as illustrated in the Managing Home Page Links topic.
2. From the Link Type drop-down list, select Launch Process.
3. From the Process to Launch drop-down list, select the enabled Form route to which you wish to create a link.
4. Complete the process of creating the link.
5. Click Save.
The Process task associated with the route you selected will launch in a new window when you click the link on your home page or in Quick Links. MasterControl will load the My Tasks page and the task you have launched will appear there.
Current Home Page
You can make any page in MasterControl the home page the system will open after you log in. To set your home page:
1. Navigate to the page you wish to set as your home page.
2. Click Make Current My Home Page from the My Links menu.
3. Click Confirm Change to change the home page or Cancel Change to leave the current home page as it is.
To link another MasterControl page to your home page:
1. Navigate to the page you wish to link to your home page.
2. Click Add Link to Current Page from the My Links menu.

My MasterControl Menu
14
Add New Home Page Link window
3. Enter a title in the Link Title field.
4. Enter a description of the link in the Link Description field.
5. Under Link Accessibility, select Private to prevent other users from seeing the link, or Public to allow others to see it.

11.6 MasterControl Creator-Reviser Manual
15
6. Under Link Image, choose an image for the link from the Select Existing Image drop-down list, or add a new one by browsing for it in the Upload New Image field.
7. Click Save.
Word Integration Overview
MasterControl supports an integration with Microsoft Word that allows you to interact with the system from the Word toolbar. This is done by downloading and installing an add-in toolbar for Word.
Note: The add-in is only available for Word 2007 or later.
The following are MasterControl functions that can be replicated in MS Word:
Save the URL for the MasterControl server and the default username.
Log in and out of MasterControl.
Query MasterControl for an Infocard via Basic Search (see Toolbar Search).
Create a new InfoCard from the active document and attach the document as a main file.
Edit the main file on an InfoCard if rights are appropriate.
Allow the “One-button revision” of an existing released document – pushing it into collaboration, redlining the document and uploading the redlined document.
Copy out a document from MasterControl to use as a template/starting point for a new document.
Retrieve a list of documents in Collaboration in My Tasks, create a redline, and upload the redline.
Upload a document directly to a collaboration and redline it.
Compare two versions of a document.
Sharepoint Integration Overview
MasterControl supports integration with Sharepoint, which makes MasterControl functionality accessible in environments where Sharepoint is the standard. There are two levels of integration:
Simple Integration
In this integration, you can launch MasterControl from the Sharepoint interface. Data is not shared between the two applications.
Full Integration
This integration allows Sharepoint users to access documents in MasterControl from the Sharepoint interface. The integration is available for Sharepoint WSS 3.0 and MOSS 2007 or later. The following functionality is available:
You can log in to MasterControl from Sharepoint.
You can search for MasterControl documents using a Query By Example interface similar to MasterControl's Basic search.
You can view and edit MasterControl document metadata.
You can export Sharepoint documents to MasterControl.
You can copy a MasterControl document to a Sharepoint document library.
You can create links in Sharepoint to MasterControl documents.
You can check MasterControl documents in and out.

My MasterControl Menu
16
Start Task
Starting a Packet Task
The vehicle that carries an object or group of objects through an approval cycle is a packet task. A packet task is analogous to a file folder containing InfoCards. The Start Task page is the location from which you can create a task, add InfoCards, assign routes, configure advanced packets (see Starting an Advanced Packet) and start packet tasks.
To create a new task, complete the following steps:
1. Select Packets from the Start Task menu item, then click the New button in the toolbar. or Retrieve one or more InfoCards using any Find method, click the down-arrow next to Approve in the InfoCard toolbar, and then select New Packet Task. The Create Task page displays with all retrieved InfoCards added to the Task Contents section (unless the InfoCard is locked). Continue with step 2, below.
2. If there are more than one Packet Types available in the system a pop-up window will appear. Choose a Packet Type to associate with your new Packet Task.
Packet Types window

11.6 MasterControl Creator-Reviser Manual
17
Create Packet Task Page

My MasterControl Menu
18
3. Enter a number for the task in the Task Number field.
4. Enter a name for the task in the Task Name field.
5. Place instructions for approving the task in the Instructions field.
6. To add InfoCards to the task:
1. Click the New icon next to Task Contents. The InfoCard (Find) window opens.
Note: Vault rights are enforced throughout MasterControl Documents. Because of this, all task approvers must have either "View Native" or "View PDF" rights to the vaults where the InfoCards are stored.
2. Retrieve the InfoCard(s) you want to add to the task using one of the three search methods, if necessary. The InfoCards appear in the Task Contents section. This excludes locked or in-process InfoCards.
8. Select a route from the Selected Route drop-down list. Routes appear in this list only if they have been successfully built and released, and only if they belong to a role that you also belong to.
Note: Only approval and collaboration routes are available from this drop-down list. Form routes cannot be used as approval routes (if MasterControl Process is installed).
9. Click the Launch button in the toolbar to start the task. If any of the InfoCards in the task already belong to another task that is in-route, a message will appear identifying the conflicting InfoCards.
Important: You can also click the Save button to save the task. Saved tasks can be launched from the main Start Task page by clicking the Launch ( ) icon in the task list.
Note: If any user on a route rejects a packet, that packet is archived and a new packet started in its place with the same document. A collaboration step is added so the reason the packet was rejected can be examined and fixed. The author, owner, originator, and rejecter of the packet are included in the collaboration. After completion of the collaboration step, the packet can be sent on its original route again. If it is sent on the route, the rights of all users in the collaboration remain the same as they were before the packet was rejected. All changes made to the route via Modify Step will be intact. If collaboration has not been installed, the packet will go to the originator.
Starting a Form Task
When new forms need to be filled out, they are sent on specific data entry routes. Form tasks are created and made available in MasterControl Process. Once they are made available, form tasks are accessed and started from the Start Task page.
To start a form task, do the following:
1. Select Forms from the Start Task menu item in the My MasterControl menu.
2. Click the Launch icon next to the task you want to start (the list of available processes are filtered based on user rights). Form tasks appear in groups named after the Form Template InfoCard Type (CAPA tasks appear in the "Quality" section, etc.). If you are a user on the first step of the route, the form will appear in a new window. Otherwise, the task will be sent directly to all users on the first step of the route.
1. Note: You can also preview the form, view route information and create external links for the task on this page. External links to form tasks allow either anonymous or authorized users to start the form task without having to log in to MasterControl. To view the form before launching it, click the Preview Form icon. To view route information, click the Details icon. To create an external link, click the Create External Link icon. More information about external links can be found in the Creating InfoCard External Links section.
To complete a step on a Form task:
1. Complete the data entry on the form, and then click the Submit button. The Approve Task page appears.
2. Choose a status for the step (usually "Data Complete," if the data entry is complete), and type your approval password in the Electronic Signature field.
3. Click the Save button. A message will appear stating that the step was successfully saved.
Note: Depending on the process, the Modify Step icon may appear in the Set Step Status page. This action is explained in more detail in the Changing Route Users section.

11.6 MasterControl Creator-Reviser Manual
19
Required Right
Start Task (for a complete list of Process rights, see MasterControl Process Rights)
Starting an Advanced Packet
Advanced Packets provides the ability to set the level of scrutiny and review a document should receive. This is useful when handling documents of varying criticality and complexity.
1. Select Packets from the Start Task item in the My MasterControl menu.
2. Click New.
3. In the Packet Types window, select a packet type from beneath the Advanced Packets heading.

My MasterControl Menu
20
Advanced Packet page
4. Enter a number in the Task Number field.

11.6 MasterControl Creator-Reviser Manual
21
5. Enter a name in the Task Name field.
6. If the due date was enabled in the packet type (see Adding New Packet Types), select the due date from the calendar icon or the Today's Date icon . You may enter an expiration date the same way.
7. Enter any instructions in the Instructions field.
8. Select a route from the Selected Route drop-down list.
9. Enter any proposed changes in the Proposed Changes field if a change request step is used. This step will also be editable in the subsequent collaboration step.
10. Enter the reason for the proposed changes in the Reason for Change field if a change request step is used. This step will also be editable in the subsequent collaboration step.
11. Click the New icon to add InfoCards to the Task Contents section.
12. Add details, attachments and links to the Risk Assessment and Regulatory Affairs Assessment tabs, if present.
13. In the Verification and Validation tabs, select Yes or No to determine whether these things will be required, and enter justification for either choice. Add attachments and links.
14. In the Supporting Information tab, add any other attachments or links to information that supports the packet.
15. Click Save to save the packet, or Launch Task to launch it on the selected route.
Note: Launching an Advanced Packet from a form creates a dependency with the form task. In order for this to happen, the Advanced Packet must be launched immediately; it cannot be saved first.
The Change Number field of each InfoCard in the packet is populated with the packet number while the packet is on its approval route. Click the Details icon next to the field to view the packet. This view is read-only and is available when the value in the Change Number or Previous Number fields matches an inprocess or completed packet. The Change Number data is deleted for an InfoCard when that InfoCard is removed from the packet, or for all the InfoCards in the packet if the packet is aborted or rejected.
A View Change Control History link is presented on the History tab of each InfoCard, which shows each revision of an InfoCard, the date it became effective, and a description of the change.
When you approve a packet from My Tasks, a change request workspace will open in which you can add InfoCards to the packet and view the packet details. You may sign off on the task from this workspace.
To print the contents of the packet, click Print in the toolbar. All packet details, such as Description of Change, Reason for Change, Notes, Disposition, etc., and the tabs in the Task Options section of the packet are included in the printout.
Note: If you reject an Advanced Packet on a Change Request route, the route will return to the collaboration step that follows the Change Request step, rather than going to a new collaboration step like a regular rejected route.
Linking Advanced Packet Tasks
A single change within an organization can often involve changing several documents with differing approval routes. Creating links between these documents makes it easier for you to track the progress of each in relation to the others. In addition, it may be necessary to restrict release of any of the documents until all have been approved. In order to coordinate these releases, you can create a "parent" Advanced Packet task and link "child" tasks with different approval processes to it. Child tasks can be created anytime prior to the parent task entering the approval step.
To link Advanced Packet tasks:
1. Click the name of an Advanced Packet in the Task Name column of My Tasks.
2. Click the Launch Child Task button in the toolbar.
3. In the Dependency Types window, select one of the following:
Stop & Wait - one task stops and waits for the other to complete its route. You can still open, work on, and sign off on the task that has stopped. All previously created dependencies are Stop & Wait dependencies (see What Can I Do with Dependent Sub-routes?).
Synchronize - synchronized tasks defer their release until all tasks in the synchronize group are complete. Once the last synchronized task completes, it will be immediately released, and all other synchronized tasks will have their dates set with scheduled tasks. Synchronize dependencies are only allowed on Document route tasks that have not passed their Set Dates step yet.
Associate - one task is linked to another, but no functionality is associated with the link.
4. Fill in the task information (see Starting an Advanced Packet).

My MasterControl Menu
22
Note: The Task Number field in the workspace will be a read-only field if you do not have override template rights and a numbering series is specified for the task, or a number has already been generated for the task (see Adding New Packet Types for a description of the Child Task Numbering Series).
5. Click Launch Task to launch the task.
Note: Advanced Packets with dependencies cannot be saved; they must be launched immediately.
A Task Dependencies tab will appear alongside the other tabs in the Task Options section. In this tab, you can view a dependency tree that shows the hierarchy of dependencies you have created for a parent task.
Starting a Scheduled Task
Starting a Scheduled Forms Task
Forms Tasks may be set to recur at regular intervals. This is useful for tasks that need to be initiated on a regular basis.
To start a recurring Forms task:
1. Select Scheduled Forms from the Start Task item in the My MasterControl menu.
2. Click New.
Create Scheduled Forms Task Page
3. Fill in the Task Name, Route Name, and Select Originator fields. The Route Name will determine which form is appended to the task.
4. If you wish to populate the HTML or PDF form before launching the task, click the Pre-Populate Form icon.
5. Under the Schedule Information heading, select whether the task is Date Defined, Task Defined, or Rule Defined.

11.6 MasterControl Creator-Reviser Manual
23
6. If you select Date Defined, enter the start date for the task and the frequency with which it is to occur. You can insert the current date by clicking the Today's Date icon .
7. If you select Task Defined, select the dependant task from the Dependant Task drop-down list.
8. If you select Rule Defined, the tasks release will depend on the rule with which it is associated (see Adding Rules for more information).
9. Click the Save button.
Note: In the Forms Scheduling page, you may select a single Role in the Originator drop-down list. By doing this, a new Form InfoCard and task will be created for each user assigned to that role, allowing you to send multiple copies of a task with a single execution.
Launching a Scheduled Forms task will generate a report that includes Task Name, Route Name, Start Date, Frequency, form fields, and any pre-populated values. Reports are accessible in the MasterControl Process section of the Analytics Reports page, or from the Reports page in the Forms module.
Starting a Scheduled Packet Task
Packet Tasks may be set to recur at regular intervals. This is useful for tasks that need updating on a regular basis.
To start a recurring task:
1. Select Scheduled Packets from the Start Task item in the My MasterControl menu.
2. Click New.
Create Scheduled Packets Task Page
4. Fill in the Task Name, Route Name, and Select Originator fields.

My MasterControl Menu
24
5. Create a new InfoCard for the Packet, or add existing InfoCards. Note: If you choose existing InfoCards, any template features such as Task Name, Route, and Instructions will be superseded by the information defined in the scheduled task you are creating.
6. Under the Schedule Information heading, select whether the task is Date Defined, Task Defined, or Rule Defined.
7. If you select Date Defined, enter the start date for the task and the frequency with which it is to occur. You can insert the current date by clicking the Today's Date icon .
8. If you select Task Defined, select the dependant task from the Dependant Task drop-down list.
9. If you select Rule Defined, the tasks release will depend on the rule with which it is associated (see Adding Rules for more information).
10. Click the Save button.
Note: If you choose Revise Existing InfoCard(s), the Frequency option will be disabled. This is so the previous version of an InfoCard will not continue to be revised after it has moved to a new version.
Starting a Scheduled Report
Reports may be set to recur at regular intervals or to run once at a particular date in the future. When the specified date and/or interval has been reached, an e-mail will be sent with a PDF copy of the report attached.
To start a recurring report:
1. Select Scheduled Reports from the Start Task item in the My MasterControl menu.
2. Click New.

11.6 MasterControl Creator-Reviser Manual
25
Create Scheduled Reports Page
3. Fill in the Task Name field.
4. Select a report from the Select Report drop-down list.

My MasterControl Menu
26
5. Enter the subject of the e-mail that will be sent with the report in the E-mail Subject field.
6. Write the body of the e-mail in the E-mail Body field.
7. In the Recipients section, choose users or roles from the list on the left and use the arrow button to move them to the list on the right. Those users and roles in the list on the right will receive the report. You can search in the Quickfind field by first name, last name, or a portion of either if there is a long list of options. If you enable external users by clicking all check box options on the Guest Connect Settings page (see Configuring Guest Connect Settings), you can also select guests to receive the report.
8. Enter the date when the report will be sent in the Future Start Date field by clicking on the Calender icon . You may enter the current date by clicking the Today's Date icon .
9. Choose a time for the report to be sent from the Future Start Time drop-down list.
10. Enter the frequency with which the report will be sent in the Frequency section.
11. In the Report Type section, select PDF or Excel as the format for the report.
Tracking
Tracking Overview
All tasks are tracked during the approval process and retained after they have completed their respective routes. From the main Tracking page, you can search for a specific task, and then view the status or history details of the task, along with its file or form. Task details show all the steps that a task has completed, steps yet to be completed (if in process), and comments made by users along the route.
Tracking also allows System Administrators and route owners to stop and then restart tasks that are awaiting approval. Occasionally, a user may not be ready to approve a task - such as when they are awaiting further information or input on a task file. When this occurs, they can request that the System Administrator stop the task until they are ready to approve, reject, or review the task. Additionally, tasks can be completely taken out of their approval cycle by aborting the task.
What Can I Do with Tracking?
Overview
Have you ever logged onto a shipping company's website to check the progress of a package you are expecting? The MasterControl Tracking page lets you do the same thing for MasterControl tasks by allowing you to search for a task that is in progress.
Typical Scenarios
You are awaiting the approval of a task. To see how many users still need to sign off:
1. You open the Tracking page.
2. Click Search, and enter any or all of the information you know about a packet.
3. When the packet is returned, click the Details icon to see all the members on every step of the route. You will see who has signed off and who has not.
You can then contact those members who still need to sign off and remind them, allowing you to get the task approved in a more timely manner.
More Details
For more information on how to use Tracking, see:
Locating a Task
Tracking Task Details
Tracking Collaboration Tasks
Required Right
Tracking (for a complete list of Document rights, see MasterControl Documents Rights)
Note: Please refer to MasterControl’s online help for a table of icons and their actions.

11.6 MasterControl Creator-Reviser Manual
27
Locating a Task
When you first arrive at the Tracking page, a list of in process tasks to which you have rights (based on assigned roles) appears. From there you can search for your desired task, view the task details and status, and perform other actions on the task.
To locate a task and view task details, do the following:
1. Click the Search item in the toolbar of the Tracking page. The Search page appears.
Note: The Simple and Advanced tabs are the same here as they are for other list pages. The fields in the Basic tab are different here than they are in other list pages.
Search Page (Basic tab)
2. Check the History checkbox if you need to view closed tasks associated with the task being searched for. Leaving the checkbox unchecked will only pull up information about open tasks.
3. Complete any of the search criteria fields, and then click the Submit Search button. A list of processes that meet those criteria appears in the Task Tracking List page. The following table explains the purpose of each of the search criteria fields in the Basic tab:
Criteria Description
Type The type of task, based on the Type column. Includes form, document, training, etc.
Task Name
The name of any task. This is a "contains" search, so you could enter a letter, and the search will return all tasks with a name containing that letter.
Route Name The name of the route on which the tasks were sent.
User ID The ID of the user that launched the process. The list in this field is populated with the User IDs of all users who have performed an action on a task.
Note: On the Tracking list page, the user ID will display as a hyperlink for users who have changed their user ID at some time in the past. The link will show all previous IDs associated with that user.
Started The time frame during which the tasks were started. Options include such periods as yesterday, today, last 30 days, last quarter, etc.
Task Number
The packet number for both in-process and completed document tasks. Advanced packet numbers are listed in the Task Number column of the Tracking list page.

My MasterControl Menu
28
InfoCard Title
The title of an InfoCard in a task.
InfoCard Number
The number of any InfoCard belonging to a task, or that was sent as a task. This includes InfoCard number, form number, form template number, training number, and organizer number.
Tracking Search Criteria Fields
4. Click the Details icon next to the task for which you want to view details. The Tracking Report or History Report page appears, and shows the following information for each step: Step Name, Step Status, # Approved, Escalate After, User(s), Notification Date, Completion Date, Status, Leader, and Comments. The Current Step icon appears next to the current route step if the task is still in process.
Task Details
4. View comments by a particular user by clicking the Comments icon. Comments appear in a new browser window.

11.6 MasterControl Creator-Reviser Manual
29
5. View the task files (form or document) by clicking the View icon next to the file name in the Files section. After you click Open from the Save/Open window, the file will appear in a new window.
6. Click the Complete History tab to view the history of each step that has been signed off on the route. Approvals, rejections and “Work in Process” sign-offs are all listed. It contains a list of each step that has been signed off and comments added to any step. Each step name in the Step Name column is hyperlinked and clicking one will display the information for that step that is contained on the Report Details tab. The Complete History tab will be grayed out for tasks that have no steps signed off. You can print the information in this tab by clicking the Print icon in the toolbar. All information contained in the iframe will print.
7. Click the Return button when you are finished to return to the list of tasks in Tracking.
Stopping, Restarting, and Aborting Tasks
Tracking also allows System Administrators and route owners to stop and then restart tasks that are currently on a route. Stopping a task will remove the task from all affected users' queues (in the My Tasks page). Restarting a task that was previously stopped will place the task back in the affected user's queues.
Tasks can also be aborted, which completely removes the task from their approval cycle, ending the route they are on. For packet tasks, the system will return the task's status to Unlaunched. You can then add additional InfoCards to it, delete InfoCards from it, change the route, or delete the task altogether from the Packets tab of the Start Task page. For Form tasks, the task will end its route and appear as a historical entity. Users can launch another instance of the Form task by clicking the Launch icon in the Forms tab of the Start Task page. For Training tasks, the task will end its route and automatically send a new Training task to the user for whom it was aborted.
To stop, start, or abort a task, complete the following steps:
1. Perform a search for a task in Tracking, according to the instructions above.
2. Click the appropriate icon for the action you want to perform (Stop – , Restart – , or Abort – ). A message appears confirming that you want to stop, restart or abort the task.
3. Click the OK button.
Locating Classic Forms
Form History
If your system was upgraded from a version prior to 4.0.0, you can use the Flash Form History button to search for MasterControl Process Classic forms (flash forms). Once you have found a form, you can choose to view the form or view the history of the form as it progressed along the route. Viewing the form will allow you to see all the data that has been entered. You can also view a printable version of the form history and form layouts together.
Locating a Finished Flash Form
Before you can view a flash form or form history you must first find the form.
To locate a flash form, do the following:
1. Click the Flash Form History button from the Tracking page toolbar. The History Form Search page appears.
2. Complete any of the search criteria fields, and then click the Search button. A list of forms that meet those criteria appears below the search form. The following table explains the purpose of each of the search criteria fields:
Criteria Description
Status The current status of the form. The two options available are ”Any Status” and ”In Process.”
Date Range Form was Started
The range of dates between which the form was started. The From Date field sets the beginning of the date range, and the To Date field sets the end of the date range.
Search: Contains Allows you to search for forms that contain the text you typed in the Initiator ID field.
Search: Begins With Search for forms that only begin with the text you typed in the Initiator ID field.
Search: Equal Search for forms that exactly match the text you typed in the Initiator ID field.
User ID The ID of the user that launched the form.
My MasterControl Menu
30
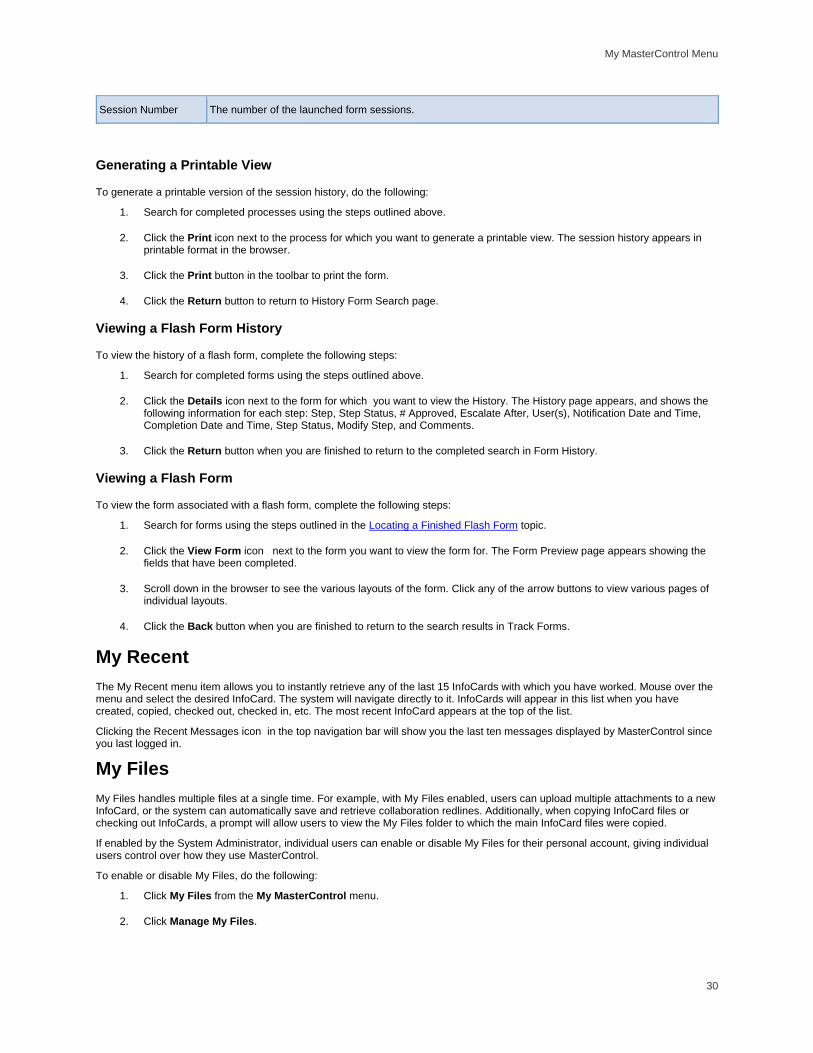
Session Number The number of the launched form sessions.
Generating a Printable View
To generate a printable version of the session history, do the following:
1. Search for completed processes using the steps outlined above.
2. Click the Print icon next to the process for which you want to generate a printable view. The session history appears in printable format in the browser.
3. Click the Print button in the toolbar to print the form.
4. Click the Return button to return to History Form Search page.
Viewing a Flash Form History
To view the history of a flash form, complete the following steps:
1. Search for completed forms using the steps outlined above.
2. Click the Details icon next to the form for which you want to view the History. The History page appears, and shows the following information for each step: Step, Step Status, # Approved, Escalate After, User(s), Notification Date and Time, Completion Date and Time, Step Status, Modify Step, and Comments.
3. Click the Return button when you are finished to return to the completed search in Form History.
Viewing a Flash Form
To view the form associated with a flash form, complete the following steps:
1. Search for forms using the steps outlined in the Locating a Finished Flash Form topic.
2. Click the View Form icon next to the form you want to view the form for. The Form Preview page appears showing the fields that have been completed.
3. Scroll down in the browser to see the various layouts of the form. Click any of the arrow buttons to view various pages of individual layouts.
4. Click the Back button when you are finished to return to the search results in Track Forms.
My Recent
The My Recent menu item allows you to instantly retrieve any of the last 15 InfoCards with which you have worked. Mouse over the menu and select the desired InfoCard. The system will navigate directly to it. InfoCards will appear in this list when you have created, copied, checked out, checked in, etc. The most recent InfoCard appears at the top of the list.
Clicking the Recent Messages icon in the top navigation bar will show you the last ten messages displayed by MasterControl since you last logged in.
My Files
My Files handles multiple files at a single time. For example, with My Files enabled, users can upload multiple attachments to a new InfoCard, or the system can automatically save and retrieve collaboration redlines. Additionally, when copying InfoCard files or checking out InfoCards, a prompt will allow users to view the My Files folder to which the main InfoCard files were copied.
If enabled by the System Administrator, individual users can enable or disable My Files for their personal account, giving individual users control over how they use MasterControl.
To enable or disable My Files, do the following:
1. Click My Files from the My MasterControl menu.
2. Click Manage My Files.
11.6 MasterControl Creator-Reviser Manual
31
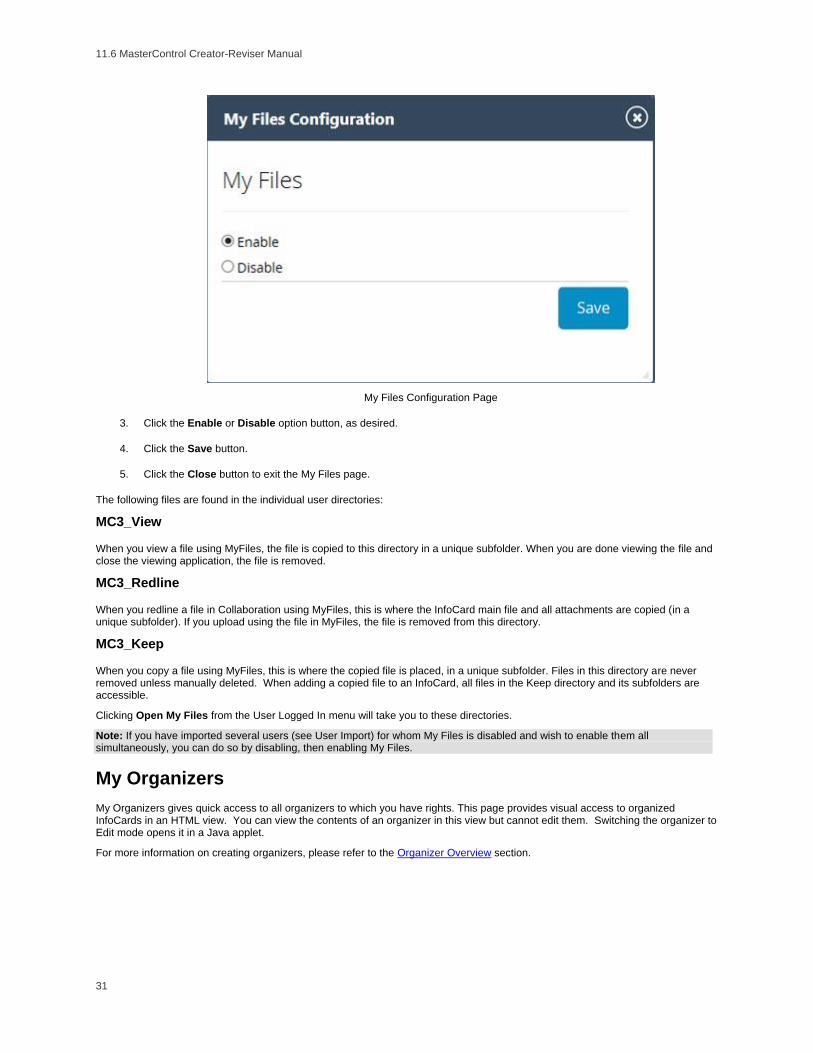
My Files Configuration Page
3. Click the Enable or Disable option button, as desired.
4. Click the Save button.
5. Click the Close button to exit the My Files page.
The following files are found in the individual user directories:
MC3_View
When you view a file using MyFiles, the file is copied to this directory in a unique subfolder. When you are done viewing the file and close the viewing application, the file is removed.
MC3_Redline
When you redline a file in Collaboration using MyFiles, this is where the InfoCard main file and all attachments are copied (in a unique subfolder). If you upload using the file in MyFiles, the file is removed from this directory.
MC3_Keep
When you copy a file using MyFiles, this is where the copied file is placed, in a unique subfolder. Files in this directory are never removed unless manually deleted. When adding a copied file to an InfoCard, all files in the Keep directory and its subfolders are accessible.
Clicking Open My Files from the User Logged In menu will take you to these directories.
Note: If you have imported several users (see User Import) for whom My Files is disabled and wish to enable them all simultaneously, you can do so by disabling, then enabling My Files.
My Organizers
My Organizers gives quick access to all organizers to which you have rights. This page provides visual access to organized InfoCards in an HTML view. You can view the contents of an organizer in this view but cannot edit them. Switching the organizer to Edit mode opens it in a Java applet.
For more information on creating organizers, please refer to the Organizer Overview section.

My MasterControl Menu
32
My Training Folder
What Can I Do with My Training Folder?
Overview
If you have MasterControl’s Training module installed on your system, you will receive periodic training tasks to sign off. My Training Folder is a listing of every training task that has ever crossed your path. Anything you want to know about your training record can be found here, from task statuses, past and future due dates, completion dates, when retraining will be required, and who verified your training.
More Details
In order for there to be anything in the My Training Folder, you have to complete a training task first, of course. For more information on MasterControl’s training module, and for detailed information on using the My Training Folder, see:
MasterControl Training Overview
Trainees
Viewing My Training Folder
Note: Please refer to MasterControl’s online help for a table of icons and their actions.
Adding Training Attachments
The Training Attachments button opens a page that allows you to add and view certificates, resumes, and other items related to your professional training. It is in Edit mode at all times.
Note: You cannot remove any attachments.
To add a training attachment to your My Training Folder:
1. Click the My Training Folder item from the My MasterControl menu.
2. Click the Training Attachments button in the toolbar.
3. Click the Add Attachments icon or the Add File(s) from My Files icon to attach a file to the page.
4. Click Return to return to the My Training Folder page.
Note: Since Sysadmin does not have a Trainee InfoCard, this feature is not available when you are logged in as Sysadmin.
If you have the Delete Trainee Attachments right, you can delete any of the attachments you add.
Taking Exams
To take an exam:
1. Select a training task to which an exam has been attached from My Tasks.
2. Follow the progression for training tasks (see What Can I Do with Training Tasks?):
1. In the Pre-Exams section (if applicable), select the pre-exam name to begin taking the pre-exam.
2. In the Materials section, select an item to access its contents.
3. In the Exams section, select the exam name to begin taking the exam.
Note: You will fail the exam if you do not complete it in the allotted time or navigate away from a closed-book exam before you have completed it.
4. Select an answer to a question and then select the Submit Answer button. Continue until you have completed the exam.
5. If, at any point, you need to save the progress of your exam and finish the rest later, click to close the window. A prompt will appear asking if you want to save your progress. Select Yes. Your exam progress is now saved, and will continue at the spot you left off the next time you access it.
Note: Saving exam progress only works for Open Book exams.

11.6 MasterControl Creator-Reviser Manual
33
My Settings
When you are logged in to MasterControl Portal, the main application header contains a number of items to facilitate use of the system. The MasterControl icon in the top-left of the header will take you to the MasterControl Portal Home Page. The Log Out link, of course, will log you out of MasterControl Portal. You may also change your passwords and set security questions, determine out of office settings, e-mail notification and import settings, configure and open My Files (if enabled), manage virtual folders, enable Windows integrated authentication, create rules and select skins for MasterControl. This section explains these options.
Change Passwords
For system security, MasterControl Portal utilizes two different passwords. One is used to log in to MasterControl Portal. The other is called the electronic signature, and is used when approving tasks, InfoCards, forms, etc. All users can use the Change Passwords page to change their login passwords and/or electronic signatures.
Note:Changing your password here will set the "Change Password on Next Login" or "Change ESig on Next Login" option in the Users page to "No."
To change a login password and/or electronic signature, complete the following steps:
1. Click Change Passwords from the System Administrator drop-down menu.
Change Passwords Page
2. Type your current password in the Current field of the password type you are changing (Login or Electronic Signature).
3. Type the desired new password in the New Login Password and/or the New Electronic Signature fields.
4. Type the same new password in the Confirm Login Password and/or the Confirm Electronic Signature fields.
5. Click the Save button to save your changes. If tracking has been set to display the Change Reason window, the Change Reason window will appear.
6. Type a reason for the change in the Change Reason window, and then click the Save button. A message will appear confirming the success of the password change.
On-Demand Training Video: How to Reset Your Password
Security Questions
Security questions allow you to access the system in the event that you forget your login password.
To configure your security questions:
1. Select Security Questions from the My Settings section of My MasterControl.
2. Fill in answers for at least three of the eight questions.
3. Click Save.
Note: Once you have saved your answers, they are encrypted in the database for added security.

My MasterControl Menu
34
If you forget your login password:
1. Click the Forgot your password? link on the login page (see Logging In to MasterControl Portal).
2. Enter your User ID and e-mail address.
3. Click Submit.
4. Answer the security question that appears.
5. Click Submit.
Out of Office
All users can set their own accounts to Out of Office. When a user account is set to Out of Office, selected approval, collaboration, document, and form tasks that would be sent to his/her queue are forwarded to a designated alternate. If the alternate is not able or authorized to complete the forwarded tasks, he/she can return the task to the original user's queue. Users with the "Out of Office Administration" right (usually Subadmins) can set Out of Office options for other users. Users can also schedule multiple Out of Office events.
Note: Training tasks cannot be redirected.
To set your account to Out of Office:
1. Click the Out of Office item from the My Settings menu.

11.6 MasterControl Creator-Reviser Manual
35
Out of Office Administration Page
2. In the Current Out of Office Status section, choose In the Office or Out of the Office. Selecting Out of the Office will automatically populate the Start Date and End Date fields with today's date.
3. Enter the user for whom you wish to configure Out of Office in the Affected User section.
4. In the Create New Out of Office Event section, enter the alternate user in the Alternate field. This is the user to whom forwarded tasks will be sent.
Note: If the selected alternate is also out of the office, a message will appear when you save the settings alerting you to the conflict. If you save your settings and your alternate is out of the office, tasks sent to you will not be redirected.
5. In the Start Date field, select the date at which the Out of Office event begins. Use the Today's Date icon or the calendar icon .
Note: If you selected In the Office but enter a start date of today or earlier, your status will change to Out of the Office upon saving. If you selected Out of the Office but enter a start date in the future, your status will change to In the Office upon saving.
6. In the End Date field, select the date you will be in the office again. Use the Today's Date icon or the calendar icon . This date is optional in the event of an open-ended absence.
7. Select the tasks/routes that you want to redirect. If you select the All Tasks option button, all new tasks sent to you will be redirected to your alternate when you are out of the office. If you click the Selected Tasks option button, the list below the option will become enabled, and you can select the routes and tasks that will be redirected when you are out of the office.
8. Click the Yes or No button under Include In Process Tasks. If you select Yes, in-process tasks will be sent to the alternate. If you select No, they will go to the out of office user.
Note: In the case of a task with an escalation step, if the designated supervisor is out of office, it will go to the supervisor's alternate. For routes with originator on more than one step, the task will go to the originator on the first step but to the originator's alternate on the next step.
Note: If an out of office user is added to the current step in a form route by another user, the user's alternate will appear on the step instead.
9. Click the Save button to save your settings.
The Out of Office events you schedule will be listed in the Future Scheduled Out of Office list. You can edit or delete them from this list.
When you log back in to MasterControl after changing your settings to Out of Office, you will be prompted to return to the Out of Office settings page. If you accept, you may set your account back to In Office:
1. Click the In the Office option button.
2. Click Save.
E-mail Import
E-mail Import allows you to convert e-mail to Document InfoCards, enabling you to store critical e-mails in a MasterControl repository. In order to be able to do this, the following conditions must be met:
There must be a unique e-mail address associated with your user account.
There must be a document type configured with a template numbering series, lifecycle, and revision.
You must have the New InfoCard right for the draft vault of the associated lifecycle.
To configure E-mail Import:
1. Configure the company e-mail address, server name and port settings in MasterControl's E-mail Import Configuration page (see E-mail Import Configuration).
2. Configure the InfoCard Types with a numbering series and lifecycle. InfoCards produced with e-mail import will be of this InfoCard Type.

My MasterControl Menu
36
3. Associate a unique e-mail address in the system in the Add New User page (see Adding Users to MasterControl Portal) for each user who will make use of E-mail Import.
To use E-mail Import:
1. Log in and select E-mail Import from the My Settings menu.
2. Select an InfoCard Type from the InfoCard Type drop-down list.
3. Click the Save button.
Once configured, the MasterControl server logs into e-mail and checks the inbox on a regular schedule via an internal POP account. When you send or forward an e-mail to MasterControl's designated company address, the system checks to see if you are a valid user via your unique e-mail address, and locates the InfoCard Type you selected. If you have New InfoCard rights to that type, MasterControl will create a new InfoCard of that type and do the following:
Insert you as the owner and author.
Use the subject line of the e-mail as the InfoCard title.
Insert the e-mail's body text as the main file (.txt format).
Make any attachments in the e-mail into attachments on the InfoCard.
Insert the InfoCard number and revision from the InfoCard Type's template (see Creating InfoCard Templates).
Put the InfoCard into the Draft vault for that InfoCard Type's designated lifecycle.
Delete the e-mail from the MasterControl inbox.
E-mail Notifications
You can control the settings that govern e-mail notification. With the E-Mail Notification Preference right, you may choose from three options by which to receive notification of a launched task:
Receive No Messages
Receive All New Messages
Receive All Messages
When a task is launched, the system will either notify you or not, depending on your preference.
To set e-mail preferences:
1. From the My Settings menu, select E-mail Notification.
2. Select one of the three options from the Notification Level drop-down list.
3. Check the Don't send me notification e-mails on tasks I create box if you wish to avoid receiving notifications for tasks you originate.
4. Click Save.
The following table describes the e-mail notifications that MasterControl sends, and the frequency at which they are sent. Some occur on a daily basis, while others are "triggered", i.e. the system sends an e-mail when the action occurs.
E-mail To: Reason Frequency
Sysadmin No licenses available Trigger Occurrence
Document Connections error Trigger Occurrence

11.6 MasterControl Creator-Reviser Manual
37
Supervisor Overdue training Daily
Overdue collaboration Daily
User Daily digest Daily
New task (Document, Process, Project, Training) Trigger Occurrence
Rejected Tasks Trigger Occurrence
Rules Trigger Occurrence
Out-of-Office changes Trigger Occurrence
Another user signs off on a joint collaboration Trigger Occurrence
Optional Route Notify steps (originators, approvers, etc.) Trigger Occurrence (route step advancement)
Notify when Collaboration InfoCard is available Trigger Occurrence
Collaboration comments Trigger Occurrence
Collaboration members e-mail Trigger Occurrence
Guests Added to a collaboration Trigger Occurrence
Simple Project tasks Trigger Occurrence
Scheduled Report Scheduled Occurrence
My Rules
MasterControl Rules is an optional licensed module that allows you to be notified via e-mail whenever a defined set of criteria in an Analytics report of your choice is met. The e-mail will include a PDF version of the latest copy of the report.
For more information on the rights associated with Rules, see MasterControl Rules Rights.
To configure My Rules:
1. Select My Rules from the My Settings section of the My MasterControl menu.
2. Click New.

My MasterControl Menu
38
My Rules
3. Enter the name of the rule in the Name field.
4. Check the Enabled box to enable the rule. Rules that are not enabled will not be evaluated but will still be displayed in the Rules list page.
5. Select the report for which you wish to create the rule from the Report drop-down list, select an operator, and enter a value against which the rule will be evaluated.
6. Select PDF or Excel from the Report Format drop-down list to determine the format of the report. The report will appear in this format as an e-mail attachment.
7. In the E-mail Subject field, enter the subject line of the e-mail that will be sent.
8. Check the Mandatory box to make the rule mandatory and prevent recipients from disabling the rule.
9. Write the text for the e-mail in the E-mail Body field.
10. Select users or roles from the Available Recipients list on the left by using the arrow buttons to move those who will receive the e-mail to the Selected Recipients list. You can search in the Quickfind field by first name, last name, or a portion of either if there is a long list of options.
11. Select the date when the rule will first be evaluated will be sent by clicking the calendar icon under the Future Start Date field.
12. Select the time when the rule will be evaluated from the Future Start Time drop-down list.
13. Select the frequency with which the rule will be evaluated in the Frequency section.
14. Click Save.
Manage Virtual Folders
The Managing Virtual Folders page allows you to manage the various attributes of the saved searches in your Virtual Folders. To access the Managing Virtual Folders Page:
Click Virtual Folders in the My Settings menu.

11.6 MasterControl Creator-Reviser Manual
39
Managing Virtual Folders Page
Public - Making a Virtual Folder public allows other users to view it. You need to have the "Public Virtual Folder" right to do this.
Default - When you open the InfoCard list page associated with a default search, the results of that search will be the first list displayed.
Delete - This function deletes a search.
Note: An alternate method for deleting a search is to click "Virtual Folders" from the toolbar of the InfoCard list page and clicking the Delete icon next to the search you wish to delete.
Hide - It is possible to hide Virtual Folders other users have created and made public. It is not possible to hide a search you have created.
Organizer - By selecting this option, the search is made available to define virtual folders within an Organizer (only available for Document InfoCard Virtual Folders).
Note: After clicking the checkboxes for the functions you wish to enable, remember to click Save before exiting the page.
The Sysadmin can delete any user's public folders via the Where Used page (see Viewing Where Used Reports).
Choosing a Time Zone
It is possible to choose the time zone in which all dates and times will be displayed in MasterControl. To do this:
1. Click the My Time Zone item from the My Settings menu in the My MasterControl menu.
2. Select a time zone from the Time Zone drop-down list.
3. Click Save.
Help Message Settings
The Help Message Settings option displays a list of help messages that accompany certain pages in MasterControl. For example, opening the collaboration workspace will also open the Collaboration Workspace First-Time Help message.
To enable help messages:

My MasterControl Menu
40
1. Select Help Message Settings from the My Settings section of the My MasterControl menu.
2. Click the checkbox for each help message you want to display. Checked messages will display once each session. If the message is unchecked, it will never display.
3. Click Save.
My Languages
My Languages
To set the language you wish to use for MasterControl:
1. In the My MasterControl menu, hover over My Languages to show the drop-down list of available languages.
2. Click the desired language. These are German, English, Spanish, French, Japanese, Korean and Chinese.
Analytics
Reports
The Analytics menu item allows you to access all reports to which you have rights in MasterControl Analytics. From this menu item in the My MasterControl section, you can view MasterControl Analytics reports for all installed applications. Each application in the menu also has a "Reports" menu item, which allows you to access reports for that application. Available reports include Approvals, Audit, Cycle Time, and Master List. Additional information about viewing and customizing system reports can be found in the MasterControl Analytics Overview section.
Creating Dashboards
Dashboards are a series of reports and performance indicators combined on a single page to create an overview of a number of reports. Analytics reports can be stored on dashboard pages as "reportlets," which represent existing reports by displaying graphs that have been created and saved to them. You can choose to review a full report from each reportlet.
Note: Only custom reports can be viewed in a dashboard.
To create a dashboard:
1. Click on Reports.
2. Create a report with a chart.
3. Click on Dashboards in the drop-down list of the Analytics section of the Quick Start menu.
4. Click New.
5. Click the report with the chart in first drop down list.
6. Select up to three more reports with charts in the dashboard.
7. Click Save As.
8. Give the dashboard a name and description, and select whether or not to make it public.
9. Click Submit.
Click the Report Details icon in the list page to rename the dashboard, change the description or change its public or private status.
Creating a Dataset Profile
You can create a dataset profile by linking the fields between two form datasets (see Creating Datasets). This creates a report based on the profile that shows only the linked fields. These reports are based on form datasets but appear in the Portal reports section of MasterControl.
To create a dataset profile:
1. Select Dataset Profiles from the Analytics section of the My MasterControl menu.

11.6 MasterControl Creator-Reviser Manual
41
2. Click New.
Dataset Profiles
3. Enter the name of the profile in the Profile Name field.
4. Select a dataset from each of the Datasets drop-down lists. The fields for each associated form template will appear.
5. Select a field from each dataset.
6. Click Add Link to link the two fields.
7. Click Save.
My Subscriptions
My Subscriptions allows you to keep track of changes to any Document InfoCards you desire. After subscribing to a Document InfoCard you will be notified any time a change takes place.
1. Click the Subscribe icon on the Document InfoCard toolbar for any InfoCards you would like to track changes on.
2. Select Subscriptions from the My MasterControl menu. Here you can view the changes to your subscriptions.
My Subscriptions Page
3. Click on the My Subscriptions Menu icon to access more options.

My MasterControl Menu
42
4. Use the drop-down menu in the header to sort viewable Subscriptions by defined time periods (15 days, 30 days, 45 days, or All).
My Subscriptions Menu
5. Click Add Subscription to search for more InfoCards to add to your My Subscriptions list.
Note: The maximum number of subscriptions that can be added is 25.
6. Click on a subscription to see the Subscriptions Options menu.
7. Click View InfoCard to view the subscribed InfoCard.
8. Click View File to view the Main File on the subscribed InfoCard.
9. Click Unsubscribe if you want to remove the subscription.
Note: When a subscribed InfoCard is revised and the revision is released, the subscription will update to the most recent released revision. This will also remove all information from the subscription referencing the previous revision.

43
InfoCards
InfoCards are the core of MasterControl. The InfoCard controls access to documents as well as the functions available to each user. It is file format independent, allowing you to store files created in any application. It also contains the functionality for revision control (checkout/check-in), approval, searching, and viewing. When viewing a document, MasterControl forces all users to view the PDF version of the document (if PDF Publishing is installed), unless the user is given specific rights to select the viewing application.
InfoCards are similar to a library card catalog. A card in a catalog contains information about a book while the book itself is stored on a shelf in the library. In much the same way, MasterControl Portal's vaults store document information on an InfoCard while keeping the associated files safe in the vault.
The MasterControl Portal Virtual Vault system provides a secure environment for documents. It meets all the document control requirements for ISO 9000, QS-9000, FDA, and OSHA. It provides the ability to quickly find documents based on multiple criteria. It enforces the discipline necessary to meet strict document control standards. The Web architecture also provides a high degree of database and document integrity.
File information is contained in a set of InfoCard tabs. If data is contained in the tabs, the tab text appears black. If no data is contained in the tabs, the text is gray. If any fields are required on a tab, an asterisk will appear in the tab text. Additionally, if an InfoCard has not yet been approved, the text of the Information tab is red. If it has been approved, the text is green. InfoCards can contain information for both electronic files as well as external (paper only) documents.
When you select an InfoCard list from the main navigation menu (Documents, Forms, Job Codes, etc.), the selected InfoCard List page will appear. This list displays all InfoCards of the type you selected to which you have rights. For example, if you do have rights to all but the Archive vault, all InfoCards not belonging to the Archive vault will appear in the list.
The following sections first explain the fields for each tab you see in the main InfoCard page. They then go on to explain how to perform these and other InfoCard functions.
Required Rights
InfoCard
Manage Documents
For more information on these rights and for a complete list of Document rights, see MasterControl Documents Rights.
InfoCard Tabs
Information Tab
Information Tab Fields
When you retrieve existing InfoCards or finish creating a new InfoCard, you are taken to the Information tab. The Information tab identifies the InfoCard and provides general InfoCard information, including a Notes field and cross-reference data when needed. The following table explains the fields that appear on this tab.

InfoCards
44
Information Tab Page
Field Description
Version Information

11.6 MasterControl Creator-Reviser Manual
45
InfoCard Number
This field contains the InfoCard number. It is required and must be populated to save the InfoCard. It can be up to 30 alphanumeric characters. MasterControl Documents has an auto numbering feature that can populate the next available number from a predefined numbering series. Before saving the InfoCard, the system ensures that the combination of the InfoCard number and the revision level for each InfoCard is unique.
Revision This field contains the current revision level of the InfoCard. When entering an InfoCard into the system, you can enter any revision level desired (including leaving it blank). This field can contain any combination of up to 30 alphanumeric characters. In Checkin mode, this field is required.
Version This field shows a version of the InfoCard independent of the revision. A new version appears each time a new main file is uploaded to the InfoCard. If a new version is added to a released InfoCard, the new version must be approved through a quick approval or approval route. The version number is always reset to 0 on a new revision.
Vault A vault is assigned to each InfoCard. This is a required field. The list of available vaults is set up using the MasterControl Portal configuration. The available vaults list can be different for each user, in different modes (such as New, Checkin, or Edit).
Title This field contains the InfoCard title. It is a required field, containing up to 300 alphanumeric characters that must be populated before saving an InfoCard.
Notes This is an optional field used for including comments about an InfoCard. You can use any combination of up to 255 alphanumeric characters.
Status The Status is automatically populated when a vault belonging to a lifecycle is selected from the Vault drop-down list. Lifecycles allow for automatic movement of InfoCards among vaults as you have configured them. When an InfoCard has been moved to another vault, such as release, the new vault will appear in the Vault field, and the "Release" status will appear in this field.
InfoCard Type The InfoCard Type is a required input field. To fill in this field, make a selection from the drop-down list, which will include both InfoCard types and sub-types. InfoCard types might include Quality Manual, Procedure, Work Instruction, CAD Drawing, and so on. InfoCard types are also used to define custom fields. Each InfoCard type can have its own set of custom fields.
Subtype The InfoCard Subtype field is populated when a subtype of an InfoCard Type is created. The subtype will retain the information of the parent InfoCard Type but may also be changed as needed.
Other Information
Author This is an optional field for tracking a document’s author. This field allows up to 60 alphanumeric characters.
You may add roles in the Author field. All users in the roles will get notifications regarding tasks associated with the InfoCard the same as a single user would. The following conditions apply:
If you free type in the field and enter a userID the system will use that user as the author/owner.
If you free type in the field and enter a role the system will use that role as the author/owner unless that role is also a userID, in which case the system will use the user as the author/owner.
Users always overwrite roles.
Owner This is an optional field for tracking the document’s owner. The owner can be a person or a department. This field allows up to 60 alphanumeric characters.
You may add roles in the Owner field. The same conditions exist for this option as for when roles are added to the Author field (see above).
Previous Number
This field references a previously used InfoCard number. This field is commonly used when changing from one numbering system to another. It is an optional field that can be up to 75 alphanumeric characters.
Change Number
This optional field records a change notice number. In an engineering or manufacturing environment, this is commonly referred to as an ECO (Engineering Change Order) or ECN (Engineering Change Number). You can use the same number with many documents. When you perform a search on this field, the system locates all documents with the same number. This field can be up to 255 alphanumeric characters.
Main File

InfoCards
46
Main File When creating a new InfoCard, the File icon is used to locate the electronic document file.
MasterControl Documents stores the name of the electronic file being placed into the vault. The stored file name becomes the default file name when a user checks out the file or makes a copy of the file. MasterControl Documents places a copy of the electronic file where you specify it. The size of the file is displayed next to the file name once it has been uploaded to the InfoCard.
The My Files icon allows you to add a file from My Files. Only one file may be selected from the My Files select screen.
Note: When you click the Add File icon, the browse path will access My Files by default. You can select a file from My Files for the main file, or you can browse to another location. The next time you click the Add File icon, the browse path will default to whichever directory you accessed the last time.
When the InfoCard is in Edit mode, you have the option of including or excluding the signature manifest for InfoCard documents that will be exported with Organizer Gateway (see Exporting Organizer Contents with Organizer Gateway). Check the Include signature manifest on gateway export box to enable this functionality. It is unchecked by default.
MasterControl Training
Use this area specify the training needs for certain documents. If you choose Yes in the "Defer release until training is completed" field a menu will appear. That menu will allow you to choose a specified percentage of training that needs to be completed before the document is released.
The default is 100%, but you can also choose 95, 90, 85, 80, and 75.
Date Information
Created Displays the date the InfoCard was created.
Released This field displays the document’s release date. Users set the effective date when approving an InfoCard. If an InfoCard belongs to a lifecycle, this date determines when the InfoCard is moved to the release vault.
Effective This field displays the date when an InfoCard becomes effective.
Expires This field displays the date when an InfoCard expires or when it should be reviewed. Users set the expiration date when approving an InfoCard. If an InfoCard belongs to a lifecycle, this date determines when the InfoCard is moved to the archive vault.
Moved to Phase
This field displays the date the InfoCard moved to its current phase on the lifecycle.
Next Review This field displays the date when an InfoCard will be sent out for review prior to its expiration date.
Standards Use this field to maintain an easy cross-reference between all sections of a standard – such as ISO 9000 – and the document. You can cross-reference each InfoCard to any system standard(s). Use Standards in the Configuration menu item to set up a list of predefined standards.
InfoCard Fields
Training Tab
The Training tab displays a list of all In Process and completed training tasks to which the Document InfoCard has been linked in the Course InfoCard's Attachments and Links tab. Click the Details icon in the Actions column to view the Trainee InfoCard and its Training Task.

11.6 MasterControl Creator-Reviser Manual
47
Training Tab page
Controlled Copies Tab
The Controlled Copies tab has a sortable list of all controlled copies associated with the InfoCard. When you are creating a new InfoCard, or when an existing InfoCard is in edit mode, you can create controlled copies in this tab. You can also view your controlled copies and Copies on Previous Revision.
Creating a Controlled Copy
To create a controlled copy:
1. From the Edit drop-down list, select Edit.
2. Click the Add Copies icon .

InfoCards
48
Add Controlled Copy page
3. Enter the location of the copy in the Location field.
4. Select Electronic or Paper from the Type drop-down list.
5. In the Create Date field, click the Calendar icon to select a date or click the Today's Date icon to choose today's date.
6. Select a copy status from the Copy Status drop-down list. You can select from Distributed, Obsolete, and Destroyed.
7. If you entered a URL in the Location field, check the URL box. The location name will appear as a link and will open the linked site when clicked.
8. Click Save.

11.6 MasterControl Creator-Reviser Manual
49
Attachments & Links Tab
Use the Attachments & Links tab to maintain a list of attached files and related InfoCards.
Attachments & Links Tab
Main File
You can view the InfoCard's main file from this page by clicking the View Document icon or View PDF icon . Create an external link by clicking the Create External Link icon .
Attachments
To view an attachment or link, click the View icon in the Actions column. A window will open asking if you want to open or save the document. If you choose to open the file, it will appear in a new browser window.

InfoCards
50
If the InfoCard type does not have an associated viewer program configured in the browser, the Windows Open With window will appear. Choose the program you want to view the file with, and then click the OK button.
Note: When you click the Add File icon to add an attachment, the browse path will access My Files by default. You can select a file from My Files for the main file, or you can browse to another location. The next time you click the Add File icon, the browse path will default to whichever directory you accessed the last time.
Links
You can also view attached InfoCards by clicking the View InfoCard icon next to the InfoCard you wish to view.
MasterControl supports multi-file documents, such as an AutoCAD file with cross references or a master document created within Microsoft® Word that has one or more subdocuments. The Attachments section displays pertinent files for sub files related to the master document. If PDF Publishing is installed and enabled, complex documents will be published to one PDF file.
Web links on the Attachments & Links tab of a Course InfoCard will display in the Additional Materials section of a training task's course materials. This is the case for InfoCards that are added to a trainee's curriculum. You can add multiple web links to a training task this way.
Note: It is important to remember that if a tab contains data, the tab text appears darker. If any tabs are grayed-out, you can still click them to view the tab contents.
Creating Attachments
To create an attachment:
1. Click the Edit button in the InfoCard toolbar to enter Edit mode.
2. Select the Attachments & Links tab.
3. In the Attachments section, click the Add Attachment icon .
3. Click Browse to select a file to attach.
4. Click Load File.
5. Click Save.
Creating Links
Two kinds of links can be created: InfoCard links and Web links. To create a link to an InfoCard:
1. Click the Edit button in the InfoCard toolbar to enter Edit mode.
2. Select the Attachments & Links tab.
3. In the Links section, click the Add Linked InfoCard icon .
4. Search for an InfoCard using the Simple, Basic or Advanced Search functionality (see Toolbar Search for more information).
5. Check the Smart Link box if you wish to make the linked InfoCard a smart link. If you save a smart link, when you try to edit the InfoCard a pop-up window will appear stating that this change may require you to update the linked InfoCards, and give you the option of accessing the linked InfoCards, saving your changes or canceling.
Note: The Smart Link box will also appear when a user creates and launches a packet with an InfoCard containing a Smart Link; a user clicks Collaborate (under the Revision menu on the InfoCard) and launches a packet; and a user checks out an InfoCard then checks it back in (with the revision number changing).
6. Click Save.
To create a link to a web page:
1. Click the Edit button in the InfoCard toolbar to enter Edit mode.
2. Select the Attachments & Links tab.
3. In the Web Links section, click the Create New Web Link icon .
4. Enter a title for the link in the Link Title field.
5. Enter the URL for the link in the Link URL field.
6. Click Add Link.
7. Click Save.

11.6 MasterControl Creator-Reviser Manual
51
Custom Fields Tab
Custom Fields Tab
The system administrator (or someone with the proper rights) defines all the fields that are displayed on this tab.
Custom fields are associated with InfoCard types in the Configuration section of MasterControl Portal. Whenever you choose a certain InfoCard type, the special set of custom fields will display in the Custom Fields tab. There is no limit to the number of custom fields that you can set up. To the right of the field name is the acceptable data type for the field. The following table lists the available field types.
Field Type Description
Text Any alphanumeric character (up to 200 characters).
Number Must be a valid number.
Date Must be a valid date.
Time Must be a valid time.
Custom Data Entries must be chosen from a predefined list (specified by selecting Custom Fields).
Data Structure Entries must be chosen from existing Data Structures.
Custom Field Types
InfoCards will only accept data in the custom fields that have the correct data type and format.
History Tab
Use the History tab to view a record of InfoCard approvals. This tab will display related approval information, such as the approval task name, approval status, and the ID of the user who approved the InfoCard. It also shows a record of InfoCard revisions. MasterControl Documents tracks each instance of an InfoCard being checked out or in, allowing you to see the revision number, version number, effective date, release date and current vault. Clicking the icon under the Actions column will open the InfoCard for the revision indicated.

InfoCards
52
History Tab
Status Tab
Status Tab Fields
The Status tab allows you to view the current status of the selected InfoCard. The status includes whether the InfoCard is checked out or not, if another user or process has locked it, and other relevant status information.

11.6 MasterControl Creator-Reviser Manual
53
Status Tab
The following table describes each of the fields found on the Status tab.
Field Description
Locked Information
The Locked Information fields only contain information if the InfoCard is locked. MasterControl locks documents when they are being edited, when they are checked out, and when they are in a task awaiting approval. Locked documents cannot be edited, but they can be viewed and checked out (if they are not already checked out by another user). InfoCards in a task are unlocked when the task is successfully completed, final rejected, or aborted.
Reason The reason the InfoCard has a lock placed on it.
Name The name of the user who placed the lock on the document.
Time The date and time that the InfoCard was locked.
Routing Information
The Routing Information fields only contain information if the InfoCard is in a task. MasterControl locks documents when they are in a task awaiting approval. Locked documents cannot be edited, but they can be viewed and checked out (if they are not already checked out by another user).
Route Name The name of the route the InfoCard's task is currently on.
Current Route Step
The current step of the route that the task is on.

InfoCards
54
Other Information
The Other Information area contains other pertinent information about the selected InfoCard.
Released By Upon final approval, MasterControl automatically places the name of the individual who releases the InfoCard in this field (through Approvals).
Parent InfoCard Number
This field contains the InfoCard number of the current document's parent. When adding a new document, the Parent InfoCard Number field is blank. The Parent InfoCard Number field is only filled in when an InfoCard is checked in as a revision of an InfoCard already in the vault.
Parent InfoCard Revision
This field contains the revision number of the parent InfoCard. When adding a new InfoCard, the Parent Revision field is blank.
Input By MasterControl automatically inputs the full name of the user who created the InfoCard.
Status Tab Fields
Versions Tab
A new version appears each time a new main file is uploaded to the InfoCard. You can view all previous versions' main files from the Versions tab. Click on the icon in the Actions column for the version you wish to view. The start and end dates for each version are also recorded on this tab.
Click the View Audit Trail link to see the audit trail for the InfoCard.
Other Tabs
InfoCards for other applications may have additional tabs that require information. For example, Form Template InfoCards have a Form Fields tab. Course InfoCards have a Course tab. Information on these tabs must be completed before the InfoCard can be saved. More information about the fields that are found on these tabs can be found in their respective module sections.
Working with InfoCards
InfoCards allow you to manage the information on your MasterControl site by performing the following functions from the list page:
Add, edit, and delete InfoCards
Quick approve InfoCards
Link files
Locate information using various search methods
View stored files
Check InfoCards out of vaults to review or make revisions
Check revised InfoCards into vaults as updated revisions
Copy files
Create external links to InfoCards and InfoCard files
Access workspaces
Required Rights
Edit InfoCard
Find InfoCard
Delete InfoCard
11.6 MasterControl Creator-Reviser Manual
55
New InfoCard
View Native
View PDF
For more information on these rights and for a complete list of Portal Vault rights, see MasterControl Portal Vault Rights.
InfoCard List Page
This high-level InfoCard list page encompasses all the InfoCards in the portal. Searches performed from this page will return results from every type of InfoCard. A padlock icon indicates that the InfoCard is in use and may not be edited. Hovering your mouse over the icon will show the name of the user who locked the InfoCard, as well as the date and time it was locked.
You must have the Portal Search right to access this page.
Placing Documents in a Vault
Placing a new InfoCard in a vault involves the following steps:
1. Create an InfoCard before adding a file to a vault. You can create an InfoCard for both electronic documents and external, paper-based documents. The only difference between the two is that for a paper-based document, you do not specify an electronic file in the File field. MasterControl controls the actual electronic file of the document to ensure its security even outside of the actual application.
2. Once you save the InfoCard, MasterControl Documents copies the specified electronic file into a specified database directory. From then on, MasterControl maintains complete security of the file.
3. Only users with the proper rights can check out the document, view the document, or edit the InfoCard.
Creating an InfoCard for Electronic Documents
To create an InfoCard:
1. Click the New button in any InfoCard List toolbar. The Select InfoCard Type pop-up box will display.
2. In the Select InfoCard Type window, select the type of InfoCard that you are adding to the vault, and then click the Continue button (you can also double-click the desired type). A blank InfoCard will display with the Type field populated with your InfoCard type selection.
Note: If MasterControl Process is installed, only Form Template InfoCards can be created manually. Form InfoCards are created when a form task has been started.

InfoCards
56
New InfoCard
3. In the Number field, enter an InfoCard number up to 30 alphanumeric characters. You can also click the linked InfoCard Number icon to choose a preset numbering system. Select the numbering series you want to use from the drop-down list in the Select Number Series window, and the InfoCard Number field will automatically populate with the next valid InfoCard number. If only one numbering series has been configured for the selected InfoCard type, the next number in the series will automatically be placed in the Number field. Preset InfoCard numbers are directly linked to InfoCard types. For instructions on creating a preset document numbering series, please see the Numbering section.
Note: InfoCard number is one of at least five required fields (appearing with asterisks next to the field name). You cannot save the InfoCard until you populate all these required fields.
o Number
o Revision

11.6 MasterControl Creator-Reviser Manual
57
o Vault
o Title
o InfoCard Type
In addition, you will need to populate any required field on other tabs containing an asterisk before saving the InfoCard.
4. Type an InfoCard revision in the Revision field.
5. In the Vault field, select a vault from the drop-down list. This is a required field. The list of available vaults can change from user to user, depending on the access rights granted by the system administrator.
6. In the Title field, enter a document title that is up to 300 characters.
7. Enter data in any of the other fields, as desired.
Note: If you chose the "Organizer" document type, clicking the Save button will take you to the Organizer. For details on creating an Organizer, please refer to the Organizer section.
Adding an Electronic File to a Vault
Electronic files that are added to InfoCards can be located on any local or network drive that you can access from your workstation.
Note: If you chose the "Organizer" InfoCard type, you will not be able to upload an electronic file from this location.
To add an electronic copy of the file to the InfoCard, do the following:
1. Click the New icon next to File Name. The Upload File window will appear.
2. Click the Browse button. The standard Windows file browser will display. Select the drive and file as you normally would.
3. Click the Load File button when finished. The file name will display in the File Name field.
4. If the document being entered is a multi-file document, add attachments according to the instructions in the Adding InfoCard Attachments section.
Note: The main file can also be added from the Attachments & Links tab.
Adding Standards to an InfoCard
To add a reference to the InfoCard, do the following:
1. Click the Add Standards icon next to Standards when creating or editing an InfoCard to add references to the InfoCard. A list of references appears.

InfoCards
58
Add Standard Page
2. Click the checkbox next to the standard(s) you want to add, and then click the Save button. The standards are added to the InfoCard.
Note: The maximum number of standards that can be added to an InfoCard is 100.
Adding InfoCard Attachments
Attachments are files related to the main file. These files can be located on any local or network drive that you can access from your workstation. Up to 100 attachments can be added to each InfoCard.
Note: If you chose the "Organizer" document type, you will not be able to upload attachments from this location.
To add attachments to the InfoCard, do the following:
1. Click the Attachments & Links tab.
2. Click the New icon next to Attachments. The Upload File window will appear.
3. Click the Browse button. The standard Windows file browser will display. Select the drive and file as you normally would.
4. Click the Load File button when finished. The file name will display in the File Name field.
5. Repeat the above steps for all attachments.
Viewing and Deleting Attachments
MasterControl contains the ability to view or delete files from one location. This functionality allows an easy way to see the content of the documents you are adding to the InfoCard. You may wish to do this, for example, to verify that the file you added is the one you intended to associate with the InfoCard.
To delete attachments, click the Delete icon next to the file you want to remove. The selected files are removed from the InfoCard.

11.6 MasterControl Creator-Reviser Manual
59
To view an attachment, click the View icon next to the file you wish to view. A message will appear asking if you want to open or save the file. Selecting the "Open" option will cause a new browser window to open with the attachment loaded.
Completing Custom Field Data
Custom fields are defined by InfoCard type in the Configuration area. Whenever you choose a certain InfoCard type, the special set of custom fields will display in the Custom Fields tab. There is no limit to the number of custom fields that you can set up.
Note: An asterisk in the Custom Fields tab indicates required custom fields must be completed before saving the InfoCard.
To complete custom field data, do the following:
1. Click the Custom Fields tab. Any field name with an asterisk (*) is a required field. You must populate the required fields before you can save the InfoCard.
2. Complete any desired Custom Information text boxes.
Creating InfoCard External Links
External Links is an innovative method that helps users and administrators avoid creating rogue copies of documents and enables simplified access to vital documents and forms. An external link is a URL that provides access to a specified MasterControl resource. For example, an external link to the Corporate Handbook could be created and posted on the corporate Intranet site. When users click this link, MasterControl displays the controlled document to the end user, eliminating the need to have a rogue copy stored on the Intranet web server.
Similarly, a user can create an external link to a form, such as a CAPA or PTO request. This external link could be sent in an email or provided on a common website. To invoke one of these forms, a user simply clicks on the link.
The user maintains complete control over external links and can choose whether the external link requires authentication (displays the MasterControl login) or is anonymous.
To create an external link to an InfoCard:
1. Retrieve a saved InfoCard.
2. Click the drop-down arrow next to the Copy button in the toolbar.
3. Click Copy External Link.
4. Select the Dynamic or Static option button. A static link will always take the user to this revision of the InfoCard. A dynamic link will take the user to the most current released version of the InfoCard. For example, if revision 2 is released, and revision 3 is in draft format, the dynamic link will take the user to revision 2 of the InfoCard until revision 3 is approved.
5. Click the Generate button.
Note: If you are using Internet Explorer, when you click this button, the URL is automatically placed on your system’s clipboard (you do not have to manually copy it).
6. Click the Close (X) button to close the page.
7. After generating the link, create the shortcut or paste into an e-mail for distribution for your intended users.
To create an external link to an InfoCard file:
1. Retrieve a saved InfoCard.
2. Click the Create External Link next to the main file.
3. Select the Authenticated or Anonymous option button. For a user to access the file through an authenticated link, he/she must have a valid user account with rights to the vault in which the InfoCard resides. An anonymous link allows any user to view the file without having to log in to MasterControl, provided the Anonymous role has rights to the vault in which the InfoCard resides.
4. Select the Dynamic or Static option button. A static link will always take the user to the file for this revision of the InfoCard. A dynamic link will take the user to the file for the most current released version of the InfoCard. For example, if revision 2 is released, and revision 3 is in draft format, the dynamic link will take the user to the file for revision 2 of the InfoCard until revision 3 is approved.

InfoCards
60
5. Click the Generate button.
Note: When you click this button, the URL is automatically placed on your system’s clipboard (you do not have to manually copy it).
6. Click the Close (X) button to close the page.
7. After generating the link, create the shortcut or paste into an e-mail for distribution for your intended users.
Editing InfoCards
The InfoCard's Edit function allows you to change the information contained on an InfoCard. To edit InfoCards, you must retrieve one or more InfoCards. For more information on the search features, see Finding InfoCards.
When you complete your InfoCard search, all the information about your selected InfoCards will display. If you selected more than one InfoCard, you can move from one document to the next by clicking on the navigation buttons located in the top-right of the InfoCard screen.
To edit an InfoCard:
1. Retrieve the InfoCard that you want to edit using one of the search functions described in the Finding InfoCards topic.
2. Click the Edit button in the toolbar to enter Edit mode.
3. At this point you can change any of the information on the InfoCard. The following rules apply to editing an InfoCard:
If you change the InfoCard Number, it must be unique.
The combination of InfoCard Number and Revision must be unique.
You must assign all InfoCards to a vault.
You must populate any required information on the Custom Fields tab.
4. When you are finished editing the InfoCard, click the Save button.
Note: When a user edits an InfoCard, a lock is placed on that InfoCard that will not permit other users to edit it at the same time. If a user retrieves an InfoCard that is being edited by another user, a Locked icon will appear at the top of each tab in the InfoCard page. Information about the lock, such as the ID of the user editing the InfoCard, the time the lock began, etc., can be found in the Status tab. Users editing an InfoCard will receive a message five minutes prior to the lock expiration advising the user that they have five minutes to save their changes. After the 30 minute lock has expired, any other user can edit the InfoCard, which will restart the lock on the InfoCard. Locks on InfoCards being edited are also released when the user navigates away from the Edit InfoCard page, either through the main navigation menu or by logging out of the system. The length of this lock is set in the Home Page Settings section of MasterControl Portal.
Mass Replace
As a timesaving device, you can edit the information contained in several InfoCards at once. Information entered into the fields in the Replace Fields window will be applied to all the InfoCards you select.
To edit several InfoCards at once:
1. Check the checkboxes of the InfoCards you wish to edit.
2. Click View InfoCard(s).
3. From the Edit drop-down list, select Replace Fields.

11.6 MasterControl Creator-Reviser Manual
61
Mass Replace
4. Change information in the fields presented.

InfoCards
62
Note: Several restrictions apply when editing multiple InfoCards:
o You cannot edit an InfoCard that is checked out or locked, unless it is in a collaboration route.
o You cannot edit a Training InfoCard's vault or lifecycle.
o You cannot edit an InfoCard and change the document number revision to something that will conflict with another InfoCard.
o You will only have the rights to edit in the replace utility and select vaults for which you have edit rights.
o Only custom fields common to all InfoCards selected will be displayed in the Common Custom Fields drop-down list. Data entered in the New Custom Field Value field will replace the custom fields previously associated with the InfoCard, or add new entries if none existed.
Copying InfoCard Files
MasterControl manages the actual electronic file of a document. The only way to get a copy of the electronic file is to use the Copy feature. Copying is not the same as "checking out," which puts a lock on the file, preventing any other user from checking out the document. When a copy is made, no locks are put on the InfoCard and the file is copied to the user’s local computer. There is no limit (other than for security considerations) to the number of users that can copy a document from an InfoCard or the number of copies that can be made of InfoCard files.
To copy a file from an InfoCard, follow these steps:
1. Use one of the search features to locate and select the InfoCard(s) from which you want to copy documents.
2. Click the Copy button in the toolbar. The Copy Electronic Files window displays the current main electronic file for the loaded InfoCards.
3. Click the option button next to the file you want to copy. Standard Web browsers limit you to copying one file at a time.
4. Click the Copy button to start the copying process. The Windows File Download window appears.
5. Click the Save button to save a copy of the file to your computer.
6. Using the standard Windows method, navigate to the location on your computer where you want to save the file.
7. Click the Save button. The file is copied to your computer.
Note: If My Files is enabled, copying InfoCard files will automatically copy the main file and all attachments to your My Files directory, saving you the trouble of having to navigate to the directory you want and copying each file individually.
8. Repeat the above steps for each file you want to copy.
Deleting InfoCards
In MasterControl you can delete one InfoCard at a time, or you can select multiple InfoCards and then delete them all at once.
Note: You cannot delete an InfoCard that is currently checked out, in a task, or in the Delete vault.
To delete InfoCards, do the following:
1. Use one of the three methods explained in the Finding InfoCards section to locate the documents that you want to delete.
2. Select the check boxes next to the InfoCard you want to delete.
3. Click View InfoCard(s).
4. Click the Delete button in the toolbar. The Delete InfoCard window appears.
5. Click the checkbox next to each InfoCard you want to delete.
6. Click the Continue button. A message appears confirming the deletion.
7. Click the OK button to delete the document or the Cancel button to return to the InfoCard Delete window.
Note: All links must be removed from an InfoCard before it can be deleted.

11.6 MasterControl Creator-Reviser Manual
63
Note: Deleted InfoCards will be renamed with a "-DEL" at the end of the InfoCard name, and moved to the Delete vault. This will allow InfoCards to continue with the revision numbering series without skipping numbers.
InfoCard Autoload
Auto-Loading InfoCards
One method of creating an InfoCard quickly and easily is to auto-load its contents from an outside file. This is done by dragging and dropping a file to a mapping in My Files (or saving the file to a folder for an InfoCard Type that has Auto-Load enabled in My Files). When you do this, the system displays the InfoCard page with the given file already attached and InfoCard fields pre-populated. The Title field is populated based on the filename. After the InfoCard is saved, the file is removed from the InfoCards folder.
The following conditions are required:
1. My Files must be enabled
2. The InfoCard Type must have the following template options:
Lifecycle
Number series
Task Name
Route
Automatic InfoCard Loading enabled
Launch Task (Optional) - This automatically puts the InfoCard on a collaboration route. If you do not have Launch Task checked, it will create an InfoCard but not launch a task.
Originator
Finding InfoCards
MasterControl includes many quick and easy ways to locate controlled InfoCards stored in vaults:
1. Portal Search
2. My Recent
3. Simple
4. Basic
5. Advanced
6. Virtual Folders
MasterControl allows you to retrieve up to 100 InfoCards at a time.
You must have the Find InfoCard right for the vault in which an InfoCard is stored in order to retrieve it.
Using Virtual Folders
Virtual Folders
You can save any search for future reference. Saved searches are kept in Virtual Folders, located in the toolbar of every list page, and contain search results from among the InfoCards in that list page. For more information on configuring and deleting Virtual Folders, see Manage Virtual Folders.
To create Virtual Folders:
1. Click Search.
2. Select Simple, Basic, or Advanced.

InfoCards
64
3. Enter data to be searched on.
4. Enter a name for the search in the field marked "Enter name here".
5. Click Save Search.
The Virtual Folders button now appears in the toolbar. Clicking on the Virtual Folders button will reveal the results for all saved searches.
To change a search's parameters:
1. Click Search.
2. Load a saved search.
3. Change the criteria in the search fields.
4. Click Save Search.
Viewing an Electronic File
You can view an electronic file from MasterControl Documents as long as you have a viewing program or PDF publishing is installed - the MasterControl Documents vaults are file format independent. It supports most document creation programs as viewers, as well as most third-party viewing applications.
The viewing operation will fail if:
The InfoCard references an external or paper-based document.
The viewing links were not properly established in the Web browser.
Training has not yet been completed on the InfoCard (if MasterControl Training is installed).
In view mode, you are viewing a copy of the master document in the vault. If you make any changes while in view mode, the master copy in the vault will not be not affected. Many users can view the same file simultaneously.
Viewing InfoCard Main Files
The InfoCards for the various MasterControl modules carry different main files, as follows:
Document InfoCards - document files such as Word, PDF, or text files
Process InfoCards - PDF forms
Project InfoCards - Project Workspace
BOM InfoCards - BOM Workspace
Supplier InfoCards - document files if appropriate
Training InfoCards do not carry main files but contain their pertinent information in their respective training tabs.
These files may be opened through the same process:
1. Locate the InfoCard for the file you want to view. For more information on locating InfoCards, see the Finding InfoCards topic.
2. Click the View button in the toolbar. A window will appear asking if you want to open or save the file.
3. Click the Open button.

11.6 MasterControl Creator-Reviser Manual
65
Note: If MasterControl PDF Publishing is installed, different actions may occur when the View button is clicked. If you only have "View PDF" rights, clicking the View button will open the PDF version of the main file. If you only have "View Native" rights, clicking the View button will open the native version of the main file. If both rights are given, the default action of the View button will be to open the PDF version. However, in this case a drop-down list arrow will also appear next to the View button, allowing you to select from the two view options. For more information about PDF Publishing, please see the MasterControl PDF Publishing Overview section of this manual.
4. If the file type is supported by the browser, the file will appear in a new browser window. If the document type is not supported by the browser, a window will appear asking you to make a program association for that file type. Select the program you want to use to view the program, and then click the OK button.
5. You can also click the Attachments & Links tab to view any associated InfoCard attachments or links. If the viewer does not have rights to view files in the vault that the InfoCard links belong to, he/she will not be able to view that file.
Checking InfoCards Out and In
MasterControl maintains strict revision control rules. The only way you can make any changes to an InfoCard and its documents and maintain a revision history is to check it out of the vault, and then check the changed document in as a new revision. This section describes how to check documents out of and into MasterControl.
Checking Out an InfoCard
When a user checks out an InfoCard, only a copy of the attached document is available for revision. The master file is always safe in the vault. This creates a complete revision history for every InfoCard and document. In addition, MasterControl only allows one person to check out any InfoCard at one time. This eliminates the possibility of users overwriting each other’s changes. InfoCards that are currently in tasks also cannot be checked out.
If the InfoCard does not have an electronic file associated with it, you cannot check it out. An external or paper-based document is an example of an InfoCard that usually does not have an electronic file associated with it.
To check out an InfoCard from the vault, follow these steps.
1. Load an InfoCard using one of the methods described in the Finding InfoCards section.
2. Click the Check Out button in the InfoCard toolbar.

InfoCards
66
Check Out InfoCard Page
3. Fill out each of the fields in the Checkout Information of the Check Out window.
4. When you are finished, click the Check Out button. The File Download window appears.
5. Click the Save button.
6. In the Save As window, select the drive and directory where you want to copy the file, and then click the Save button. The InfoCard file is saved to your computer and the checkout is completed.
Note: If My Files is enabled, checking out InfoCards will automatically copy the main file and all attachments to your My Files directory, saving you the trouble of having to navigate to the directory you want and saving each file individually.
Checking In an InfoCard
To check an InfoCard in to the vault, you must first have checked it out and have "Check-In InfoCard" rights. System Administrators and users with the "Check-In Administrator" right can check in InfoCards that have been checked out by any user.
To check an InfoCard back into the vault, do the following:
1. Click the Check In button from any InfoCard list page. You can also click the Check In button from the InfoCard toolbar.
2. The Check In InfoCard page displays.
3. To select an InfoCard to check in, click the option button next to the InfoCard number.
Note: To check in an InfoCard that you have not made any changes to, select the Check In Without Revision check box. Doing this unlocks the InfoCard so others can check it out, but it does not create a new revision of the InfoCard in the vault.
4. Select Copy Parent Attachments to copy any attachments from the previous version of the InfoCard. This will be checked automatically if My Files is disabled.
5. When finished, click the Check In button. A window displays asking you to locate the file to be uploaded.
6. Click the Browse button to locate the file using the standard Windows method.
7. Click the Open button, and then click the Load File button. The Load File window closes and the Edit InfoCard page appears.
8. Assign the InfoCard to a vault, complete the required data on the Custom Fields tab, and fill out any other desired fields.
9. Click the Save button to save the new InfoCard. The checked-in InfoCard loads in the browser.
Note: Form InfoCards are checked in as Form Template InfoCards.
My Files is available to help you streamline the process of checking in an InfoCard. You can select or deselect the Use My Files button on the Check-In page. If My Files is enabled, you will no longer get the file popup when checking in a file. You will have the option to switch between the keep folder and the file directory in the My Files pop-up. You will have the option to automatically bring the main file and attachments from the My Files folder.
Viewing InfoCard Audit Trails
System Administrators and Subadmins can view audits of all changes made to any system InfoCard. MasterControl Portal keeps track of any change to an InfoCard, such as a field edit, revision, or approval. Users with the appropriate rights can then view these changes in an Audit Trail report, which can be accessed from the InfoCard itself.
To view an InfoCard audit report:
1. Retrieve an InfoCard using any of the InfoCard search methods.
2. Click the Versions tab.
3. Click the View Audit Trail link.
4. All changes to the InfoCard appear in the InfoCard Audit Trail page, including the field that was changed, the old and new values, the change reason, the ID of the user that made the change, and the change date.
Note: You can view any change details by clicking the Details icon next to the specific item.

11.6 MasterControl Creator-Reviser Manual
67
5. Click the Return button to return to the InfoCard.
InfoCard Quick Approval
MasterControl Portal includes a feature called Quick Approval. This feature allows System Administrators and Creator-Reviser users to perform immediate approval of InfoCards.
To quick approve an InfoCard:
1. Use one of the Find features to locate and select the document(s) that you want to approve.
2. From the Sign Off drop-down list in the toolbar, select the Quick Approve item. The Quick Approval window opens.
Quick Approval Page
3. Enter any comments in the Comments field.
4. Type your electronic signature in the Electronic Signature field.

InfoCards
68
5. Click the Show Dates or Hide Dates link. Whichever option you choose will be saved when you sign off and appear on subsequent logins. When quick-approving an InfoCard, the Effective Date field in the sign-off window is auto-populated with today's date. Once the InfoCard is approved, the Released Date field is auto-populated with today's date.
6. Click the Submit button. A message appears stating that the document has been approved. If the InfoCard belongs to a lifecycle, its vault will change to the release vault on the effective date, and the archive vault on the expiration date.
Note: The contents of approved organizers cannot be edited. However, approved InfoCard information (name, revision, etc.) can be edited in the InfoCard by users with the appropriate vault rights.
Note: The Show Dates or Hide Dates link will appear for any sign off or approval window for which dates are needed.
Note: If an InfoCard is locked or checked out but has an effective date in the future, you will still be able to quick-approve.
InfoCard Quick Revision
For an InfoCard with no predefined revision path, MasterControl features a Revision button that creates a new revision of a Document InfoCard and places the new revision in a collaboration. This is a streamlined process that bypasses the Check In/Check Out functions. The new packet is named for the InfoCard and the route is a one-step collaboration route with the originator as the leader.
To create a new revision and collaboration route for an InfoCard:
1. Select an InfoCard from a list page. The InfoCard must be in a released vault.
2. Select Collaborate from the Revision drop-down list in the toolbar.
A new revision of the InfoCard appears in the Collaboration Workspace and you may sign off to approve the new revision. If the template for the Document InfoCard Type specifies a route, signing off on the collaboration will automatically launch the InfoCard on that route.
Once the InfoCard is in a Release vault, you can select Revision from the Revision drop-down list to create further revisions.
The revision button is enabled only if the following criteria are met:
The user has the Manage Documents right.
The user has the Start Task right.
The user has the Approve Packets right.
The InfoCard is the latest revision in a series.
The user has the Check Out right in the InfoCard's current vault.
The user has the Check In right to the InfoCard's current vault if not in a lifecycle.
The user has the Check In right to the InfoCard's Lifecycle draft vault if in lifecycle.
The InfoCard is not locked.
Document Review
Document Review Overview
Document Review allows you to review documents without the Expiration Date. There are situations when a new version of a document cannot be completed by the expiration date of the active version. If the active document were an SOP and it expired without a replacement ready, the company using that SOP would be out of compliance.
In order to prevent this, MasterControl features a template option that allows you to set a review policy. The document will be sent to users in specified roles so they can address the document's needs before the review date.

11.6 MasterControl Creator-Reviser Manual
69
Configuring Document Review
To configure document review:
1. Select InfoCard Types from the Configuration item of the Portal menu.
2. Click New to create a review policy for a new InfoCard Type, or click the Edit icon next to an existing InfoCard Type.
Document Review
3. Fill in the Review Period fields to specify the time when the document needs to be reviewed.
4. Fill in the Lead Time (Days) to specify how many days before the review date the task is sent.
5. Select a role from the Send Review Task to these role(s) list. The task will be sent to all users assigned to this role.
6. Add any instructions in the Task Instructions field.
7. Fill in the Defer Review if Later Revision is on Route fields to specify the time a review will be deferred in the event there is a later revision of the document being routed. An e-mail will be sent to users scheduled to review the document, stating that the review has been deferred. If these fields are left blank, the review task will proceed as scheduled.
8. Click the Save button in the toolbar at the top of the page.
Note: The document review policy will not calculate a review date unless the InfoCard is in a released vault that is part of a lifecycle.
You can change the document review date manually when you edit an InfoCard to which it has been applied.
The author and owner of the InfoCard are automatically added as leaders to the review and collaboration steps of the document review.
Review Process
A review task will automatically be launched when the scheduled review date minus the policy’s lead time is reached. The task name is automatically created in the following format: ”r;Review Task: InfoCard Number Revision and InfoCard Title." The due date becomes the review date.
The review route consists of a single collaboration step with two statuses:

InfoCards
70
Reviewed - if all users sign off with this status, the review date will be updated to the new review date and the approval will be recorded in the Approval History of the InfoCard.
Needs Update - archives the review packet and creates a new revision of the InfoCard, which is launched on a single-step collaboration route. A single user can trigger this action by signing off with this status.
Note: MasterControl will create an InfoCard even if the user performing the Needs Update sign-off does not have New InfoCard rights in the configured vault.
The roles selected in the policy become the step leaders. The author and owner become normal step users unless they are in one of the selected roles. The revision route is a single collaboration step. All leaders on the review step become leaders on the collaboration step and all normal users on the review step become normal collaborators. If collaboration is not licensed, the user signing-off with the Needs Update status becomes the single step user on the collaboration.
Importing Last Review Date
When importing documents, you can set a review date. The Review Policy for the InfoCard Type assigned to those documents will begin calculating from that date.
1. Select Data Import from the Import menu.
2. In the Data Import field, import your documents.
3. Specify the last review date for the documents. The next review scheduled from that date will appear on the InfoCards in the Next Review field.
You can also search for review dates using the Simple/Basic/Advanced search method.
Simple will search against the information in the Next Review field.
Basic contains a Next Review field.
Advanced includes Review Date in its Field drop-down list.

71
MasterControl Audit
MasterControl Audit Overview
MasterControl Audit is a separately-licensed module that enables a company to manage an audit process in both group and individual applications. Companies perform audits to ensure and verify that various entities (process, system, site, supplier, department, study, etc.) are operating in accordance with the applicable standard(s). These audits are an integral part of a company’s overall risk management system. Auditors have the capability to create and present a professional final audit report with minimal effort. Additionally, it ensures that the appropriate follow-up takes place by managing all the associated activities that audits initiate so that companies can stay in compliance with regulations as well as improve their business processes.
The Audit module allows users to:
plan and schedule audits, with allowances made for predetermined holidays.
execute audits.
capture findings offline.
manage the associated findings, responses, and CAPAs.
report on the resulting data, including the creation of rich text final audit reports.
The Audit scheduled task runs automatically on the first day of each month and creates another month of the Audit Schedule with the applicable Audit Entities with their Audit InfoCard Types and frequencies (see Viewing the Audit Schedule).
It is also possible to create ad hoc audits that only run once. See Creating an Audit InfoCard for more information.
For more information on the rights associated with the Audit module (see MasterControl Audit Rights).
Audit Workspace Tabs
Creating an Audit InfoCard
An Audit InfoCard is the vehicle for the Audit Workspace.
To create an Audit InfoCard:
1. Select Audits from the Audit menu.
2. Click New. The Audit Details page opens.
3. Enter data in the fields in the Set Audit Details page (see Configuring Audit Details).
This creates an ad hoc, or one-time, audit. To create an audit that recurs on a set schedule, see MasterControl Audit Overview.
Users on the current step of the route can access the Audit Workspace from the InfoCard or from My Tasks and edit it. See the following topics for more information:
Audit Workspace Information Tab
Audit Workspace Documentation Tab
Audit Workspace Observations Tab
Scheduled tasks will launch the audit on the date you specify. Once the audit is launched, the corresponding Audit InfoCard will appear in the Audit list page.
Auditors on each step of the route will receive an e-mail with actions pertaining to that step:
Audit step - you can download a copy of the checklist for the audit, or open the task in MasterControl.
Peer Review step - you can view the collaboration task or sign off.
Approval step - you can open the task in MasterControl or sign off.
See Creating Audit InfoCard Types for information on creating Audit InfoCard Types.
Audit Workspace Information Tab
The Audit Workspace consists of four tabs. Users on the current step of an Audit route can access the Audit Workspace from the InfoCard or from My Tasks and edit it.

MasterControl Audit
72
To edit the Information tab:
1. View an Audit InfoCard.
2. Click the Open Audit Workspace icon.
3. Click the Information tab.
4. Click Edit.
Note: If the Workspace is being modified by another user, you will receive a message notifying you of the user who locked the Workspace and the time it was locked. Once that user saves their changes the Workspace will unlock. When you click Edit after a lock has been removed, due to saving, the Workspace will be refreshed and show the most current data.
Information Tab
4. Enter the name of the audit in the field next to the Audit Number.*
5. Enter the start and end dates for the audit in the Scheduled Start*, Scheduled End*, Performed Start, and Performed End date fields by entering a date manually, by clicking the Today's Date icon, or by selecting a date from the Calendar icon.
6. Click the Add/Remove link to add or remove an auditor. This option is only available to the lead auditor.
Note: An auditor added to a route using Modify Step will be removed from the current step and all future steps of an Audit route as a result of changes made via Add/Remove. This happens if the auditor was previously assigned to the audit and is not in the new list of auditors.
7. Enter a summary of the audit in the Summary field.
8. Enter the scope of the audit in the Scope field.
9. Enter any conclusions drawn from the audit in the Conclusions field.
10. In the Custom Fields section, enter any data pertaining to custom fields in the Data column.
11. Click Save.
Note: Once an audit has been completed, it is no longer possible to edit the audit. Users with View Native rights to the vault containing the Audit InfoCard can view the workspace in read-only mode.
*Indicates a mandatory field
Audit Workspace Documentation Tab
The Audit Workspace consists of three tabs. Users on the current step of an Audit route can access the Audit Workspace from the InfoCard or from My Tasks and edit it.
To edit the Documentation tab:
1. Click the Open Audit Workspace icon.
2. Click the Documentation tab.

11.6 MasterControl Creator-Reviser Manual
73
3. Click Edit.
Documentation Tab
4. In the Checklists section, click Upload Checklist to save and upload a previously-downloaded checklist (see Issuing Reports for more information).
5. In the Attachments section, click Add Attachments to add files related to the audit, such as agenda, audit plan, etc., to the workspace. Checklists added as attachments will not appear in the Attachments list.
6. In the Links section, click Add Linked InfoCard to add an InfoCard to the workspace.
7. Click Save.

MasterControl Audit
74
Audit Workspace Observations Tab
The Audit Workspace consists of four tabs. Users on the current step of an Audit route can access the Audit Workspace from the InfoCard or from My Tasks and edit it.
The Observations tab shows the observations added using the Audit Checklist Word document (see Creating an Audit Checklist InfoCard), the Audit Workspace, or the Audit Workspace (Mobile). Click an item in the left pane to view its details in the right pane.
Observations Tab
On this tab, you can:
Filter the list of observations by task status or assignee. Statuses include the following:
New - an observation is created
Assigned - a user is assigned to the observation
Waiting - a response has been submitted for response
Returned - a response has been returned from the responder
Initiate a corrective action (see Initiating Actions).
Assigning Observations
Assigning Observations to Auditors - In previous versions of MasterControl users could not assign Observations to auditors. Version 11.X.X now allows this ability
Assigning Observations to Lead Auditors - If the Observation is assigned to a Lead Auditor they must respond using the response document (see Response Input Document Overview) generated for the Word Add-in.
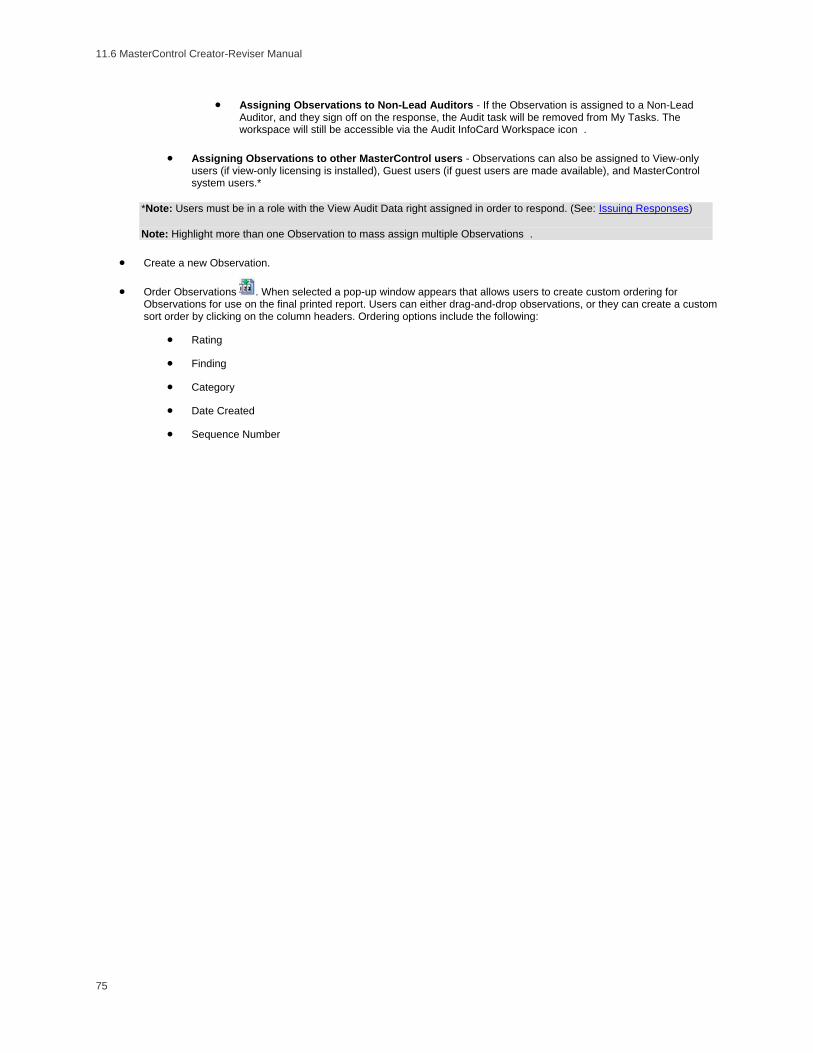
11.6 MasterControl Creator-Reviser Manual
75
Assigning Observations to Non-Lead Auditors - If the Observation is assigned to a Non-Lead Auditor, and they sign off on the response, the Audit task will be removed from My Tasks. The workspace will still be accessible via the Audit InfoCard Workspace icon .
Assigning Observations to other MasterControl users - Observations can also be assigned to View-only users (if view-only licensing is installed), Guest users (if guest users are made available), and MasterControl system users.*
*Note: Users must be in a role with the View Audit Data right assigned in order to respond. (See: Issuing Responses)
Note: Highlight more than one Observation to mass assign multiple Observations .
Create a new Observation.
Order Observations . When selected a pop-up window appears that allows users to create custom ordering for Observations for use on the final printed report. Users can either drag-and-drop observations, or they can create a custom sort order by clicking on the column headers. Ordering options include the following:
Rating
Finding
Category
Date Created
Sequence Number
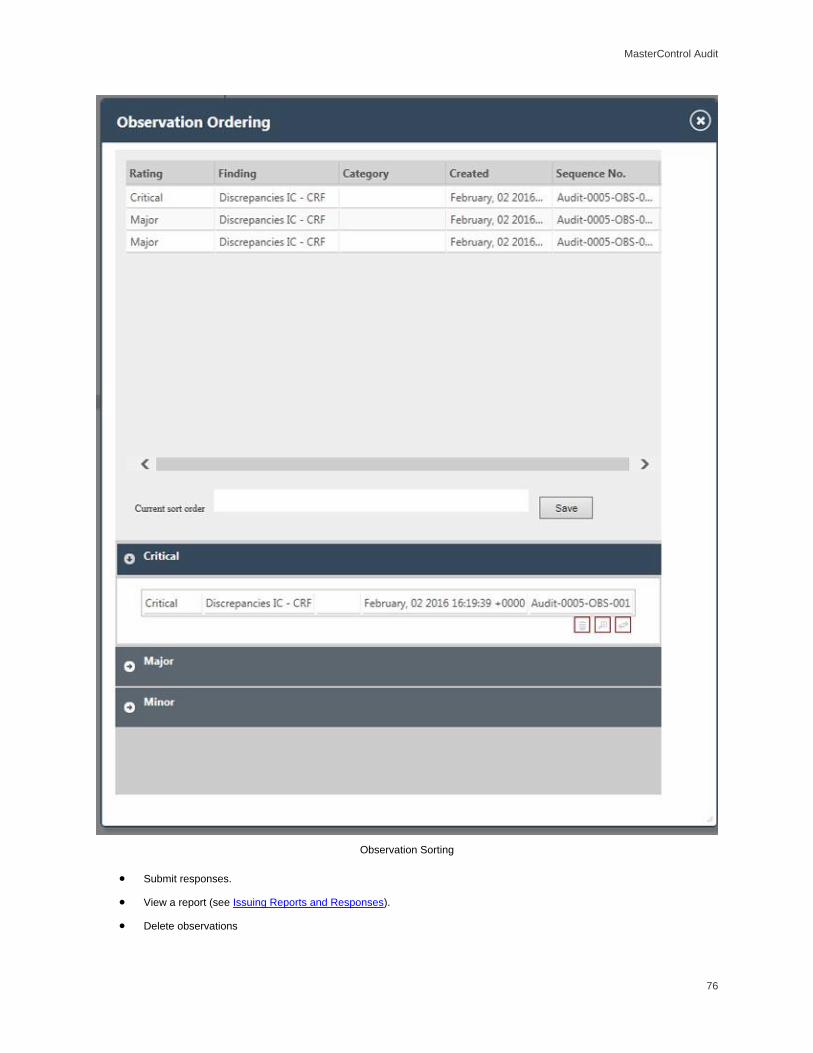
MasterControl Audit
76
Observation Sorting
Submit responses.
View a report (see Issuing Reports and Responses).
Delete observations

11.6 MasterControl Creator-Reviser Manual
77
Note: If you delete an observation, then re-upload a checklist that still contains the observation that was deleted, the observation will be added back to the audit.
Note: Observations may be edited, but a new Draft Report must be generated before the Audit can be signed off to the next step.
The Lead Auditor can edit or change ratings, findings, categories, responses, summaries, details, and recommendations on this tab, and individual auditors can edit their own entries.
Audit Workspace Checklist Tab
Auditors have the option to use the Word based audit checklist or they can complete the checklist from the audit workspace or the audit team can mix and match the data entry mechanisms. If a criterion has been completed and another checklist is uploaded, the latest answer will overwrite the existing answer, unless the latest answer is blank – in which case the existing answer is maintained.
Checklist Tab - Edit Mode
Depending upon your Audit Checklist configuration (see Creating an Audit Checklist InfoCard) selected standards and criteria will display in this tab. When in edit mode criteria will be editable.

MasterControl Audit
78
Checklist Tab - View Mode
Clicking the Add Finding icon , which is associated to the specific criterion, will cause a new observation to be created with the checklist reference pre-populated from the corresponding checklist criterion.
Audit Schedule
Viewing the Audit Schedule
The Audit Schedule shows a calendar view of all audits created in the system. Audits that show on the Audit Schedule List page are based upon the Find InfoCard right associated with the Audit InfoCard Type (for that Audit), and the View Audit Data right. The Audit Schedule assists you in keeping track of each auditor’s schedule.
Audits in the schedule fall into one of six statuses:
Pending - No lead auditor assigned and confirmation unchecked
Scheduled - Lead auditor is assigned and confirmation unchecked
Confirmed - No lead auditor assigned and confirmation checked
Scheduled & Confirmed - Both lead auditor assigned and confirmation checked
In Process - Lead auditor is assigned and the start date (including any lead time) has been reached and a task for the Audit has been launched
Overdue - no lead auditor is assigned and the start date (including any lead time) has been reached
The following actions can be performed on Audits in the schedule, depending upon their status:
Edit - Allows you to change details related to the Audit
View - Allows you to view Audit details
Delete - Allows you to delete an Audit.
Unlock Workspace - Allows you to override the Audit Workspace lock.
Note: The Unlock Workspace Right is required.

11.6 MasterControl Creator-Reviser Manual
79
See Configuring Audit Details for more information on configuring statuses.
To view the Audit Schedule:
1. Select Audit Schedule from the Audit menu. The audit entities will appear in the list page.
Note: Items that are marked "inprocess" or "completed" cannot be edited or deleted from the list page, or clicked in the Calendar.
2. Click Calendar View in the toolbar. The current month will display with any scheduled audits. Planned audits are shown in aqua, and audits confirmed on the schedule are shown in blue.
3. Click a planned audit to configure its details (see Configuring Audit Details). This will confirm the audit and change its color to blue. Clicking a scheduled audit opens the Audit Workspace for that task.
4. If you wish to extend the duration of an audit, you can click and drag the arrow icon (>>) at the end of the colored audit bar to the desired date. If you wish to reschedule an audit, you can drag and drop it to the new day on the calendar.
Note: Up to three audits can be displayed on the same day in the calendar. If a fourth audit is added to that day, it will display as the third audit, and an arrow icon will indicate that there are further audits scheduled on that day which are not displayed.
Select an option from the Group Events By: drop-down list to filter the audits that display on the calendar. The available options are:
Audit Name
Auditor
Status
Out of Office users
On each day that at least one auditor is out of office, there will be an indication on the Audit Calendar. Non-auditor out of office users are not depicted.
Viewing Conflicting Audits
Sometimes audits are scheduled over weekends, out-of-office events, or holidays. Other times, the same auditor may be scheduled for more than one audit at the same time.
Click the Audit Conflicts button in the toolbar of the Audit Schedule page to view a list of conflicting audits.
Resolve a conflicting audit by clicking the Edit icon in the list page and reconfiguring the details (see Configuring Audit Details).
Delete a conflicting audit by clicking the Delete icon in the list page.
Using the Audit Calendar
The Audit Calendar gives you an overview of all Audits existing within MasterControl. It provides month and week views. It allows you to schedule Audits with the ease of drag-and-drop functionality. To view the Audit Calendar open Audit Schedule and click on the Calendar View button in the toolbar.

MasterControl Audit
80
Audit Calendar
Viewing the Audit Calendar
The default calendar view is by month. Use the arrows in the top left corner to navigate through months and years. The Today button will automatically navigate you to the current date.
When there are three or more audits scheduled on any given day, click the gray arrow beneath the audits to open a week view. From here, you can click an audit to configure its details.
The Audit Calendar provides visual representation of the following Audit statuses:
Pending
Scheduled
In Process
Scheduled and Confirmed
Confirmed
Confirmed and Overdue
Overdue
Note: Conflicted Audits will show up with a red outline. This indicates that two Audits, with the same Lead Auditor, are scheduled during the same time period.
Grouping Audits
The Event Grouping section on the right side of the calendar provides several ways to visually group Audits. Audits can be grouped by:
Status
Auditor
Audit Name
Creating New Audits
You can launch ad hoc audits from the Calendar page by clicking New and configuring the Audit Details page (see Configuring Audit Details).

11.6 MasterControl Creator-Reviser Manual
81
Editing Existing Audits
Click on any Audits visible on the Audit Calendar to pull up the corresponding Audit Details page. If a Confirmed Audit is dragged and dropped or moved to another location on the calendar you will have to confirm the Audit again, by selecting the Auditee Confirmation checkbox on the Audit Details page.
Audit Routes
There are four system routes from which to choose when creating an audit. See Creating Audit InfoCard Templates for information on adding a route to an audit.
Note: Various HTML E-mails will be sent out depending upon the Route Type chosen.
The following system routes are available:
Audit - this route includes a peer review collaboration step in which auditors collaborate on a draft report, and a final review collaboration step allowing users to cleanup the draft audit report and final audit report before the approval step.
Audit No Peer Review - this route does not include a collaboration step.
Audit No Response - this route does not require a response for observations.
Basic Audit - this route consists of the audit step and an approval step.
Note: Steps where the Audit Workspace is available (Audit or Response steps), sign off can only occur after the report for that step has been created (See: Using Create Document Functionality). If the data in the workspace has changed, then a report is created, and you or another auditor has signed off already, you or the other auditor will be required to sign off again.
The following items apply to Audit routes:
When an audit task is launched, any collaboration step in the route is removed if the Documents module is not installed.
The Sysadmin or the Route Owner may abort the route on the first step.
The Sysadmin is the only user that is allowed to use Modify Step on the Audit and Response steps of an Audit Task.
Modify Step shows only available auditors in the Available list.
The audit status updates to "Complete" after the final sign-off.
If an Audit Approver is added to an Audit from the Available Approvers list they will receive a sign-off task during Audit Approval steps.
To copy an Audit Route, click the Copy icon ( ) next to the route.
If you reject on an Approval step, the task will be sent back to the last Collaboration (when on Audit or No Response routes) or Audit Workspace step (when on No Peer Review or Basic routes).
Note: Audit routes which use a collaboration step have the setting "Resend Task After Each Redline" enabled by default.

MasterControl Audit
82
Audit Route page
Issuing Audit Responses
Issuing Responses only happens on the Response Step of an Audit route. Once Responses have been initiated they cannot be initiated again.
The following users will have rights to view and respond to Response Tasks:
View-only users (if view-only licensing is installed)
Guest users (if guest users are made available)
MasterControl system users in a role with the View Audit Data right assigned

11.6 MasterControl Creator-Reviser Manual
83
Issuing Responses
When the Initiate Response button is clicked a pop-up will appear prompting you to enter a Due Date and Instructions. Upon clicking the launch button a Response Task will be initiated to the assignees of each Observation. An e-mail will be issued for each Response Task that is initiated.
Initiating a Response
Responding to Response Task
Once the Response(s) have been initiated links to the Response(s) will be available under the coinciding Observation. The Response(s) will be able to be filtered based on the following statues:
None - No filter applied
Waiting - The Response is not yet submitted
Returned - The Response is completed and returned for approval
Assignee - The user assigned to the Response

MasterControl Audit
84
Responses in the Workspace
The Response Task Workspace allows an assignee of an Observation to submit a Response, and if allowed, initiate Action Tasks in the system (see Initiating Actions).
Response Task Workspace
1. Enter Response in the Response field.
2. Save the Response at any time.
Note: Navigating away from the response, without saving it, will cause a warning to pop up that informs you all your information will be lost. Click Cancel, then save your response before navigating away.
3. Add Attachments if necessary.

11.6 MasterControl Creator-Reviser Manual
85
4. Click Reassign Response if you need to reassign the Response to another user.
Note: MasterControl users can reassign the task to any other user in the system. External users, i.e. guests, can assign the task to other external users.
5. Select a checkbox (or multiple checkboxes) next to the Observation(s) you wish to initiate a task for (see Initiating Actions).
6. Click Submit to submit the Responses. Only Responses with an entry in the Response field will populate the list in the pop-up window.
Response Submission window
Resending Responses
Responses can be resent to any user in the system at any time during the Response Step.

MasterControl Audit
86
Resending Responses
1. Highlight the required Response.
2. Click the Resend button.
Resend Response window
2. Select the Assignee you wish to send the response to.

11.6 MasterControl Creator-Reviser Manual
87
Note: MasterControl users can resend the task to any other user in the system. External users, i.e. guests, can assign the task to other external users.
3. Select the Due Date.
4. Enter any desired Response Instructions.
5. Click the Launch button.
Adding a Holiday
On the Holidays page, you can schedule the holidays for the year on the audit calendar and make it easier for you to manage the audit schedule.
To add a holiday:
1. Select Holidays from the Configuration section of the Audit menu.
2. Enter the name of the holiday in the Holiday Name field.
3. Enter the start and end dates of the holiday in the Start Date and End Date fields by entering it manually in the dd/mmm/yyyy format, or by clicking either the Today's Date or Choose Date icons.
4. Click Save.
The holidays will be listed in the Future Scheduled Holidays list, from which you may edit or delete them.
An Audit Duration field has been added to the Audit InfoCard Type. This field determines the length of time an audit is scheduled.
The following rules apply:
If the duration of the audit is five days or fewer and the scheduled start day falls on Saturday, the audit will move backwards to fit into one week. If the start day falls on Sunday, the audit will move forward one day and begin the following week.
If the duration of the audit is more than five days, and the audit starts on a Saturday or Sunday, it will move to start on Monday of the following week.
If there is a holiday in the audit schedule date range, the audit will start on Monday of the following week.
Scoring an Audit
Each criteria assigned to a checklist has a point value associated with it (see Adding Criteria to a Standard). You can set a passing score for an audit based on the possible number of points for the assigned criteria (see Creating an Audit Checklist InfoCard).
When you first launch the audit, the Score field will not appear in the Audit Workspace. After the auditors have answered the criteria questions in the checklist and uploaded the checklist back to MasterControl, the Score field will appear in the workspace. The value is either Pass or Fail, depending on how the auditors answered the checklist questions relative to the passing score you set.
If you download and answer multiple checklists, the passing score will be calculated based on the average score from all the checklists.
Once the score has been calculated, a Score column appears in the Audits report.
Using Create Document Functionality
The generation of Word documents, based upon document templates, are created with the template editor (see Word Template Editor Add-in). Users may customize these documents in order to create various custom documents such as:
DRAFTREPORT
FINALREPORT
GCPDRAFTREPORT
GCPFINALREPORT
MEMO

MasterControl Audit
88
This allows the user to create various stylized documents.
Note: There are various reports that must be created to move an audit along its route.
To create an audit report:
1. While viewing the Audit Workspace, click the Create Document button .
Create Document window
2. Select desired template.
3. Click Submit button to create the document.
This creates the various document types listed above.
Initiating Actions
The Initiate Action button is located on the Audit Workspace Observations tab (see Audit Workspace Observations Tab). It launches an action task from among those selected on the Audit InfoCard Type (see Creating Audit InfoCard Types). This button will appear based on the selection chose in the Action Initiators list on the Audit Infocard Types page.
Auditors - Auditors will see the Initiate Action button in the Workspace during the Audit Step and the Response Step.
Responders - Auditors will not see the Initiate Action button in the Workspace during the Audit Step and the Response Step. Responders will be the only users to see the Initiate Action button in the Response Workspace of a Response Task.
Both - Both Auditors and Responders will see the Initiate Action button in both the Audit Step and the Response Step in the Audit Workspace and the Response Workspace.
To initiate an action:
1. In the Observations tab, highlight a response (see Issuing Reports and Responses).
2. Click the Initiate Action button in the toolbar.

11.6 MasterControl Creator-Reviser Manual
89
Initiate Action window
3. Select an action from the Action Task drop-down list.
4. Select the user responsible for the action task from the Responsible User drop-down list.
5. Enter the due date for the action task in the Due Date field by clicking the Calendar icon or the Today's Date icon .
6. Enter a description of the action in the Description field.
7. Click the Initiate button.
You will associate corrective action forms with an Audit InfoCard Type on sites that have the Audit and Process modules installed. If you only have the Audit module installed on your site, there will be a Default Action Task in the Action Task field. Initiating this task launches a one-step route that will appear in the responsible user's My Tasks list with the task name as "[Audit Number] [Observation Rating] – [Observation Finding]" and the due date set by the initiator. The instructions for the task are as entered in the Description field. You will receive an e-mail for each default action task to which you are assigned.
Note: Out of Office users will have their Action Tasks redirected to an alternate user if specified.


91
MasterControl Documents
MasterControl Documents Overview
MasterControl Documents is a document control software solution designed to meet all the requirements for efficient document management and security. This includes standards such as ISO 9000, QS-9000, FDA, and OSHA requirements. Its Web-based architecture allows it to expand from a single user to a worldwide enterprise. Users at every level of expertise will find MasterControl Documents easy to use because of its intuitive graphical user interface. MasterControl Documents also has the most extensive security of any document control application. Because it controls the actual electronic file of the document, it can enforce its security even outside of the actual application. This ensures strict document control inside or outside the application.
The principal components of MasterControl Documents include MasterControl Documents InfoCards, Organizers, and MasterControl Approval Workflows. MasterControl Documents provides the ability to create, route and control all document control tasks. Functions include InfoCard creation, InfoCard numbering, approval routing, etc. To create a new InfoCard, please see the instructions in the InfoCard Overview section. Approval Workflows and Organizers are explained in the rest of this section.
For more information on the rights associated with the Documents module, see MasterControl Documents Rights.
MasterControl Approval Workflows Overview
MasterControl Approval Workflows comes with MasterControl Documents, and is used for electronic routing and online document approval. Using this application, document approval is far faster and more efficient than manual approval cycles. Any InfoCard can be sent on an approval route. You can define multiple routes, with serial, parallel, and combination routes available. In addition, the onscreen tracking feature allows users to see the status of any document in an approval cycle at any time.
In Approval Workflows, you will first want to set up and configure the routes that your users will utilize. Once the routes are successfully built and released, users can add them when they create tasks, and use them to route their tasks to the appropriate personnel. Once launched, users with the appropriate rights can approve, track, stop, restart, or abort the in-route tasks. When the tasks have finished their routes, users with the appropriate rights can view task histories to see what occurred during the course of the task routing. For information on creating an approval route, please see the Routing Overview section.
Sign Off Tasks
In the approval process, you can view each InfoCard in the task individually. Each reviewer can also read the instructions supplied by the originator of the task. In addition, users can view comments written by the last previous reviewer and write their own comments upon approval/review.
To approve, reject, or review a task, do the following:
1. Click the My Tasks item from the main navigation menu. The My Tasks page displays.
2. View tracking details by clicking the Tracking icon next to the task name.
Note: To go directly to the Sign Off Task window without viewing task details, click the Sign Off icon in My Tasks.
3. To change step users, if desired, click Modify Step (instructions in the Changing Route Users section).
4. Click the Sign Off icon to approve or reject the task.
5. View the attached electronic files by clicking the View Document or View PDF (if PDF Publishing is installed) icon next to the number of the InfoCard containing the document you want to view. You can also view the InfoCard by clicking the View InfoCard icon.
6. Click the Sign Off button in the toolbar.
7. Click the View Previous Comments icon to view any previous comments. It displays the View Comments page that allows you to scroll through all previous comments, including comments made during collaboration steps.
8. Type comments for the step status in the Comments field.
Note: Comments are required for rejected packets.
9. Enter your electronic signature in the appropriate field.
10. Click the Show Dates or Hide Dates link. When the dates are hidden, the default effective date is "today", the date you sign off. Whichever option you choose will be saved when you sign off and appear on subsequent logins. Enter an effective and an expiration date in the appropriate fields by clicking the Calendar, or click the Today's Date icon to add the current date.

MasterControl Documents
92
11. Select an action from the Status drop-down list. Depending on the route, possible statuses include "Approved," "Rejected," "Needs Update," or "Reviewed."
Note: In instances where there is only one status available, the drop-down list will be replaced by a text label.
12. Click the Save button or hit the Enter key to complete the approval and to complete your portion of the task.
Organizer Overview
Organizers enable you to create graphical InfoCard trees that show the relationships between InfoCards. An Organizer is a collection of objects, including Folders, Projects, and InfoCards. InfoCards can be organized at the same level or below folders. A Project is analogous to a filing cabinet containing filing cabinets called Steps.
In MasterControl Documents, projects can have multiple steps that can contain InfoCards and folders. The Organizer manages virtual copies of documents by enabling individual users to create custom document hierarchies. An InfoCard can only be in one vault at a time, but it can be placed in as many organizers as necessary. The Organizer is also easily used for configuration management.
Organizer
Required Rights
Manage Organizers
Organizer
For more information on these rights and for a complete list of Document rights, see MasterControl Documents Rights.
Creating Organizers
An organizer is a hierarchical tree structure. You can expand or contract each level of an organizer by double-clicking it. The icon for each level changes when you double-click it. If a level does not expand when you double-click it, there are no sub-level objects in the tree structure.
An organizer is an InfoCard type and is stored in a vault within MasterControl. Organizers can contain any number of InfoCards, folders, or projects. However, an organizer cannot be added to another organizer.
To create an organizer, follow these steps:
1. Click the My Organizers item from the My MasterControl menu.
2. Click the Mode menu item

11.6 MasterControl Creator-Reviser Manual
93
3. Click Edit.
Note: Because the contents of approved organizers cannot be modified, any approved organizers will disappear from the Organizer window when in Edit mode. To edit an approved organizer’s contents, you must first check it out and then check it back in with a new revision or as a new organizer (see the Checking InfoCards Out and In section for instructions on revisioning an InfoCard).
4. Click the Organizer menu, New, and then Organizer (you can also click CTRL+G on your keyboard or click the New Organizer button). The New InfoCard window will appear with the InfoCard tab active.
Note: You can also create a new organizer by clicking the Organizer item from the MasterControl Documents section of the main navigation menu, and then clicking the New button in the toolbar.
5. Complete the required information in the New InfoCard window (per the instructions under the Working with InfoCards section). Click the Save button when you are finished. The Organizer window will open again with the new organizer displayed.
6. You can establish rules for each new organizer; all rules refer to InfoCards that received final approval. To change the rules for the organizer:
1. Click the Mode menu item, and then click Edit.
2. Double-click the new organizer, and then click the Organizer Rules tab at the bottom of the page.
3. Click the checkbox next to each of the rules you want to enforce. The following table explains these rules:
1) Allow approved InfoCards only Permits only approved InfoCards to be added to the organizer.
2) Automatically replace parent revision on effective date
Automatically updates the organizer with the latest approved InfoCards.
3) Disable expired InfoCard link Note: Because non-lifecycle InfoCards are not automatically archived, links to these InfoCards will not be disabled in the organizers.
Organizer Rules
Rules #2 and #3 affect how InfoCards belonging to lifecycles are updated in an organizer when their statuses change (such as released to archive, when a child has been approved and the parent is archived, etc.). The following table explains the actions that will occur when combinations of these two rules are selected:
No rule selected
The parent InfoCard is never replaced by the child document. However, the parent InfoCard is moved to the archive vault when the child becomes effective.
#2 only (with or without #1)
The parent InfoCard is replaced by the child InfoCard when the child InfoCard becomes effective. The parent InfoCard is moved to the archive vault.
#3 only (with or without #1)
If the parent InfoCard expires or is archived, it is disabled.
Note: To avoid links being disabled unintentionally, InfoCards that are in a static organizer (rule #2 not checked) should not be given an expiration date.
#2 and #3 (with or without #1)
If the parent InfoCard expires or is archived prior to the child InfoCard becoming effective, the link to the parent becomes disabled and the link appears in red. When the child becomes effective, the disabled link is replaced by the child, and the parent is moved to the archive vault.
Organizer Rule Actions
7. Add any Folders, Projects, Steps or InfoCards to the organizer, according to the instructions below.
8. Click Organizer and then Save (or CTRL+S or the Save button) to save your organizer with these rules.
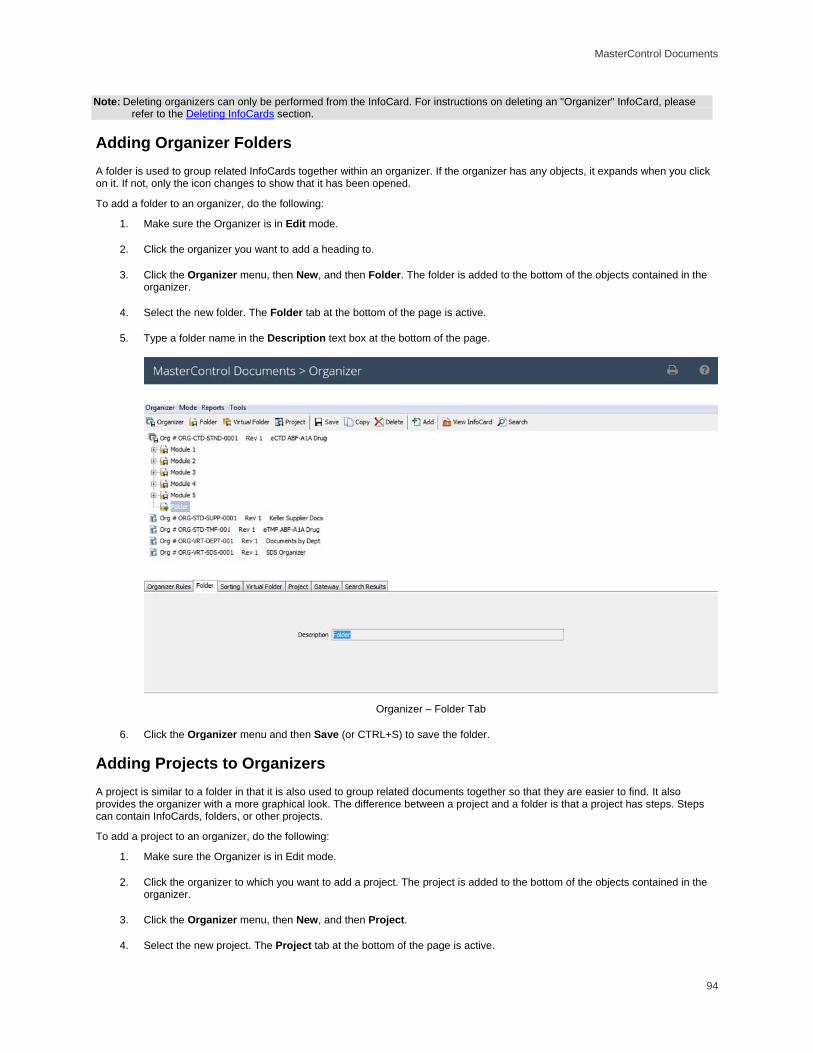
MasterControl Documents
94
Note: Deleting organizers can only be performed from the InfoCard. For instructions on deleting an "Organizer" InfoCard, please refer to the Deleting InfoCards section.
Adding Organizer Folders
A folder is used to group related InfoCards together within an organizer. If the organizer has any objects, it expands when you click on it. If not, only the icon changes to show that it has been opened.
To add a folder to an organizer, do the following:
1. Make sure the Organizer is in Edit mode.
2. Click the organizer you want to add a heading to.
3. Click the Organizer menu, then New, and then Folder. The folder is added to the bottom of the objects contained in the organizer.
4. Select the new folder. The Folder tab at the bottom of the page is active.
5. Type a folder name in the Description text box at the bottom of the page.
Organizer – Folder Tab
6. Click the Organizer menu and then Save (or CTRL+S) to save the folder.
Adding Projects to Organizers
A project is similar to a folder in that it is also used to group related documents together so that they are easier to find. It also provides the organizer with a more graphical look. The difference between a project and a folder is that a project has steps. Steps can contain InfoCards, folders, or other projects.
To add a project to an organizer, do the following:
1. Make sure the Organizer is in Edit mode.
2. Click the organizer to which you want to add a project. The project is added to the bottom of the objects contained in the organizer.
3. Click the Organizer menu, then New, and then Project.
4. Select the new project. The Project tab at the bottom of the page is active.
11.6 MasterControl Creator-Reviser Manual
95
5. Type a name for the project in the Project Name field at the bottom of the page.
If you do not create any steps at this point, you will not be able to add any folders or other projects to this project. For more information, see the Editing Steps in a Project topic.
Deleting Steps
To delete steps from an organizer:
1. Double-click the step that you want to delete and click the Delete button from the Organizer toolbar (or hit the DELETE key on your keyboard). A confirmation message appears.
2. Click the OK button to confirm the deletion. The step is deleted from the project.
3. Click the Organizer menu and then Save (or CTRL+S) to save the project.
Adding InfoCards to an Organizer
You can insert or add InfoCards to an organizer. Adding an InfoCard adds it to the bottom of the objects contained in the organizer, but InfoCards can be rearranged. If the organizer has any objects, it expands to show the objects. If not, the Organizer icon shows that it has not been opened.
To add an InfoCard to an organizer, do the following:
1. Make sure the Organizer is in Edit mode.
2. Double-click an existing organizer.
3. Click the Add button, and then click either Simple, Basic or Advanced.
4. Search for and retrieve one or more InfoCards using one of these search methods. The retrieved InfoCard numbers, titles, revisions and types appear at the bottom of the page.
5. Click one or more of the InfoCards at the bottom of the page. (Select multiple InfoCards by clicking the InfoCard numbers while holding down the CTRL button.)
6. While holding down the mouse button (and the CTRL button if selecting multiple documents) drag the InfoCard numbers to the organizer in the frame above.
Note: The organizer allows full drag-and-drop functionality. You can change the order of documents or the object the document falls under simply by clicking and dragging it to the desired location or order. You can also drag and drop a folder from one organizer to another organizer.
7. If you do not see the InfoCards listed below the organizer, double-click the organizer name. The InfoCard(s) appear below the organizer name.
Several icons denote the various statuses of InfoCards in an organizer. See the Status Icons section of the Icon Directory for more detail.
Copying an Organizer
To copy an organizer:
1. Create a new organizer.
2. Drag the icon of an organizer or portion of an organizer you wish to copy onto the new organizer.
All virtual folders, folders, projects, etc. will be copied from one organizer to the other.
Filtering Access View of Organizers
Organizers, like InfoCards, are stored in vaults. The Filter feature allows users to display organizers from a vault, or filter organizers themselves. To display by vault:
1. Click the My Organizers item from the My MasterControl menu.
2. Click the Filter button in the toolbar.

MasterControl Documents
96
Organizer Filter
3. Select vaults by which you want to filter in the By Vault list.
4. Click the Filter button. Only organizers belonging to the selected vaults display.
Note: Only vaults you have rights to will appear in the filter list. You can click and filter organizers by multiple vaults. Simply check the other vaults you want use to filter the organizers you can see. To reset the filter, select all available vaults.
To display by organizer, do the following
1. Click the My Organizers item from the main navigation menu.
2. Click the Filter button in the toolbar.
3. Select the organizers you wish to hide in the By Organizer list.
4. Click the Filter button. The remaining organizers will be displayed on the page.
5. To make an organizer available for viewing again, deselect it in the By Organizer list by pressing Control and clicking on the organizer.
Viewing Organizers and Organizer Files
Because organizers are graphical representations of your InfoCards and InfoCard organization, it is easy to view your desired organizers and files.
To view Organizers and/or Organizer files:
1. Click the My Organizers item from the main navigation menu (in the Quick Start) section.
2. Double-click the desired organizer to reveal the organizer contents.
3. Double-click organizer contents until you locate the document that you want to view.
4. Double-click the InfoCard containing the file you want to view. A new browser window opens and displays the chosen InfoCard’s main file.
5. Once you have viewed the document, close the new browser window to return to the Organizer screen.

11.6 MasterControl Creator-Reviser Manual
97
When you enter organizers via a view action such as pasting the external link into a web browser, you can only see the organizers for which you have view native or PDF rights. Entering organizers by selecting My Organizers from the Quick Start menu shows all organizers for which you have find rights, but you will only be able to load those for which you have view rights.
Searching for InfoCards in Organizers
Searching for InfoCards in Organizers is as easy as entering a single term. The search field will look for InfoCards from among those in the Organizers.
To search for InfoCards within Organizers:
1. Click the My Organizers item from the My MasterControl menu.
2. Click Search.
3. In the Find InfoCard window, enter a search term specific to the type of InfoCard you wish to view.
4. Click Search.
5. From the list of results, choose from the icons in the list to the right to view the InfoCard, the organizer, or the contents of the organizer. Selecting an organizer to view will open the organizer in a Java applet.
Note: Searching in Organizers is different in that adding an asterisk to the beginning or the end of a search term will not create a wild card search. You must replace one of the characters in the search string with the asterisk to create a wild card search.
Performing Document Level Actions in Organizers
Document level actions provide you with a way to work on the documents in an InfoCard without leaving the organizer. To do this:
1. Open an organizer and expand it to reveal a list of InfoCards.
2. Highlight an InfoCard.
3. Right-click the InfoCard and select from among the following actions:
View Native
View PDF
Copy
External Link
Check In
Check Out
Note: Any action for which you do not have rights will be disabled.
Adding Virtual Folders to Organizers
You can add the contents of your saved searches to an organizer via the Virtual Folders function.
To add virtual folders to an Organizer:
1. From the My Settings section of the My MasterControl menu, click Virtual Folders.
2. Click the check boxes in the Organizer column to make them available for addition to Organizers.
Note: Only Virtual Folders you have created will be available for you to check in this column and add to Organizers.
3. Click My Organizers in the My MasterControl menu.
4. From the Mode item in the toolbar, choose Edit.
5. Double-click an organizer to expand it.
6. Click Virtual Folders in the toolbar.
7. At the bottom of the Organizer window, a drop-down list of saved searches, labeled Description, will appear. Select the saved search you wish to add to the Organizer. The search will be added to the Organizer you selected.

MasterControl Documents
98
Note: If the virtual folder is made public (see Manage Virtual Folders), the InfoCards in the organizer will be filtered according to the rights of the user who created the virtual folder, regardless of who views them.
Viewing InfoCards from an Organizer
You can also view the InfoCard for documents that belong to an Organizer. To do so, select the organizer InfoCard, and then click the View InfoCard button in the toolbar.
Opening an Organizer in an Independent Browser
You can create an external link that will open an organizer in a browser window independent of MasterControl. This is ideal for external and view-only users who will not have access to the navigation menus and search functions. Available actions depend on the rights of the user viewing the organizer.
To create a stand-alone organizer:
1. Create an organizer (see Creating Organizers).
2. Open the InfoCard for that organizer.
3. Create an external link (see Creating InfoCard External Links).
4. Paste the link in a browser and open it.
Note: If you create an Authenticated link, you will be required to log into MasterControl after pasting the browser URL. An Anonymous link will not require login.
Organizer Reports
Organizer Reports
Four standard reports are included with the Organizer.
1. Contents Report This reports lists all of the organizer contents. This report is run on an organizer-by-organizer basis.
2. Master List Report This report provides a complete list of all organizers. This report can be run on a vault-by-vault basis.
3. Where Used Report A Where Used report makes it easy to get a listing of all organizers that contain the selected InfoCard. Access to organizers is controlled in system roles. You can only see organizers that you have access rights to view and for which you have the proper security rights. This ensures that each user only sees the InfoCards that are necessary for the user’s job. This report is run on an InfoCard-by-InfoCard basis.
4. Checked Out Report This report provides a list of all Organizers that are checked out. This report can be run on a vault-by-vault basis.
Generating a Report
To generate an organizer report, do the following:
1. Click the Organizer item from the main navigation menu.
2. Double-click an organizer or organizer InfoCard for which you want to generate a report (if applicable).
3. Click the Reports menu, and then click the report you want to generate. The report will appear in a new browser window for the Where Used report. The Select Vault window will appear for the Master List and the Checked Out reports.
4. Select one or more vaults in the Select Vault window, and then click the OK button. The report appears in a new browser window.
Printing and Saving Reports
Organizer reports can be printed and saved using the normal browser save and print controls. If printing a report, be sure that your browser’s print options are set to print background colors and images.

11.6 MasterControl Creator-Reviser Manual
99
Taxonomy Organizers
Creating a Taxonomy Organizer
Taxonomy organizers expand on the capabilities of standard organizers by providing a dynamic folder structure based on custom fields and InfoCard metadata. You must have the Create Taxonomies right in order to create Taxonomy organizers. You will be able to view InfoCards in a Taxonomy organizer according to your vault rights.
To create a Taxonomy Organizer InfoCard:
1. Create a new organizer as detailed in Creating Organizers, using the Taxonomy InfoCard Type.
2. Click the Taxonomy tab on the new InfoCard.
Taxonomy Organizer tab
4. Add fields from the Available System Fields list to the Selected Taxonomy Fields list. Available fields are Lifecycle, Status, InfoCard Type, InfoCard Subtype and Vault.
5. Add fields from the Available Custom Fields list to the Selected Taxonomy Fields list.
Note: Only custom fields of the custom data type are available for use in a taxonomy (see Configuring a Custom Data Type). Custom fields must also be designated as "required" in order for them to appear in the Available Custom Fields list.
6. Arrange the selected fields to create the hierarchy that will appear in the organizer. You may reorder this hierarchy as desired.
7. Select any Taxonomy in the Selected Taxonomy Fields list and an Exclusions table will appear. Select your desired value in the Values to use Taxonomy list and add it to the Available Values list.
Note: This allows the user to filter a Taxonomy based on certain values. It's a powerfully specific drill-down tool.
6. Click Save.
In the organizer, you will drill down through the information you selected, beginning with the topmost item in the hierarchy.
Explorer Overview
Using Explorer
Explorer offers a sleek interface to view and interact with your Organizers. You can display your Organizers in a tile, list, or pane view. You can also easily sort and filter your Organizers (see: Organizers).

MasterControl Documents
100
Explorer
Using the top navigation bar you can toggle between different views, sort Organizers, and choose InfoCard Label options.
1. Select for Tile view.
2. Select for List view.
3. Select for Pane view.
4. Use to sort organizers.
5. Use to choose InfoCard Label options. The options include:
Title
Title and Number
Title, Number, and Revision
Number and Title
Number, Revision, and Title
6. Use to view the Explorer Change Log.
7. Use the Search box to filter your organizer results.
InfoCard Drawer
Clicking on an InfoCard from the Explorer will activate the InfoCard Drawer, visible on the right side.

11.6 MasterControl Creator-Reviser Manual
101
InfoCard Drawer
The icons included in the InfoCard Drawer are links to the InfoCard's Main File.
1. Click to see the Main File.
Note: This icon can change depending on file type.
2. Click to see the published Main File.
Folder Drawer
Selecting a folder displayed in Explorer will activate the Folder Drawer, visible on the right side.

MasterControl Documents
102
Folder Drawer
1. Click the Open to open the folder.
2. Use the Copy button to highlight the folder Link. Then copy and paste it where necessary.
3. Click Export Settings to set up exporting options for the selected Organizer (see Export Settings section below).
4. Click Export to export the Organizer.
Note: A message will appear reminding you to close all files that are being exported. If files are left open while exporting the export will fail.
Export Settings
1. Enter the export destination path in the Destination Path field.
2. Choose which file naming convention to use with the Main File Naming drop-down:
File Name
Document Number - Revision
Title - Document Number
Title - Revision
Title
3. Check Export released InfoCards only to export only released InfoCards.
4. Check Export InfoCards with published main files only to export only InfoCards that have published main files.
5. The Enable Manual Export checkbox enables the Sysadmin to toggle the Export button in the folder drawer on or off for users.

11.6 MasterControl Creator-Reviser Manual
103
6. Check Enable Scheduled Export to set up a scheduled export. If selected you will enter a Start Date, a frequency number in the Every field, and a time period (Years, Months, Weeks, Days, or Hours) in the Interval field.
Interacting with Organizers
Explorer provides various options that will allow you to customize your Organizers. While viewing an Organizer in Explorer use the to select which action you would like to perform:
Create New Folder
Create New InfoCard
Add InfoCard
Add Virtual Folder
Insert Template


105
MasterControl Portal
MasterControl Portal Overview
MasterControl Portal is the gateway to MasterControl applications. It provides access to all major functions in the suite, and is the location from which System Administrators and Subadmins access administration features and configure the system. From here, you can add users to the system and define security rights. MasterControl Portal also includes password, Home Page configuration, audit settings, and audit log tools, as well as InfoCard configuration such as vault, InfoCard type, and numbering series management.
For more information on the rights associated with the Portal module, see MasterControl Portal Rights.


107
MasterControl Process
MasterControl Process Overview
MasterControl Process enables interactive form-based processes, including quality processes such as non-conformances, deviations, CAPA, change control, customer complaints, etc. MasterControl Process incorporates strict compliance features for customers who are regulated by the FDA, certified by ISO, or directed by other quality standards.
By automating form-based processes, MasterControl Process enables customers to control the collection/data input, the processing, and the output/reporting of critical data.
For more information on the rights associated with the Process module, see MasterControl Process Rights.
Processing Form Tasks
MasterControl Process provides electronic routing and online form processing and approval. Many MasterControl products rest on MasterControl Process as the engine. In these cases a pre-configured forms process is installed and can be fine-tuned by the system administrator. A form process configuration requires an approved form template that defines the layout of the record as well as one or more routes that define the workflow for the form.
Once the routes are successfully built and released, the form tasks appear in the Forms tab of the Start Task page. Users with appropriate rights can then start form tasks from that page, which creates a new Form InfoCard and sends the new InfoCard on the specified route. Once launched, users can approve, track, stop, restart, or abort the in-route tasks.
When the tasks have finished their routes, users with the appropriate rights can view task histories to see what occurred during the course of the task routing. For information on creating a form route, please see the Creating a New Route section. For information on starting a form task, please refer to the Starting a Form Task section.
Performing Form Tasks
During the course of a form task, users enter form data, review saved form data, and approve or reject the form at various stages of its route. MasterControl Process retains all field data, and uses PDF Publishing to add approval and watermark information on completed forms.
To perform an action on a form task, do the following:
1. Click the My Tasks menu item.
2. On Data steps:
1. Click the Data Entry icon. The form will appear in a new window. You can then enter data in the appropriate form fields.
2. When data entry is complete, click the Submit button in the form. The Approve Task window will appear.
3. Enter comments, your electronic signature, and select a status (Data Complete, Data Reject or Work Inprocess).
Note: If Work Inprocess was selected, the signoff will complete, but the task will remain in your My Tasks list for further input.
3. On Approval steps:
1. Click the Approve icon. The form will appear in a new window, but previously completed fields will generally be disabled so you can view information entered by other users, but not alter it.
2. When you are finished reviewing the data, click the Submit button in the form. The Approve Task window will appear.
3. Enter comments, your electronic signature, and select a status. Statuses could be any of the following: Data Approval, Data Rejection, Final Approval, Final Rejection, or Revisit. The action that occurs for each of these actions are explained in the Adding Step Statuses section.
4. Click the Save button. The task continues its route and is removed from your My Tasks page.


109
MasterControl Training
MasterControl Training Overview
MasterControl Training provides automated employee training and documentation. It controls role-based training requirements and employee competencies, allowing creation and deployment of a variety of simple or extensive training courses requiring users to learn their duties and demonstrate proficiency.
MasterControl Training enables companies to fulfill FDA regulatory requirements and ISO quality standards by automating employee training and documentation. It controls role-based training requirements and employee competencies, allowing you to create and deploy a variety of simple or extensive training courses requiring users to learn their duties and demonstrate proficiency.
All MasterControl Training objects are based on MasterControl InfoCards. Once InfoCards are approved, tasks are automatically sent to affected users. Additionally, MasterControl Training automatically tracks retraining periods and training tasks that have been completed and still need to be finished.
MasterControl Training is connected to MasterControl Documents. FDA regulated or ISO certified companies tend to be document-centric organizations. Within these types of organizations, the vast majority of training is triggered as a result of new or changed documents. MasterControl Training completely automates the issuance of training tasks when documents are approved.
For more information on the rights associated with the Training module, see MasterControl Training Rights.
Processing Training Tasks
When MasterControl Training InfoCards are approved, the system automatically does a check for training gaps, or incomplete training. When it finds a gap, it automatically sends training tasks to affected users, or trainees. All training tasks are sent on two-step routes by default. On the first step, tasks are sent to trainees, who are then expected to complete the course and sign off. Once the trainee signs off on the task, it is sent to the training verifier, who certifies that the trainee has completed the task adequately and signs off of the task. Once the task is complete, the retraining interval begins. Supervisors can also view trainee’s training folders and grandfather certain tasks, for example if the trainee has equivalent education or already completed the training in another job code. Supervisors can also manually launch retraining if a trainee requires it.
What Can I Do with Training Tasks?
Overview
MasterControl sends training tasks to you on a training schedule configured by system administrators in order to ensure you are current with important processes and standards. When you receive one, you will view the training course, review any attached files or InfoCards, complete the training, and sign off on the task. You also have access to your personal Training Folder, which shows the status of your training tasks.
Typical Scenario
Your employer wants everyone to be familiar with the employee handbook. A training task will appear in your My Tasks list page with a title like "Employee Handbook Training" and will contain an electronic version of the employee handbook for you to read, and then possibly an exam that asks several questions about the policies within. You would complete the task in this fashion:
1. Click the My Tasks menu item.
2. Click the Training Task icon next to the task you want to complete.

MasterControl Training
110
Training Task
3. Click Introduction to begin the task.
4. Complete each item in the row, following its prescribed order. For example, if a pre-exam has been applied to a task, you will be required to complete this before moving on to the course materials. Click the icon or the arrow pointing to the Pre-Exam item in the progression. Once you have completed the pre-exam, click the Materials icon or the arrow pointing to the Materials icon to access the training material.
Note: Clicking the Materials icon will display the training material attached to the Course InfoCard. Clicking one of these attachments will open either the attached InfoCard or the training material file itself, depending on how it is configured in the List Page Settings page (see Configuring List Page Settings).
5. When you are finished with the task, click the Sign Off icon. You can also sign off from an exam when you pass it.
6. Enter comments and your electronic signature in the Approve Task page.
Note: If the task is a retraining task in which the Course InfoCard has not been revised, the header will be Retraining Task. If there have been changes made to the main file and the InfoCard has been revised, the header will be Retraining Task With Changes.
More Details
For more information on MasterControl's Training module and the Training Folder, see the following topics:
MasterControl Training Overview
What Can I Do with My Training Folder?
Viewing My Training Folder
Training Gates
Required Right
Approve Training
Launch Re-training Task
For more information on these rights and for a complete list of Training rights, see the MasterControl Training Rights topic.

11.6 MasterControl Creator-Reviser Manual
111
Supervisors
At times, a trainee supervisor may want to grandfather a user's training tasks. Such cases may be when the user has equivalent education or work experience, or when the trainee completed similar training in a previous job code. Additionally, supervisors may manually launch retraining on tasks that users have already completed. This may occur when a course has changed but did not require automatic retraining, or when the supervisor feels the trainee could use a refresher. Supervisors may also sign off large numbers of people if a training course has been administered to a group, indicating the group as a whole has passed the course.
Note: Only System Administrators can stop, restart, or abort training tasks. For instructions on performing these actions, please refer to the Stopping, Restarting, and Aborting Tasks section.
Note: With the View Training Folders right, you can view all Training Folders. However, you will only be able to launch retraining or grandfather tasks on those Training Folders for which you are the Supervisor.
To grandfather a training task:
1. Log in to MasterControl as a training (trainee) supervisor.
2. Click the Training Folders menu item from the MasterControl Training section of the main navigation menu. A list of trainees for whom you are the supervisor displays.
3. Click the Details icon next to a user in the list. The user’s Training Folder appears.
Training Folder – Supervisor View
4. You can search for specific tasks using the Search button in the toolbar. You can also view which tasks are complete, who verified the tasks, etc.

MasterControl Training
112
5. View the Trainee InfoCard by clicking the link next to Trainee User ID.
6. Click the Sign Off icon in the Actions column next to the task you wish to grandfather.
7. Enter comments and your electronic signature in the Approve Task page. Then select the "Grandfathered" status and click the Save button. The task completes the first step of the route and is sent to the course verifier for verification.
To launch retraining:
1. Log in to MasterControl as a training (trainee) supervisor.
2. Click the Training Folders menu item from the MasterControl Training section of the main navigation menu. A list of trainees for whom you are the supervisor displays.
3. Click the Details icon next to a user in the list. The user's Training Folder appears.
4. You can search for specific tasks using the Search button in the toolbar. You can also view which tasks are complete, who verified the tasks, etc.
5. View the Trainee InfoCard by clicking the link next to Trainee User ID.
6. Click the Retrain icon next to the task you wish to start.
7. Click the Yes button in the confirmation message to resend the task.
Verifiers
Once a trainee completes a training task, it is sent to the designated course verifier, who will certify that the trainee completed the training satisfactorily. Once the verifier signs off on the task, the training task completes its route.
To verify a completed training task:
1. Click the My Tasks menu item. The training task will appear in the list with the User ID of the trainee that completed the task in parentheses after the task name.
2. Click the Training icon next to the task you want to verify.
3. View any InfoCard, file, or the attached file the trainee added by clicking the linked file name/InfoCard number.
4. Click the Sign Off button in the toolbar.
5. Enter comments and your electronic signature in the Approve Task page. Then select the "Approved" or "Rejected" status and click the Save button. If approved, the task completes its route and training is finished. If rejected, the current task completes its route and a new training task based on the course is sent to the user.