11) Semi Dry Blotters Instruction Manual · Western Blotting:-1. ... Tovey, E.R. and B.A. Baldo....
12
Instruction Manual CSL Semi Dry Blotting Units SD10 Semi Dry Mini, 10 x 10cm System SD20 Semi Dry Maxi, 20 x 20cm System SD33 Semi Dry Maxi, 33 x 45cm System SD50 Semi Dry Maxi, 20 x 50cm System 1
Transcript of 11) Semi Dry Blotters Instruction Manual · Western Blotting:-1. ... Tovey, E.R. and B.A. Baldo....

Instruction ManualCSL Semi Dry Blotting Units
SD10 Semi Dry Mini, 10 x 10cm SystemSD20 Semi Dry Maxi, 20 x 20cm SystemSD33 Semi Dry Maxi, 33 x 45cm SystemSD50 Semi Dry Maxi, 20 x 50cm System
1

Contents:-
Page
1) Safety Instructions 3
2) Packing Lists / System details 4
3) Care and Maintenance 5
5) Setting up the blot sandwich 6
6) Running the Blot 8
7) References 9
11) Solutions 10
12) Warranty 12
2
SAFETY PRECAUTION
WHEN USED CORRECTLY, THESE UNITS POSE NO HEALTH RISK.
HOWEVER, THESE UNITS CAN DELIVER DANGEROUS LEVELS OF ELECTRICITY
AND ARE TO BE OPERATED ONLY BY QUALIFIED PERSONNEL FOLLOWING THE
GUIDELINES LAID OUT IN THIS INSTRUCTION MANUAL.
ANYONE INTENDING TO USE THIS EQUIPMENT SHOULD READ THE COMPLETE
MANUAL THOROUGHLY.
THE UNIT MUST NEVER BE USED WITHOUT THE SAFETY LID CORRECTLY IN
POSITION.
THE UNIT SHOULD NOT BE USED IF THERE IS ANY SIGN OF DAMAGE TO THE
EXTERNAL TANK OR LID.
THESE UNITS COMPLY WITH THE STATUTORY CE SAFETY DIRECTIVES:
73/23/EEC: LOW VOLTAGE DIRECTIVE: IEC 1010-1:1990 plus AMENDMENT
1:1992
EN 61010-1:1993/BS EN 61010-1:1993
3
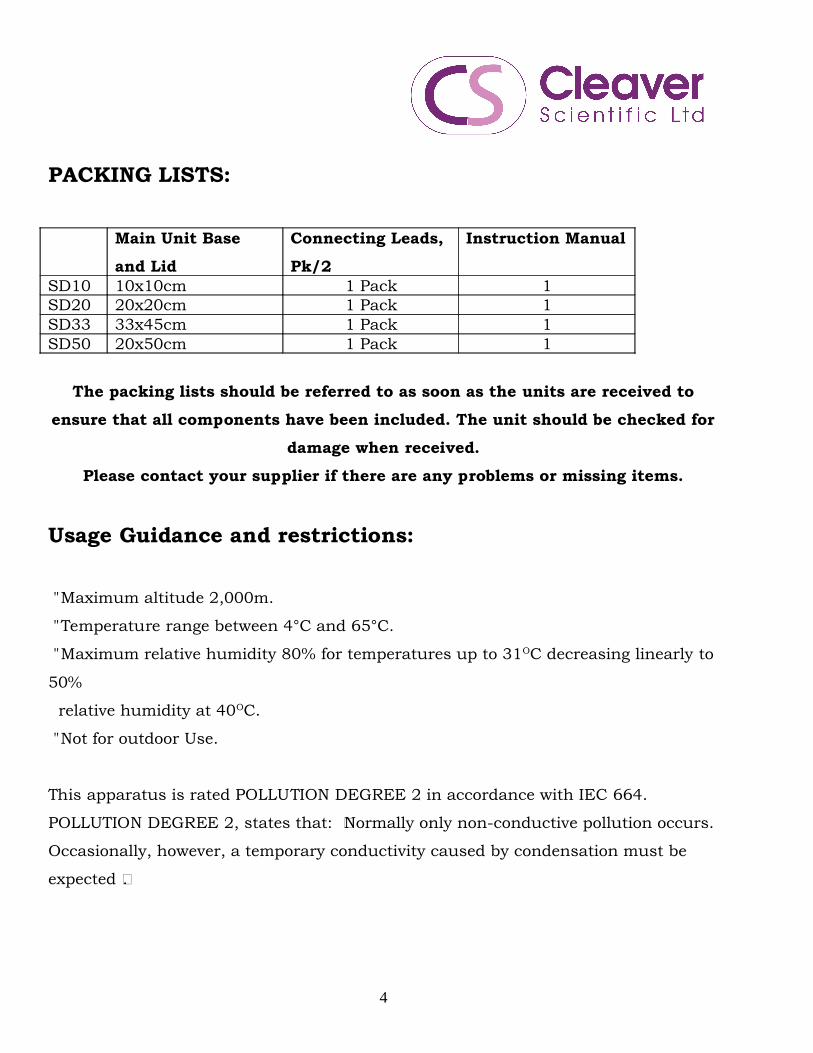
PACKING LISTS:
Main Unit Base
and Lid
Connecting Leads,
Pk/2
Instruction Manual
SD10 10x10cm 1 Pack 1SD20 20x20cm 1 Pack 1SD33 33x45cm 1 Pack 1SD50 20x50cm 1 Pack 1
The packing lists should be referred to as soon as the units are received to
ensure that all components have been included. The unit should be checked for
damage when received.
Please contact your supplier if there are any problems or missing items.
Usage Guidance and restrictions:
• Maximum altitude 2,000m.
• Temperature range between 4°C and 65°C.
• Maximum relative humidity 80% for temperatures up to 31OC decreasing linearly to
50%
relative humidity at 40OC.
• Not for outdoor Use.
This apparatus is rated POLLUTION DEGREE 2 in accordance with IEC 664.
POLLUTION DEGREE 2, states that: “Normally only non-conductive pollution occurs.
Occasionally, however, a temporary conductivity caused by condensation must be
expected”.
4

Care and Maintenance:-
Cleaning CSL Semi Dry Blotting Units
Units are best cleaned using warm water and a mild detergent. Water at
temperatures above 600 C can cause damage to the unit and components.
The unit should be thoroughly rinsed with warm water or distilled water to prevent
build up of salts but care should be taken not to damage the plate electrodes and
vigorous cleaning is not necessary or advised.
Air drying is preferably before use.
The units should only be cleaned with the following:-
Warm water with a mild concentration of soap or other mild detergent.
Compatible detergents include dishwashing liquid, Hexane and Aliphatic
hydrocarbons
The units should not be left to in detergents for more than 30 minutes.
The units should never come into contact with the following cleaning agents,
these will cause irreversible and accumulative damage:-
Acetone, Phenol, Chloroform, Carbon tetrachloride, Methanol, Ethanol, Isopropyl
alcohol
Alkalis.
RNase Decontamination
This can be performed using the following protocol:-
Clean the units with a mild detergent as described above.
Wash with 3% hydrogen peroxide (H2O2) for 10 minutes.
Rinsed with 0.1% DEPC- (diethyl pyrocarbonate) treated distilled water,
Caution: DEPC is a suspected carcinogen. Always take the necessary precautions
when using. RNaseZAP™ (Ambion) can also be used. Please consult the instructions
for use with acrylic gel tanks.
5

Instructions:-
Setting up the blot sandwich:-
Please consult the solutions pages 9 and 10 for details on buffers required for
protein, DNA or RNA blotting. The recommended buffers are given on page 9
and alternatives on page 10. This also provides a guide for the amount of
standard grade filter paper pieces required for each buffer. Adjust amounts
accordingly for thicker grade filter paper.
1. Cut the membrane and filter paper to the size of the gel. At no point touch the
membrane with bare fingers as this will cause changes in the surface
properties of the membrane and cause inconsistent sample binding.
2. Depending on the type of membrane used, the membrane may need equilibrating
in buffer prior to blotting. This is generally true of PVDF and nylon membranes
but varies for nitrocellulose membranes. Please consult the membrane
manufacturer’s guidelines for wetting the membrane prior to blotting.
3. Ensure that excess liquid drains from the membrane.
4. Soak the required number of filter paper pieces in the appropriate buffer.
Generally six filter paper pieces are required per electrode, twelve in total. Lists of
buffers for different types of blotting are on pages 9 and 10.
5. Mark or use some other means to enable identification of the gel side of the
membrane. This is necessary for the blot probing stage, more efficient binding can
occur when the membrane is facing upwards in the probe solution. It is also an
idea to clip the corner of the gel nearest to the top of lane 1 was on the gel to allow
easy sample identification during analysis.
6. Remove the lid from the blotter and place six pre-soaked filter paper pads onto the
base electrode plate ensuring that any excess liquid is wiped away.
6

7. Carefully place the membrane on top of the six filter paper pads and ensure that
no air pockets have formed. Any air pockets should be smoothed out using a wet
gloved finger.
8. Place the gel on top of the membrane and smooth to ensure no air pockets have
formed. It may help to add a small amount of transfer buffer to the gel to help the
membrane attach to the gel evenly.
9. Place the remaining six filter paper pads on top of the membrane and gently
smooth.
10. Carefully place the lid over the blot sandwich and secure using the screws. These
should be tightened evenly a little each at a time. The blot may de disturbed if one
screw is tightened fully, then the next. Note: only use the screws for blotting of
acrylamide gels up to 2mm thick. For blotting thicker gels and agarose gels
do not use the screws. The weight of the lid will provide enough pressure or a
small container of buffer ~ 0.5 – 1 litre container can be used as a weight
11. Connect the leads to the unit, red to the positive base and black to the negative
lid. Note: The red lead inserts through the lid into the base. The black lead
inserts through the side of the base into the lid. This is a necessary safety
feature so that the electrodes cannot be accessed when the unit is connected
to a power supply.
12. Attach the power leads to the appropriate sockets, red to red, black to black on a
power supply. Do not invert the leads or connect up incorrectly as this will
cause corrosion of the stainless steel electrode.
13. Blotting generally requires high current settings >250mA and the power supply
should contain these capabilities. Please see the Cleaver Scientific range for
details of these.
7

Running the Blot:-
1. For SD10 units, set the power supply to run at between 80 and 200mAmps, 10 –
15 Volts depending on the time you want to transfer. For SD20 Units, set to
between 320 and 800mps, 15 – 25 volts. Similar settings are advised for the SD33
and SD50 units though a time course study is highly recommended to establish
the most efficient settings. Higher current settings may cause excessive heat
generation and the following upper limits must never be exceeded:-
SD10 - 550mAmps, 75 Volts
SD20 - 1200mAmps, 75 Volts
SD33 - 2000mAmps, 75 Volts
SD50 - 2000mAmps, 75 Volts
2. Allow transfer to proceed for between 30 minutes to one hour depending on
current settings.
3. The efficiency and quality of transfer depends on the type of buffer used and also
the type of samples. Generally, better results can be obtained by reducing the
power settings and increasing the blot time. It is generally best to do a time course
for the type of gels, samples and buffers being used to ensure that transfer occurs
at maximum efficiency.
8

References
Western Blotting:-
1. Bjerrum, O.J. and Schafer-Nielsen, C. in: Dunn, J.J. (ed.) Electrophoresis ‘86
VCH
Weinheim 1986, pp. 315-327.
2. Tovey, E.R. and B.A. Baldo. 1987. Comparison of semidry and conventional
electrotransfer of proteins from polyacrylamide gels to nitrocellulose
membranes.
Electrophoresis 8: 384-387.
3. Dunbar, B.S., Ed. 1994. Protein Blotting: A Practical Approach. IRL Press at
Oxford University Press, Oxford, England.
Southern / Northern Blotting:-
1. “Blotting, Hybridization & Detection: An S&S Laboratory Manual”, a
publication
of Schleicher and Schuell.
2. “Hybond Blotting Guide: The direct route to excellent blotting results",
Amersham
Life Science.
General:-
1. Sambrook, Fritsch, and Maniatis, Molecular Cloning A Laboratory Manual,
Second Edition,
Cold Spring Harbor Laboratory Press, 1989.
2. Current Protocols in Molecular Biology, Greene Publishing Associates and
Wiley-Interscience,1989.
9

Solutions:-
NOTE:- Transfer buffers must be made accurately using high grade reagents. Do
not adjust the pH with acid or base as this will affect the properties of the
buffer.
pH will vary according to the purity of the reagents used.
Protein (Western) Blotting Buffers:-
Triple buffer system:-
For high efficiency transfer of Protein from acrylamide gels
Anode 1 Buffer: 0.3M Tris Base, 20% MeOH, pH 10.4 – Soak 4 standard grade filter
paper sheets
Anode 2 Buffer: 0.025M Tris Base, 20% MeOH pH 10.4 – Soak 2 standard grade filter
paper sheets
Cathode Buffer: 0.025M Tris Base, 0.04M Caproic Acid, 20% MeOH pH 9.4 – Soak 6
standard grade filter paper sheets
DNA (Southern) Blotting Buffer:-
For high efficiency transfer of DNA from agarose gels.
Soak 12 pieces of standard grade filter paper, 6 for the cathode, 6 for the anode in:-
50 X 1M ethanolamine-glycine buffer, pH 11
RNA (Northern) Blotting Buffer:-
For high efficiency transfer of RNA from agarose gels.
Soak 12 pieces of standard grade filter paper, 6 for the cathode, 6 for the anode in:-
50 X 0.2M morpholinopropanesulfonic acid (MOPS)
50mM sodium acetate
5mM EDTA
pH 7.0
10

General Nucleic Acid Transfer Buffers:-
Soak 12 pieces of standard grade filter paper, 6 for the cathode, 6 for the anode in:-
1x TAE 40 mM tris (pH 7.6), 20 mM acetic acid, 1 mM EDTA.
50x (1L) dissolve in 750 ml distilled water:
242 g tris base (FW = 121)
57.1 ml glacial acetic acid
100 ml 0.5 M EDTA (pH 8.0).
Fill to 1 litre with distilled water.
Soak 12 pieces of standard grade filter paper, 6 for the cathode, 6 for the anode in:-
1x TBE 89 mM tris (pH 7.6), 89 mM boric acid, 2 mM EDTA
10x (1L) dissolve in 750 ml distilled water:
108 g tris base (FW = 121)
55 g boric acid (FW = 61.8)
40 ml 0.5 M EDTA (pH 8.0)
Fill to litre with distilled water.
General Transfer Buffers:-
Towbin Buffer with 20% methanol
Soak 12 pieces of standard grade filter paper, 6 for the cathode, 6 for the anode in:-
0.025M Tris Base
0.192M Glycine
20% Methanol.
pH 8.3
11

Warranty
The Cleaver Scientific Ltd. (CSL) Semi Dry Blotting Units have a warranty against
manufacturing and material faults of twelve months from date of customer receipt.
If any defects occur during this warranty period, CSL will repair or replace the
defective parts free of charge.
This warranty does not cover defects occurring by accident or misuse or defects
caused by improper operation.
Units where repair or modification has been performed by anyone other than CSL or
an appointed distributor or representative are no longer under warranty from the
time the unit was modified.
Units which have accessories or repaired parts not supplied by CSL or it ’s associated
distributors have invalidated warranty.
CSL cannot repair or replace free of charge units where improper solutions or
chemicals have been used. For a list of these please see the Care and Maintenance
subsection.
If a problem does occur then please contact your supplier or CSL on:-
Cleaver Scientific Ltd.
Unit 4 Triton Park
Swift Valley
Brownsover Road
Rugby
CV21 1SG
Tel: +44 (0)1788 565300
Fax: +44 (0)1788 552822
Email: [email protected]
12