1 GUI programming Intro to GUI & events. 2 GUI programming GUI stands for graphical user interface...
70
1 GUI programming Intro to GUI & events
-
date post
21-Dec-2015 -
Category
Documents
-
view
326 -
download
3
Transcript of 1 GUI programming Intro to GUI & events. 2 GUI programming GUI stands for graphical user interface...

1
GUI programming
Intro to GUI & events

2
GUI programming
• GUI stands for graphical user interface
• In Java, two packages are involved in creating GUI programs:– AWT (abstract window toolkit), the original
suite of GUI classes in Java– Swing, an updated and expanded version of
AWT; replaces some but not all of the original AWT classes
3
Event-driven programming
• Style of programming that uses a signal and response approach to control flow, rather than the standard sequential approach
• Objects react to events
• Programs often proceed in a non-linear fashion

4
Event-driven programming
• Event: an object that is created by an action, such as a mouse click
• Listener: an object that performs an action in response to an event
• Exception handling follows this model:– A thrown exception is an event– The catch block that corresponds to the event
is a listener

5
Event-driven programming
• An event component (such as a button) may have from zero to several listeners
• Each listener can respond to a different type of event (such as mouse movement vs. mouse click), or several listeners might be programmed to respond to the same event
• Listener objects respond to events by invoking methods called event handlers

6
How it works
• As a programmer, you are not so much concerned with the sequence of events as with the interaction of objects
• You create objects (such as buttons) that can fire events, and you create listeners that can respond to events
• The events themselves determine the order in which things proceed in your program

7
How it works
• The Swing library makes extensive use of the inheritance mechanism
• Certain methods are automatically invoked when events are fired
• You will often write methods that are never called by any code you write; instead, the methods are called automatically when triggered by event objects

8
JFrame – a simple window
• The window shown below is an example of a basic Swing object, the JFrame:
• The code on the following slide was used to create this window

9
import javax.swing.*; // note the x!import java.awt.*;
public class JFrameEx1 extends JFrame { // class inherits variables, // constants and methods from
public JFrameEx1 () { // parent class JFrame setTitle("I've been framed!"); setSize(300, 200); // width is 300 pixels, height is 200 pixels setLocation(150, 250); // window appears 150 pixels from the left
// and 250 pixels from the top of the screen setDefaultCloseOperation(EXIT_ON_CLOSE);
// indicates that the program should end when the close// button is clicked; default is to do nothing, so the window// would close but the program wouldn’t end
} public static void main(String[] args) { JFrameEx1 frame = new JFrameEx1(); frame.setVisible(true); // can setVisible(false) to make window } // disappear, if desired}

10
Adding components to a JFrame
• The previous program example displayed an empty window
• We can place GUI objects, such as buttons, text areas or sliders in a JFrame window by using the add method, as shown in the next example
11
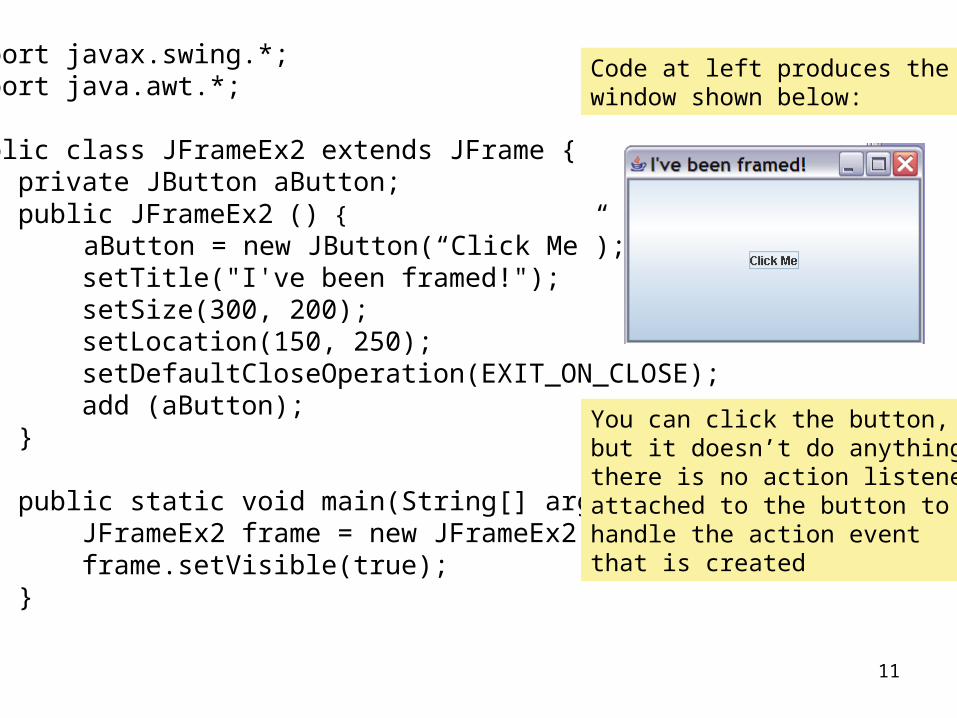
import javax.swing.*; import java.awt.*;
public class JFrameEx2 extends JFrame { private JButton aButton; public JFrameEx2 () { aButton = new JButton(“Click Me”); setTitle("I've been framed!"); setSize(300, 200); setLocation(150, 250); setDefaultCloseOperation(EXIT_ON_CLOSE); add (aButton); } public static void main(String[] args) { JFrameEx2 frame = new JFrameEx2(); frame.setVisible(true); }}
Code at left produces the window shown below:
You can click the button,but it doesn’t do anything;there is no action listenerattached to the button tohandle the action eventthat is created

12
Buttons that listen
• In order for a button to be functional, it must have an action listener associated with it
• Each button object possesses an addActionListener method which can be used to make the association
• The addActionListener method takes an ActionListener object as its argument
• An ActionListener object is an instance of a class that implements the ActionListener interface

13
The ActionListener Interface
• An interface in Java is something like a class with methods specified but not defined
• A class that implements an interface provides the definition(s) for any specified method(s)
• The ActionListener interface has one method specified:public void actionPerformed(ActionEvent e)

14
import javax.swing.*; import java.awt.*;import java.awt.event.*;
public class JFrameEx3 extends JFrame implements ActionListener { private JButton aButton; public JFrameEx3 () { aButton = new JButton(“Click Me”); aButton.addActionListener(this); setTitle("I've been framed!"); setSize(300, 200); setLocation(150, 250); setDefaultCloseOperation(EXIT_ON_CLOSE); add(aButton); }
JFrame with working button

15
… continued from previous slidepublic void actionPerformed (ActionEvent e) {
aButton.setText(“Thanks”); }
public static void main(String[] args) { JFrameEx3 frame = new JFrameEx3(); frame.setVisible(true); }}Before click: After:

16
Notes on example
• The example illustrates some of the principles of event-driven programming discussed earlier
• Note that, although the actionPerformed method exists, and we can see that it performs its action, it is never explicitly called anywhere in the program
• Keep in mind that an event object is like an exception object:– it only gets created under certain circumstances– like a catch block that matches an exception, the
actionPerformed method is invoked automatically when its matching event object appears

17
More notes on example
• In the example, the class defined (JFrameEx3) both inherited from parent class JFrame (using the extends mechanism) and implemented the ActionListener interface
• In the first couple of examples in the text, a separate class is defined to implement ActionListener
• In either case, the only requirement of a class that implements the interface is that the class provides a definition for the actionPerformed method

18
Even more notes on example
• The reason for having the example class implement the interface was so that the actionPerformed method would have access to the JButton object and its setText method
• Note that a third import statement had to be added to the program to make the ActionListener interface available:import java.awt.event.*;

19
Color and the content pane
• The Color class and a set of Color constants is defined in the java.awt package
• To set the background color of a JFrame, you must first access the entire inner portion of the window; this part of the window is called the content pane
• The content pane is a separate object; it is an instance of the Container class, which, just to keep things interesting, is an ancestor of the JFrame class

20
Color and the content pane
• The content pane of a particular JFrame object is returned by the getContentPane method
• For example, we could create a Container object to represent a JFrame’s content pane with the following code:public class Window extends JFrame {
Container pane = this.getContentPane();

21
Color and the content pane
• The setBackground() method can be used to add color to a container
• The argument to setBackground is an object of type Color; the color constants are such objects
• The code below would make a pink window:public class Window extends JFrame {
Container pane = this.getContentPane();
…
pane.setBackground(Color.PINK);

22
Color objects
• A color object can be constructed using three int parameters, each of which may have a value between 0 and 255
• The first parameter represents the amount of red saturation in the color; the second, the amount of green, the third, the amount of blue
• For example, the Color.RED constant is an object constructed as follows:public static final Color RED = new Color(255,0,0);
• Other colors can be created by using different combinations of the three numbers

23
import javax.swing.*; import java.awt.*;import java.util.*;
public class JFrameEx4 extends JFrame { Container pane; Random rg; public JFrameEx4 () { rg = new Random(); pane = this.getContentPane(); pane.setBackground(new Color(rg.nextInt(256),rg.nextInt(256),rg.nextInt(256))); setTitle("Beauty or the beast?"); setSize(300, 200); setLocation(150, 250); setDefaultCloseOperation(EXIT_ON_CLOSE); } public static void main(String[] args) { JFrameEx4 frame = new JFrameEx4(); frame.setVisible(true); }}
Output examples:

24
Containers & layout managers
• The add method places a component within a JFrame (or other container)
• To control the way components are arranged when more than one is added to a container, we employ a layout manager
• To add a layout manager to a container, use the setLayout method, which requires:– a Container calling object (a JFrame is a kind of
Container)– a LayoutManager object argument

25
Layout Managers in the Java API
• Several layout manager classes are defined in the API; three of them are:– BorderLayout– FlowLayout– GridLayout

26
BorderLayout
• A BorderLayout manager places components in five defined regions of the container to which it is applied
• As components are added to a container, the region is specified in the call to the add method

27
import javax.swing.*;import java.awt.*;
public class WinEx extends JFrame {Container pane;public WinEx() {
setSize(300,300);pane = this.getContentPane();pane.setLayout(new BorderLayout());pane.add (new JButton(“NORTH”), BorderLayout.NORTH);pane.add (new JButton(“SOUTH”), BorderLayout.SOUTH);pane.add (new JButton(“EAST”), BorderLayout.EAST);pane.add (new JButton(“WEST”), BorderLayout.WEST);setDefaultCloseOperation(EXIT_ON_CLOSE);
}
public static void main (String [] args) {WinEx window = new WinEx();window.setVisible();
}}

28
Output
The fifth region is represented by the constant BorderLayout.CENTER; this is the largest region, as can be seen in the example
It is not necessary to place components in every region; any component placed in the center will occupy any unused space in other regions – see next slide

29
import javax.swing.*;import java.awt.*;
public class WinEx extends JFrame {Container pane;public static void main (String [] args) {
WinEx window = new WinEx();window.setVisible();
}
public WinEx() {setSize(300,300);pane = this.getContentPane();pane.setLayout(new BorderLayout());pane.add (new JButton(“CENTER”), BorderLayout.CENTER);pane.add (new JButton(“SOUTH”), BorderLayout.SOUTH);setDefaultCloseOperation(EXIT_ON_CLOSE);
}
}

30
FlowLayout
• With the FlowLayout manager, components are laid out left to right, in the order in which they are added
• When no horizontal space remains, a new row begins
• The look of the overall layout will vary depending on the size of the window and the size and number of components in it

31
Variations of FlowLayout with same window contents
300 x 300 window: 200 x 400 window: 400 x 200 window:

32
Code for FlowLayout Examplesimport javax.swing.*;import java.awt.*;
public class WinEx2 extends JFrame {public WinEx2() {
setSize(400,200);this.getContentPane().setBackground(Color.BLUE);setLayout(new FlowLayout());add (new JButton("button 1"));
// other buttons added here …add (new JButton("button"));setDefaultCloseOperation(EXIT_ON_CLOSE);
}
public static void main (String [] args) {WinEx2 window = new WinEx2();window.setVisible(true);
}}

33
GridLayout
• Using the GridLayout manager, components are laid out in an evenly-spaced grid
• The constructor takes two arguments, indicating the number of rows and columns in the grid
• Depending on the number and size of components, and the size of the window, there may be some variation: the number of columns will be ignored if it is too small to accommodate the components

34
GridLayout Examples
3 x 2 grid with 6 buttons in 300 x 200 window 6 x 1 grid in 100 x 400 window
1 x 0 grid in 500 x 100 window

35
Code for GridLayout examplesimport javax.swing.*;import java.awt.*;
public class WinEx3 extends JFrame {public WinEx3() {
setSize(500,100);setLayout(new GridLayout(1,0));add (new JButton("button 1"));
// … other buttons added …add (new JButton("button 6"));setDefaultCloseOperation(EXIT_ON_CLOSE);
}
public static void main (String [] args) {WinEx3 window = new WinEx3();window.setVisible(true);
}}

36
Layout managers & containers
• Before we started looking at layout managers, we saw some examples of GUI windows that had functional buttons
• All of the layout examples contained buttons, but they weren’t functional; they were just a convenient way to illustrate the layout managers
• Most GUI windows are laid out using a variety of containers within a larger window, which has a layout manager attached to it
• Some or all of the component containers may employ their own layout manager(s)

37
JPanel objects
• A JFrame makes a good overall container, as it has all of the attributes we have come to expect in a window
• However, a JFrame contained within a JFrame would be overkill; a better option would be an unadorned window, with just a content pane and no frame or title bar
• Such a window can be created with a JPanel object
• A single JFrame can contain several JPanels

38
Example
• The next example illustrates the use of this hierarchical layout scheme
• The main window is split into two panels (display and buttonArea), which are arranged in the main window using the BorderLayout manager
• The buttonArea has a FlowLayout manager attached to it, and it contains a single component, a JButton
• The code fragment on the next slide contains that portion of the constructor where the layout managers and components are added; the class and method heading, as well as instructions that set up the main window are omitted for brevity

39
Examplepane = getContentPane(); // content pane of main windowpane.setLayout(new BorderLayout()); // layout manager for main window
display = new JPanel(); // upper portion of window: displays colordisplay.setBackground(getNewColor()); // starts with random colorpane.add(display, BorderLayout.CENTER);
control = new JButton ("CHANGE IT!"); // button to change to new colorcontrol.addActionListener(this);
buttonArea = new JPanel(); // lower portion of window: holds buttonbuttonArea.setLayout(new FlowLayout());buttonArea.setBackground(Color.BLACK);buttonArea.add(control);pane.add(buttonArea, BorderLayout.SOUTH);

40
Example continuedpublic Color getNewColor() { // returns a new color constructed randomly
Random rg = new Random();int r, g, b;r = rg.nextInt(256);g = rg.nextInt(256);b = rg.nextInt(256);return new Color(r,g,b);
}public void actionPerformed (ActionEvent e) { // changes color when
// button is activateddisplay.setBackground(getNewColor());
}public static void main (String [] args) {
ColorPanel06 demo = new ColorPanel06();demo.setVisible(true);
}

41
Complete program produces output like the examples shown below

42
Swing Menus
• Menus are lists of options from which a user can choose
• Three Swing classes are involved in creating a GUI menu interface for a Java program:– JMenuItem: an individual menu entry– JMenu: a collection of JMenuItems– JMenuBar: a container for JMenus

43
JMenuItem
• Like JButtons, JMenuItems generate ActionEvents
• We can program the actionPerformed method to respond to an ActionEvent from a specific menu (or a specific button, if we have more than one) by invoking the getActionCommand() method of the ActionEvent object
• By default, this method returns the String used to construct the JButton or JMenuItem object

44
Example
• The code fragment below creates a JMenuItem and adds an ActionListener to it:JMenuItem cyan = new JMenuItem("cyan");
cyan.addActionListener(this);
• The corresponding code fragment comes from the actionPerformed method:public void actionPerformed (ActionEvent e) {
String command = e.getActionCommand();
if (command.equals(“cyan”))
display.setBackground(Color.CYAN));

45
JMenu and JMenuBar
• A JMenu can be thought of as a container for JMenuItems; we place items in the menu by using the set method, as in this example:
JMenu other = new JMenu("Others");other.add(cyan);
• Similarly, a JMenu can be added to a JMenuBar:JMenuBar menus = new JMenuBar();menus.add(other);

46
The setActionCommand method
• As previously mentioned, the getActionCommand() method, when called from an ActionEvent object, returns a String– by default, this will be the label from the
button or menu item that created the event– the setActionCommand method can be used
to set a different return String for the button or menu item

47
Exampleimport javax.swing.*;import java.awt.*;import java.awt.event.*;
public class ActionEx extends JFrame implements ActionListener {JButton b1, b2, b3;Container pane;public ActionEx() {
setSize(100,200);setLocation(150,150);pane = this.getContentPane();pane.setLayout(new GridLayout(3,0));
setupButtons();setDefaultCloseOperation(EXIT_ON_CLOSE);
}

48
Example continuedpublic void setupButtons() {
b1 = new JButton("?");b1.setActionCommand("1");b1.addActionListener(this);pane.add(b1);b2 = new JButton("??");b2.setActionCommand("2");b2.addActionListener(this);pane.add(b2);b3 = new JButton("???");b3.setActionCommand("3");b3.addActionListener(this);pane.add(b3);
}

49
Example concludedpublic void actionPerformed(ActionEvent e) {
String s = e.getActionCommand();int x = Integer.parseInt(s);switch (x) {
case 1:b1.setText("OK");break;
case 2:b2.setText("Oh no!");break;
case 3:b3.setText ("Ouch");
} // end switch } // end method } // end class
Effect of running this codein a program; before buttonsare activated:
After all have been pressed:

50
Labels, Text Fields and Text Areas
• Each of the elements listed above describes a way to add text to a GUI window
• A label is a static text field; it can’t be changed by the user
• A text field is a fixed-size blank for the user to fill in
• A text area is basically a larger text field, allowing for multiple lines of input

51
JLabel example
• A JLabel is constructed with an initial String:JLabel label = new JLabel(“”);
• The text content can be changed with the setText() method:label.setText(“New text”);
• The next slide shows excerpts from a previous example enhanced with an explanatory label – only the additional lines of code and method headings are shown

52
Example// import statements omitted for brevity
public class ColorPanelWithText extends JFrame implements ActionListener {// some declarations not shownContainer pane;JLabel label;public ColorPanelWithText () {
// a few lines omitted for brevitypane = getContentPane();label = new JLabel("");pane.setLayout(new BorderLayout());pane.add(label, BorderLayout.NORTH);
} public Color getNewColor() {// random numbers obtained as before – code not shown
label.setText("red: " + r + " green: " + g + " blue: " + b);return new Color(r,g,b);
}// actionPerformed() and main() methods not shown - unchanged
}

53
Result of changes

54
Text fields
• A text field is a single line blank that a program’s user can fill in
• A JTextField object is constructed with a single int argument, representing the visible length of the field
• A text field is typically linked with a label, which serves the same purpose as a prompt

55
Example
• The next several slides contain excerpts from a program similar to the previous random color example
• The panel can still display random colors, but the ability to control the color values has been added via the use of text fields

56
Example - declarations
Container pane; // content pane of main window
JPanel display, // middle panel – displays colorbuttonArea, // bottom panel – holds random color buttontextArea; // top panel – holds labels & text fields
JButton control, // random color button go; // control button for chosen values
JTextField red, // editable display fields for color values green, blue;
57
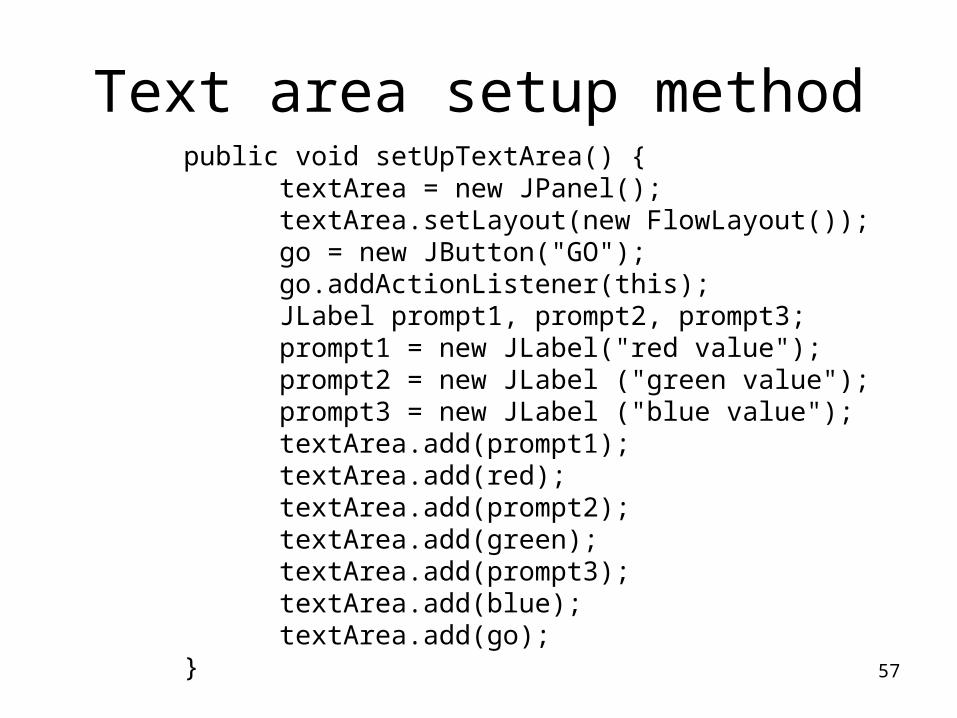
Text area setup methodpublic void setUpTextArea() {
textArea = new JPanel();textArea.setLayout(new FlowLayout());go = new JButton("GO");go.addActionListener(this);JLabel prompt1, prompt2, prompt3;prompt1 = new JLabel("red value");prompt2 = new JLabel ("green value");prompt3 = new JLabel ("blue value");textArea.add(prompt1);textArea.add(red);textArea.add(prompt2);textArea.add(green);textArea.add(prompt3);textArea.add(blue);textArea.add(go);
}

58
Revision of actionPerformed
public void actionPerformed (ActionEvent e) {String command = e.getActionCommand();if (command.equals("SURPRISE ME!"))
display.setBackground(getNewColor());else
changeFromText();}

59
New method - changeFromText
public void changeFromText() {int r = Integer.parseInt(red.getText());int g = Integer.parseInt(green.getText());int b = Integer.parseInt(blue.getText());display.setBackground(new Color(r,g,b));
}

60
Result examples

61
Text Areas
• A JTextArea object is similar to a JTextField, but is constructed with two int values instead of one– first argument is number of text lines (rows)– second argument is number of characters per
line (columns)
• As with a JTextField, the arguments to the constructor provide guaranteed minimum values, which can be exceeded in practice

62
Adding a String argument
• Although labels can be used to prompt users to fill in the blanks for text fields and text areas, another option is to place the prompt within the box for the user to replace; for example:JTextArea commentBox = new JTextArea
(“Please add your comments here”, 10, 20);

Scroll bars
• As we have previously seen, a JTextArea has a fixed size, but the amount of text that can be inserted is not fixed
• As a result, some text may become invisible as the window is overfilled
• A JScrollPane object can be added to a JTextArea (or JFrame or JPanel) to enable the user to access all window contents via scroll bars

Scroll bars
• A JScrollPane is constructed using the text area (or other component) it applies to as its argument:JTextArea commentBox = new JTextArea(50,
20);JScrollPane viewBox = new
JScrollPane(commentBox);
• The JScrollPane object can then be added to a JFrame or JPanel using the add method
Swing objects and the paint() method
• Most Swing components include a paint() method, which is used to draw the component on the screen
• This method is inherited from JComponent, an ancestor class for most of the Swing objects
• As an inherited method, we have been able to use it (invisibly, since none of our code has called it directly) without modifying, or overriding the original version
• In order to draw our own pictures, we will need to provide a new paint() definition, overriding the original

The paint() method
• The paint method for an object is automatically invoked when the object is made visible; there is almost never an explicit call to the method
• The paint() method has a single parameter of type Graphics, typically named g
• We use g to invoke the methods that draw pictures

The repaint() method
• The paint() method is called automatically when a window is made visible
• If changes need to be made to the window’s appearance, the window must be redrawn
• This operation is accomplished by the repaint() method

Icons
• An icon is a small picture, typically displayed as part of a GUI component such as a button, menu item, or label
• In Java, an icon is an instance of the ImageIcon class, and is constructed with a digital picture file, such as a .gif or .jpg
• Example:ImageIcon pic = new ImageIcon(“pic.gif”);

Adding icons to GUI components
• To add an icon to a JLabel, JButton or JMenuItem, you can use the setIcon method:JButton button = new JButton(“”);button.setIcon(pic);
• Alternatively, you can construct the component using an icon argument instead of String argument:JButton button = new JButton(pic);
• In both instances above, a String should be associated with the JButton by using the setActionCommand() method

Placing icons in a window
• To use an existing drawing (as opposed to one you create yourself), you can use the paintIcon method of an ImageIcon object
• The method takes 4 arguments:– The component on which to paint the icon
(e.g. a JPanel or JFrame)– A Graphics object– The x and y coordinates of the upper left
corner of the bounding rectangle