1 Enter rotation angle Click Rotate for rotate and flip options.
21
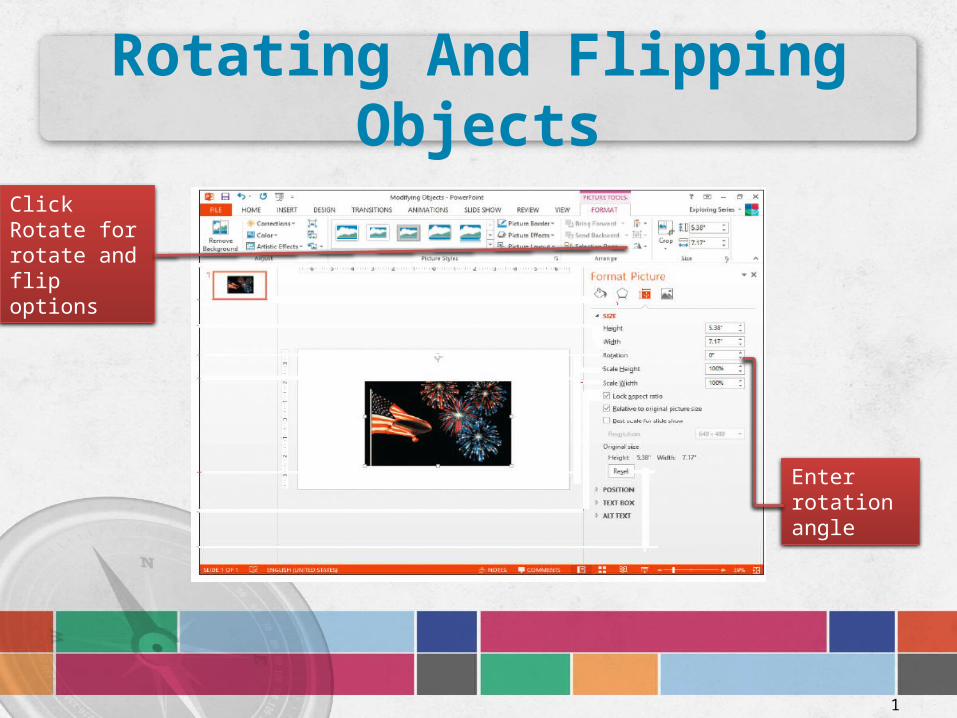
Rotating And Flipping Objects 1 Enter rotation angle Click Rotate for rotate and flip options
-
Upload
darrell-bennett-watkins -
Category
Documents
-
view
239 -
download
0
Transcript of 1 Enter rotation angle Click Rotate for rotate and flip options.
1
Rotating And Flipping Objects
Enter rotation angle
Click Rotate for rotate and flip options

2
Order Objects• You can order shapes by placing them under or on top of one
another. • The order of the layers is called the stacking orderTo change the order of a stack of shapes:1. Select a shape.2. Click the FORMAT tab.3. The Arrange group on the FORMAT tab includes the Bring Forward and Send Backward arrows to open a submenu for each that includes the following options:Bring to Front Moves the shape to the top of the stacking orderSend to Back Moves the shape to the bottom of the stacking orderBring Forward Moves the shape up one layerSend Backward Moves the shape down one layer

3
Organization Chart
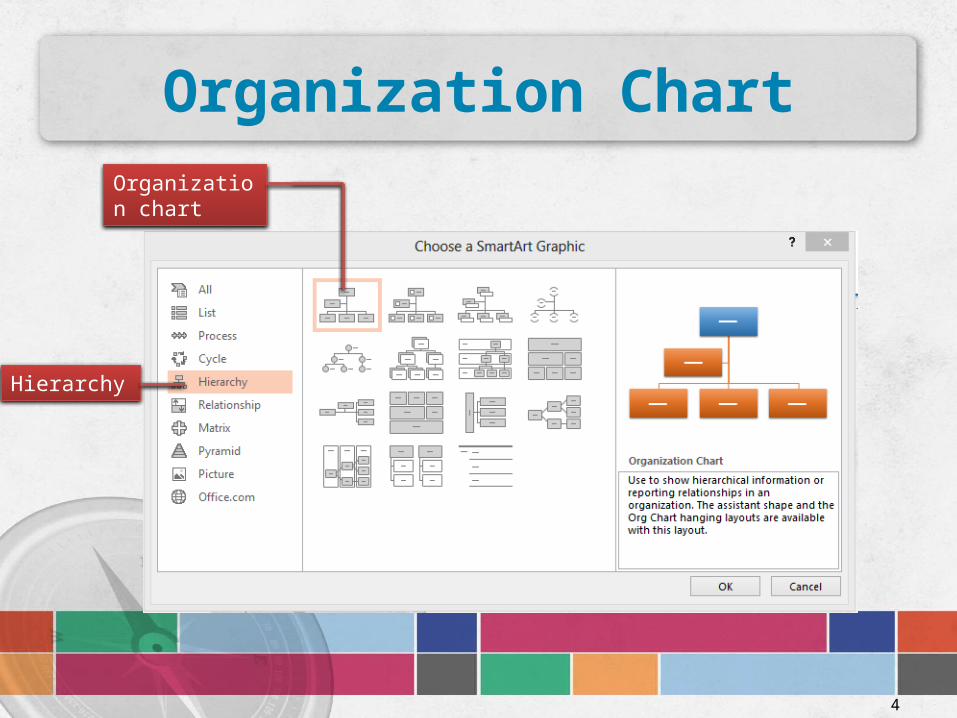
To create an organization chart:• 1. Click the INSERT tab.• 2. Click SmartArt in the Illustrations
group.• 3. Click the Hierarchy in the left pane.• 4. Click the organization type in the
right pane.• 5. Click OK
4
Organization Chart
Hierarchy
Organization chart
5
ADD Shapes To Organization Chart
To use the Add Shape command do the following:1. Click an existing shape in the SmartArt diagram.2. Click the DESIGN tab.3. Click the Add Shape arrow in the Create Graphic group.4. Select Add Shape After, Add Shape Before, Add Shape Above, Add Shape Below, or Add Assistant as needed.

6
Inserting Headers And Footers To insert a slide footer:1- Click the Insert tab.2- Click Header & Footer in the Text group.3- Click the slide tab and select one of the following options:
– Click the Date and time check box to insert the current date and time. • Click Update automatically if you wish the date to always be
current.• Alternatively, you can choose the option to enter a fixed date
– Click the Slide Number check box to show the slide number on the slide.
– Click in the Footer box to enter information
7
Inserting Headers And Footers
4-Click Apply to All to add the information to all slides, or if you are adding the footer to a single slide then click Apply.

8
Inserting Headers And Footers
Date field in footer
Slide number field
Active slide number option
Slide tab
Click insert header & footer

9
Inserting Video
To insert a video in a presentation, do the following:1. Click the INSERT tab.2. Click Video in the Media group.3. Click Video on My PC.4. Browse, locate, and select the video you want to use in the presentation.5. Click Insert to insert the video in your presentation.

10
Adding Audio
To insert audio from a file, do the following:1. Click the INSERT tab.2. Click Audio in the Media group.3. Click Audio on My PC.4. Browse, locate, and select the desired file.5. Click Insert.

11
Modifying A Theme
Themes can be modified once they have been applied.To change the theme:1. Click the Design tab.2. In the Themes group click More, and then choose the Theme you want to change to.

12
Modifying A ThemeTheme Gallery

13
Slide Size And Orientation
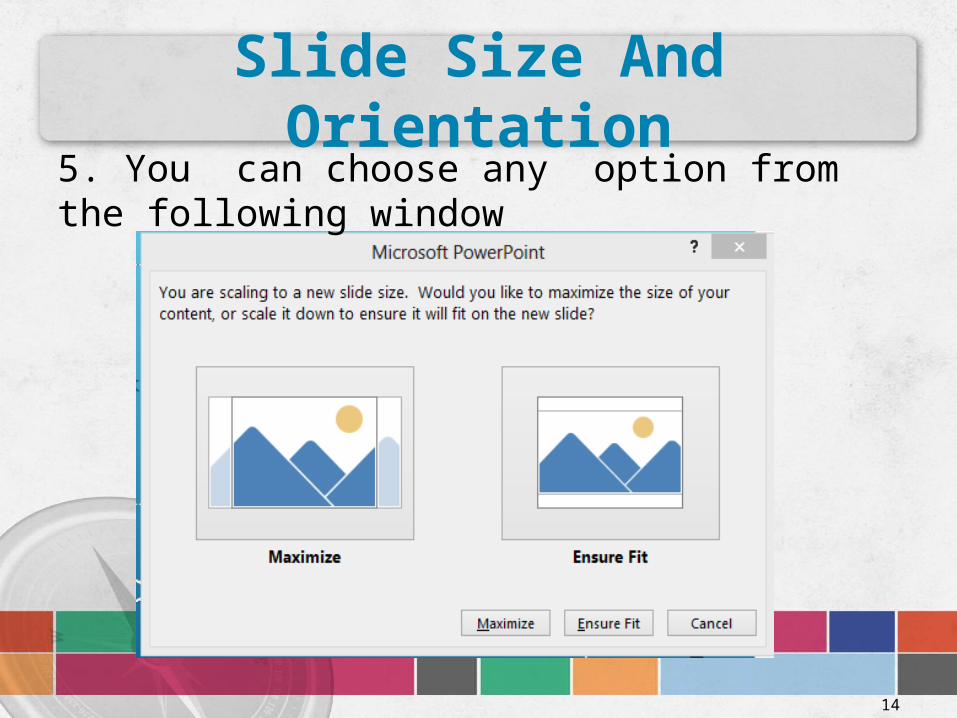
To change your slide orientation:1. Click the DESIGN tab.2. Click Slide Size in the Customize group.3. Click Customize Slide Size.4. Click Portrait or Landscape in the Slides section. Here, you can also change the size of the slide as well as the orientation.
14
Slide Size And Orientation5. You can choose any option from the following window

15
Animating Objects• An animation is a movement that
controls the entrance, emphasis, exit, and/or path of objects on a slide.
• To apply animations to text or other objects:
1- Select the object you want to animate.2- Click the Animations tab then click More in the Animation group to display the Animation gallery.3- Click an animation type to apply. 4- Click Effect Options to display available options related to the selected animation type.

16
Animating Objects
Animation tagAnimation gallery
Animations tab

17
Animating Objects
Effect Options gallery
Active animation
Fly In animation applied
Preview

18
Transitioning Slides
• A transition is a specific animation that is applied as a previous slide is replaced by a new slide.
• Transitions are selected from the Transition to This Slide group on the Transitions tab. You can select from the basic transitions displayed or from the Transition Gallery.
• To display the Transition gallery, click the More button in the Transition to This Slide group on the Transitions tab.

19
Transitioning Slides
Transition gallery
20
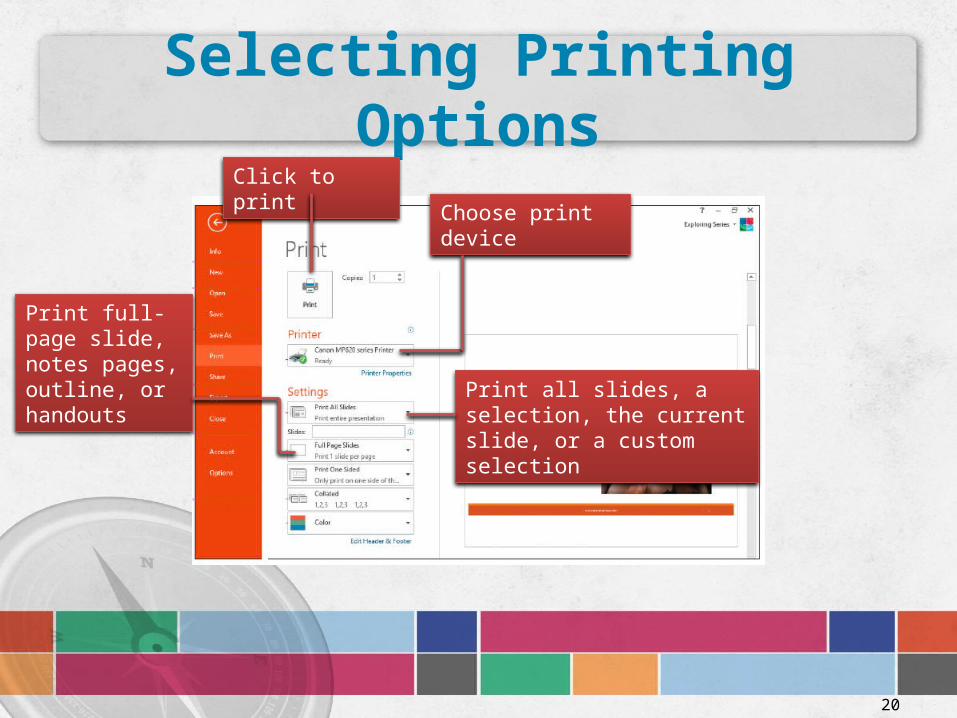
Selecting Printing Options
Print full-page slide, notes pages, outline, or handouts Print all slides, a selection,
the current slide, or a custom selection
Choose print device
Click to print

21
Printing Handouts
Click to select print layout
Click to select Handouts, 6 slides per page, horizontal
Handouts can be use to print one, two, three, four, six, or nine slides per page.