
Dawn: Exploring Dichotomies across Space and Time DAWN Mission Speaker’s Kit Dawn EPO Teams.

Table of Contents
Kitura Until Dawn
A Comprehensive Introduction to the Kitura Web Development Framework
This book is an introductory guidebook or tutorial for teaching existing Swift developers to develop web sites and services using the Kitura web framework. This version of the book covers Kitura 2 running on Swift 4.
Kitura Until Dawn is available in a wide variety of formats. If you’re not currently reading this book in the manner that you would prefer, and/or the information within itc seems to be out of date, please check out the Kitura Until Dawn web site for alternatives.
This Book is Free!But if you find this or my other projects to be useful to you, please consider sponsoring me on Patreon! Your support will go a long way towards helping keep my work on these sorts of free projects financially viable.
Kitura Until Dawn is still being written, and may, in fact, never be finished as Swift and Kitura continue to evolve. Feedback and bug reports are welcome! Please file an issue or pull request on this book’s GitHub project or email the author at [email protected].
This work is licensed under a Creative Commons Attribution-NonCommercial-ShareAlike 4.0 International License.
Copyright, such as it is, by Nocturnal, 2017-2018. If you paid any money for this book, then we both got cheated. Kitura may or may not be a trademark of International Business Machines, with whom I have no affiliation.
This book is dedicated to Commodore International and the team behind the Commodore 64, the little brown-and-tan wedge that made me the hopeless nerd I am today. Big thanks also go out to the intelligent, kind, and patient people on the Swift@IBM Slack server and the lovable curmudgeons in the Freenode #iphonedev-chat channel.

Welcome to Kitura!
What is Kitura?Kitura is a lightweight web development framework written in the Swift programming language. It was developed by a team at IBM and released as open source software under the Apache 2.0 license (the same as Swift itself) in early 2016.
Though Kitura has received continued attention and promotion from Big Blue, Kitura hasn’t quite caught the world on fire yet. Perhaps the world does not need Yet Another Web Framework. Even if you decide to use Swift to write your server-side application, Kitura has competition among other Swift web frameworks like Vapor and Perfect. That, and Kitura’s documentation is sort of all over the place, and of uneven quality and coverage among its various sister packages like Kuery (for database connectivity) and Kitura-TemplateEngine (for templating). Well, I can’t fix all those other problems, but I can fix that last one.
Why Kitura?• Because Swift is a great programming language. Originally announced by Apple in
2014 to replace the aging, eternally-quirky Objective-C in the Apple ecosystem, it is modern, friendly, sleek, and fun.
• Because it’s backed by IBM, who perhaps is second only to Apple in terms of adoption and promotion of Swift in the enterprise space. IBM provides Swift application hosting on their cloud platform and is supporting it on their enterprise Linux and Unix operating systems like PowerLINUX and z/OS - seriously heavy iron stuff. IBM is likely to continue supporting Swift and Kitura for the foreseeable future.
• As Swift is a compiled language, web applications written in Kitura will generally run much faster than those written in scripting languages like PHP, Python, Perl, or Ruby (though things like opcode caches for those languages can close the gap when used).
Why Not Kitura?• Because Kitura and Swift in general is still rather new, you may occasionally run into
libraries and such which do not yet have great Swift support. While this isn’t such a problem if you’re the type that doesn’t mind writing code to integrate Swift with C or C++ libraries (and I’m definitely not one of those people), it’s still more work to do.
• Kitura is a very low-level framework, along the lines of Laravel or Ruby on Rails, so while it’s very quick to implement something like a REST interface that provides JSON responses for consumption by, say, a client app on iOS, building something like a blog will take considerably more work than it would using a more full-featured web framework or content management system like WordPress, Drupal, or Alfresco. That being said, building full-featured web sites with Kitura is certainly possible, as later examples in this book will show.
• Because compiling Swift code is currently not widely supported outside of macOS, Ubuntu Linux, and the IBM operating systems mentioned above. Most notably, Windows support is missing, and I sincerely hope there are some people from Apple
and/or Microsoft and/or IBM working on that. There are unofficial ports of Swift to Windows and other Linux flavors, as well as FreeBSD, but your mileage may vary on the effectiveness of these systems.
What You Should KnowThis book makes some assumptions about what you already know about software development and the workings of the web. Please review the list below. If anything in the list is unfamiliar to you, I suggest you bone up on those things before diving deep into this book.
• Software development with Swift. Though this book will periodically teach or review certain aspects of Swift which may be unexpected or unusual for those not strongly familiar with it, it is not intended as a thorough introduction to Swift programming. At the least, you should have read Apple’s The Swift Programming Language book, though I’ll accept just reading the “A Swift Tour” section of the book if you’re already familiar with contemporary object-oriented programming languages such as C# or Java. You should already have Swift installed on your development machine and know how to build and run a basic command-line application. You do not need to be an experienced iOS or macOS developer; in fact, if you are, there’s actually probably a few things you will need to unlearn to become an effective Kitura developer. See the CLI Swift for Cocoa developers appendix for more information if this applies to you.
• General knowledge about HTTP. The Hypertext Transfer Protocol is how web clients and web servers talk to each other. You should know about the different parts of a URL. You should know the meaning and usage of common HTTP status codes like 200 OK and 404 Not Found, as well as common client and server HTTP headers.
• HTML. The Hypertext Markup Language is how a simple text file can be interpreted by a web browser as a functional web page. You should know common HTML tags and page structure. Earlier chapters in this book will not deal with server responses in HTML, but later ones will.
• SQL and associated concepts. Structured Query Language is used by relational database systems such as PostgreSQL, MySQL, SQLite, or Microsoft SQL Server to read and manipulate data. You should understand common database structures such as tables, rows, and columns.
• Swift Package Manager. This is the modern way to add “packages” of additional code to your project. As I expect a major part of the audience of this book will be Cocoa developers who are familiar with using CocoaPods or Carthage for this purpose, this book includes an appendix chapter introducing SPM. Additionally, you should understand the concept of semantic versioning; the appendix will cover this as well.
• Git. You should have Git installed on your development server, as this is how Swift Package Manager will fetch packages. Ideally, you have some experience with using Git yourself and basic concepts of version control systems. If you wish to use a different version control system for your sites, that’s fine, but the chapter in this book on creating middleware will involve creating a new Swift Package Manager package, which requires experience with Git.

Other Learning ResourcesIf you don’t like this book or just want a few more long-form tutorials for Kitura, here are some to consider.
• Server-Side Swift is another e-book that covers Swift; this one is by Paul “twostraws” Hudson, who has written several books on Swift development. At US$40, Hudson’s book is certainly more pricey than this one, but in both cases you probably get what you paid for… I haven’t read Server-Side Swift myself, but I’ve read one of Hudson’s other books and found it to be pretty high-quality stuff.
• David Okun, Developer Advocate at IBM, has posted two entry-level articles at RayWenderlich.com: Kitura Tutorial: Getting Started with Server Side Swift, which covers basic REST responses and CouchDB database integration (the latter of which is not covered in this book), and Kitura Stencil Tutorial: How to make Websites with Swift, which covers templating with the Stencil templating engine.
• Like blogs? I suggest adding the Swift@IBM Blog to your feed reader of choice. Its updates are sporadic, but often content-rich.
• If you like to learn with video, LinkedIn Learning (formerly Lynda.com) has released a video series entitled Learning Server-Side Swift Using IBM Kitura. You can watch the first couple videos in the series without needing an account. LinkedIn Learning/Lynda.com subscriptions can be pricey, but both offer you free one-month trial subscriptions.
Getting HelpYou are not alone. As you go along, if you get stumped by something, don’t hesitate to reach out for help and clarification.
The Swift@IBM team site has a public Slack instance. (Slack is a feature-rich yet resource-intensive chat application targeted towards teams and workgroups.) There are several channels including #kitura specifically for Kitura discussion and #general which is good for general discussion about Swift development and other topics in the ecosystem. You can find me there under the username “nocturnal.” Feel free to reach out to me if you’re having any trouble with something in this book.
If Slack’s not your thing, you can also join the Freenode IRC network. It doesn’t have any Kitura-specific channels currently (unfortunately), but it does have the #swift-lang channel which is great for general Swift discussion; there’s lots of smart people there. There may be other Swift-related channels in the IRC universe, but I like the Freenode network because its focus on open-source software means that if you need help with any other open-source (and some not-so-open-source) software you use throughout the day, you can probably find a channel related to it on Freenode. If you’re a Cocoa developer, the #iphonedev and/or #macdev channels may also be of interest; #iphonedev-chat is a fun channel for off-topic banter with others in the community. On Freenode, you can find me using the “_Nocturnal” alias. Again, feel free to reach out and say hi!

The official Swift forums have a Kitura category. As I write this, the category is still fairly new and hasn’t seen much activity; also, I find the forum system that they are using to be quite confusing and borderline unusable. Nonetheless, forums are often a better place to ask long-form questions than the chat-based systems listed above.
Finally, don’t forget about the GitHub issue queues on most projects hosted there. They’re generally intended for reporting bugs and such, but you’re generally welcome to ask for help with usage there too.
Notably Absent TopicsThere are some topics that this book does not currently cover, but perhaps should. (Perhaps it will in future revisions.) I list them here so that you may peruse these topics on your own, should you so desire, as well as explain why I omitted them.
kitura create
kitura create is an optional CLI tool which can be used in place of swift package init to start a new Kitura project. It can automatically add the Kitura dependency to your project as well as insert boilerplate code into your project based on your answers to some questions it asks you.
I ultimately decided not to cover this tool in this book because it is written in Node.js, and that’s a rather large dependency to install for those that don’t already have it (why the authors of this tool chose to write something in JavaScript when they could have chosen Swift itself is beyond me); also, I feel that it is very important to learn how to do “by hand” the things that this tool does for you, such as defining router paths.
Swift-Kuery-ORM
Kuery is a package for integrating with SQL-based database management systems. The chapter on Kuery and following chapters use Kuery as a rather thin interface between the application and the underlying SQL engine - just a step up from writing direct SQL queries, really. Swift-Kuery-ORM abstracts things further by basically letting you save and load objects themselves directly to and from the database, at least from the perspective of your app - of course things are still ending up as SQL queries at the very bottom, but manually breaking objects down into insert or update queries or building them back up from the result of select queries is handled for you.
I didn’t cover Swift-Kuery-ORM as I personally am more familiar with using databases without ORM tools. However, as using an ORM is quite common in some ecosystems, I can appreciate that some experienced web developers may be more comfortable using them than not. Thus, I may add coverage of Swift-Kuery-ORM in the future, once I improve my own familiarity with it.
Automated Testing
Automated testing is an important concept in ensuring software quality and avoiding bugs and functionality regressions as software evolves. Kitura and its related packages have

rather good automated tests, and I encourage anyone building a “production-ready” project in Kitura also implement automated testing - especially if that project is intended to be a package used by others.
However, automated testing is a rather broad and complex topic, and for Kitura projects it can be doubly complex since the test has to both run the server part of it as well as the client part, ensuring the server is returning the appropriate responses. I ultimately decided that this all was just too complex to cover competently in what is intended to be an introductory-level, wide-but-shallow Kitura tutorial. But perhaps my mind will be changed in the future.
Deploying
Okay, so you’ve written a great Kitura web app, and it runs fine on your local machine; now how do you get that up and running on the public internet? There are many options, from IBM’s own Bluemix cloud hosting service to using Docker containers to simply just building the app as normal and letting it go. The latter is my preferred method, though I know it’s pretty much unheard of in today’s Linux container culture.
Given that wide variance in how things can be deployed, and all the various complexity that goes along with such things, I haven’t decided on a way to cover it just yet.
Security NoticeMany of the code examples in this book involve taking user input and sending it back to the user’s client, such as a web browser, without first escaping it. (Escaping text involves converting “dangerous” characters or series of characters to safer before the text is sent to the client’s browser; the browser can then convert those escaped characters back to the characters they should represent before displaying the data.) This is a serious security vulnerability; such input should properly be escaped prior to being sent to a user. The most common exploit for web applications which do not properly escape user input before displaying it is called a cross-site scripting, or XSS, attack; basically, the attacker injects content in the page which causes a victim visiting that page to execute a bit of JavaScript which sends their cookie data for the site to the attacker, thus possibly allowing the attacker to gain control of the victim’s account.
However, for the sake of simplicity and not distracting from the points the code samples are trying to demonstrate, few code samples in this book do proper escaping. Therefore, I suggest - I insist - that you do not execute any of these code samples on a server which is publicly accessible from the internet unless the port that your Kitura site is running on (8080, in these code samples) is properly firewalled. You should especially never run these code samples on a server which hosts other sites which may contain sensitive or valuable user data; I suggest only executing them on personal development machines.
Thank you.

Chapter 1: Hello WorldLet’s create a classic Hello World example.
First, install Swift and get it running. On your system, you should be able to type swift into a terminal window to start up the Swift REPL. (Press Control-D to exit the REPL.) Hopefully you already have this up and running, but if not, here’s some guidance.
On MacOSIf you’re on a macOS system, installing Apple’s full-featured Xcode IDE from the App Store should be all you need to do. (It’s not necessary to use Xcode to edit Swift code on your Mac, but when you install Xcode, the Swift binaries and other software development goodies will come along for the ride.)
On LinuxOn Ubuntu Linux, install the following packages using apt-get install:
• clang• python-dev• libicu-dev• libcurl4-openssl-dev• libssl-dev
Then download Swift and unpack it to a convenient place on your system. See the Installing Swift page on the official Swift site for more info.
Starting a New ProjectOnce you’ve confirmed Swift is up and running on your system, you can start a new Swift project by doing the following in a terminal:
mkdir hello-worldcd hello-worldswift package init --type=executable
Now open up the Package.swift file and add a dependency for Kitura. It will have a bit of boilerplate in there that you’ll have to modify to add a dependency to Kitura. The end result should look like this. (Note that capitalization is important for the below.)
// swift-tools-version:4.0// The swift-tools-version declares the minimum version of Swift required to build this package.
import PackageDescription
let package = Package( name: "hello-world",

dependencies: [ // Dependencies declare other packages that this package depends on. // .package(url: /* package url */, from: "1.0.0"), .package(url: "https://github.com/IBM-Swift/Kitura.git", from: "2.0.0") ], targets: [ // Targets are the basic building blocks of a package. A target can define a module or a test suite. // Targets can depend on other targets in this package, and on products in packages which this package depends on. .target( name: "hello-world", dependencies: ["Kitura"]), ])
Have the Swift Package Manager resolve Kitura and its dependencies and add them to your project.
swift package resolve
If you’re on macOS and wish to use Xcode as your code editor, now’s the time to create a new Xcode project and open it up. (If you’re not on macOS or not using Xcode, ignore the following.)
swift package generate-xcodeprojopen hello-world.xcodeproj
Now note that your project won’t build properly in Xcode unless you change the scheme to be your real application. I don’t know why this is; if it’s a glitch in Swift Package Manager, Xcode, or both. At any rate, you have to do it every time you use generate-xcodeproj. From the scheme menu to the right of the “stop” button, change the scheme from “hello-world-Package” to just “hello-world.”
Scheme selection
Okay, let’s add some code. Open up the Sources/main.swift file in your editor. Delete what SPM has put in there by default and enter the following:
import Kitura
let router = Router()
router.get("/") { request, response, next in response.send("Hello world!\n") next()}
Kitura.addHTTPServer(onPort: 8080, with: router)Kitura.run()
(Note: If you already have a network service running on IP port 8080 on your development machine, try another port number, such as 8081 or 8888. Remember to substitute that number for 8080 in all examples throughout this book.)
Now build and run your project. Back in your console window, enter:
$ swift build
If all goes well, the last line will be:
Linking ./.build/[Your hardware architecture and OS]/debug/hello-world
That’s where your compiled binary was saved. So let’s run that.
$ ./.build/[Your hardware architecture and OS]/debug/hello-world
If all goes well, the program will execute without any output.

Now open up a second terminal window and hit your new Kitura site!
$ curl localhost:8080/Hello world!
Note that I will use the Curl command line client for this and other examples in this book, but you can of course use wget if you prefer it or simply don’t have Curl installed. Use -qO- (that’s a capital letter “oh”, not a zero) to have wget print the result to the screen instead of saving it to a file.
$ wget -qO- localhost:8080/Hello world!
Aside from just the body of your response, your Kitura site is sending standard HTTP headers. You can check this by adding the --include flag to your Curl command. (If you’re using wget, add a --server-response flag.)
$ curl --include localhost:8080/HTTP/1.1 200 OKDate: Sun, 27 Aug 2017 03:37:28 GMTContent-Length: 13Connection: Keep-AliveKeep-Alive: timeout=60, max=99
Hello world!
Now just for fun, let’s see what happens if we access a path other than “/” on our server. Let’s try the “/hello” path:
$ curl --include localhost:8080/helloHTTP/1.1 404 Not FoundDate: Sun, 27 Aug 2017 03:39:23 GMTContent-Length: 18Connection: Keep-AliveKeep-Alive: timeout=60, max=99
Cannot GET /hello.
Oh, we got a 404 error. You may be able to guess why, but if not, I’ll explain it later in this chapter.
Back in the terminal window that’s running your program, you can stop execution by typing Control-C.
Note that Xcode users can run your project by using the “Run” command in the “Product” menu or by pressing the “Play” button in the toolbar rather than using the command line to build and execute your compiled project, and indeed this process is generally faster for Xcode users. You should also know how to do it via the command line, however. You can try it now, but don’t forget to halt the program in the terminal first.

So What Did We Do?First, we created a new project with Swift Package Manager. The full scope of what SPM can do is outside the scope of this book; if you are unfamiliar with it, have a look at the “Swift Package Manager basics” appendix in this book for the basics as far as Kitura development is concerned. As fair warning, later chapters in this book will not give you a step-by-step process for adding new packages to your project and instead merely say something like “add package X to your project.”
Then we added some code. Let’s go through it line by line.
import Kitura
We are importing the Kitura module into the scope of main.swift for further use by our code.
let router = Router()
We are instantiating a new Router object, which is provided by Kitura. Routers will be covered in more depth in a future chapter. For now, know that routers are how we define paths that our site will listen for and what happens when a request for that path is made to the server.
router.get("/") { request, response, next in
We are creating a handler for the “/” path; specifically, for GET HTTP requests made to the “/” path. (We’ll learn how to handle other types of requests in a later chapter.) Note that in our code, this is the only path for which we are creating a handler. This is why we got a 404 error when we tried the “/hello” path above. (Up for a bit of experimentation? Try changing this to “/hello” or any other path and rebuild your project. Just remember to keep that slash at the beginning of the path.)
The part that begins with a curly brace is a trailing closure. It’s actually a closure which is passed as the final parameter to the “get()” method on the Router object instance, even though it is outside of the parentheses. If you’re like me, this syntax is pretty bizarre, but you’re going to want to get used to it, because Kitura uses it everywhere. Have a look at the “Trailing Closures” section of The Swift Programming Language for more information on what’s being done here. For now, know that request is an instance of Kitura’s RouterRequest object, response is an instance of RouterResponse, and next is a closure. (RouterRequest and RouterResponse will be covered further in later chapters.)
Finally, request, response, next in specifies that our closure that we just began has three parameters passed to it: request, which is a Kitura RouterRequest instance with information about the incoming request; response, which is a Kitura RouterResponse object with information about the response we want to send to the client that made the request; and next, which is itself a closure. I’ll explain that next parameter more later in this chapter; first, we should explain the rest of the code in this example.
response.send("Hello world!\n")

The first line in our handler simply sends a string composed of “Hello world!” followed by a standard line break character to the client. It does this by invoking the send() method of the RouterResponse instance that was passed to our handler.
next()
Call the next handler that can respond to this route. Again, I will go further in depth to the next parameter later in this chapter.
}
End our route handler closure.
Kitura.addHTTPServer(onPort: 8080, with: router)
Tell Kitura that we want to start an HTTP server that’s listening on port 8080, and we want it to use the paths and handlers we defined to our Router instance router.
Kitura.run()
Finally, start the HTTP server. The server will continue running until either a major error occurs or the process is interrupted (as you do when you type Control-C into the terminal where Kitura is running).
Congratulations, you are now a Kitura hacker! The rest of the book will basically just be expanding on what we’ve learned here.
About That next Parameter…The next parameter needs further explanation. In Kitura, it’s perfectly valid to have more than one handler for a given route. You can think of each handler which is going to respond to a request as being in a chain. The next link in the chain - the next handler that should be invoked for the route - is passed in as the next parameter. That’s why it’s important to remember to always include next() after normal execution of the code in your handler. The exception - when you do not want to invoke next - is when an error has happened and we want to abort any further “normal” response to the client; for example, if the user is trying to access a resource they don’t have access to, we should send their client a 403 error and stop any further execution.
You can test this “chain” behavior by adding a second handler to our code. Add this right before the Kitura.addHTTPServer(onPort: 8080, with: router) line:
router.get("/") { request, response, next in response.send("And hello again!\n") next()}
Our code now has two simple handlers for the “/” path. (If you experimented by changing “/” to “/hello” or some other path in the first route handler above, either change it back or have this handler use that same new path; either way, make sure the first parameter to the

get method is equivalent). Now do another request in the command line, and check out how the output has changed.
$ curl localhost:8080/Hello world!And hello again!
See? Our handlers fired one after the other, as expected. But now go back to the first handler and comment out or delete the next() line. Build your project and test your site again:
$ curl localhost:8080/Hello world!
Oops. As you can see, failing to call next() from our first handler means our second one didn’t get invoked. So don’t forget your next() line!
To help them not forget, many coders will wrap their next() lines in a defer block at the beginning of their callbacks, like this:
router.get("/") { request, response, next in defer { next() } response.send("Hello world!\n")}
Code in the defer block is executed right before the function returns, no matter where or how the function returns, so the code in this handler closure is functionally equivalent to the first one we wrote above. (See the “Defer Statement” section in The Swift Programming Language for more information on this structure.) However, since we don’t always want to call next() - as above, there will be important exceptions - I don’t want you to get in the habit of using defer blocks in your handlers this way, and will not use it in further examples in this book. You will see this pattern used frequently in others’ Kitura code around the web, however, so I feel it’s important to explain what’s happening in that code.
Kitura Serves Itself?!Now if you’re familiar with web development with scripted languages like Ruby and PHP, you may be surprised right now that our Kitura application is serving itself directly to the browser without having to connect to a web server daemon like Apache or Nginx through FastCGI or SCGI. Yes, this is a feature inherent in Kitura; it itself is a web server, and unlike PHP or Ruby’s built-in web servers, it’s fully performant enough to use in production environments.
That being said, it’s trivial to have Kitura to operate as a FastCGI application served through a web server as well. Reasons this may be desirable is for ease of SSL certificate configuration, integration of both Kitura and non-Kitura applications on one server, and higher-performance static file serving, among countless others. Simply replace the line:

Kitura.addHTTPServer(onPort: 8080, with: router)
…with one like this:
Kitura.addFastCGIServer(onPort: 9000, with: router)
And then configure your web daemon accordingly. See the Kitura FastCGI page on IBM’s official Kitura site for more information.
For consistency and simplicity’s sake, however, all examples in this book will use Kitura’s built-in server functionality.
Adding Logging with HeliumLoggerLogging can be quite helpful when developing web applications. To that end, IBM has developed LoggerAPI, an API for logging implementations, and HeliumLogger, a lightweight implementation of a logger for that API.
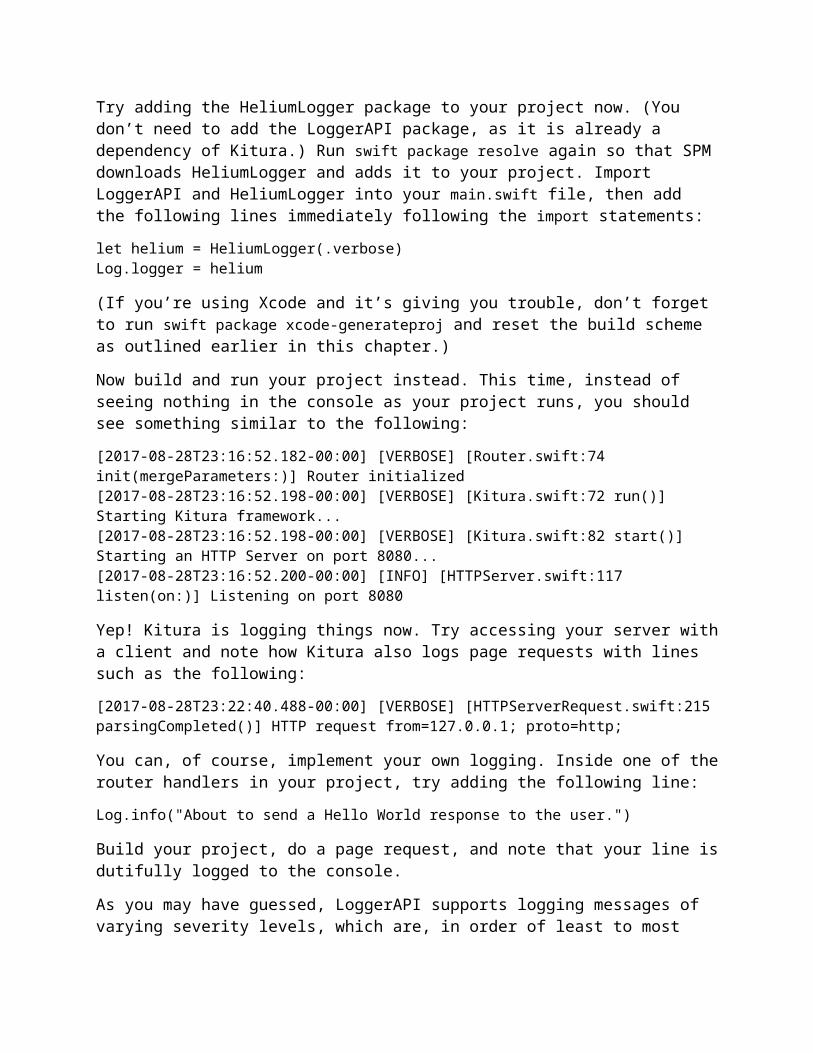
Try adding the HeliumLogger package to your project now. (You don’t need to add the LoggerAPI package, as it is already a dependency of Kitura.) Run swift package resolve again so that SPM downloads HeliumLogger and adds it to your project. Import LoggerAPI and HeliumLogger into your main.swift file, then add the following lines immediately following the import statements:
let helium = HeliumLogger(.verbose)Log.logger = helium
(If you’re using Xcode and it’s giving you trouble, don’t forget to run swift package xcode-generateproj and reset the build scheme as outlined earlier in this chapter.)
Now build and run your project instead. This time, instead of seeing nothing in the console as your project runs, you should see something similar to the following:
[2017-08-28T23:16:52.182-00:00] [VERBOSE] [Router.swift:74 init(mergeParameters:)] Router initialized[2017-08-28T23:16:52.198-00:00] [VERBOSE] [Kitura.swift:72 run()] Starting Kitura framework...[2017-08-28T23:16:52.198-00:00] [VERBOSE] [Kitura.swift:82 start()] Starting an HTTP Server on port 8080...[2017-08-28T23:16:52.200-00:00] [INFO] [HTTPServer.swift:117 listen(on:)] Listening on port 8080
Yep! Kitura is logging things now. Try accessing your server with a client and note how Kitura also logs page requests with lines such as the following:
[2017-08-28T23:22:40.488-00:00] [VERBOSE] [HTTPServerRequest.swift:215 parsingCompleted()] HTTP request from=127.0.0.1; proto=http;
You can, of course, implement your own logging. Inside one of the router handlers in your project, try adding the following line:
Log.info("About to send a Hello World response to the user.")

Build your project, do a page request, and note that your line is dutifully logged to the console.
As you may have guessed, LoggerAPI supports logging messages of varying severity levels, which are, in order of least to most severe: debug, verbose, info, warning, and error. Just call the corresponding static method on the Log object. Try adding some lines like the following to your routes:
Log.verbose("Things are going just fine.")Log.warning("Something looks fishy!")Log.error("OH NO!")
You can also use these severity levels to determine which log messages you want to see when initializing HeliumLogger. We used the following line to initialize HeliumLogger above:
let helium = HeliumLogger(.verbose)
This means that HeliumLogger will log messages of verbose severity and higher, but messages with the debug severity level will not be logged. If you only want to log messages of the warning and error severity levels and ignore those of info severity and lower, simply do:
let helium = HeliumLogger(.warning)
Later examples in this book will periodically use logging, and you are of course free to add your own logging to help you trace through the code.
So logging to the console is great and all, but can’t HeliumLogger log to stderr or files on disk as most other logging systems can? The answer is yes, but not out of the box; you need to write an implementation of TextOutputStream that writes data where you want it to go, then pass it as a parameter as you instantiate a HeliumStreamLogger object rather than a HeliumLogger one. This is less painful than it sounds; nonetheless, I will leave it as an exercise to the reader.
Chapter 2: Ins and Outs of RouterRequest and RouterResponseLet’s look back at that router handler we wrote in the last chapter.
router.get("/") { request, response, next in response.send("Hello world!\n") next()}
You may recall that I mentioned that request was a RouterRequest object and that response was a RouterResponse object. Every route and middleware handler that we write will receive instances of these two objects. In this chapter, we’ll take a closer look at these objects and what we can do with them.

RouterRequestRouterRequest contains information about the incoming HTTP request. Here’s a non-exhaustive example of some things we can find there. Try adding this to your project from the last chapter. (Or create a new project, if you prefer; just don’t forget you need to instantiate the router variable and start Kitura at the end.)
router.all("/request-info") { request, response, next in response.send("You are accessing \(request.hostname) on port \(request.port).\n") // request.method contains the request method as a RouterMethod enum // case, but we can use the rawValue property to get the method as a // printable string. response.send("The request method was \(request.method.rawValue).\n") // Request headers are in the headers property, which itself is an instance // of a Headers struct. The important part is that it's subscriptable, so // go ahead and treat it like a simple [String: String] dictionary. if let agent = request.headers["User-Agent"] { response.send("Your user-agent is \(agent).\n") } next()}
Note that we’re using the all() method here instead of the get() one as we’ve used before. Using get() tells Kitura we want our handler to fire only on GET requests, whereas using all() tells Kitura we want it to fire on all request methods - GET, POST, and so on. These methods and Router objects in general will be examined in more depth later in this book.
Now we’ll request the path using Curl’s -d flag to post an empty string to our request path.
$ curl -d "" localhost:8080/request-info You are accessing localhost on port 8080.You're coming from 127.0.0.1.The request method was POST.Your user-agent is curl/7.54.0.
The queryParameters property is a [String: String] dictionary of the query parameters.
router.get("/hello-you") { request, response, next in if let name = request.queryParameters["name"] { response.send("Hello, \(name)!\n") } else {

response.send("Hello, whoever you are!\n") } next()}
And the result:
$ curl localhost:8080/hello-youHello, whoever you are!$ curl "localhost:8080/hello-you?name=Nocturnal"Hello, Nocturnal!
There are a few more things that RouterRequest contains that are of varying level of interest, but these are the most relevant ones in my not so humble opinion. For now, have a look at RouterRequest.swift in the Kitura project if you’re curious what else you can find there - but then come right back, because things will get more interesting soon.
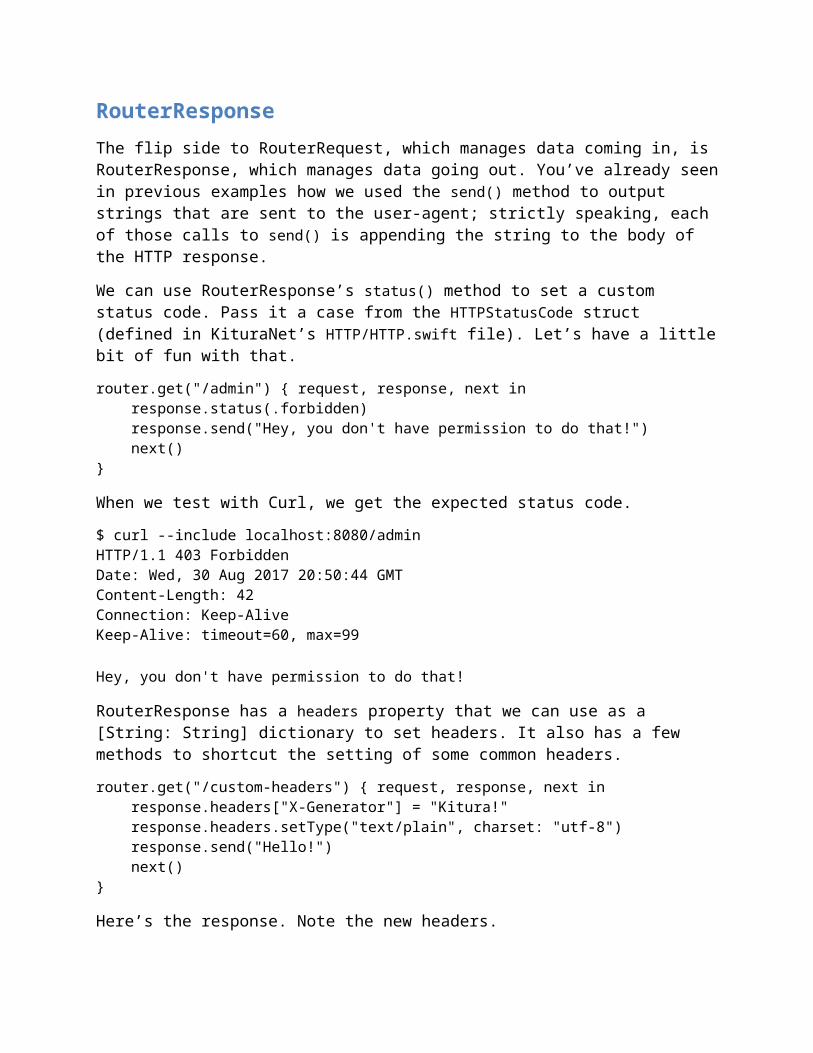
RouterResponseThe flip side to RouterRequest, which manages data coming in, is RouterResponse, which manages data going out. You’ve already seen in previous examples how we used the send() method to output strings that are sent to the user-agent; strictly speaking, each of those calls to send() is appending the string to the body of the HTTP response.
We can use RouterResponse’s status() method to set a custom status code. Pass it a case from the HTTPStatusCode struct (defined in KituraNet’s HTTP/HTTP.swift file). Let’s have a little bit of fun with that.
router.get("/admin") { request, response, next in response.status(.forbidden) response.send("Hey, you don't have permission to do that!") next()}
When we test with Curl, we get the expected status code.
$ curl --include localhost:8080/adminHTTP/1.1 403 ForbiddenDate: Wed, 30 Aug 2017 20:50:44 GMTContent-Length: 42Connection: Keep-AliveKeep-Alive: timeout=60, max=99
Hey, you don't have permission to do that!
RouterResponse has a headers property that we can use as a [String: String] dictionary to set headers. It also has a few methods to shortcut the setting of some common headers.
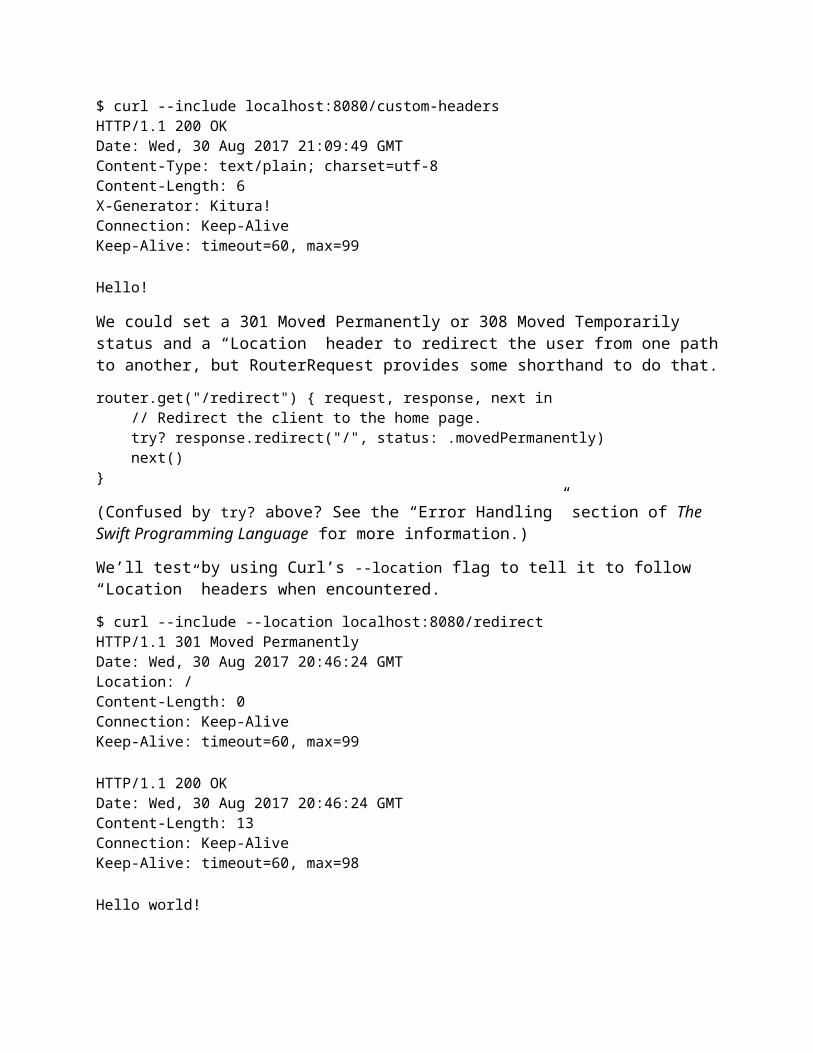
router.get("/custom-headers") { request, response, next in response.headers["X-Generator"] = "Kitura!" response.headers.setType("text/plain", charset: "utf-8")

response.send("Hello!") next()}
Here’s the response. Note the new headers.
$ curl --include localhost:8080/custom-headersHTTP/1.1 200 OKDate: Wed, 30 Aug 2017 21:09:49 GMTContent-Type: text/plain; charset=utf-8Content-Length: 6X-Generator: Kitura!Connection: Keep-AliveKeep-Alive: timeout=60, max=99
Hello!
We could set a 301 Moved Permanently or 308 Moved Temporarily status and a “Location” header to redirect the user from one path to another, but RouterRequest provides some shorthand to do that.
router.get("/redirect") { request, response, next in // Redirect the client to the home page. try? response.redirect("/", status: .movedPermanently) next()}
(Confused by try? above? See the “Error Handling” section of The Swift Programming Language for more information.)
We’ll test by using Curl’s --location flag to tell it to follow “Location” headers when encountered.
$ curl --include --location localhost:8080/redirectHTTP/1.1 301 Moved PermanentlyDate: Wed, 30 Aug 2017 20:46:24 GMTLocation: /Content-Length: 0Connection: Keep-AliveKeep-Alive: timeout=60, max=99
HTTP/1.1 200 OKDate: Wed, 30 Aug 2017 20:46:24 GMTContent-Length: 13Connection: Keep-AliveKeep-Alive: timeout=60, max=98
Hello world!
Really, though, the star of the show is RouterResponse’s send() method - or, should I say, methods. The one we’ve used in this book so far has had the following signature:
@discardableResult public func send(_ str: String) -> RouterResponse
(That’s right; this whole time, the method has been returning a reference to the RouterResponse object itself, for chaining purposes. We’ve been ignoring it thus far and will probably continue to do so in this book, but just know this basically means you can do something like response.send("foo").send("bar") if you wish.)
RouteResponse has many other send() methods, though. For example, if we wanted to send binary data to the server - say, an image generated by an image library - we can use this one:
@discardableResult public func send(data: Data) -> RouterResponse
Or we can send a file read from the disk:
@discardableResult public func send(fileName: String) throws -> RouterResponse
This book will not demonstrate these methods, but it might be handy to know they exist in the future.
For those of you interested in using Kitura to build a REST API server, you might be glad to know that RouterResponse has many methods for sending JSON responses, including the following two for sending a response currently in the form of a Foundation JSON object and a [String: Any] dictionary, respectively:
@discardableResult public func send(json: JSON) -> RouterResponse
@discardableResult public func send(json: [String: Any]) -> RouterResponse
A later chapter in this book will give a more complex example of sending JSON responses to the client, but let’s play with a simple one now.
router.get("/stock-data") { request, response, next in // Completely made up stock value data let stockData = ["AAPL": 120.44, "MSFT": 88.48, "IBM": 74.11, "DVMT": 227.44] response.send(json: stockData) next()}
And here’s the output:
$ curl --include localhost:8080/stock-dataHTTP/1.1 200 OKDate: Wed, 30 Aug 2017 21:23:12 GMTContent-Type: application/jsonContent-Length: 75Connection: Keep-AliveKeep-Alive: timeout=60, max=99

{ "MSFT" : 88.48, "DVMT" : 227.44, "IBM" : 74.11, "AAPL" : 120.44}
Note how Kitura automatically added a “Content-Type: application/json” header for us.
Bringing it TogetherLet’s make a route with a path of “/calc” that takes two query parameters, “a” and “b,” adds them together, and returns the response. Let’s have our handler respond accordingly in the case that one or both parameters are missing or could not be converted to numbers (in this case, Float objects).
If you’ve been doing all right following along so far, I challenge you to stop reading now and go ahead and try to implement this yourself before peeking at the code sample below. My code doesn’t use anything that hasn’t been covered in this book so far. This time I’m going to show you my code’s output when I test it with Curl first, and show you the code later.
$ curl --include localhost:8080/calcHTTP/1.1 400 Bad RequestDate: Wed, 30 Aug 2017 21:55:57 GMTContent-Length: 33Connection: Keep-AliveKeep-Alive: timeout=60, max=99
"a" and/or "b" parameter missing$ curl --include "localhost:8080/calc?a=7&b=kitura"HTTP/1.1 400 Bad RequestDate: Wed, 30 Aug 2017 21:56:18 GMTContent-Length: 57Connection: Keep-AliveKeep-Alive: timeout=60, max=99
"a" and/or "b" parameter could not be converted to Float$ curl --include "localhost:8080/calc?a=7&b=8"HTTP/1.1 200 OKDate: Wed, 30 Aug 2017 21:56:24 GMTContent-Length: 19Connection: Keep-AliveKeep-Alive: timeout=60, max=99
The result is 15.0$ curl --include "localhost:8080/calc?a=12.44&b=-88.2"HTTP/1.1 200 OKDate: Wed, 30 Aug 2017 21:56:42 GMTContent-Length: 21

Connection: Keep-AliveKeep-Alive: timeout=60, max=99
The result is -75.76
Okay, here’s my code. How does yours compare? (Of course, if yours is quite different, that doesn’t mean it’s wrong!)
router.get("/calc") { request, response, next in guard let aParam = request.queryParameters["a"], let bParam = request.queryParameters["b"] else { response.status(.badRequest) response.send("\"a\" and/or \"b\" parameter missing\n") Log.error("Parameter missing from client request") return } guard let aVal = Float(aParam), let bVal = Float(bParam) else { response.status(.badRequest) response.send("\"a\" and/or \"b\" parameter could not be converted to Float\n") Log.error("Parameter uncastable") return } let sum = aVal + bVal Log.info("Successful calculation: \(sum)") response.send("The result is \(sum)\n") next()}
If you’re an experienced web developer, you may be cringing at the use of query parameters. Can’t Kitura let us use a nice pretty path with no query parameters instead - maybe something like “/calc/12.44/-88.2”? Well, of course it can, and we’ll find out how when we examine Kitura’s Router object in the next chapter.
Chapter 3: RoutersWe’ve already used Kitura’s Router class quite a bit in this book, and you might be thinking that you’ve already got a pretty good idea of how it works. Well, if that’s what you think… you’re probably right. Nonetheless, there are still a few new tricks we can learn.
HTTP MethodsAs previously mentioned, routers have methods (in the Swift sense) for defining routes and handlers which correspond to various HTTP methods (also sometimes called HTTP verbs) available. In most cases, get() and post() are the only ones you’ll use, which obviously correspond to the GET and POST HTTP methods. But if you want to be really RESTy, there’s also put() and options() and lock() and a bunch more available to you. See the RouterHTTPVerbs_generated.swift file in the Kitura project for all of them; the code in

this file is so monotonous that, as the filename implies, it was actually generated by a script rather than written by hand. (The script itself is at Scripts/generate_router_verbs.sh in the Kitura project directory.) Use these methods to define routes and corresponding handlers that will only fire if a request using the corresponding HTTP method is made from the client. Let’s test that.
router.get("/get-only") { request, response, next in response.send("GET Success!\n") next()}
Let’s try accessing that route with both GET and POST requests.
$ curl localhost:8080/get-onlyGET Success!$ curl -d "" localhost:8080/get-onlyCannot POST /get-only.
And let’s try that again with one of the more unusual methods.
router.lock("/lock-only") { request, response, next in response.send("LOCK success!\n") next()}
Curl’s --request option will let us define any arbitrary HTTP method to send in the request, so let’s use that when we test.
$ curl --request LOCK localhost:8080/lock-onlyLOCK success!$ curl -d "" localhost:8080/lock-onlyCannot POST /lock-only.$ curl localhost:8080/lock-onlyCannot GET /lock-only.
Okay, so nothing too surprising there.
Aside from these methods, you may recall in an earlier example that we used all(). Setting a handler with this method will cause the handler to fire no matter what HTTP method was used to access the path. This bit of code may look a little familiar:
router.all("/request-info") { request, response, next in response.send("The request method was \(request.method.rawValue).\n")}
Let’s test it out.
$ curl localhost:8080/request-infoThe request method was GET.$ curl -d "" localhost:8080/request-infoThe request method was POST.
curl --request UNSUBSCRIBE localhost:8080/request-infoThe request method was UNSUBSCRIBE.
The request type still has to be one included in Kitura’s RouterMethod enum, however, so we can’t get too crazy.
$ curl --request BEANSANDRICE --include localhost:8080/request-infoHTTP/1.1 400 Bad RequestDate: Sun, 03 Sep 2017 03:20:36 GMTConnection: Close
If you enabled logging, you’ll also see “Failed to parse a request. Parsed fewer bytes than were passed to the HTTP parser” logged. Note that, despite the wording of the error, if you see it in the future, it may be because you’re using an incorrect HTTP method to make a request to your server. And remember, capitalization counts!
At any rate, I generally would not recommend using all() in most cases and instead use get(), post() and friends. If you’re using all(), then either you want the same thing to happen no matter what HTTP method was used to access a path, which is incorrect behavior speaking on a technical level and just generally silly, or you’ll have to implement a convoluted logic fork in your code along the lines of…
router.all("/some-path") { request, response, next in switch request.method { case .get: // Do something break case .post: // Do something else break default: // Respond with a 404 error break } next()}
But this sort of thing is unnecessary. Remember way back in the first chapter when I mentioned that paths can have more than one handler assigned to them? The same holds true no matter what HTTP method you’re telling that path to use. So the above can be replaced with the following much nicer code:
router.get("/some-path") { request, response, next in // Do something next()}
router.post("/some-path") { request, response, next in // Do something else next()
}
// Requests to "/some-path" with methods other than GET and POST will still// automatically result in a "404 Not Found" response.
Path ParametersSo far in this book, we have used static paths with our routes. However, dynamic paths are pretty easy to implement with Kitura using path parameters.
For example, consider a blog that uses a path like “blog/1” to show the first blog post, “blog/2” to show the second one, and so on. Now obviously it would be unwieldy to implement this in Kitura using static paths.
router.get("/post/1") { request, response, next in // Load and show post 1 next()}
router.get("/post/2") { request, response, next in // Load and show post 2 next()}
// …
Instead, we can use a path with a parameter. To do so, add a path segment with a name prefixed with a colon character. You can then find the value of the parameter used to access the path by looking it up by that name in the parameters property of the RouterRequest object passed to your handler; parameters is a simple [String: String] dictionary.
router.get("/post/:postId") { request, response, next in let postId = request.parameters["postId"]! response.send("Now showing post #\(postId)\n") // Load and show the post}
Let’s test.
$ curl localhost:8080/post/4Now showing post #4
Note that you can easily use more than one parameter in your paths, and they don’t have to be at the end of the path.
router.get("/:authorName/post/:postId") { request, response, next in let authorName = request.parameters["authorName"]! let postId = request.parameters["postId"]! response.send("Now showing post #\(postId) by \(authorName)\n")

// Load and show the post}
We test, and it works as expected.
$ curl localhost:8080/Nocturnal/post/4Now showing post #4 by Nocturnal
Okay, that’s pretty cool. But let’s go back and look at that simpler path parameter example one more time.
router.get("/post/:postId") { request, response, next in let postId = request.parameters["postId"]! response.send("Now showing post #\(postId)\n") // Load and show the post}
There’s a potential problem here in that the postId parameter can be anything. For example…
$ curl localhost:8080/post/helloNow showing post #hello
Okay, no sweat, right? If we want to make sure the post ID is a positive number, we can just do something like…
router.get("/post/:postId") { request, response, next in guard let postId = request.parameters["postId"], let numericPostId = UInt(postId) else { response.status(.notFound) response.send("Not a proper post ID!\n") return } response.send("Now showing post #\(numericPostId)\n") // Load and show the post}
And, yes, this works well enough.
$ curl localhost:8080/post/helloNot a proper post ID!
But there’s another way. We can use regular expressions to define that we want a path parameter to fit a certain format. So let’s do it that way instead. To implement a path parameter with a regular expression, name it with a colon as normal, but then follow the name with the regular expression pattern in parentheses. The pattern to match one or more digits is \d+, but we need to escape that backslash with another backslash. So let’s implement it this way.
router.get("/post/:postId(\\d+)") { request, response, next in let postId = request.parameters["postId"]! response.send("Now showing post #\(postId)\n")

// Load and show the post}
Now let’s test. You’ll see that trying a non-numeric path parameter now causes Kitura to return its standard 404 Not Found error; we didn’t have to write any extra code in our handler to make it happen.
$ curl localhost:8080/post/helloCannot GET /post/hello.$ curl localhost:8080/post/85Now showing post #85
Note that you don’t want to use the ^ and $ regular expression tokens in your pattern to signify the beginning and end of the path parameter value; they are effectively implicitly added by Kitura.
$ curl localhost:8080/post/3-bananasCannot GET /post/3-bananas.
Chapter 4: MiddlewareWhen it comes to web applications, middleware is code which provides functionality that router handlers can take advantage of, but which doesn’t necessarily output anything on its own like the router handlers do.
For example, I myself wrote a package called Kitura Language Negotiation which provides Kitura middleware that investigates various aspects of a client’s request and attempts to determine what human language (English, Spanish, French, etc.) the visitor wants to be served. A router handler on the site can then use KLN’s calculation to serve content to a user in their desired language. Another example, which we will examine more closely later in this book, is Kitura Session from IBM themselves, which manages and maintains data associated with particular users which persists between page requests.
Let’s write some simple middleware, then see how we would use it on a site.
Writing MiddlewareAn important thing to note when starting a new project which will contain only middleware and no router handlers itself is that, when you run swift package init, you want to use library for your --type option instead of executable. In other words, instead of running swift package init --type=executable as you would for new Kitura site, you use swift package init --type=library. This is because we are building a bit of code which can be used in other sites which will be actual executables, but we aren’t building anything that should be built as an executable itself. Go ahead and do that now; start a new library project in a directory called KituraFirefoxDetector.
To create Kitura middleware, we create an object which conforms to Kitura’s RouterMiddleware protocol. This protocol requires one function, with this signature:

func handle(request: RouterRequest, response: RouterResponse, next: @escaping () -> Void) throws
Wow. That looks pretty familiar, doesn’t it? Yep, just like with router handlers, our “handler” gets passed RouterRequest and RouterResponse objects, as well as a next function.
Our example here will detect if the user is using Firefox as a browser. One property on Kitura’s RouterRequest object that I didn’t mention previously is a userInfo property. This is a [String: Any] dictionary which is useful for storing data that we’ve calculated in a middleware handler so that it can be accessed by router handlers (or, theoretically, other middleware handlers, though of course those middleware handlers need to be executed after the handler which sets the data). So our middleware handler will set userInfo["usingFirefox"] to true if the user is using Firefox, and false otherwise.
Okay, now that we’ve set the table, let’s start writing code. Add Kitura as a dependency to your new project and resolve it. Open up Sources/KituraFirefoxDetector.swift, delete what SPM put there by default, and add the following.
import Kituraimport Foundation
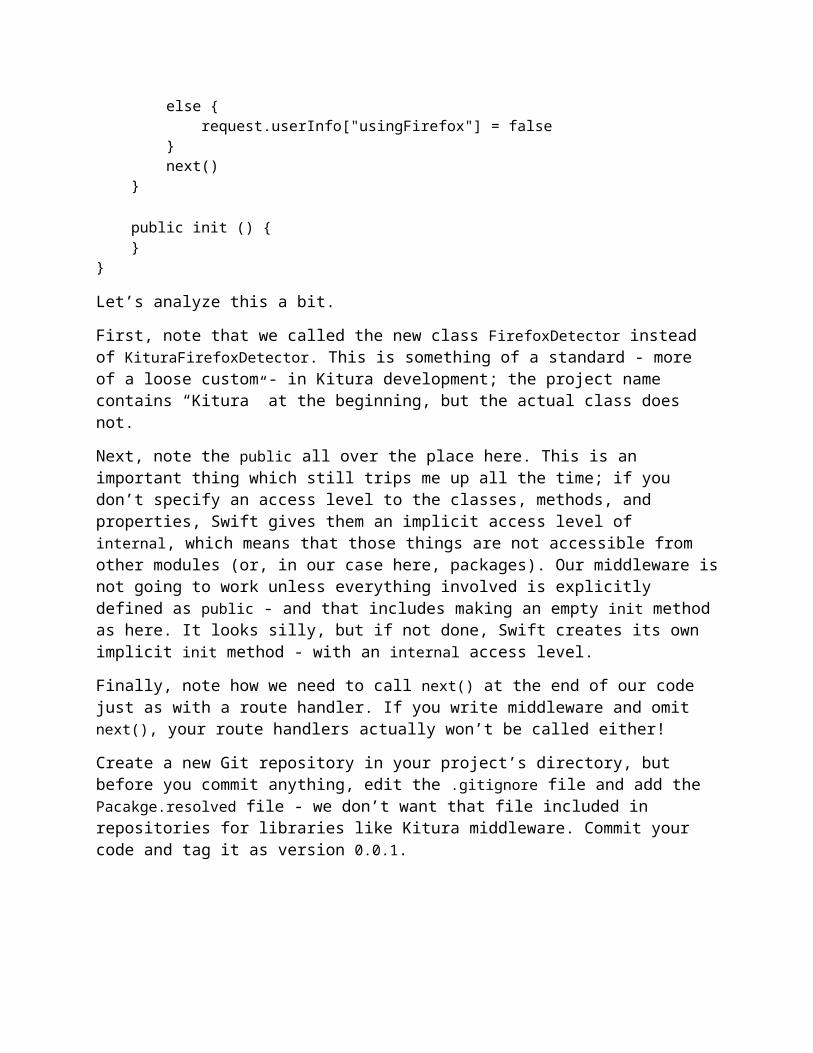
public class FirefoxDetector: RouterMiddleware { public func handle(request: RouterRequest, response: RouterResponse, next: @escaping () -> Void) throws { if let ua = request.headers["User-Agent"], ua.contains("Firefox") { request.userInfo["usingFirefox"] = true } else { request.userInfo["usingFirefox"] = false } next() }
public init () { }}
Let’s analyze this a bit.
First, note that we called the new class FirefoxDetector instead of KituraFirefoxDetector. This is something of a standard - more of a loose custom - in Kitura development; the project name contains “Kitura” at the beginning, but the actual class does not.
Next, note the public all over the place here. This is an important thing which still trips me up all the time; if you don’t specify an access level to the classes, methods, and properties, Swift gives them an implicit access level of internal, which means that those things are not accessible from other modules (or, in our case here, packages). Our middleware is not

going to work unless everything involved is explicitly defined as public - and that includes making an empty init method as here. It looks silly, but if not done, Swift creates its own implicit init method - with an internal access level.
Finally, note how we need to call next() at the end of our code just as with a route handler. If you write middleware and omit next(), your route handlers actually won’t be called either!
Create a new Git repository in your project’s directory, but before you commit anything, edit the .gitignore file and add the Pacakge.resolved file - we don’t want that file included in repositories for libraries like Kitura middleware. Commit your code and tag it as version 0.0.1.
Using MiddlewareNow create a new Kitura project and add KituraFirefoxDetector as a dependency. (Remember, you don’t need to push the project to GitHub or some other hosting service first; give it a URL comprised of “file://” followed by the absolute path to your KituraFirefoxDetector directory (including the initial slash) and it will work just fine.) Resolve the dependencies.
Okay, now that our new project has the new middleware package we’ve created, let’s actually use it. This is done by instantiating an object of the middleware’s class and then adding it to a path by way of our friend the Router object. We’ll then create a route handler which shows a different message depending on whether our middleware detected the user was using Firefox or not. Place the following in Sources/main.swift.
import Foundationimport Kituraimport KituraFirefoxDetector
let router = Router()
let detector = FirefoxDetector()
// Declare middleware for a path.router.get("/ffclub", middleware: detector)// Now add a handler.router.get("/ffclub") { request, response, next in guard let clubStatus = request.userInfo["usingFirefox"] as? Bool else { response.send("Oops! Our middleware didn't run.") next() return } if clubStatus { response.send("Congrats! You're in the club!") } else {

response.send("Hey! You need to use Firefox to be in the club.") } next()}
Kitura.addHTTPServer(onPort: 8080, with: router)Kitura.run()
(An aside: This is a simple and contrived example for the sake of teaching middleware usage. In reality, it is a very bad practice to alter your site’s content or restrict access based on what browser a visitor is using. Please have fun experimenting, but never do this sort of thing on a real site. Thank you.)
So we added the middleware to the path with router.get("/ffclub", middleware: detector). More on that later. The only other thing I’ll mention about this bit of code is a reminder that request.userInfo is a [String: Any] dictionary, which is why we need to cast values taken out of it to a useful type (as? Bool). The rest should be straightforward.
Build and run the site, and try visiting it with both Firefox and other clients. (If you don’t have Firefox, you can usually use the developer tools of other browsers to make them pretend to be Firefox.)
Okay, so that was interesting, but why did we bother using middleware to do this? We could have just put the same code that’s in the middleware handler into the standard route handler. Well, one of the benefits of middleware is that it is simple to reuse the code for different paths. Say we had a route with a path of /admin and we want to check that visitors to that path are using Firefox too.
router.get("/admin", middleware: detector)router.get("/admin") { request, response, next in // …}
And just like that, we will also have request.userInfo["usingFirefox"] available for this route handler too. (Note we don’t have to instantiate a new FirefoxDetector object; we can reuse the one we already created.)
As with route handlers, we can use different methods on the Router object corresponding to different HTTP methods to apply our middleware to paths, as in the following.
router.post("/admin", middleware: detector)
router.all("/admin", middleware: detector)
We can also have middleware fire for all requests to a site regardless of path by omitting the path parameter. The first line below will have our middleware fire for all HTTP GET requests, regardless of path, and the second will have the middleware fire for all requests, regardless of path or method.

router.get(middleware: detector)
router.all(middleware: detector)
But back to our project. What were to happen if we added another handler that looks like this?
router.get("/admin/subpath") { request, response, next in guard let clubStatus = request.userInfo["usingFirefox"] as? Bool else { response.send("Oops! Our middleware didn't run.") next() return } response.send("The middleware ran.") next()}
Well, we didn’t do router.get("/admin/subpath", middleware: detector), so if we try to access http://localhost:8080/admin/subpath, we’ll get the “Our middleware didn’t run” message, right? Go ahead and try it, and you’ll see that we actually see the “The middleware ran” message. What’s happening?
Well, there is one difference between how handler closures and how middleware are assigned to routes. By default, middleware will run for the path given, plus any and all subpaths. So when we did router.get("/admin", middleware: detector) above, we implicitly told Kitura to run that middleware for any subpaths of /admin too, of which /admin/subpath is an example. This can be quite handy at times. For example, say you have a section of your site that should only be accessible to site administrators. You can write some middleware which checks that the current user is logged in and has an administrator account and bind it to the /admin path. Now just have all the paths for that secret administrator-only section of your site have a path under /admin. There you go.
Should you wish to disable this subpath behavior and bind a middleware handler to a path without also allowing it to run on subpaths, you can add an allowPartialMatch parameter and explicitly set it to false. The following example will have our middleware fire when the /admin path is accessed regardless of HTTP method, but will not have it fire on any subpaths.
router.all("/admin", allowPartialMatch: false, middleware: detector)
SubroutersI won’t spend too much time on subrouters as they’re kind of an unusual feature which may not be widely useful, but you should at least know about them. The gist is that Kitura Router objects themselves conform to the RouterMiddleware protocol, so you can actually add a router as middleware to another router. What do you think the effect of the following is?

let router = Router()let subrouter = Router()
subrouter.get("/apple") { request, response, next in response.send("Hello world!") next()}
router.get("/banana", middleware: subrouter)
Kitura.addHTTPServer(onPort: 8080, with: router)Kitura.run()
The answer is that you’ll see the “Hello World!” message at the /banana/apple path. What good is that? For one use case, I again bring up my own Kitura Language Negotiation project. It’s possible to configure KLN so that the language the site should use is defined by a path prefix; for example, the paths /en/news, /es/news and /fr/news can show the news page in English, Spanish, and French, respectively. But developers using my middleware just develop a /news route and put it in a router, and KLN simplifies defining the /en, /es, and /fr paths in another router which then uses the developer’s router as a subrouter.
Confused by that? Hm. Okay. Don’t sweat it too much. Let’s move on.
Chapter 5: Database Connectivity with KueryPretty much any web application with more than a trivial level of complexity will be interfacing with a database. Consider a massive site like Wikipedia or a lowly WordPress blog; both are, when you get down to it, interfaces for a database of articles.
There are various types of databases, but for historical reasons, the type most commonly used by web applications is SQL databases. It is certainly possible to connect to others from within Swift, such as key-value stores like Redis and NoSQL databases like CouchDB, but primarily due to the historical precedent (as well as my own familiarity), I will stick with covering SQL database connectivity for this book.
IBM provides a library called Swift Kuery for communicating with SQL databases from within Swift. Kuery is not actually a Kitura dependency, so you can use Kuery from non-Kitura applications; also, there are other ways to connect to various SQL databases than using Kuery. However, since Kuery is part of the Swift@IBM ecosystem along with Kitura, you will typically see the two used together.
Selecting a Database SystemOfficially, Swift Kuery supports three types of SQL databases: MySQL, PostgreSQL, and SQLite. If you’re not familiar with these systems, indulge me a bit while I explain the differences.

MySQL is historically the most commonly used SQL database for web development, but PostgreSQL is generally regarded as being more advanced features-wise. Both of these databases work on a client-server model, meaning you must start a server application to host the database (this can be either on the same machine as your web application or a different one), and your web application then acts as a client that connects to the database server via an IP connection (or a Unix socket if you are running both on the same machine). Both of these databases hold the actual data spread across various not-safe-for-humans files in a certain directory on the server’s filesystem. SQLite does not use a client-server model; instead of connecting to a server to use SQLite, you just give your code a path to a database file that SQLite reads from and writes to locally. This single file that SQLite uses makes it much easier to back up or copy the database than with client-server database systems; just copy that single file as you would any other file, and things will work just fine. Copying the files behind a MySQL or PostgreSQL database to a different location might not work as expected; you instead have to create a “dump” file which serializes the binary data in the database to a plain text list of operations.
Given that SQLite is substantially simpler to install and use for the reasons above, I will be using SQLite in this chapter. (Previous versions of this chapter used MySQL; rather than destroy that information, I’ve moved it into one of the appendices for you to peruse if you prefer. However, if you have little to no previous experience with using databases in web development, I suggest you stick to using SQLite as outlined below.)
MySQL, PostgreSQL, and SQLite use slightly different dialects of SQL. (It wouldn’t be a standard if there weren’t differing implementations of it!) Fortunately, Kuery has an “abstraction layer” which makes it possible to interact with databases without actually directly writing SQL. That means that almost all of the code in this chapter will work no matter which SQL system you choose to use; only the code which is used to connect to or open the database will change. So if you start a project using SQLite and then later decide you want to switch to MySQL or PostgreSQL, in theory you’ll only have to change the parts of the code that initialize the connection to the database.
Building Projects with KueryStart a new project and add the Swift-Kuery-SQLite package to it via Swift Package Manager.
This is going to be the first project in the book which uses code which isn’t itself entirely written in Swift, so things are going to be a little bit tricky - you’re going to need to install some additional libraries on your system so that your code can communicate with SQLite databases.
On the Mac
On the Mac, your approach will depend on which package manager you decide to use.
If you’re using Homebrew, the package you’ll want to install is sqlite.
brew install sqlite

On MacPorts, you’ll want to install the sqlite3 port. Additionally, you’ll need to symlink some things into the places that Homebrew would put them, since Swift Kuery SQLite was written expecting you to have used Homebrew. The three commands below should do it.
sudo port install sqlite3mkdir -p /usr/local/opt/sqlite/includeln -s /opt/local/include/sqlite3.h /usr/local/opt/sqlite/include/
(If you get permissions errors running any of the above commands, remember you probably need to prefix them with sudo.)
On Linux
Assuming you’re on some variant of Ubuntu Linux (other versions of Linux are not officially supported by Apple as of this writing), you’ll want to install the sqlite3 and libsqlite3-dev packages.
apt-get install sqlite3 libsqlite3-dev
Importing DataLet’s get a database with some data we can work with in this and later chapters. For this purpose, we’re going to use the Chinook Database, a database populated with music and movie information originally sourced from an iTunes playlist. Clone the repository at https://github.com/lerocha/chinook-database.git. (Don’t make it a dependency of a Kitura project; just clone the repository by itself.)
The repository contains SQL dumps for various SQL systems in the ChinookDatabase/DataSources directory. Find the Chinook_Sqlite.sqlite file and copy it to a useful location. (We don’t want to use the Chinook_Sqlite.sql file; make sure you copy the one with an extension of .sqlite.) For the purposes of simplicity, I’m going to just copy it to my home folder, so the path I will use in the code samples below is ~/Chinook_Sqlite.sqlite, but you can put it anywhere else you’d like.
Back to Kitura (Finally!)Now let’s access that database file from our code. We are going to instantiate a SQLiteConnection object. Its simplest init() function takes a filename parameter which is a string to the file path where our database file resides. Here’s what it looks like on my end.
import Foundationimport Kituraimport SwiftKueryimport SwiftKuerySQLite
// Using NSString below is gross, but it lets us use the very handy// expandingTildeInPath property. Unfortunately no equivalent exists in the

// Swift standard library or elsewhere in Foundation.// Don't forget to change this path to where you copied the file on your system!let path = NSString(string: "~/Chinook_Sqlite.sqlite").expandingTildeInPath
let cxn = SQLiteConnection(filename: String(path))
cxn.connect() { error in if error == nil { print("Success opening database.") } else if let error = error { print("Error opening database: \(error.description)") }}
Adapt the above and build and run on your system. Did you see the success message? If not, confirm that the path to the database file is correct and that your user has read and write permissions to it and so on. You’re not going to be able to get much done until you get this part working, so don’t continue until you no longer get an error.
Selecting DataOkay, now let’s try doing some more interesting things. We’ll make a page which lists every album in the database. Put this in your main.swift, right underneath the connection testing code.
let router = Router()router.get("/albums") { request, response, next in cxn.execute("SELECT Title FROM Album ORDER BY Title ASC") { queryResult in if let rows = queryResult.asRows { for row in rows { let title = row["Title"] as! String response.send(title + "\n") } } } next()}
Kitura.addHTTPServer(onPort: 8080, with: router)Kitura.run()
Now build your project and watch what happens when you visit the “/albums” path.
> curl localhost:8080/albums ...And Justice For All20th Century Masters - The Millennium Collection: The Best of

ScorpionsA Copland Celebration, Vol. IA Matter of Life and DeathA Real Dead OneA Real Live One[continued…]
So you can probably see what happened here, but just in case, let’s go over that router handler bit by bit.
cxn.execute("SELECT Title FROM Album ORDER BY Title ASC") { queryResult in
The execute() method here takes a string containing an SQL query and an escaping closure that is executed after the query is made. The closure is passed a QueryResult enum which we name queryResult.
if let rows = queryResult.asRows {
asRows is a computed parameter on QueryResult objects which returns the results of a select query as an array of [String: Any?] dictionaries where the keys are the selected field names. Most of the examples in this book will use this parameter, but there are others; asError is one you’re probably going to want to get familiar with if your queries don’t seem to be working.
for row in rows { let title = row["Title"] as! String response.send(title + "\n") } } } next()}
The rest of this should be self-explanatory at this point.
Abstracting SQL QueriesNow if you’re familiar with other database libraries in various other frameworks and languages, you may have bristled when you saw above that we used an actual SQL query string to make our query. Isn’t there a better way than basically embedding ugly SQL (which is itself its own programming language, in a way) into our beautiful Swift projects? Yes, there is! We’ll learn how to use it next.
(Now, on the other hand, I’m sure there are people who are highly familiar with SQL and would rather just stick to SQL query strings rather than abstracting things away under Swift code. I don’t think this mindset is necessarily wrong, so if you’d prefer to just use Kuery this way, more power to you. This book will use the abstractions, however.)
The first thing we need to do is define the schemas of the tables for Kuery. This is done by subclassing the Table class. We add a property named tableName which is a string containing the table name. Other properties are instances of the Column class corresponding to columns on the table. Note that we only have to define the columns we intend to use, and we don’t have to give any information about the field types of the columns; it’s pretty simple.
To make things neat, I like to keep my schemas in a separate file from the rest of my code. Add a new file to your project called Schemas.swift. Add the following.
import SwiftKueryimport SwiftKuerySQLite
class Album: Table { let tableName = "Album" let Title = Column("Title")}
It’s that simple. Again, we’re only defining the columns we need to use in our code, and right now, we’re only using Title; as we go on and use other columns, we’ll add them to the schema.
Go back to main.swift and modify your router handler code to match the following.
router.get("/albums") { request, response, next in let albumSchema = Album() let titleQuery = Select(albumSchema.Title, from: albumSchema) .order(by: .ASC(albumSchema.Title)) cxn.execute(query: titleQuery) { queryResult in if let rows = queryResult.asRows { for row in rows { let title = row["Title"] as! String response.send(title + "\n") } } } next()}
Build and run your project and access the “/albums” path, and you should see the same result as before.
Can you see what we did here? First, we instantiated our new Album class so we could reference tables from it. Then we built a Select query. Select is a substruct of the Query struct, and as you can probably guess, there are Insert and Delete and Update ones too - but in due time. Let’s look at the signature of Select’s constructor.
public init(_ fields: Field..., from table: Table)
If you can’t recall what that ellipsis means, it means we can pass an arbitrary number of Field parameters for that first parameter. But the final parameter must be a Table.

Now this is pretty much the simplest example of how Kuery’s database API can be used without using direct SQL strings. But wanna know a not-so-surprising secret? Kuery is just taking all this API stuff and making SQL strings out of it anyway. As we continue with more elaborate examples, you may run into times when your queries aren’t working as expected, and in those cases you may find it useful to see what SQL Kuery is compiling for your query. The query instance, like our Select in the code above, has a method called build with a signature like this:
public func build(queryBuilder: QueryBuilder) throws -> String
Huh. What’s a QueryBuilder? Don’t worry about it too much; just know that we can easily get one by using the queryBuilder parameter on our connection object.
Go back to your router handler and try adding the following right before the call to cxn.execute().
print(try! titleQuery.build(queryBuilder: cxn.queryBuilder))
Now, if you build and run your project, you should see the following appear in the console when a request for the “/albums” path is made.
SELECT Album.Title FROM Album ORDER BY Album.Title ASC
Yep, that SQL looks about right to me.
Adding Where ParametersOkay, so right now, we have a router handler that returns a list of all albums. That’s a lot of albums. Let’s make things a little more practical by setting up a route where, for example, if the path “albums/t” is requested, we return all albums with titles that start with the letter T. In SQL this is done by using a “LIKE” condition on a “WHERE” clause, such as SELECT Title FROM Album WHERE Title LIKE "t%". We can do this kind of query with Kuery too by using a like() method on the field in the schema of the desired table. (If you’re like me, the code will make more sense than that sentence.)
However, this introduces a complication in that we are going to use an arbitrary string provided by a visitor as part of our SQL query. Just as with any other web-facing database-backed app, we need to be careful of SQL injection issues of the Bobby Tables variety. (If you are not familiar with the concept of SQL injection, please stop reading this right now and go research it before you ever build a database-powered web application, with Kitura or otherwise.)
Fortunately, Kuery has a pretty simple solution to help us avoid SQL injection. But since we sometimes need to learn how to do something wrong before we learn how to do something right, let’s do it wrong first.
router.get("/albums/:letter") { request, response, next in guard let letter = request.parameters["letter"] else { response.status(.notFound) return

}
let albumSchema = Album()
let titleQuery = Select(albumSchema.Title, from: albumSchema) .where(albumSchema.Title.like(letter + "%")) .order(by: .ASC(albumSchema.Title))
cxn.execute(query: titleQuery) { queryResult in if let rows = queryResult.asRows { for row in rows { let title = row["Title"] as! String response.send(title + "\n") } } } next()}
Do you see where we’re taking unsanitized user input and putting it into an SQL query - or, more precisely, some code that will be compiled into an SQL query? Yeah, that’s bad. So how can we avoid that? Well, first, in the query part, we instantiate a Parameter instance where the user input needs to go after it’s sanitized; we pass its init() method a name for the parameter. Then, in the execute() method on the connection object, we pass a new parameter that consists of a [String: Any?] dictionary of the unsanitized parameters keyed by the name we gave our parameter. Let’s go to the code.
router.get("/albums/:letter") { request, response, next in guard let letter = request.parameters["letter"] else { response.status(.notFound) return }
let albumSchema = Album()
let titleQuery = Select(albumSchema.Title, from: albumSchema) .where(albumSchema.Title.like(Parameter("searchLetter"))) .order(by: .ASC(albumSchema.Title))
let parameters: [String: Any?] = ["searchLetter": letter + "%"]
cxn.execute(query: titleQuery, parameters: parameters) { queryResult in if let rows = queryResult.asRows { for row in rows { let title = row["Title"] as! String response.send(title + "\n") } }

} next()}
There we go. Now Kuery will automatically sanitize the parameter values when the query is built, and Bobby Tables’ mother will have to go have fun elsewhere.
(Dear smart aleck: Yes, we could have also sanitized the user input by using a regular expression in our route path to make sure that the incoming value was a single letter, as in:
router.get("/albums/:letter([a-z])") { request, response, next in
And certainly, that’s not a bad thing to do in addition to the sanitized, parameterized query construction in order to be doubly safe. Your cleverness has been duly noted. However, this chapter is about Kuery, so we’re learning about Kuery today, okay? Okay. Now sit back down.)
Joining Across TablesLet’s do something a little tricker. Let’s make a route which returns a list of songs (tracks) for a given letter, but along with the track name, we want to include the corresponding artist (composer) and album names for each track. This is a little trickier than our earlier example because while the track and artist names are in the respective Name and Composer fields in the track table, the album name is in the Title field in the album table. However, there is an AlbumId field in the track table with a numeric ID which corresponds to an AlbumId field in the album table. We need to do a join to associate information in the track table with corresponding information in the album table in order to get all the information we need in a single query.
What would that query look like if we wrote it in SQL? Here’s what I came up with to find all songs with titles that begin with the letter “N”.
SELECT track.Name, track.Composer, album.Title FROM trackINNER JOIN album ON track.AlbumID = album.AlbumIDWHERE track.Name LIKE "k%"ORDER BY track.name ASC
Go ahead and give that query a try and check out the result.
So how would we replicate that in Kuery? Well, first note how we’re using other fields besides the Title field on the album table. In order to use those with Kuery, we need to update our schema definition for the album table, and we’ll go ahead and define a schema for the track table while we’re at it. Go back to Schemas.swift and update it to match the below.
import SwiftKueryimport SwiftKuerySQLite
class Album: Table { let tableName = "Album"

let AlbumId = Column("AlbumId") let Title = Column("Title")}
class Track: Table { let tableName = "Track" let Name = Column("Name") let AlbumId = Column("AlbumId") let Composer = Column("Composer")}
Okay, now let’s define our route and make our query. A lot of this should look familiar at this point. The big change is that we’re using the the .join() method to define our inner join, passing it the schema of the table we wish to join to (album in this case), and we follow that with an .on() method where we define how the join should be done. (Yes, SQL nerds, Kitura also has .leftJoin() and .naturalJoin() and others, but we’ll just be using.join (inner join) for now.) Also, for many tracks, the Composer value is actually null; in this case, we want to use a string of “(composer unknown)” when we get a null value in that field. In the code below we’ll use the nil-coalescing operator, ??, to do this; it basically says “if the value to the left of the ?? is nil, use the value to the right of it instead.“ See the “Nil-Coalescing Operator” section of the “Basic Operators” chapter of The Swift Programming Language for more information.
router.get("/songs/:letter([a-z])") { request, response, next in let letter = request.parameters["letter"]!
let albumSchema = Album() let trackSchema = Track()
let query = Select(trackSchema.Name, trackSchema.Composer, albumSchema.Title, from: trackSchema) .join(albumSchema).on(trackSchema.AlbumId == albumSchema.AlbumId) .where(trackSchema.Name.like(letter + "%")) .order(by: .ASC(trackSchema.Name))
cxn.execute(query: query) { queryResult in if let rows = queryResult.asRows { for row in rows { let trackName = row["Name"] as! String let composer = row["Composer"] as! String? ?? "(composer unknown)" let albumName = row["Title"] as! String response.send("\(trackName) by \(composer) from \(albumName)\n") } } }

next()}
Let’s test.
> curl localhost:8080/songs/kKarelia Suite, Op.11: 2. Ballade (Tempo Di Menuetto) by Jean Sibelius from Sibelius: FinlandiaKashmir by John Bonham from Physical Graffiti [Disc 1]Kayleigh by Kelly, Mosley, Rothery, Trewaves from Misplaced ChildhoodKeep It To Myself (Aka Keep It To Yourself) by Sonny Boy Williamson [I] from The Best Of Buddy Guy - The Millenium Collection[continued…]
Oh, that’s nice.
But wait a minute. Something about that code looks really, really strange.
.join(albumSchema).on(trackSchema.AlbumId == albumSchema.AlbumId)
Why does that work? Why is the code behind on() able to see the components of what we’re passing it and not just receiving whatever trackSchema.AlbumId == albumSchema.AlbumId evaluates to?
The answer is… well, I have no idea. Even digging into the code, I’m stumped. I guess it has something to do with overloading of the == operator, maybe? But I intend to come back and update this part of the book once I figure it out and/or someone is able to explain it to me.
(Hey, I never said I was some god-tier Swift ninja rockstar Chuck Norris or anything.)
This Is Just The Beginning!This chapter was quite lengthy, but it really only scratches the surface of what Kuery is capable of. We didn’t even bother trying to insert or update data in this chapter, and of course Kuery is capable of doing that as well. For more examples of what you can do with Kuery and how to do it, check out the front page of the Kuery GitHub repository.
Don’t delete the Kuery project you worked with in this chapter just yet; we’re going to work with it more in the next one.
Chapter 6: Publishing Data with JSON and XMLFor the most part, our examples so far in this book have just been outputting plain text; printing unformatted data out to the client basically just so we can see that our code has been working correctly. In reality, very few web applications output plain text; they usually output either web pages to be viewed by humans, or structured data to be consumed by other applications. The web pages part will come next chapter; since it’s somewhat simpler

to do and will tie in well with the database connectivity stuff we learned about in the last chapter, we’re going to cover the structured data part first.
What is structured data? It is data formatted in a predictable way. Consider the output of our track list route handler from the previous chapter.
Karelia Suite, Op.11: 2. Ballade (Tempo Di Menuetto) by Jean Sibelius from Sibelius: FinlandiaKashmir by John Bonham from Physical Graffiti [Disc 1]Kayleigh by Kelly, Mosley, Rothery, Trewaves from Misplaced ChildhoodKeep It To Myself (Aka Keep It To Yourself) by Sonny Boy Williamson [I] from The Best Of Buddy Guy - The Millenium Collection
Now strictly speaking, this data does have a structure:
[song name] by [composer] from [album title]
But nonetheless, it’s structured as an English sentence and not really intended to be easily “read” by a computer. For example, let’s say you wanted to write a smartphone app that would display your current music collection, and it got its data by requesting it from your Kitura-powered web site. If your data was formatted as above, you would have to write a custom parser in your smartphone app that would analyze each line returned by your Kitura app to determine the song name, composer, and album title for each line. “Oh, that’s easy!” you might say. “I just split the line on the words ‘by’ and ‘from,’ and I know the first part will be the song name, the second will be the composer, and the third will be the album title!” Okay, smarty pants; what do you do if you have a song named “Trial by Fire” on an album named “Miles from Milwaukee?”
Trial by Fire by John Doe from Miles from Milwaukee
Now before you go too far down the rabbit hole of how you would then tweak your algorithm to work with a case like that… let’s just use structured data instead. That will let us send the data from our Kitura site to our smartphone app with a predictable structure that the phone app will easily be able to parse.
When it comes to structured data, there are two formats in common use on the web: JavaScript Object Notation, or JSON, and Extensible Markup Language, or XML. XML is older and far more powerful, but JSON has come into common use recently since it is simpler, yet still good enough for many common cases. We’ll implement both, starting with the simpler JSON. Before starting the respective JSON or XML sections below, I suggest you do a little research on them if you’re not already familiar with them, just so you have a better idea of what you’ll be looking at.
Headings UpThere’s a common HTTP request header called “Accept” that lists content types that the client is expecting to see in the response. Similarly, there’s a “Content-Type” response header to specify the content type of the response. We’ll use the former to figure out whether our response should be in XML or JSON, and then the latter to clarify that that is

the type we are responding with. Should the client request a type in its “Accept” header that we can’t satisfy, we’ll send a “406 Not Acceptable” response code. Finally, our response will also include a “Vary” header that will tell proxy servers and the like that the response clients are going to get from our server will be different depending on the request’s “Accept” header, so they need to take that into consideration when caching. We touched on headers back in chapter 2, but we’re going to do quite a bit more with them here. (All of this is pedantic HTTP protocol stuff that many building testing/demo apps, and often even full production apps, don’t generally worry about, but the idea here is to learn about Kitura functionality in this regard, and if you pick up some good HTTP habits while we’re at it, all the better.)
To start, I want to create a new Track struct for compartmentalizing information on tracks that are plucked from the database. I want to add an initializer to simplify creating a Track from a row we’ve plucked out of the database - which, you may recall, will be a [String: Any?] dictionary. Create a Track.swift file in your project and add the following.
import Foundation
struct Track { var name: String var composer: String? var albumTitle: String enum TrackError: Error { case initFromRowFailed }
init(fromRow row: [String: Any?]) throws { // Ensure we have at least a name and album title guard let rowName = row["Name"] as? String, let rowTitle = row["Title"] as? String else { throw TrackError.initFromRowFailed } name = rowName albumTitle = rowTitle composer = row["Composer"] as? String? }}
This should look fairly straightforward. One thing to note is that composer is an optional string (String?) because, as you may recall, some tracks have NULL as their composer column in our database.
Okay, now back to our main project file. Let’s stub out some code first, and then we’ll look through it later. Open back up your Kuery test project and change the route callback for songs to match the below.
router.get("songs/:letter") { request, response, next in let letter = request.parameters["letter"]!
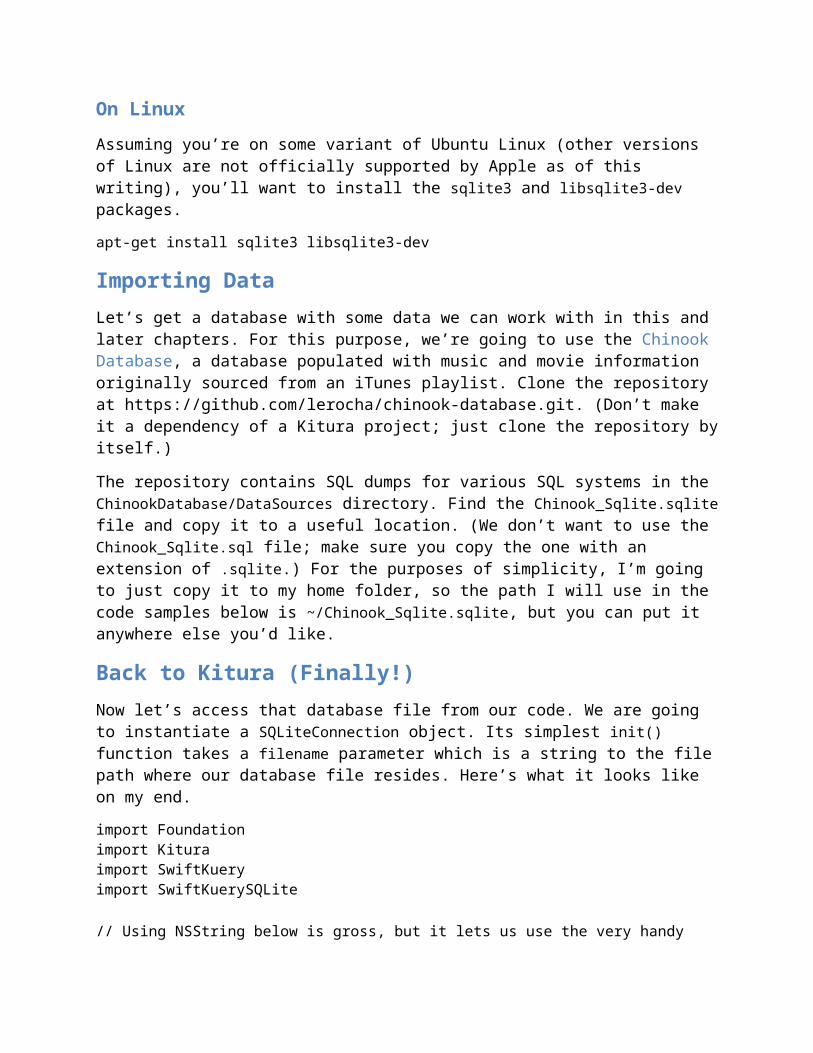
let albumSchema = albumTable() let trackSchema = trackTable()
let query = Select(trackSchema.Name, trackSchema.Composer, albumSchema.Title, from: trackSchema) .join(albumSchema).on(trackSchema.AlbumId == albumSchema.AlbumId) .where(trackSchema.Name.like(letter + "%")) .order(by: .ASC(trackSchema.Name))
cxn.execute(query: query) { queryResult in if let rows = queryResult.asRows { var tracks: [Track] = [] for row in rows { do { let track = try? Track(fromRow: row) tracks.append(track) } catch { Log.error("Failed to initialize a track from a row.") } }
response.headers["Vary"] = "Accept" let output: String switch request.accepts(types: ["text/json", "text/xml"]) { case "text/json"?: response.headers["Content-Type"] = "text/json" output = "Not yet implemented. :(" response.send(output) break case "text/xml"?: response.headers["Content-Type"] = "text/xml" output = "Not yet implemented. :(" response.send(output) break default: response.status(.notAcceptable) next() return } }
else if let queryError = queryResult.asError { let builtQuery = try! query.build(queryBuilder: cxn.queryBuilder) response.status(.internalServerError) response.send("Database error: \

(queryError.localizedDescription) - Query: \(builtQuery)") } } next()}
Okay, let’s look at all the fun stuff we’re doing with headers here.
response.headers["Vary"] = "Accept"
Here, and on other lines where we use response.headers, we are setting a response header. Pretty straightforward.
switch request.accepts(types: ["text/json", "text/xml"]) {
The .accepts methods on the RouterRequest object is really handy here. We throw it an array of types that we can support to its types parameter, and it will find the best match and return a String? with the matched value, or nil if no value matched.
What do I mean by a “best match?” Well, in the “Accept” header (and similar headers, like “Accept-Language”), the client can not only supply a list of types it wants to accept, but a sort of order in which it wants to accept them. For example, what follows is the “Accept” header that Firefox sends when it requests a web page.
Accept: text/html,application/xhtml+xml,application/xml;q=0.9,*/*;q=0.8
In this header, commas separate the types. So Firefox is asking for four different types:
text/htmlapplication/xhtml+xmlapplication/xml*/*
Note that that last type, */*, corresponds to “all other types.” In addition, you notice that Firefox sends a “q value” for the last two types; 0.9 for application/xml, and 0.8 for */*. These values specify the desire that Firefox wants to receive those types, and are inferred to be 1.0 when not explicitly stated (as for text/html and appication/xhtml+xml). So if our server could send a response in both text/html and application/xml, Firefox would prefer to receive the text/html one.
For the purposes of our callback here, which can send responses as both text/json and text/xml, we may get an Accept header which looks like:
Accept: text/xml,text/json;q=0.9
Which means that the client can accept a response as both the types that we can provide, but it would prefer to receive a text/xml one. Fortunately, if we pass such a header to request.accepts(), it’s smart enough to take all that stuff into account and send us back the best match.

Okay, let’s move on.
response.status(.notAcceptable)
response.status(.internalServerError)
On these lines, we are setting the status code of the HTTP response. There are dozens and dozens of possible status codes, and Kitura has the most common ones defined in its HTTPStatusCode enum for more readable code. As mentioned above, we send a “406 Not Acceptable” status when the client asks for a content type we cannot send them. In addition, we now send a “500 Internal Server Error” code if we can’t answer the request because an error occurred when attempting to query the database. (Note that we are also sending information about the query in the body of the HTTP response. This is useful for testing and debugging, but on a live server, sending this information may be a privacy and/or security vulnerability, so don’t do this on live servers!) If we don’t explicitly define a status code, as we haven’t in previous chapters in this book, Kitura automatically sends a “200 OK” code for us.
Let’s fire up our server and do some testing with Curl.
$ curl localhost:8080/songs/w -i -H "Accept: text/json"HTTP/1.1 200 OKDate: Thu, 23 Nov 2017 20:54:33 GMTContent-Type: text/jsonContent-Length: 24Vary: AcceptConnection: Keep-AliveKeep-Alive: timeout=60
Not yet implemented. :($ curl localhost:8080/songs/w -i -H "Accept: image/png"HTTP/1.1 406 Not AcceptableDate: Thu, 23 Nov 2017 20:55:13 GMTContent-Length: 0Vary: AcceptConnection: Keep-AliveKeep-Alive: timeout=60
$
Note the “Content-Type” and “Vary” headers, as well as the status codes.
Okay, now that we’re finally done crawling through the HTTP protocol weeds on our belly, let’s send some real responses.
JSONConverting data to (and from) JSON in Swift is so blissfully easy. First, I need to briefly introduce a protocol in Foundation called Codable. Data structures which are Codable are able to be converted by encoders and decoders into structured data formats, and

Foundation has an encoder and decoder for JSON built in. Codable itself is the union between two other protocols, Encodable and Decodable. In our case, we’re only worried about encoding to JSON, so we’ll just worry about Encodable.
First, we need to make our Track struct conform to Encodable. This is a piece of cake. Open up Track.swift and make the Track struct subclass Encodable.
struct Track: Encodable {
Now we go back to our route handler, and specifically the switch case for text/json. We need to instantiate a case of JSONEncoder and pass our tracks array to its encode() method. If all goes well, it will return a Data object, which we’ll convert to a String.
case "text/json"?: response.headers["Content-Type"] = "text/json" let encoder: JSONEncoder = JSONEncoder() do { let jsonData: Data = try encoder.encode(tracks) output = String(data: jsonData, encoding: .utf8)! response.send(output) } catch { response.status(.internalServerError) Log.error("Failed to JSON encode track list.") } break
Can it really be that easy? Build and test:
$ curl localhost:8080/songs/w -H "Accept: text/json"[{"name":"W.M.A.","albumTitle":"Vs.","composer":"Dave Abbruzzese\/Eddie Vedder\/Jeff Ament\/Mike McCready\/Stone Gossard"},{"name":"W\/Brasil (Chama O Síndico)","albumTitle":"Jorge Ben Jor 25 Anos"},{"name":"Wainting On A Friend","albumTitle":"No Security","composer":"Jagger\/Richards"},{"name":"Waiting","albumTitle":"Judas 0: B-Sides and Rarities","composer":"Billy Corgan"},{"name":"Waiting","albumTitle":"International Superhits","composer":"Billie Joe Armstrong -Words Green Day -Music"}, …]
I’ll clean up the formatting on the response a bit just for ease of reading below.
[ { "name": "W.M.A.", "albumTitle": "Vs.", "composer": "Dave Abbruzzese\/Eddie Vedder\/Jeff Ament\/Mike McCready\/Stone Gossard" }, {

"name": "W\/Brasil (Chama O Síndico)", "albumTitle": "Jorge Ben Jor 25 Anos" }, { "name": "Wainting On A Friend", "albumTitle": "No Security", "composer": "Jagger\/Richards" } …]
So just as our tracks variable in our Swift code was an array of Track objects, this JSON code represents an array (delineated by the square brackets) of objects (delineated by the curly braces) with properties for name, albumTitle, and, when available, composer properties.
Yes, it can be that easy. Wow.
XMLUnfortunately, publishing our data in XML is going to be a little more difficult. Part of the reason is that there is a lot more ambiguity on how to “correctly” encode something as XML versus as JSON.
For example, consider the following:
let arrayOfInts: [Int] = [1, 2, 3]
What is the correct way to encode arrayOfInts into JSON? If you asked this question to a hundred different coders familiar with JSON, I’ll bet you a nice dinner that every single one of them would give you this answer:
[1, 2, 3]
But how would you encode it as XML? Again, you could ask 100 coders familiar with XML this question, but this time around my bet is that you’d get several dozen different answers at least. They might or might not include the following:
<arrayOfInts> <int>1</int> <int>2</int> <int>3</int></arrayOfInts>
<array type="Int"> <value>1</value> <value>2</value> <value>3</value></array>
<collection type="array" name="arrayOfInts">

<item position="0" value="1" /> <item position="1" value="2" /> <item position="2" value="3" /></collection>
…And so on. And none of these are necessarily wrong.
So can we just throw the Encodable protocol on a class or struct and get it to generate XML as easily as we can with JSON? Well… kind of. You see, besides JSON, Foundation has built-in support to generate property lists, or “plists.” Property lists are files that serialize Foundation data types into a particular XML format, but that XML format, or schema, is rather verbose and not well optimized to a particular use case. Property lists originate in the NeXTSTEP operating system developed in the late ’80s, which was eventually purchased by Apple and molded into macOS, which itself served as the basis of Apple’s other operating systems. So outside of the Apple ecosystem, property lists are practically unheard of. So let’s just forget about them and implement our own schema, shall we? I think something that looks like this will work nicely:
<tracks> <track> <name>W.M.A.</name> <albumTitle>Vs.</albumTitle> <composer>Dave Abbruzzese/Eddie Vedder/Jeff Ament/Mike McCready/Stone Gossard</composer> </track> …</tracks>
So the root element of our XML document will be <tracks>, which will contain several child <track> elements. Each <track> element will itself contain <name>, <albumTitle> and <composer> elements. This is pretty straightforward, right?
So now that we know what we want our XML to look like, should we write an encoder like JSONEncoder so that we can encode our Encodable Track object? Well… we could. But writing encoders takes a lot of code, and truth be told, it’s best for cases where we need to encode things generically, without necessarily a strictly enforced structure. So if we had many different types of objects we needed to encode into XML, writing an encoder might be a good choice. But for our case, we’ll just do things more manually.
Let’s add a method to our Track struct to have it create a <track> element from itself, along with its corresponding child elements. Open up Track.swift and add in something like this.
func asXmlElement() -> XMLElement { let trackElement: XMLElement = XMLElement(name: "track") let nameElement: XMLElement = XMLElement(name: "name", stringValue: name) let composerElement: XMLElement = XMLElement(name: "composer", stringValue: composer) let albumTitleElement: XMLElement = XMLElement(name:
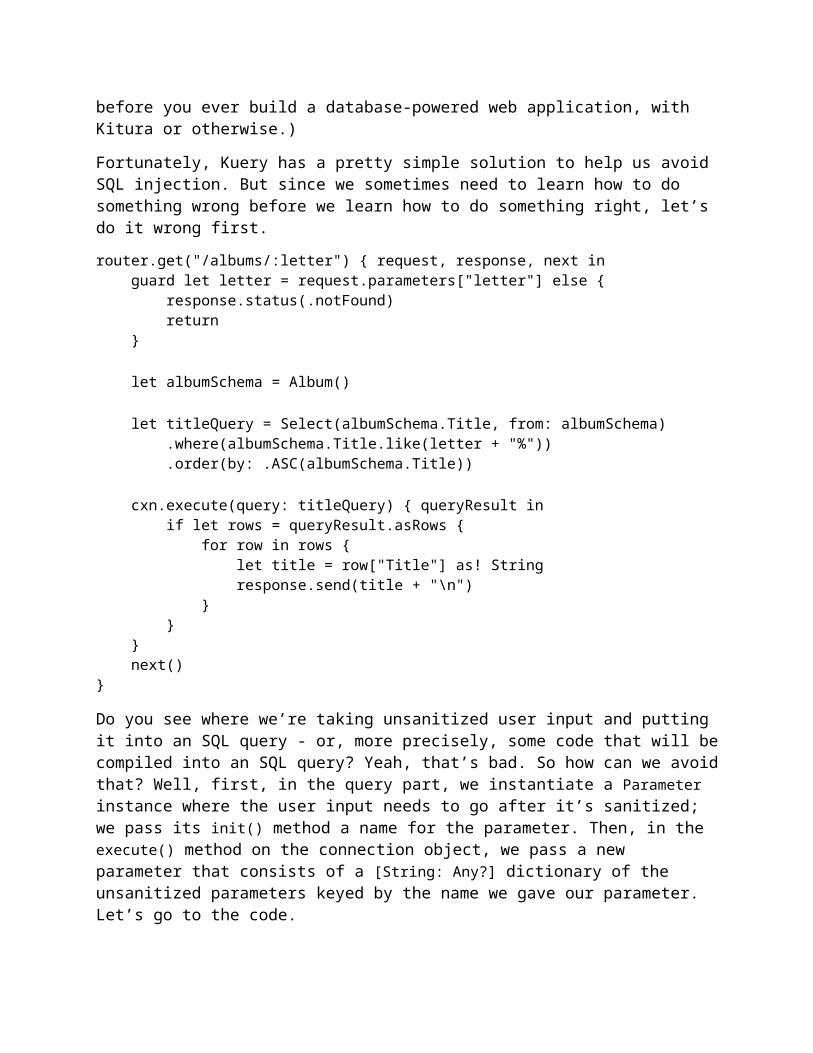
"albumTitle", stringValue: albumTitle) trackElement.addChild(nameElement) trackElement.addChild(composerElement) trackElement.addChild(albumTitleElement) return trackElement }
So we are working with a whole lot of XMLElement objects. When we initialize them, we can pass a name parameter corresponding to the tag name, and a stringValue corresponding to the value between the opening and closing tags.
Now let’s go back to our router callback and the switch case for an XML request.
case "text/xml"?: response.headers["Content-Type"] = "text/xml" let tracksElement: XMLElement = XMLElement(name: "tracks") for track in tracks { tracksElement.addChild(track.asXmlElement()) } let tracksDoc: XMLDocument = XMLDocument(rootElement: tracksElement) let xmlData: Data = tracksDoc.xmlData output = String(data: xmlData, encoding: .utf8)! break
So we are creating a <tracks> element, looping through our tracks array, and appending child <track> elements to it. Finally, we’re creating an XMLDocument and setting our <tracks> element as the root element. We get a Data object out of that, and after it’s converted to a String, it will have our XML. Let’s give it a try.
> curl localhost:8080/songs/k -i -H "Accept: text/xml"HTTP/1.1 200 OKDate: Wed, 29 Nov 2017 03:35:22 GMTContent-Type: text/xmlContent-Length: 3496Vary: AcceptConnection: Keep-AliveKeep-Alive: timeout=60
<tracks><track><name>Karelia Suite, Op.11: 2. Ballade (Tempo Di Menuetto)</name><composer>Jean Sibelius</composer><albumTitle>Sibelius: Finlandia</albumTitle></track><track><name>Kashmir</name><composer>John Bonham</composer><albumTitle>Physical Graffiti [Disc 1]</albumTitle></track><track><name>Kayleigh</name><composer>Kelly, Mosley, Rothery, Trewaves</composer><albumTitle>Misplaced Childhood</albumTitle></track><track><name>Keep It To Myself (Aka Keep It To Yourself)</name><composer>Sonny Boy Williamson [I]</composer><albumTitle>The Best Of Buddy Guy - The Millenium Collection</albumTitle></track>

Again, let’s clean that output up and see what we have.
<tracks> <track> <name>Karelia Suite, Op.11: 2. Ballade (Tempo Di Menuetto)</name> <composer>Jean Sibelius</composer> <albumTitle>Sibelius: Finlandia</albumTitle> </track> <track> <name>Kashmir</name> <composer>John Bonham</composer> <albumTitle>Physical Graffiti [Disc 1]</albumTitle> </track> … </tracks>
Yep, that looks about right.
We were adding to lots of code to our router callback in fits and starts in this chapter, so just in case you got lost, here’s what ours should look like - or at least reasonably similar to - in the end.
router.get("songs/:letter") { request, response, next in let letter = request.parameters["letter"]!
let albumSchema = albumTable() let trackSchema = trackTable()
let query = Select(trackSchema.Name, trackSchema.Composer, albumSchema.Title, from: trackSchema) .join(albumSchema).on(trackSchema.AlbumId == albumSchema.AlbumId) .where(trackSchema.Name.like(letter + "%")) .order(by: .ASC(trackSchema.Name))
cxn.execute(query: query) { queryResult in if let rows = queryResult.asRows { var tracks: [Track] = [] for row in rows { do { let track = try? Track(fromRow: row) tracks.append(track) } catch { Log.error("Failed to initialize a track from a row.") } }

response.headers["Vary"] = "Accept" let output: String switch request.accepts(types: ["text/json", "text/xml"]) { case "text/json"?: response.headers["Content-Type"] = "text/json" let encoder: JSONEncoder = JSONEncoder() do { let jsonData: Data = try encoder.encode(tracks) output = String(data: jsonData, encoding: .utf8)! response.send(output) } catch { response.status(.internalServerError) Log.error("Failed to JSON encode track list.") } break case "text/xml"?: response.headers["Content-Type"] = "text/xml" let tracksElement: XMLElement = XMLElement(name: "tracks") for track in tracks { tracksElement.addChild(track.asXmlElement()) } let tracksDoc: XMLDocument = XMLDocument(rootElement: tracksElement) let xmlData: Data = tracksDoc.xmlData output = String(data: xmlData, encoding: .utf8)! response.send(output) break default: response.status(.notAcceptable) next() return } }
else if let queryError = queryResult.asError { let builtQuery = try! query.build(queryBuilder: cxn.queryBuilder) response.status(.internalServerError) response.send("Database error: \(queryError.localizedDescription) - Query: \(builtQuery)") } } next()}

Chapter 7: TemplatingNotice: The Gitbook version of this book has many formatting errors on this page. It appears that the system they are using is actually trying to parse some of the template syntax in inline code samples. For now, if you’re trying to read this online, try reading this chapter on GitHub instead.
Okay, so we know how to tell Kitura to output plain text, and we know how to tell Kitura to output JSON and XML. What about good ol’ classic web pages made with HTML?
Well, since HTML pages are based in plain text, we could do some silly things like…
response.send("<!DOCTYPE html><html><head><title>My awesome web page!</title></head><body><p>…")
But Kitura Template Engine gives us a better way.
Kitura Template Engine and StencilA templating engine allows us to build web pages using templates, which are basically like HTML pages with “holes” in them where data from our web application can be plugged into. Here’s a (simplified) example of a template that we’ll be using later in this chapter. Can you see what the output of this is likely to be?
<table> <thead> <tr> <th>Title</th> <th>Artist</th> <th>Album</th> </tr> </thead> <tbody> {% for track in tracks %} <tr> <td>{{ track.name }}</td> <td>{{ track.composer|default:"(unknown)" }}</td> <td>{{ track.album }}</td> </tr> {% endfor %} </tbody></table>
Just as the Swift Kuery project was a protocol upon which implementations like Swift-Kuery-MySQL and Swift-Kuery-PostgreSQL could be implemented, the Kitura Template Engine project is a protocol upon which specific templating engines could be implemented. As of this writing, the IBM@Swift project has three implementations available; Mustache, Stencil, and Markdown. We’ll ignore the Markdown implementation as it’s not a complete templating engine in my opinion, and Stencil seems to be more widely used than Mustache in the Swift ecosystem, so we’ll work with the Stencil implementation here.

Stencil is a templating engine inspired by the one provided for Django, a popular web framework for the Python language. It has a pretty good balance of simplicity and advanced features.
For this chapter, we’re going to continue to use the project we used for the previous two chapters. Go ahead and crack open its Package.swift file and add Kitura-StencilTemplateEngine to your project.
Getting StartedUnfortunately, Kitura-TemplateEngine is severely under-documented at the moment. But that’s part of the reason this book exists.
For this chapter, we’ll continue to tinker with our Kuery project. First, we’ll create our template file. Create a new directory at the top level of your project and name it “Views” (with a capital V). Inside that, create a new file, name it hello.stencil, and put the following in there.
<!doctype html><html> <head> <title>Hello!</title> </head> <body> <p> Hello, {{ name }}! </p> </body></html>
Now go into main.swift and add the following to your list of imports:
import KituraStencil
Right after you initialize router, add:
router.setDefault(templateEngine: StencilTemplateEngine())
Finally, let’s create a new route handler.
router.get("/hello/:name") { request, response, next inresponse.headers["Content-Type"] = "text/html; charset=utf-8" let name = request.parameters["name"] as Any try response.render("hello", context: ["name": name]) next()}
Now visit “/hello/(your name)” in your browser (so, “/hello/Nocturnal” in my case), and you should see that the page now says “Hello, (your name)!”

Okay, let’s look at what we built here. Let’s start with the hello.stencil file. You probably recognize it as a straightforward HTML file, except for this part:
Hello, {{ name }}!
So this is special Stencil mark-up. Namely, the double-curly-braces, {{ }}, specify that the part in between the pairs of braces will be a variable name, and we want Stencil to insert the value of the named variable into the template at that spot. And the name of that variable is name. We’ll get back to Stencil variables in a bit.
Back in main.swift, we added:
router.setDefault(templateEngine: StencilTemplateEngine())
This basically sets up our instance of Router that when we call its render() method later, it should use an instance of StencilTemplateEngine to render the template. Don’t worry about that too much.
Now let’s look at our new route handler, specifically the last two lines.
let name = request.parameters["name"] as Any try response.render("hello", context: ["name": name])
So the render() method here takes two parameters. The first is a reference to the template we want to be used; in this simplest case, it’s the same as the filename of the template we created earlier (hello.stencil), minus the extension. The second parameter is a [String: Any] dictionary. That’s why we cast name as an Any before we put it in the dictionary, even though it’s really a String?. Other types we can use in this dictionary include other scalar types such as Int as well as collection types such as Array or Dictionary. We’ll see more examples of this later.
FiltersStencil allows variables to have “filters” applied to them. There are a number of filters included with Stencil, as well as the ability to implement your own. I’ll show you how they work by showing you how to use default, the most useful filter.
First, go back to your route handler we created previously and change the route path as follows:
router.get("/hello/:name?") { request, response, next in
Do you see the difference? There’s a question mark after the :name. That means that the name parameter is optional in this path, and that the route handler will still fire even if that parameter isn’t included in the given path; in other words, the handler will fire both for “/hello/(your name)” and simply “/hello”.
So rebuild your project and try accessing just the “/hello” path. You should see a page which awkwardly says “Hello, !” You can probably guessed what happened; since there was

no name parameter, the String? that Stencil eventually got handed for its name variable had a nil value, so it just rendered nothing in its place.
To fix this, we’ll go back to hello.stencil and tell it to use the default filter. We tell Stencil to apply a filter to a variable by putting a pipe followed by a filter name right after the variable name. In this case we also need to pass in a default value. That default value will be used when the filtered variable is nil. Let’s use “World” as our default value. So go back to hello.stencil and modify the line with the variable to match the following.
Hello, {{ name|default: "World" }}!
Now switch back to your browser and reload the page, and it will now show “Hello, World!” for the “/hello” path, but still properly drop in your name if you visit “/hello/(your name)”.
BlocksNext, let’s look at Blocks, a method by which we can reduce replication in our Stencil templates. Imagine that your web site will have a largely consistent design from page to page, but the title and body of the page will change from page to page. Well, just as we can fill in parts of a page with variables, we can also fill in parts of a page with other parts of a page using Blocks.
An example should clarify things here. Inside that Views directory you created earlier, create a file named layout.stencil and fill it in as follows.
<!DOCTYPE html><html> <head> <title>My Music Collection: {% block pageTitle %}Oops - no title!{% endblock %}</title> </head> <body> {% block pageContent %}Oops - no content!{% endBlock %} </body></html>
Now go back to hello.stencil and let’s change things up a bit.
{% extends "layout.stencil" %}
{% block pageTitle %}Hello!{% endblock %}
{% block pageContent %}<p> Hello, {{ name|default:"World" }}!</p>{% endblock %}

Build and run. (Note we didn’t make any changes to the Swift code here; just the templates.) When visiting the “/hello” and “/hello/(your name)” routes, you should see that the output is pretty much the same as it was before. So what changed under the hood?
Well, in layout.stencil, we defined two blocks named pageTitle and pageContent. A block begins with {% block blockName %} and ends with {% endblock %}. Inside each block, we gave a little bit of placeholder content (the “Oops” messages), but that content will only be visible if those blocks aren’t given new content by a child template.
hello.stencil became such a child template when we added the {% extends "layout.stencil" %} directive at the top. Stencil will now pull in and render layout.stencil, but will override the blocks therein with blocks we define in this file. We then go on to define pageTitle and pageContent blocks which get dropped into place of the respective blocks in the parent template.
How is this any better than what we initially had? Because it reduces duplication. Let’s say that in addition to our “/hello” route, we also had a “/goodbye” route which worked similarly. We could then create a goodbye.stencil template that looks like this:
{% extends "layout.stencil" %}
{% block pageTitle %}Goodbye!{% endblock %}
{% block pageContent %}<p> Goodbye, {{ name|default:"Everyone" }}!</p>{% endblock %}
…And maybe we also had “/good-afternoon” and “/happy-birthday” routes, with corresponding templates. Now we decide that the page looks too plain, so we want to add a CSS file to our pages. We can simply do it by editing layout.stencil:
<!doctype html><html> <head> <link rel="stylesheet" type="text/css" href="/styles.css" /> <title>My Music Collection: {% block pageTitle %}Oops - no title!{% endblock %}</title> </head> […]
And that’s it - the changes will be reflected across every route on our site that uses that parent template. On the other hand, if we still had entirely separate templates for each separate route, we would have to edit every template file to add our stylesheet to each one.

Sanitation and SanityIn case you missed it, this book contains a section at the beginning warning that many of the examples in this book contain security issues which are not fixed due to simplicity’s sake. Well, let’s address that a bit now.
The page for the “/hello” route in its current state has a cross-site scripting (XSS) vulnerability. It takes a value directly from the request URL and prints it back to the page. That means that the user could craft a naughty URL which contains some JavaScript code which then gets executed by a user’s browser.
Try this out by going to “/hello/%3Cscript%3Ealert(‘oh%20no’);%3C%2Fscript%3E”. That last part is the URL-encoded equivalent of <script>alert('oh no');</script>. The resultant HTML code will contain:
<p> Hello, <script>alert('oh no');</script>!</p>
So after visiting this URL, your browser will execute the script in the <script> tags and show an alert box with the text “oh no” in it. (Well, maybe. The current version of Safari actually detects what is going on and refuses to execute the script. Things still work in the current version of Firefox, however.) Now the code in this particular example is perfectly benign, but if this example works, then more malicious ones will work, too.
This bugs me, and I’ve raised an issue to propose a fix to make Kitura Template Engine more secure by default. In the meantime, let’s do a little tweaking to fix this problem. Create a new file in your project and name it String+webSanitize.swift, and put in the following.
extension String { func webSanitize() -> String { let entities = [ ("&", "&"), ("<", "<"), (">", ">"), ("\"", """), ("'", "'"), ] var string = self for (from, to) in entities { string = string.replacingOccurrences(of: from, with: to) } return string }}
This is an extension - a way to add methods to classes, in this case the String class, without fully subclassing them. Subclassing is not possible in many cases due to access restriction levels (see the Access Control section in The Swift Programming Language for more on
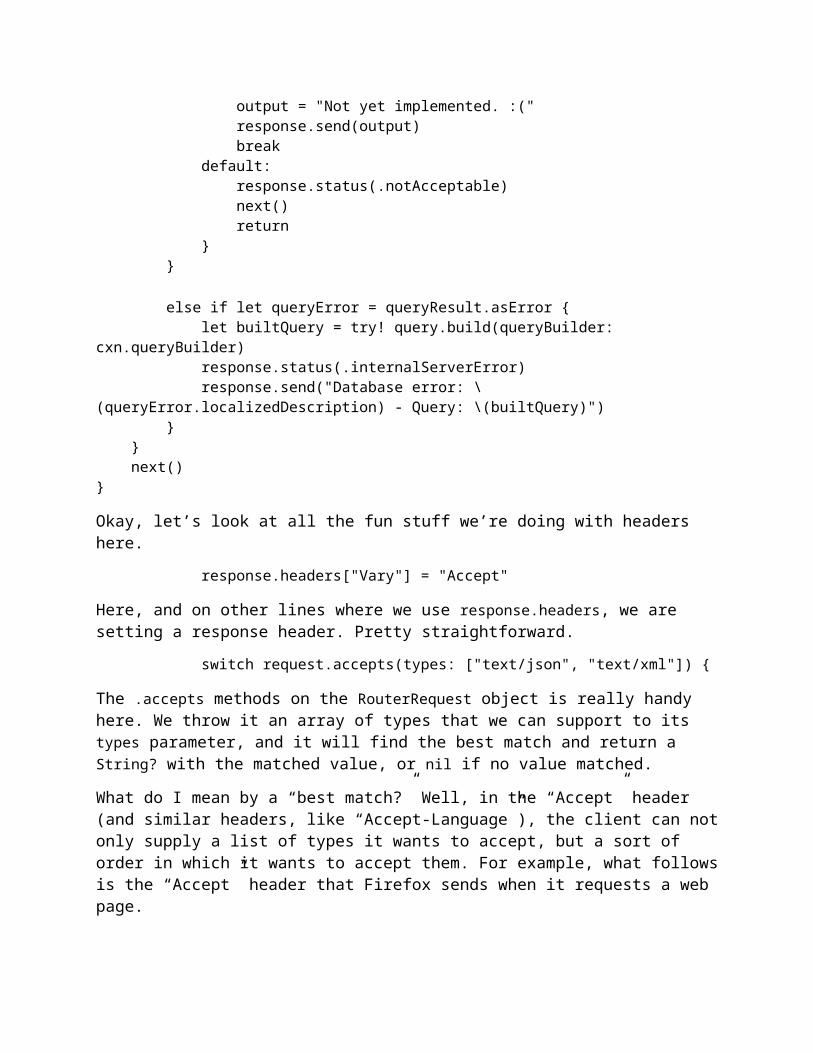
that), and in other cases it may be possible but still undesirable as code you want to interact with (in this case, Kitura) will still expect to see things using the base class. The filename of String+webSanitize.swift matches the “standard” (such as it is) pattern for Swift code files that have extensions in them; namely, BaseClassName+AddedFunctionality.swift.
At any rate, let’s tweak our route handler to use a sanitized string.
router.get("/hello/:name?") { request, response, next in response.headers["Content-Type"] = "text/html; charset=utf-8" let name = request.parameters["name"] let context: [String: Any] = ["name": name?.webSanitize() as Any] try response.render("hello", context: context) next()}
And now try loading the page with the naughty path again, “/hello/%3Cscript%3Ealert(‘oh%20no’);%3C%2Fscript%3E”. Note that you won’t see the alert box anymore, and the page markup will have the following:
<p> Hello, <script>alert('oh no');</script>!</p>
Ah, much better. All right, I think you get the idea of how Stencil works. Let’s move on to put it to practical use in our music database app.
The Song List in HTMLCheck back to the “/songs/:letter” route handler in your Kuery project. Right now it outputs JSON or XML responses as requested. We’re going to tweak it so it can output an HTML page as well.
Let’s start by creating a template. Add a songs.stencil file and put in the following.
{% extends "layout.stencil" %}
{% block pageTitle %}Songs that start with {{ letter }}{% endblock %}
{% block pageContent %}<h2>These are songs in my collection that start with the letter {{ letter }}.</h2><table> <thead> <tr> <th>Title</th> <th>Artist</th> <th>Album</th> </tr> </thead> <tbody>

{% for track in tracks %} <tr> <td>{{ track.name }}</td> <td>{{ track.composer|default:"(unknown)" }}</td> <td>{{ track.album }}</td> </tr> {% empty %} <tr> <td colspan="3"> There are no songs that begin with {{ letter }}. </td> </tr> {% endfor %} </tbody></table>{% endblock %}
Oh, hey, new syntax! Yes, we can use for loops in Stencil templates to iterate through arrays; it works pretty much as expected. But there’s also that {% empty %} bit. That part will be shown if the array we’re trying to iterate over has no elements. More on that later.
So that’s the template part. Let’s go back to our Swift code and add the logic to render the template. I’ll just include the relevant part of the switch block.
switch request.accepts(types: ["text/json", "text/xml", "text/html"]) { case "text/json"?: [same as before…] case "text/xml"?: [same as before…] case "text/html"?: response.headers["Content-Type"] = "text/html; charset=utf-8" var sanitized: [[String: String?]] = [] for track in tracks { sanitized.append([ "name": track.name.webSanitize(), "composer": track.composer?.webSanitize(), "album": track.albumTitle.webSanitize() ]) } let context = ["letter": letter as Any, "tracks": sanitized as Any] try! response.render("songs", context: context) default: [same as before…] }}
Note that we added “text/html” to the array we send to request.accepts(). Also note that we’re using our new webSanitize() method on the values we want to display.
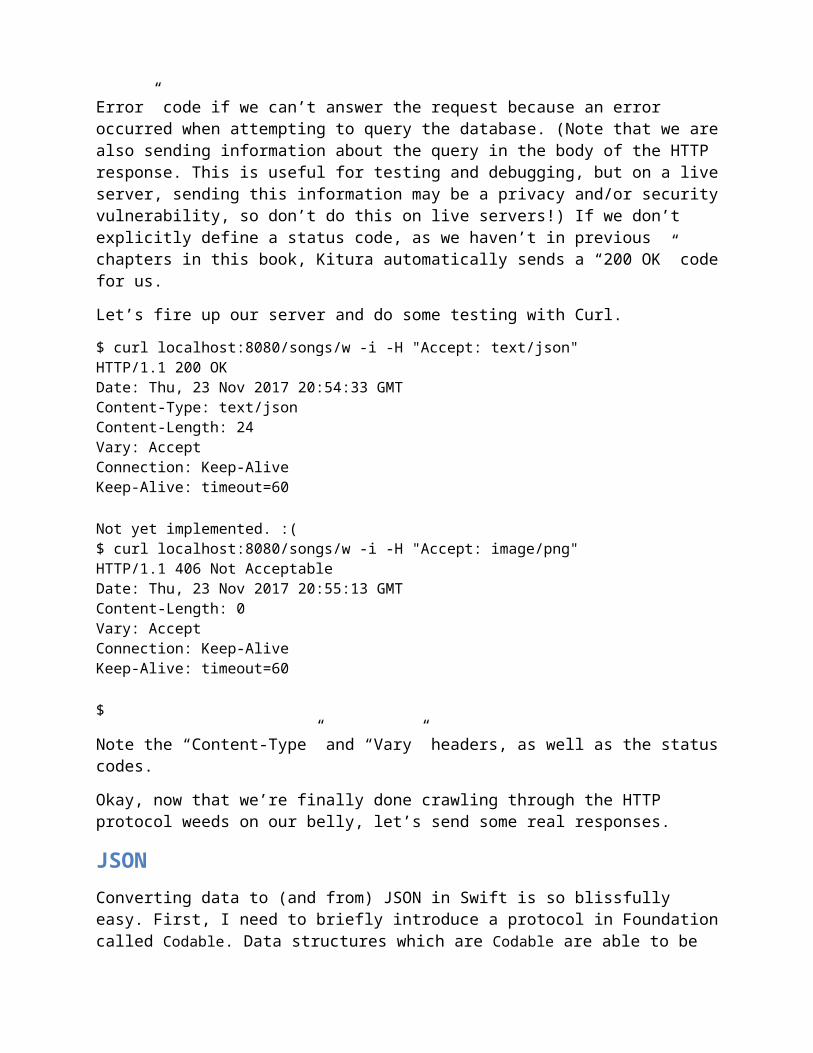
(Strictly speaking, we should do this for the XML output as well, since what this method encodes are actually reserved characters for the XML specification, but I’ll leave that as an exercise for the reader.)
Now go back to your web browser and request /songs/T (or any other letter). You should see something like the image below.
Web browser display of our new song list template
Uh oh. The default filter doesn’t seem to be working for the tracks which have a nil composer value. Yes, as I write this, the base Stencil project has a bug… but our code is correct. (Feel free to implement a workaround for this if you wish; I leave that as an exercise for the reader as well. And yes, “exercises for the reader” are often “lazinesses for the author” in thin disguise.)
What about that {% empty %} part in our template? Well, the Chinook database actually has songs with titles that start with every letter in the alphabet, so even if you go to “/songs/X” or “/songs/Z” you’ll still get a table full of songs. But we can do tricky things to see how the {% empty %} bit would work here. Try going to “/songs/-” (that’s a hyphen) and see what happens; since there are no song titles that begin with a hyphen, you’ll see the “There are no songs that begin with -.” message where the table rows were before. So that works!

Chapter 8: Form FormalitiesIn the previous chapter, we learned how to have Kitura display standard web pages via its templating system. In this chapter, we’ll use that knowledge to show some pages with forms on them, then demonstrate how to use Kitura to accept and act upon data from a form after the user submits it.
Web Forms: A ReviewBefore we start looking at the Kitura side of things, let’s do a quick review of how forms work in browsers. (But if you’re already pretty well informed on this stuff and find yourself getting bored, feel free to skip ahead to the next section.)
The HTML <form> tag has an action attribute which contains the address that the browser will contact when the form is submitted. It also has an attribute called method which can have a value of either get or post.
If method is set to get, then when the form is submitted, the browser will encode the names and values of the form’s fields and append them to the end of the address in the action attribute. It will then make an HTTP GET request to that address, and the request will have an empty body.
For example, given the following HTML:
<form method="get" action="/foo"> <label>Search for: <input type="text" name="searchQuery" /></label><br /> Media types:<br /> <label><input type="checkbox" name="mediaType" value="text" />Text</label><br /> <label><input type="checkbox" name="mediaType" value="audio" />Audio</label><br /> <label><input type="checkbox" name="mediaType" value="video" />Video</label><br /> <input type="submit" /></form>
The browser will create a form which looks something like this.
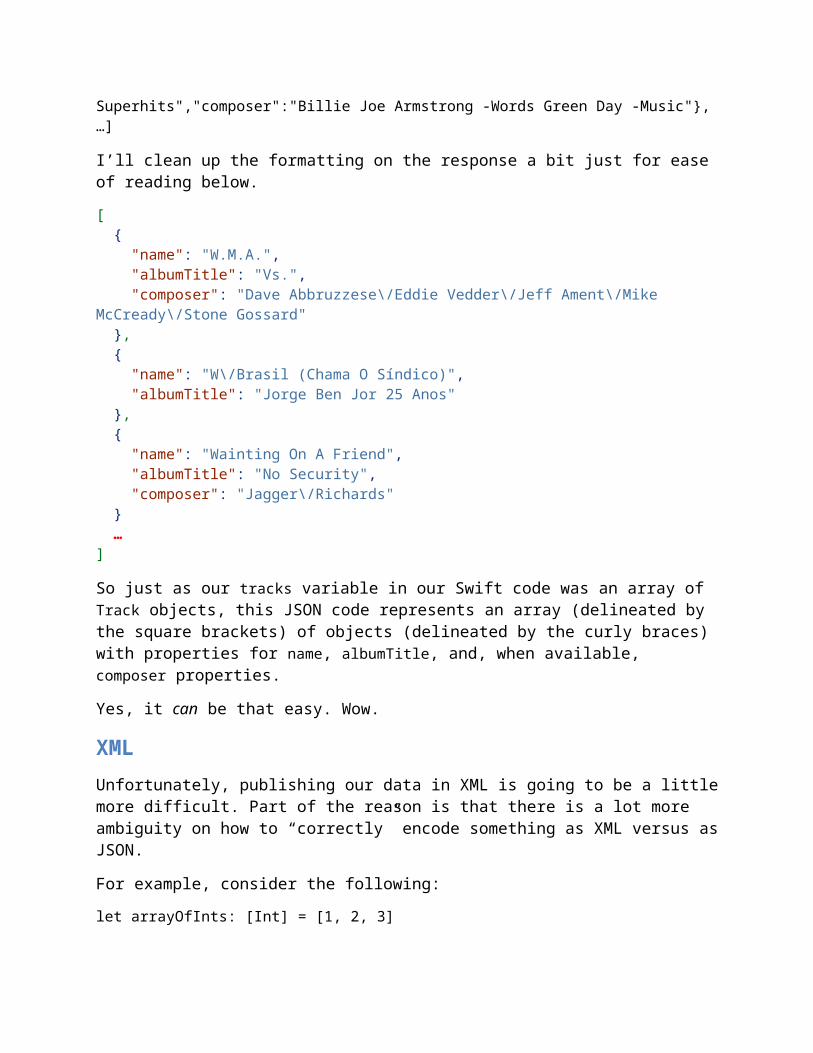
Example form
Now let’s say we enter “Kitura” in the “Search for” field, check the “Text” checkbox, and then click the “Submit” button. The browser will build a query which looks something like:
http://example.com/foo?searchQuery=Kitura&mediaType=text
See how the name attributes of the <input> elements were combined with the values entered or selected by the user to build the URL?
So what happens if we go back to our form and change the method attribute of the <form> to post?
<form method="post" action="/foo"> …
When this form is submitted via an HTTP POST query, the browser will not put the form values in the URL. That means, if this page appears at the URL “http://example.com/“, the user will just be sent to “http://example.com/foo” no matter what values they enter or select in the form. The browser will, however, still serialize the data and send it as the body of the HTML request. This point is important because it means that the URLs created via forms that submit via GET are “bookmarkable” in the sense that, after submitting the from, if you add the resulting page to your browser’s bookmarks/favorites/hotlist and then revisit it later, you will see the same results of your submission. You could also share the URL with friends or family via email or text message or the like and know that, when they click on the web address, they will see the same results page that you did. This handy property does not hold true for results pages reached by a form that submits via POST; again, for our example form above, no matter what the user selects, the address of the resulting page will always be “http://example.com/foo”.
So if forms submitted by GET have this handy “bookmarkable” property, why aren’t all forms submitted by GET? Well, there are a couple of reasons why we’d still want to use POST for some forms. For example, there may be cases where we don’t want to have the form values inside the URL; for example, for a form a user would use to log in to a site that would have a password field. We don’t want that sensitive password to be sticking around in a URL for anyone to see or get access to! Also, note that browsers have a finite limit to the length of a URL that it will support. The limit varies by browser, but just as a rule of
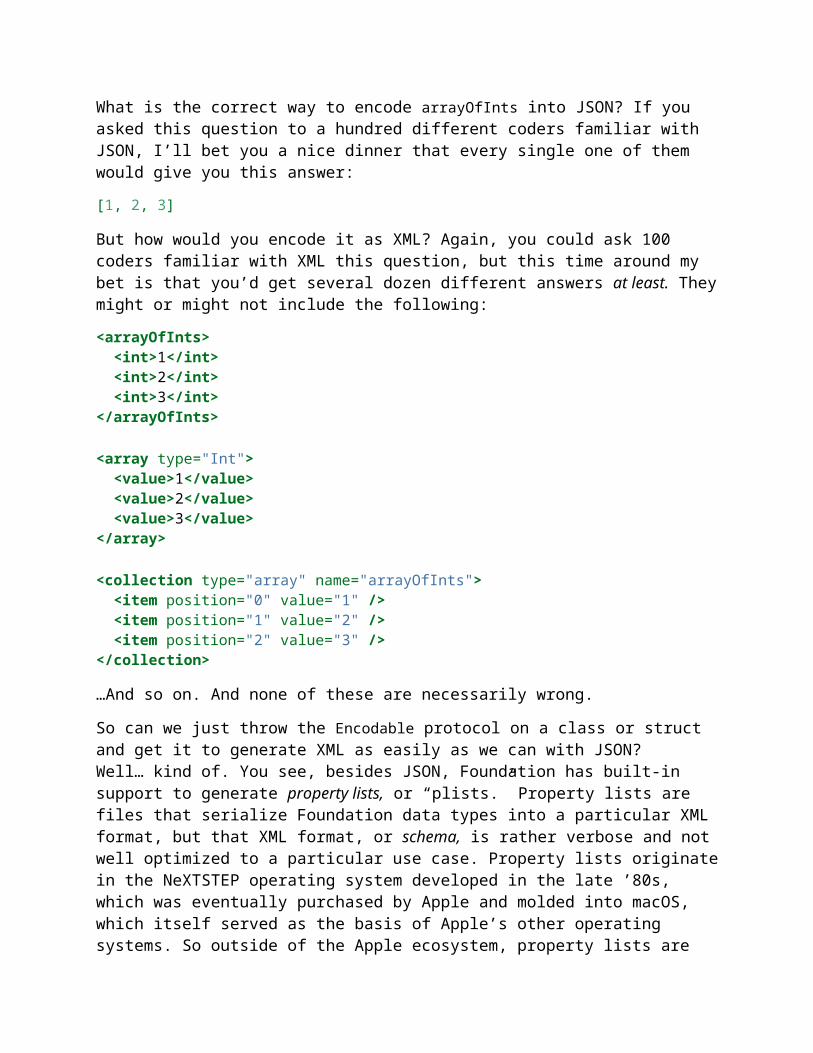
thumb, if there’s a chance someone could enter an arbitrarily large amount of data into your form - for example, if it has a <textarea> element for entering a large amount of text, a file upload field (an <input> tag with a type attribute of file), or just lots and lots of standard text fields - it’s best to have your form submit via POST rather than GET.
So when a POST request is done, as mentioned above, the form data is serialized into the body of a POST request to the server. There are two common methods by which this is done, and the method can be changed by setting an enctype value on the <form> tab. The default method used when an enctype is not present (as on our form above) is application/x-www-form-urlencoded, but the other common method is multipart/form-data. I won’t go into detail about how either of these work under the hood, but suffice it to say that if your form has a file upload field, you must set enctype to multipart/form-data. Otherwise, it’s safe to just let the browser use the default behavior by omitting the enctype attribute (which will cause it to use application/x-www-form-urlencoded by default).
So, to sum it up:
• <form method="get">– Will create a “bookmarkable” URL– Should not be used with <textarea> or <input type="file">– Should never be used on forms with fields for passwords or other sensitive
information– Should not be used on forms with many elements
• <form method="post">– Will not create a “bookmarkable” URL– Can be used with large forms or forms with <textarea> elements– Should be used with forms with field for passwords or other sensitive
information– Cannot be used with <input type="file">
• <form method="post" enctype="multipart/form-data">– As above, except can be used with <input type="file">
Handling GET SubmissionsAll right, let’s get to coding. Start a new Kitura project. (We’ve been playing with that Chinook database project for a while, so if you’ve forgotten how to start a new one, feel free to go back and take a peek at chapter 1.)
In your Package.swift, import Kitura and KituraStencil. Let’s start by creating a route at the base path which just shows a template.
import Kituraimport KituraStencil
let router = Router()

router.setDefault(templateEngine: StencilTemplateEngine())
router.get("/") { _, response, next in try response.render("index", context: [:]) next()}
Kitura.addHTTPServer(onPort: 8080, with: router)Kitura.run()
Create your Views directory and add an index.stencil which looks like the following. Part of it will look very familiar.
<!DOCTYPE html><html> <head> <title>Search Page</title> </head> <body> <form method="get" action="/search"> <label>Search for: <input type="text" name="searchQuery" /></label><br /> Media types:<br /> <label><input type="checkbox" name="mediaType" value="text" />Text</label><br /> <label><input type="checkbox" name="mediaType" value="audio" />Audio</label><br /> <label><input type="checkbox" name="mediaType" value="video" />Video</label><br /> <input type="submit" /> </form> </body></html>
Note that our form is going to submit via GET in this case.
We now want to build a route handler to handle the form submission. So how do we find those values? Well, I actually already mentioned how in this book, way back in chapter 2. Remember? You can find them in the queryParameters property of the RouterRequest object. Try adding this to your project.
router.get("/search") { request, response, next in guard let query = request.queryParameters["searchQuery"] else { response.send("Please enter a search term.") return } guard let mediaType = request.queryParameters["mediaType"] else { response.send("Please select at least one media type.") return } response.send("You searched for \(query) in the \(mediaType) type!

Here's some results.") next()}
Now load up the search form page and play around a bit.
You might notice a quirk if you select more than one of the “Media types” checkboxes. The resulting URL will look something like this:
http://localhost:8080/search?searchQuery=Kitura&mediaType=text&mediaType=audio
Note there are two values associated with the mediaType key. The text will look something like this:
You searched for Kitura in the text,audio type! Here's some results.
Yes, when there are more than one values for a key in a query, Kitura concatenates the values with a comma in order that they all fit into a single string. To work around this and get the individual values in these cases where there might be multiples, we need to split the value that Kitura gives us on the comma character. (I think this is silly - what happens if one of the values itself has a comma? - and have submitted a pull request to the Kitura project to rectify this. The pull request was accepted, but the changes have not yet appeared in a Kitura release as of this writing.) Let’s update our handler to deal with this.
router.get("/search") { request, response, next in guard let query = request.queryParameters["searchQuery"] else { response.send("Please enter a search term.") return } guard let mediaType = request.queryParameters["mediaType"] else { response.send("Please select at least one media type.") return } let separateMediaTypes = mediaType.split(separator: ",") for type in separateMediaTypes { response.send("Here are \(query) results in the \(type) media type.\n") } next()}
And the result:
Here are Kitura results in the text media type.Here are Kitura results in the audio media type.
That’s better.

Handling POST Submissions
POST Submissions with enctype="application/x-www-form-urlencoded"
For this sort of form, it would probably be best to keep it as a GET form, since it’s fairly simple and we don’t mind if the results page is bookmarkable. But we’ll turn it into a POST form just so we can see how they would work.
Now that you got this far, handling a POST submission done with the default application/x-www-form-urlencoded encoding is simple. Start by opening up your index.stencil and changing the method attribute of the <form> tag to post and save.
When we expect an HTTP request to have a body we want to deal with, we want to add an instance of the BodyParser class to the relevant route as middleware. After doing that, we can access that data in the body parameter of the RouterRequest object. That parameter is a instance of the ParsedBody enum which has cases and computed property corresponding to the type of content in the body. The one we’re interested in here is the asURLEncoded parameter which returns an optional [String: String] dictionary. No worries if this all sounds like word salad; it’s simpler than it sounds. Let’s go to the code.
router.post("/search", middleware: BodyParser())router.post("/search") { request, response, next in guard let postValues = request.body?.asURLEncoded else { response.send("That shouldn't have happened.") return } guard let query = postValues["searchQuery"] else { response.send("Please enter a search term.") return } guard let mediaType = postValues["mediaType"] else { response.send("Please select at least one media type.") return } let separateMediaTypes = mediaType.split(separator: ",") for type in separateMediaTypes { response.send("Here are \(query) results in the \(type) media type.\n") } next()}
So note in that first line where we instantiate the BodyParser class and add it to handle POST requests made to the “/search” path. Yes, this is the same path we used in the code to handle GET requests above. Remember from Chapter 2 that Kitura lets us define different handlers for the same route segregated by the HTTP request method; the code we wrote above to handle GET requests won’t run when a POST request is made to “/search”, and vice versa. Also recall that we can omit a path when defining middleware or other route

handlers, so what I often like to do is just have BodyParser kick into action on all POST requests, regardless of path, by doing:
router.post(middleware: BodyParser())
Though whether you’d like to take this approach is up to you. (If you ever try to write a POST handler and get confused why request.body is empty, odds are the problem is that you forgot to add this middleware. This has happened to me more times than I’d like to admit.)
Inside the standard request handler, we have:
guard let postValues = request.body?.asURLEncoded else {
Here’s another quirk of Swift, specifically with the handling of optionals. Going into all the quirks of Swift optionals is outside the scope of this book, but suffice it to say that it’s something which often confuses new Swift developers - it sure confused me! The short of it here is that both the body property and the asURLEncoded property of the body property are optionals. The question mark after the body part means that the Swift compiler will check to make sure that body itself is not nil before it attempts to resolve its asURLEncoded property; if body is nil, it just sends nil down the line to postValues rather than trying to continue. The short of the short of it is that postValues will be nil if either request.body or request.body.asURLEncoded are nil.
Note that, just as with queryParameters, in the case that there are multiple values for one key in the data, those values will be concatenated with commas, so we do the same splitting as we do in our GET submission code.
Go ahead and build your project and test it out. You should see that the behavior is exactly the same as it was when you were making GET requests, except that the path won’t have the query string.
POST Submisssions with enctype="multipart/form-data"
Okay, let’s round out the trifecta by seeing how we’d take a form submission with the multipart/form-data encoding. Let’s tweak our template again to add the enctype attribute, and change the action path to something else while we’re at it. We’ll also change the action path to something else.
<form method="post" action="/multipart" enctype="multipart/form-data"> <label>Search for: <input type="text" name="searchQuery" /></label><br /> Media types:<br /> <label><input type="checkbox" name="mediaType" value="text" />Text</label><br /> <label><input type="checkbox" name="mediaType" value="audio" />Audio</label><br /> <label><input type="checkbox" name="mediaType" value="video" />Video</label><br />

<label>A picture of something silly: <input type="file" name="sillyPicture" /></label><br /> <input type="submit" /> </form>
Now our router handler is going to be quite a bit different than the two cases above. We’re going to find our values in request.body?.asMultiPart, and it’s going to be an array of Part structs. Each struct will have a name property which corresponds to the name of our field in the HTML form, and a body property which contains the value the user entered as a ParsedBody enum. Most interesting for the case of file fields, there’s also a filename property which will contain the filename of an uploaded file (for other fields, it will be a blank String), and a type property which corresponds to the MIME type of the uploaded file. For example, if the file uploaded was a JPEG-formatted picture, it will be image/jpeg. (For non-file fields, this will be text/plain.)
So what we’ll do is loop through the parts and examine the name parameters to make sure all the parts we want can be found. We’ll use a switch case on the body parameters of the parts, which, recall, is a ParsedBody enum, even though (due to Swift quirkiness) we haven’t used it as one yet. You’ll see that this all makes the code quite a bit more verbose; another reason why you may wish to avoid using mutlipart/form-data-encoded forms when it’s not necessary (when there’s no file upload field).
router.post("/multipart", middleware: BodyParser())router.post("/multipart") { request, response, next in guard let postValues = request.body?.asMultiPart else { response.send("That was unexpected.") return } var mediaTypes: [String] = [] var searchQuery: String? var sillyPicture: Data? for part in postValues { switch part.body { case .text(let text): if part.name == "mediaType" { mediaTypes.append(text) } else if part.name == "searchQuery" { searchQuery = text } case .raw(let data): if part.name == "sillyPicture" { sillyPicture = data } default: response.send("Unexpected part type.") } } guard let _ = searchQuery else {

response.send("Please enter a search term.") return } guard mediaTypes.isEmpty == false else { response.send("Please select at least one media type.") return } guard let _ = sillyPicture else { response.send("Please upload a silly picture.") return } for type in mediaTypes { response.send("Here are \(searchQuery!) results in the \(type) media type.\n") } // Do something interesting with the sillyPicture here… next()}
Extra CreditWant an extra challenge? Now that you know how forms work, go back and open up your music database project from previous chapters and add a search page allowing users to search for albums, artists, and songs by name. This will involve using the form handling stuff introduced in this chapter plus the templating and Kuery stuff from earlier chapters, so it should be a good demonstration of all the fun stuff you’ve learned so far. Have fun!
Chapter 9: User Sessions and AuthenticationHTTP is a stateless protocol. That means that each HTTP transaction is (broadly speaking) made independently of any other transaction; the client (like a web browser) connects to a server and sends data to make a request; the server sends the response data in reply, then disconnects the client. If the client needs another resource from the server, it needs to reconnect to the server all over again. (This is not entirely true, but close enough for the purposes of this chapter.) This differs from protocols like IRC, where clients maintain a constant connection to the server as they trade data back and forth.
Now this statelessness works just fine when a server is just dumbly serving static files to people who request them, but sometimes we, as web application developers, want to be able to track a user across requests, so that we can ascertain that a certain request was made by the same client that made a request earlier. For example, if we have a resource we want to customize for and/or restrict to certain users, we may ask them to log in by submitting a username and password, which we can then authenticate - but then we also want them to be able to see these resources on later requests as well without having to log in each time.

In the very early days of the web, HTTP authentication was developed to solve this problem. With HTTP authentication, the server tells a connecting client that a certain resource requires authentication to access; the browser then prompts the user for credentials and sends them in the request headers in the next and subsequent requests to that server. This served the purpose, but wasn’t very flexible; for example, there was no way to add extra fields other than username and password fields to the form that the browser prompts the user with. Also, there wasn’t an elegant way to track a user across requests without having them do the authentication first, which is sometimes desirable.
To address this, HTTP cookies were developed. A cookie is a small bit of text which a server will send to a client and request that the client send the cookie back to the server on all future requests to the server. The cookie data may include instructions on how long the client should hold on and send the cookie data, and under what domain names and protocols it can be used.
Cookies can contain text-encoded data, but more frequently they contain a distinctly unique identifier key. Many web frameworks, including Kitura, can use these keys to store and restore sessions, which are basically collections of data relevant to the user that sent the key.
Kitura-SessionLet’s see this working in practice with Kitura-Session. Start a new project called SessionTest and use SPM to require Kitura and Kitura-Session.
To get sessions working in Kitura, we instantiate the Session middleware and add it to middleware to the routes we want to use it on; in the example below, I’m just going ahead and adding it to all routes, but you can be more particular and add it to only routes on which it will be used if you prefer. When we instantiate Session, we pass it a secret parameter which is a string used when generating the identifier in the cookie; to avoid cases where one user is able to guess another user’s cookie value, this should be a secret non-public string, and you should use a different one for each of your sites. Once the middleware is in place, incoming RouterRequest objects will have an optional session parameter which functions as a [String: Any] dictionary (it isn’t really, but it subscripts like one) into which we can stuff the data we want to persist across sessions.
Here’s some code to dump into your main.swift and play with. (Note that I’m cheating by putting HTML pages inline rather than properly using templates, but I think the code sample is easier to read this way.)
import Foundationimport Kituraimport KituraSession
// Instantiate a Session.// Note: Use a unique "secret" value on each of your projects/servers.let session = Session(secret: "I love Kitura!")

// Instantiate a Router and add our Session middleware for all requests.let router = Router()router.all(middleware: session)
// Add the BodyParser middleware for all POST requests.router.post(middleware: BodyParser())
router.get("/") { request, response, next in // Can we find a "name" value in the existing session data? // Remember that `request.session` is effectively a [String: Any] // dictionary, so we need to cast the "name" value to a String. if let name = request.session?["name"] as? String { // Name found, so let's say hello. let hello = """<!DOCTYPE html><html> <body> <h1>Hello, \(name)!</h1> </body></html>""" response.send(hello) } else { // Name not found, so prompt the user for their name. let logInForm = """<!DOCTYPE html><html> <body> <p>What is your name?</p> <form method="post" action="/submit"> <input type="text" name="name" /> <input type="submit" /> </form> </body></html>""" response.send(logInForm) } next()}
router.post("/submit") { request, response, next in // Extract the name from the submitted data. guard let body = request.body?.asURLEncoded, let name = body["name"] else { try response.status(.unprocessableEntity).end() return
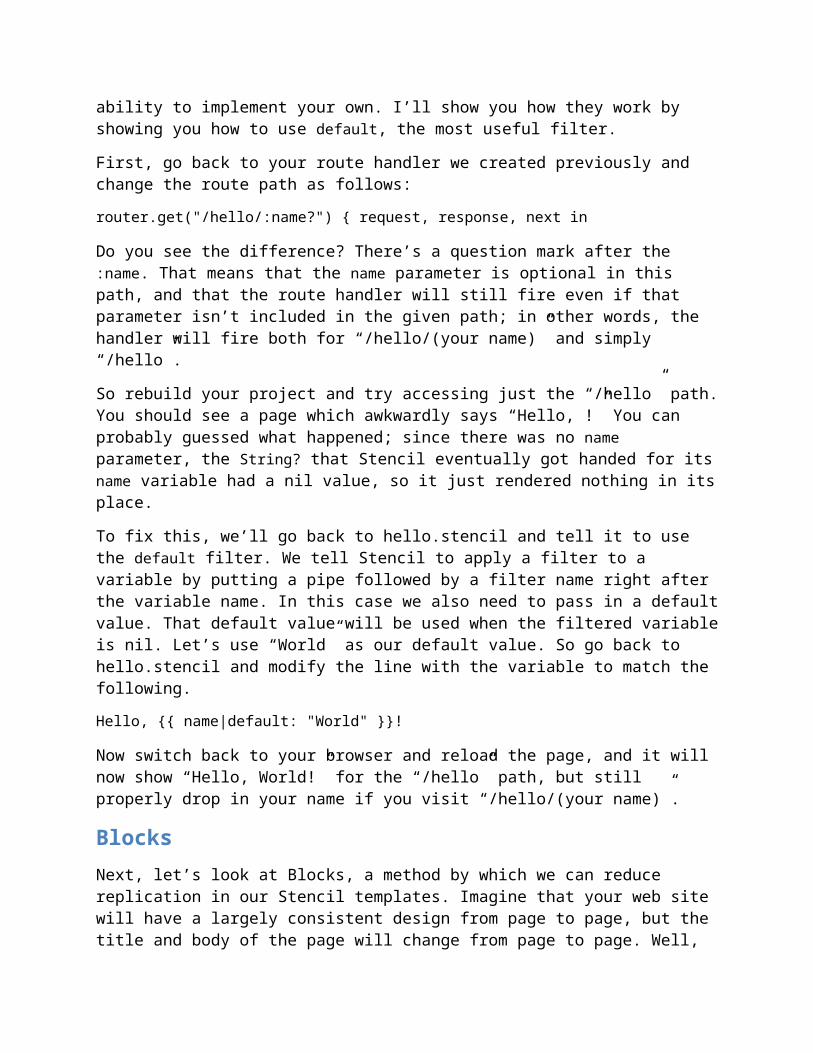
} // Save the name in the session data. request.session?["name"] = name // Redirect the user back to the front page. try response.redirect("/") next()}
Kitura.addHTTPServer(onPort: 8080, with: router)Kitura.run()
Fire up your favorite web browser and head to “http://localhost:8080/”. You’ll be prompted with a page asking your name. After submitting the form, you’ll be taken back to the “/” path, except instead of seeing the form you just submitted, you’ll be greeted by name - but note that the browser isn’t sending your name to the server in any way. That data was stored server-side in the session data.
What you probably didn’t notice is that, when Kitura sent the response for the “/submit” path, it sent a response header to your browser telling it to store a cookie. When the browser then requested the “/” path immediately after, it sent that cookie in its request. When Kitura-Session saw that cookie, it was able to restore the session data into request.session.
Now try reloading the browser page while it’s on the “/” path. The browser will once again send the cookie it has stored as part of the request, and Kitura-Session will again use it to restore the session, so you’ll once again see the “Hello” message rather than the name prompt form. But if you open up a separate web browser program (or, if you don’t have one, a new window using the private mode of your current browser) and request the “/” path, you’ll be prompted for your name again - cookies aren’t shared across browsers, so the server can’t use it to determine who you are.
So now you’re “logged in” in your main browser and will see the “Hello” message when you visit the “/” path. But what if you want to be anonymous again? We can destroy the session, which causes all the data saved for the session to be deleted and to not be recreated on future requests from the browser, even if the browser continues to send the cookie it has stored. To do this, we call the destroy method on request.session. This method takes a callback to handle a case where an error occurs during session destruction, though this is incredibly unlikely. Go back to your code editor and add the following.
router.get("/log-out") { request, response, next in // Destroy the session and redirect the user back to the front page request.session?.destroy { error in if let error = error { print("Session destruction failed: \(error.localizedDescription)") } } try response.redirect("/")

next()}
Then go back and add a link to our new route in the HTML sent in the “/” handler.
router.get("/") { request, response, next in // ... let hello = """<!DOCTYPE html><html> <body> <h1>Hello, \(name)!</h1> <p><a href="/log-out">Log out</a></p> </body></html>""" response.send(hello) // ...
Now restart your application and try things again in your browser. When you go to the “/” path, you’ll be prompted for your name. After entering it, you’ll see the “Hello” message, but now you’ll also see the “Log out” link. After clicking that, you’ll again be redirected to the front page, but this time you’ll be prompted for your name again.
More on Cookies
The HTTP cookie specification is a broadly-supported specification with lots of ins and outs, of which I won’t be covering in depth here. But if you’re unfamiliar with them, you may want to read up on them for future knowledge. The HTTP cookie Wikipedia article isn’t a bad place to start.
You can watch how cookies are sent back and forth using Curl. Use the -c flag to specify a “cookie jar” file to which cookie data sent from a server is stored; you can then use a -b flag to specify the same file, and data from that file will be used to determine what cookies to send to a server. You can, as we’ve done before, use the -i flag to show response headers from the server, but there’s no equivalent to show the request headers that Curl builds when it makes requests; instead, you’ll have to use the -v flag, which kicks off verbose mode and will show you both request and response headers as well as other data. As we have before, you can use the -d flag to specify data sent in the body of a POST request, and, finally, we can use the -L flag to have Curl automatically follow redirect headers sent from the server. Here’s an example of all that stuff in action; note the Set-Cookie headers sent from the server, and the Cookie headers sent by Curl in subsequent requests. In short, try the following lines in your terminal and see what the result looks like (I decided to forego pasting my own results for example’s sake as they are quite verbose).
$ curl -b /tmp/cookies.txt -c /tmp/cookies.txt -v http://localhost:8080/

$ curl -b /tmp/cookies.txt -c /tmp/cookies.txt -d "name=foobar" -L -v http://localhost:8080/submit
Kitura-Session Internals
So you see above how session data is stored by Kitura-Session between page requests. How exactly is this data stored? By default, it’s just stored in memory like any other variable in your program. This is quite fast, but there are a couple issues with this. For one, if you have a lot of sessions created for your users (lots of users “logged in”) and/or a lot of data stored in your sessions, the memory usage of your program can quickly balloon out of control. Secondly, if your web app stops or crashes, all of that session data is lost with it and all of your users will have to log in again.
To alleviate these issues, it’s possible to have Kitura-Session use an external storage system for session data. As I write this, there are currently integration plugins for Kuery (which in turn lets you use any database Kuery supports as a back-end) and the Redis NoSQL database system. Check out the “Plugins” section in the Kitura-Session documentation for links to these plugins. For simplicity, sake, I won’t be using one of them in the examples in this chapter, but you should definitely use one if you’re going to be writing a real web app.
Now while using one of these plugins will more permanently store the data you store in a session, it should be noted that it’s a best practice to not use a session’s data storage as a primary data storage location anyway. For example, after a user logs in to your site, you may load their name and email address from your site’s database and store it in a session for easy retrieval, but if they later change their name or email address, you should update the database with that new information and not only the session. After all, remember that that session will be destroyed when the user logs out - and all of the data stored in it will go with it.
Kitura-Credentials and AuthenticationSo by now you should have an idea of how you can use sessions to track a logged-in user between requests, and how they can log out. But what’s a good way to handle logging them in in the first place?
Well, please try to contain your shock as I tell you that the Kitura project has a solution for that in the form of a middleware package called Kitura-Credentials which provides a framework by which various plugins can implement various ways to authenticate users. There are plugins for allowing users to log in via their Facebook and GitHub accounts, among others, as well as plugins that handle authentication via local databases of usernames and passwords; you’ll find a list of existing plugins on the Kitura-Credentials repo page. It’s possible to use more than one plugin on your site; so, for example, you can allow users to log in to your site with their Facebook account, or to create a new account on your site and then log in with the username and password they used when creating an account. This sort of thing is generally a good idea because, despite what it may seem or what Mr. Zuckerburg would like, not everyone on the internet has a Facebook account, and those that do may not wish to grant your web site access to it.
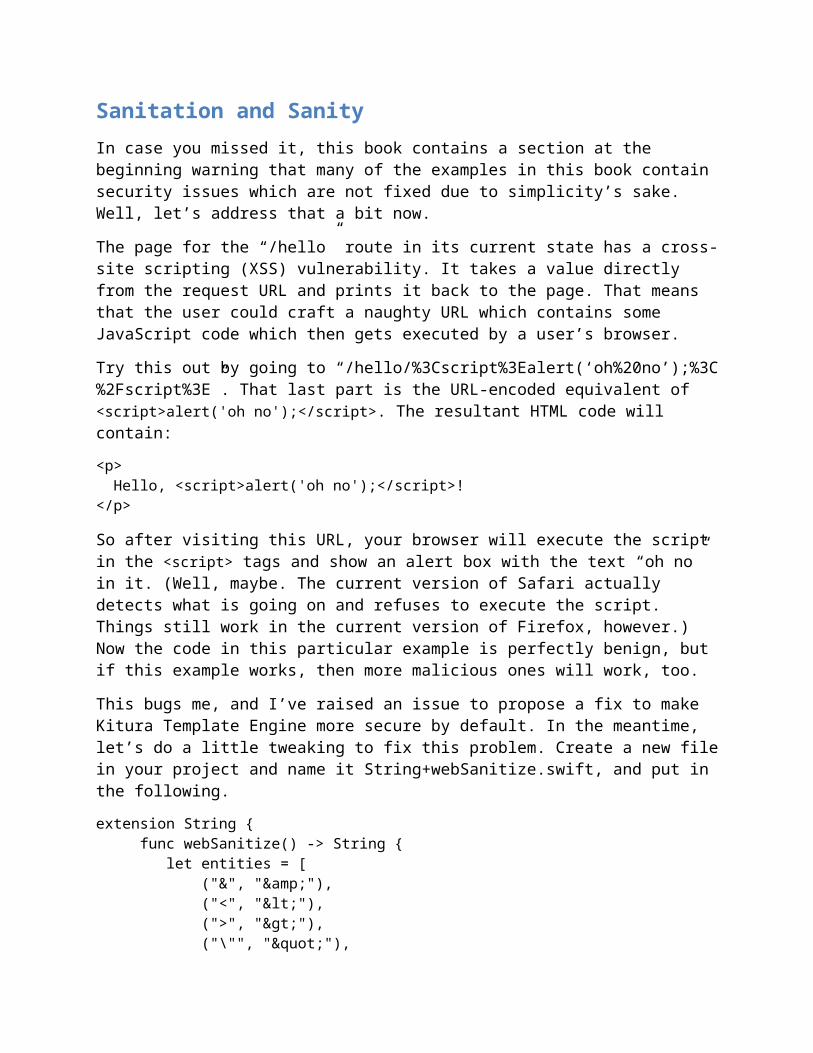
Originally I was planning to give a walkthrough of implementing Kitura-Credentials here, but since the method of implementing each method of authentication on your site can be quite different, there’s a good chance that any code I give you will be useless at best and confusion-inducing at worst. So instead I will speak of how Credentials works in general and then ask you to have a look at the instructions in the Git repos for the specific implementations you are interested in.
Implementing Kitura-Credentials should be quite familiar at this point. You instantiate Credentials; you instantiate the Credentials plugin; you register the latter as a plugin to the former; then you add the Credentials instance as middleware to the relevant paths.
Kitura-Credentials provides the UserProfile class. This is a class which contains many properties for a user’s display name, real name, email address, profile photos, and other arbitrary data. Kitura-Credentials plugins will instantiate one of these classes and pass it to your application when a user successfully authenticates, though of course not all of these properties will be populated in all cases. It will also handle storing the instance into the session storage and restoring it on future page loads from that user; you’ll find it in the userProfile property of the RouterRequest object that your route handlers will receive.
Using Kitura-Credentials may or may not actually be the best way to authenticate users for your site, given its circumstances. As with Kitura’s other pluggable middleware, you can write your own Kitura-Credentials plugin if the existing ones don’t match your needs - but you can use what you learned above with Kitura-Session to bypass it entirely. This may be desirable if you don’t want to be forced to use the (needlessly comprehensive, in my opinion) UserProfile class. Just remember that, if you’re storing user passwords locally, you need to securely hash those passwords!
Appendix: Cross-Platform Swift for Cocoa Developers: What to Learn (And Unlearn)This chapter addresses developers who have experience using Swift to write graphical macOS or iOS applications, but are new to Kitura or to the concept of writing cross-platform CLI applications in Swift in general. Our community is young, but it has swiftly developed (terrible pun partially intended) its own best practices which, generally due to Swift’s much higher focus on cross-platform compatibility compared to Objective-C, are often at odds with how experienced Cocoa developers do things. The changes you’ll need to make to ensure maximum compatibility of your code and minimum friction with the rest of the community may feel annoying and unnecessary, but all told, they’re really not that difficult.
Don’t start a new project with Xcode.To start a new cross-platform project, create a new directory, cd into that directory in a terminal window, then run swift package init --type=executable if you’re developing a Kitura site or swift package init --type=library if you’re developing

Kitura middleware. Then run swift package generate-xcodeproj to generate an Xcode project file you can then open in Xcode.
Among the files created by this process is a .gitignore file which stops various unnecessary files from making it into your Git repository (you will still manually have to initialize the repo with git init). If you plan to use Mercurial, Subversion, or some other version control system, please “port” this .gitignore file to the filename and format expected for that system.
After adding new packages with Swift Package Manager, you will need to re-generate your Xcode project file in order for the new code to be seen in Xcode.
Note that the Xcode project file is one of those excluded in .gitignore; if you are collaborating with others on this project, they will need to run the generate-xcodeproj command after cloning your project in order to get their own Xcode project file.
Use Swift Package Manager for package management.Experienced Cocoa developers are likely familiar with using CocoaPods or Carthage for package management. While these systems will probably still work for Kitura projects, you should learn and use Swift Package Manager instead. SPM is part of the Swift project itself, so any system with Swift installed also has SPM installed, with no further software installation necessary; inherent in this is that SPM will work on macOS, Linux, and whatever other operating systems Swift may get ported to in the future. Nice!
For a quick boot camp in using Swift Package Manager, check out the Swift Package Manager basics appendix in this book.
Most Cocoa libraries are not available.When coding for macOS or iOS, you have a lot of handy libraries available at your fingertips; GLKit, CloudKit, Metal, PDFKit, Core Image, Core Data, and so many more. And you can even use these libraries in your Kitura project if you wish. But by doing so, your app becomes unbuildable on Linux or other non-Apple systems.
Fortunately, Apple has thrown us a bone and ported three “core libraries” (at time of writing) for shipping with Swift, so these three are guaranteed to be on any system your Kitura project might run on. Those three libraries are:
• Foundation, which fills in a lot of holes of the Swift standard library with new object types and methods and such.
• Dispatch (Grand Central Dispatch), which makes writing multi-threaded code a relative breeze.
• XCTest, which can be used to implement unit testing.
And that’s it! You cannot expect any other Cocoa library to be present if you’re writing cross-platform code, so if you need some functionality another library provides, you’ll
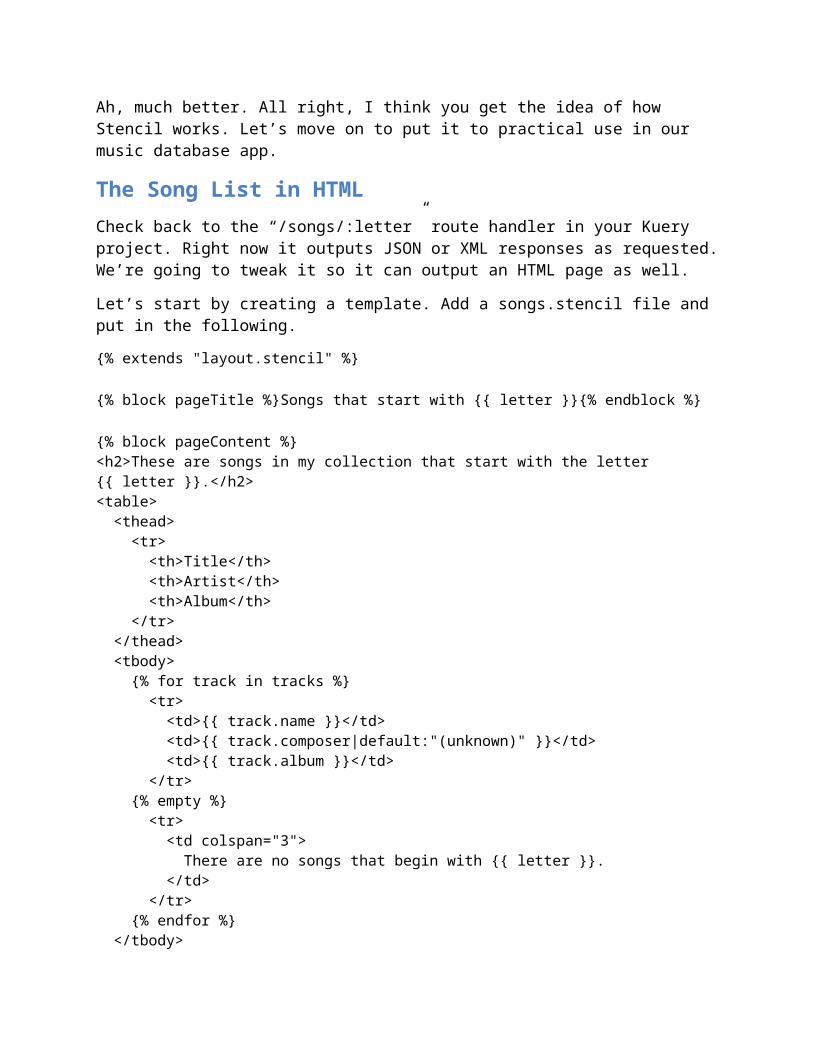
either have to find another library you can import using SPM or work around it some other way.
Even with those three libraries, there are some holes in functionality which have not yet been ported from the Cocoa library to the core library. For example, here’s a list of functionality missing or incomplete from the Foundation core library. Generally all the every-day stuff has been ported over, though.
Test on Linux.Aside from the issues with libraries above, it’s generally rare to run into cases where some bit of code that runs fine on your Mac will not build on Linux, but it’s not unheard of. Thus, I suggest you at least periodically test your code on an Ubuntu Linux system. (If you’re being disciplined about writing automated tests for your project - and you are, right? Right? - just running those tests and ensuring they all pass should suffice.)
If you don’t have a Linux machine handy, a virtual machine will do the job just fine; you can use the commercial Parallels Desktop or VMWare Fusion hypervisors, or Oracle’s open-source VirtualBox. If you’re not too afraid of the command line, I suggest you download and install Ubuntu Server instead of Ubuntu Desktop, then configure its SSH daemon to allow you to shell into the VM from macOS’s Terminal; the Server version of Ubuntu omits all of the graphical user elements present in the Desktop version, so your VM will need less RAM to run and will consume less disk space. (If you feel that your Mac is struggling to run even an Ubuntu Server VM, you may wish to consider getting a VPS account from one of the many server providers around the ‘net.)
Once you’re shelled in, you can find the surprisingly easy steps to install Swift on the Kitura site. (You can also find instructions on the official Swift site, but Kitura’s instructions will walk you through installing a couple more Linux system packages that Kitura will want to see.)
In the event that you encounter code that needs to be altered to run on Linux, you can use compiler control statements to make the relevant changes apply only when the code is compiled on Linux. For example, in my Kitura Language Negotiation project, I ran into a case where on Mac, the Foundation TextCheckingResult class has a method named rangeAt(_ idx), but the equivalent function on Linux’s Foundation is range(at: idx). (Why this discrepancy? I have no idea. This was back in the Swift 3 days, so it’s possible this discrepancy no longer exists in Swift 4.) So the project has the following bit of code to work around that transparently.
#if os(Linux) extension TextCheckingResult { /// Add the `rangeAt` method as a wrapper around the `range` method; the /// former is available on macOS, but the latter is available on Linux. func rangeAt(_ idx: Int) -> Foundation.NSRange { return self.range(at: idx)

} }#endif
See the Compiler Control Statements section in The Swift Programming Language for more examples of the statements available in Swift.
Appendix: Swift Package Manager BasicsFor those new to cross-platform Swift, using the Swift Package Manager (SPM) is often a major point of confusion - especially when something goes wrong. This appendix will attempt to teach you just enough about SPM to make it work for you without overloading you with minutiae and details.
Package ManagersWhat is a package manager? For the purpose of this book, it is a tool which helps us manage dependencies of a code project. A dependency is a bit of code, often (but not necessarily) written by someone else, that our project is going to leverage to do what it needs to do. In all of the examples of this book, Kitura is a dependency; in later chapters, other projects like the Kuery database integration tool and the Stencil templating engine are used, so those become dependencies as well. These dependencies in the form of bundles of code are called libraries; the term package is a more generalized term that applies to the code itself as well as the “wrapping” that makes it usable by a package manager, which is called a manifest in SPM. (More on manifests later.)
Technically we could “manage” these dependencies ourselves by just copying the files we need manually, or by using Git submodules. But package managers simplify this by doing a lot of the manual work for us, and also make it simpler to use a new version of a dependency with our code if one becomes available - or, alternatively, specify an older version of a dependency if the newest one “breaks” things.
If you are using Swift to write Cocoa applications, you may be familiar with CocoaPods or Carthage, two package managers in common use in that environment. However, both of those are not intended to run on platforms other than macOS; SPM, on the other hand, is built into Swift itself and runs on all platforms that Swift itself does.
SPM expects all dependencies to be stored in Git repositories, though your project itself does not need to be - at least not unless you want your project to itself be a package.
The Package.swift FileA project utilizing Swift Package Manager will need a file named Package.swift. This is what SPM uses as the manifest. Package.swift serves many purposes.
• It defines targets, or things the compiler can build. The examples in this book have all only had one target, and why you would need more than one is outside the scope of

this book; what you need to know for now is that different targets can have different dependencies.
• It defines the dependency packages; both paths to their Git repositories as well as information on what versions of those packages are needed.
• It defines the project itself as a package (regardless of whether you intend the project to be used as a dependency of something else).
Let’s start a new project and see all of these things in play. Create a directory named SPMTest and initialize a new project inside of it. You can do so by opening up a terminal prompt, moving to a nice path to put a new project, and then running:
mkdir SPMTestcd SPMTestswift package init --type=executable
That last command is itself a command directed at SPM telling it to start a new Swift project with boilerplate code. (All SPM commands will begin with swift package.) Among the files it creates is a basic Package.swift file which looks like the below:
// swift-tools-version:4.0// The swift-tools-version declares the minimum version of Swift required to build this package.
import PackageDescription
let package = Package( name: "SPMTest", dependencies: [ // Dependencies declare other packages that this package depends on. // .package(url: /* package url */, from: "1.0.0"), ], targets: [ // Targets are the basic building blocks of a package. A target can define a module or a test suite. // Targets can depend on other targets in this package, and on products in packages which this package depends on. .target( name: "SPMTest", dependencies: []), ])
So when SPM does stuff, it basically executes this code file, checks out what gets stored in package, a Package struct, and uses that data to figure out what it needs to do. You can see that it used the directory name to create a name for our package, as well as a target. In the array given to the dependencies parameter, dependencies are defined; for the other dependencies parameter in the target definition, we associate the dependency with the target.
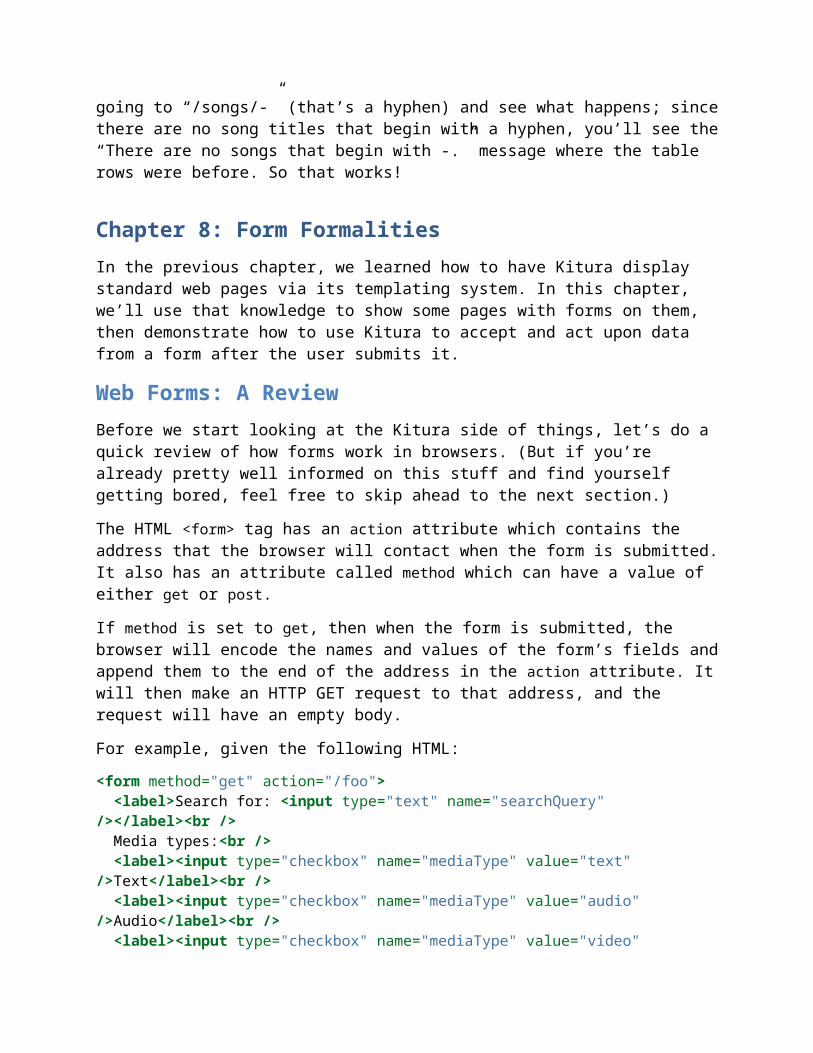
That might have been a bit confusing, so let’s try to clarify it. In SPM, a package can, in its Package.swift file, declare itself to be a library; a bit of code which is not intended to be an end product, but instead to be used in other end products. Kitura itself is a library. Let’s see what the Package.swift file in a bare-bones library looks like. Go back to your terminal window, cd up a level, and run the following:
mkdir SPMLibraryTestcd SPMLibraryTestswift package init --type=library
Note that instead of using --type=executable as we did with our previous example, we’re using --type=library when running swift package init.
The resulting Package.swift file will appear as follows:
// swift-tools-version:4.0// The swift-tools-version declares the minimum version of Swift required to build this package.
import PackageDescription
let package = Package( name: "SPMLibraryTest", products: [ // Products define the executables and libraries produced by a package, and make them visible to other packages. .library( name: "SPMLibraryTest", targets: ["SPMLibraryTest"]), ], dependencies: [ // Dependencies declare other packages that this package depends on. // .package(url: /* package url */, from: "1.0.0"), ], targets: [ // Targets are the basic building blocks of a package. A target can define a module or a test suite. // Targets can depend on other targets in this package, and on products in packages which this package depends on. .target( name: "SPMLibraryTest", dependencies: []), .testTarget( name: "SPMLibraryTestTests", dependencies: ["SPMLibraryTest"]), ])
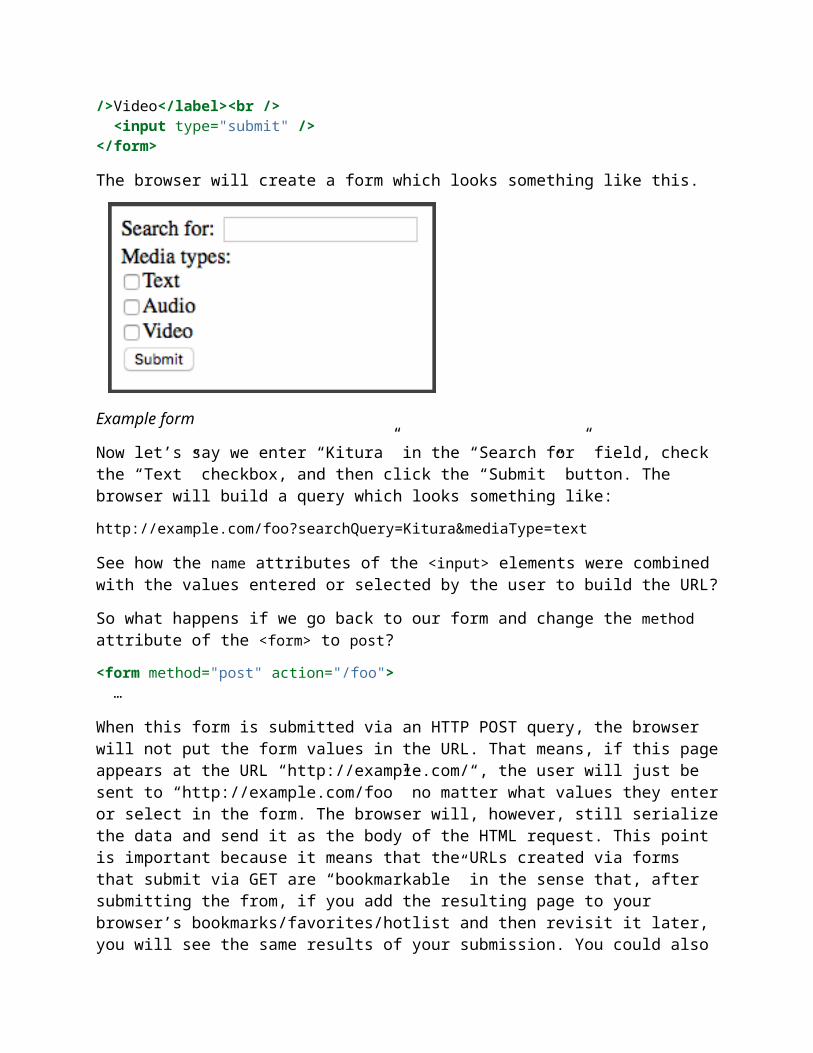
Well, it looks mostly similar to our previous example. The two biggest differences is that it automatically added a new target in the top-level targets array (which we’ll ignore for now), and there’s now a top-level products array. That .library bit is what defines the project as a library and gives it the name as defined in the following name parameter.
This is all very boring and you may be wondering where I’m going with this. I’m getting there, I promise. Your patience is appreciated.
Adding a Dependency to Your ProjectTo properly add a library as a dependency of your project, you need to know three pieces of information which you then need to express in your Package.swift file. They are:
1. The URL of a Git repository which contains the dependency.2. The desired version of the code you wish to add to your project. In most cases,
“version” is expressed as a tagged commit in the repository, and you may want to actually specify a minimum version; for example, “version 2.1.0 or later.”
3. The name of the library. This is separate from the URL of the repository or other associated names, as will be shown later.
Let’s say we want to create an app which interacts with an SQLite database (as we do in chapter 5). So we want to add the Swift-Kuery-SQLite library to our “SPMTest” project. Let’s go over this step-by-step.
1. First, check out the documentation for any special installation instructions. If the project is hosted on GitHub, as Swift-Kuery-SQLite is (and almost all other libraries you will use in the Kitura ecosystem will be), there may be special instructions on the front page of the repository. In this case there are special instructions on how to install SQLite to your system first.
2. Once those special instructions, if any, are satisfied, open up the Package.swift file for your project. In the dependencies section, copy the commented-out line that begins with // .package, paste it on a new line right afterwards, then uncomment it. Your resultant dependencies section should appear as:
dependencies: [ // Dependencies declare other packages that this package depends on. // .package(url: /* package url */, from: "1.0.0"), .package(url: /* package url */, from: "1.0.0"), ],
We will now “fill in the blanks” on our new line. 3. We need to get the URL to the Git repository itself. Fortunately, GitHub makes this very easy. We can just take the URL of the front page of the repository as hosted on GitHub and append “.git” to the end. So you can just copy the address of the Swift-Kuery-SQLite project on GitHub and paste it into the new line we just created in our Package.swift file, replacing the /* package url */ part and appending “.git”. We want this to be a string, so we’ll add double-quote characters to the beginning and end as well. The resulting line will appear as:

.package(url: "https://github.com/IBM-Swift/Swift-Kuery-SQLite.git", from: "1.0.0"),
4. Now we also want to tell SPM what version of Swift-Kuery-SQLite we want to use. Generally, the easiest way to do this is to click on the “releases” link on the GitHub repo page. This link can be a little bit easy to miss; here’s a screenshot highlighting where you can find it given GitHub’s current UI.
On the resultant page, find the top-most (most recent) release. It will be titled with a version number in a format similar to “1.2.3” - so three numbers separated by dots. Copy that version number, then go back to your code editor and paste that in place in the version number in the from parameter. In this case, as I write this, the most recent release of Swift-Kuery-SQLite really is “1.0.0,” so there’s nothing I need to change here, but there may be a newer release by the time you read this.
5. Finally, we want to add our new dependency to the dependencies array for our “SPMTest” target. But what do we add to that array? You might think we can just use the name of the repository, so “Swift-Kuery-SQLite” in this case, but I’m afraid it’s not that simple. To get the name of the library to put in here, we actually need to look at the Package.swift file for the corresponding library. Here’s what Swift-Kuery-SQLite’s Package.swift looks like - again, as I write this, anyway:
import PackageDescriptionlet package = Package( name: "SwiftKuerySQLite", products: [ .library( name: "SwiftKuerySQLite", targets: ["SwiftKuerySQLite"] ) ], dependencies: [ .package(url: "https://github.com/IBM-Swift/Swift-Kuery.git", from: "1.0.0"), ], targets: [ .target( name: "SwiftKuerySQLite", dependencies: ["SwiftKuery", "CSQLite"] ),
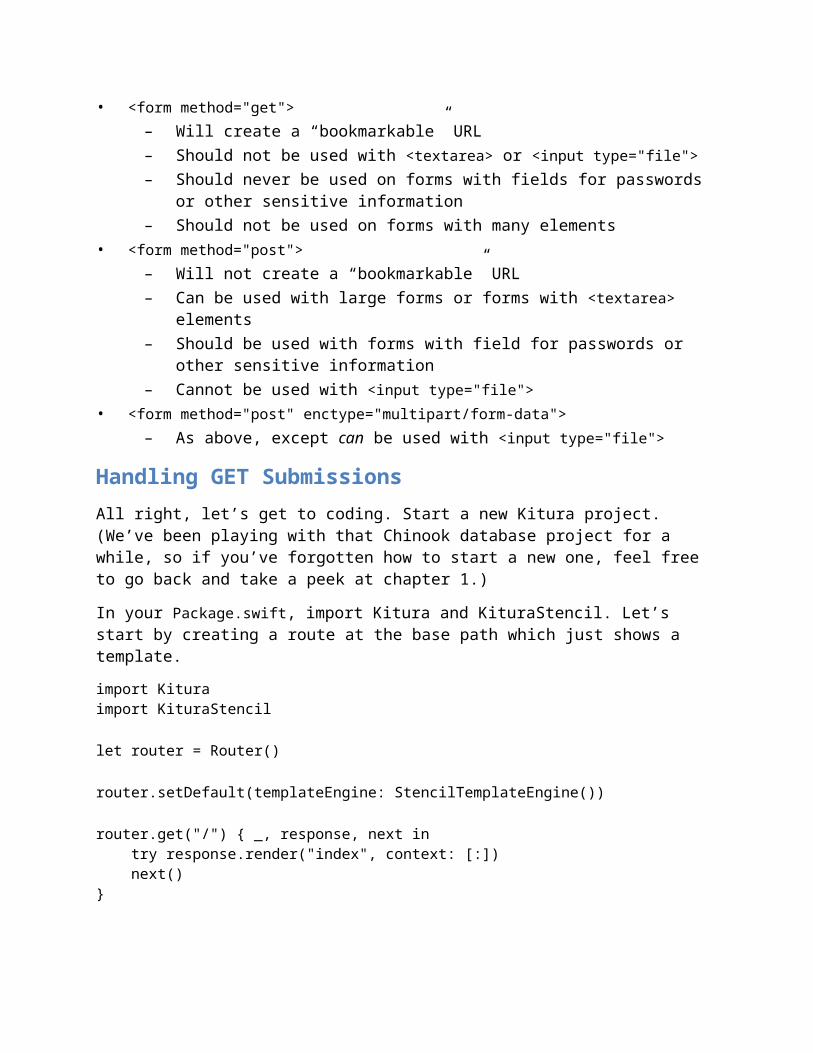
.target( name: "CSQLite", dependencies: [] ), .testTarget( name: "SwiftKuerySQLiteTests", dependencies: ["SwiftKuerySQLite"] ) ])
The specific relevant part for us is the products attribute:
products: [ .library( name: "SwiftKuerySQLite", targets: ["SwiftKuerySQLite"] ) ],
So that name part is what we want to put in the array. What a pain in the butt! Copy that, go back to your Package.swift file, and add it in the dependencies array of the SPMTest target. Again, don’t forget the double-quotes.
targets: [ // Targets are the basic building blocks of a package. A target can define a module or a test suite. // Targets can depend on other targets in this package, and on products in packages which this package depends on. .target( name: "SPMTest", dependencies: ["SwiftKuerySQLite"]), ]
All the above done, your final Package.swift file should appear similar to this (the version number may be different):
// swift-tools-version:4.0// The swift-tools-version declares the minimum version of Swift required to build this package.
import PackageDescription
let package = Package( name: "SPMTest", dependencies: [ // Dependencies declare other packages that this package depends on. // .package(url: /* package url */, from: "1.0.0"), .package(url: "https://github.com/IBM-Swift/Swift-Kuery-SQLite.git", from: "1.0.0"),

], targets: [ // Targets are the basic building blocks of a package. A target can define a module or a test suite. // Targets can depend on other targets in this package, and on products in packages which this package depends on. .target( name: "SPMTest", dependencies: ["SwiftKuerySQLite"]), ])
Now go back to your terminal window and run swift package resolve. This tells SPM to attempt to fetch your dependencies and copy them to your project. Your console should have output which looks something like:
Fetching https://github.com/IBM-Swift/Swift-Kuery-SQLite.gitFetching https://github.com/IBM-Swift/Swift-Kuery.gitCloning https://github.com/IBM-Swift/Swift-Kuery.gitResolving https://github.com/IBM-Swift/Swift-Kuery.git at 1.3.0Cloning https://github.com/IBM-Swift/Swift-Kuery-SQLite.gitResolving https://github.com/IBM-Swift/Swift-Kuery-SQLite.git at 1.0.0
Again, the version numbers might be slightly different.
But wait… Where did that Swift-Kuery bit come from? We didn’t add Swift-Kuery to our Package.swift project; just Swift-Kuery-SQLite. Well, our dependencies can, and often do, have their own dependencies. Go back up and check out the Package.swift file for Swift-Kuery-SQLite; you’ll notice it specifies Swift-Kuery as a dependency. So when the swift package resolve command downloads our dependencies, it also checks to see if any of those dependencies have their own dependencies, and so on. This entire structure of dependencies is called the dependency tree.
If you check out your SPMTest directory, you might be surprised to see that nothing appears to have changed about it. Where did SPM put the stuff it just downloaded? SPM actually creates an “invisible” subdirectory called “.build” where it stores the code it downloads, among other things. Feel free to look around in there, but be careful that you can “confuse” SPM if you change anything in there manually.
Specifying Versions
Before we continue, let’s do a quick overview of semantic versioning.
Semantinc versioning, or semver, is a standard method of assigning version numbers to software that SPM packages are assumed to follow. Each “version number“ consists of three separate numbers separated by periods, such as “1.2.3”. The first number is the major version; the second, the minor version; the third, the patch number. For new releases which only fix bugs from previous releases, the patch number should be incremented; for releases which may introduce new features, but only in a way that won’t break compatibility with software that integrated with previous versions, the minor version is incremented; for
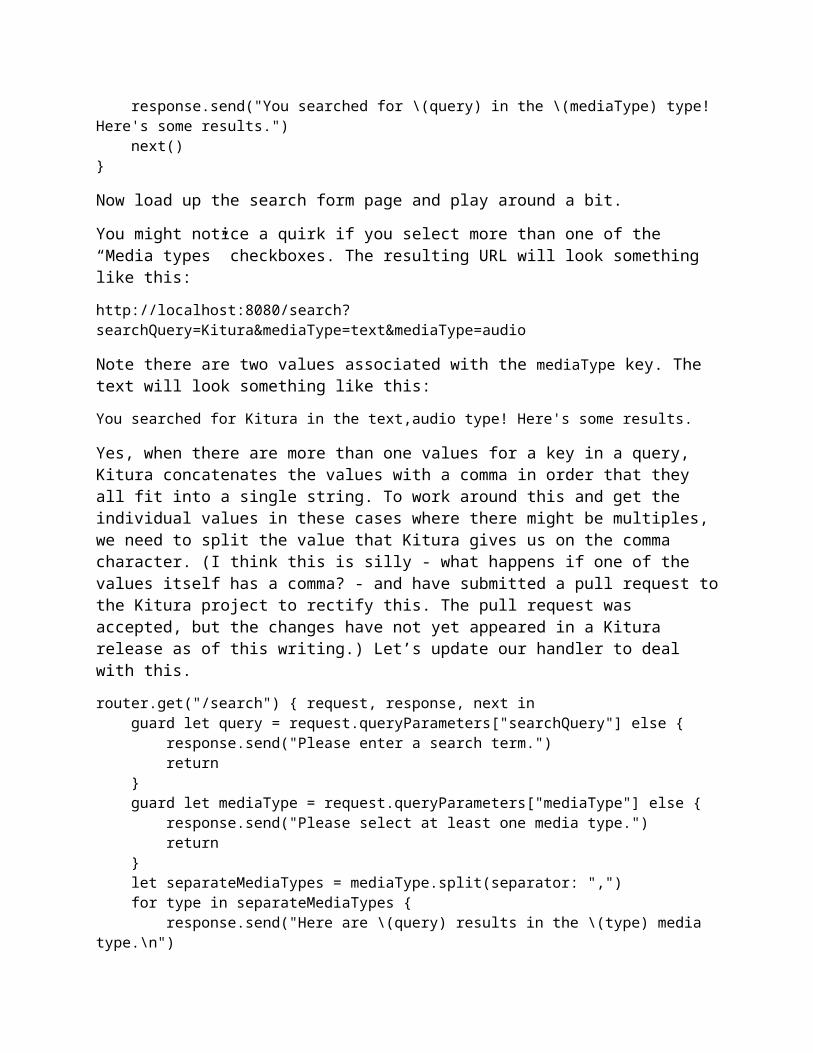
releases which have major changes which break compatibility with software that integrated with previous versions, the major version is incremented.
What this means is that if your software is using a package at version 1.2.3 and a new 1.2.4 release comes out, you can assume that the new release will be functionally equivalent, but fixes at least one bug that exists in the 1.2.3 release. If a new 1.3.0 release comes out, you can assume that the release has at least one new feature that you may want to take advantage of, but you can safely update the package and assume that all previous functionality will continue working as it used to without you having to change any of your code to integrate with it (if that assumption ends up being false, that in itself is a bug). If you see a new 2.0.0 release, you can assume that that release will have major changes and compatibility with the integration between this package and your own code is not guaranteed; you quite likely will have to rewrite parts of your code.
Okay, back to SPM. Let’s look at the line where we added the Swift-Kuery-SQLite dependency one more time.
.package(url: "https://github.com/IBM-Swift/Swift-Kuery-SQLite.git", from: "1.0.0"),
Note the second parameter, the from parameter. What this is saying is that you want to use the newest available release in this repository starting from and including the “1.0.0” release up to, but not including, the “2.0.0” release. So if and when a release with a version number of “1.0.1” becomes available, swift package resolve will fetch that version without any change in the Package.swift file necessary - and same with “1.0.2” and “1.1.0” and “1.5.7” and so on. However, since it’s presumed that a “2.0.0” release will have changes so major that it’s possible your project will severely break if that release is used.
There’s a couple other options we can use in place of the “from” parameter. Consider the following:
.package(url: "https://github.com/IBM-Swift/Swift-Kuery-SQLite.git", .exact("1.0.0")),
This tells SPM that you only want to use the “1.0.0” release. So no matter what new releases may become available - whether “1.0.1” or “1.1.0” or “2.0.0” - SPM will not fetch that new release. This can be useful if you know that a new minor release of a dependency is going to break your project. Similarly, you can use .revision() to identify an exact Git commit which you want the dependency checked out to, as below; this can be useful if the desired commit does not have an associated release tag.
.package(url: "https://github.com/IBM-Swift/Swift-Kuery-SQLite.git", .revision("2b65669e24b661787ffdb5c9a5019d7f19e2e8b9")),
Finally, you can use .branch() to tell SPM to check out the most recent commit (which will not always be the most recent release) in the given branch, as follows.
.package(url: "https://github.com/IBM-Swift/Swift-Kuery-SQLite.git", .branch("MyExperimentalBranch")),

This can be useful if you’re developing the dependency yourself, as in the case of middleware, and you want SPM to just always fetch the most recent available code in that dependency for you to test against.
There are actually other sorts of parameters you can use here, but these are the most common and useful ones.
Other Stuff SPM Can Do
Start a New Project
It was covered above, but just to clarify; you should use SPM to start a new cross-platform Swift project. Don’t do it via Xcode, as you may be used to if you’ve previously written Cocoa applications. (See the Cross-Platform Swift for Cocoa Developers chapter for more.) Use swift pacakge init --type=executable to start a new standard application, or swift package init --type=library to start a new library.
Generate an Xcode Project File
If you’re using a Mac, you’ll probably want to use Xcode for your code editor. swift package init will not create an Xcode project file for you, and creating one “manually” via Xcode will be messy. Instead, simply run swift package generate-xcodeproj and a new Xcode project file will be created for you. You’ll also want to do this whenever you add or update dependencies using swift package resolve to make sure Xcode can “see” the newest code.
Note that if you clone someone else’s cross-platform Swift project, customarily the repository will not include an Xcode project file (the .gitignore file swift package init creates for you actually blocks Xcode project files from being added to the repository). But you can use swift package generate-xcodeproj on others’ projects too to get a useful Xcode project file out of it.
Note that the Xcode project file’s name will be based on the name of the directory you run the generate-xcodeproj command in; so, for example, if you run the command in our SPMTest project directory, the Xcode project file name will be “SPMTest.xcodeproj”. However, for some reason (not sure if it’s a bug or something even weirder), if the directory name contains a space, the Xcode project file will not be usable; Xcode will tell you that a bunch of stuff is missing and such. Fortunately, there’s an easy fix here; use the --output option on the generate-xcodeproj command to manually specify a filename for the Xcode project which does not contain a space. For example, I have a project in a directory called “Midnight Post”. To generate a usable Xcode project file for this project, I have to use the command swift package generate-xcodeproj --output=MidnightPost.xcodeproj so that the filename of the Xcode project file does not contain a space.

Get Some Possibly Useful Information
swift package describe will have SPM parse your Package.swift file and tell you what it “sees” there. This may be useful if you think SPM is not parsing something in your Package.swift file as it should be.
swift package show-dependencies will generate the dependency tree for your project and print it out. This can be useful if you can’t figure out how a certain dependency, or a certain version of a dependency, got added to your project.
And More!
If you want to go further into SPM’s functionality, check out its documentation on GitHub. Specifically, the documentation for the PackageDescription API, which covers what you’ll find in the Package.swift file, is particularly useful.
TroubleshootingIf something goes wrong when you run swift package resolve, the following tips should help you find the issue.
• Check that all of the paths to Git repositories in your Package.swift file end with .git; for example, https://github.com/IBM-Swift/Kitura.git instead of https://github.com/IBM-Swift/Kitura. If you try to access the latter as a Git repository, GitHub’s servers will dutifully represent it as a Git repository and let you get away with it - but then if some other project in your dependency tree depends on the same repository and its Package.swift does include the path with .git, SPM might get confused and think it’s looking at two separate packages.
• Try narrowing down which line in your dependencies array is “broken” by commenting them out one by one and running swift package resolve after each. Once swift package resolve works, the problem probably lies with the last line you commented out.
• Ensure that the release number you are trying to reference actually exists. Sometimes people copy-and-paste a line in the dependencies array and change the repo URL, but forget to change the release part and end up referencing releases that don’t exist.
• Using Xcode and not seeing the dependency you added appear in your Xcode project? Remember that you have to re-run swift package generate-xcodeproj whenever you add or update a dependency. If you do see the dependency in Xcode but Xcode still shows you an error about the module not being available, try building your project anyway - it might just work. Xcode sometimes gets confused about what code it actually has available for compilation.
• If a dependency is not being added to your project when you run swift package resolve, check that you not only added the path and version information under the top-level dependencies parameter but also added the library name to the dependencies array in the target definition.
• The Delete Freakin’ Everything approach: If at any time you think SPM might be confused about its own state, swift package reset; rm Package.resolved;

swift package resolve will delete everything SPM has checked out so far and what tags/releases/commits it thinks it needs to check out based on the Package.swift file. It will then re-parse the Package.swift file and try again.
Appendix: Using MySQL with KueryWhat follows was originally part of the standard Kuery chapter of the book before I decided to rewrite it to use SQLite instead of MySQL, as the former is much simpler than the latter. It covers getting Kuery and MySQL to talk to each other. I include it for the benefit of those already familiar with MySQL who would prefer to continue using it rather than using SQLite. If that doesn’t sound like you, I strongly suggest sticking with using SQLite as outlined in the original chapter, as it’s generally much simpler to work with.
Building Projects with KueryStart a new project and add SwiftKueryMySQL to it via Swift Package Manager. This is going to be the first project in the book which uses code which isn’t itself entirely written in Swift, so things are going to get tricky.
On macOS
First, if you are on a Mac and prefer to use MacPorts rather than Homebrew, you will need to take a step to help the compiler find your MySQL header files. Create the directory /opt/local/include and symlink the mysql directory from under /opt/local/include under it. The precise path of that directory will depend on which variant of MySQL you installed; for example, I installed version 10 of the MariaDB fork of MySQL, so I had to run ln -s /opt/local/include/mariadb-10.0/mysql/ /opt/local/include/.
Don’t worry about any other code for now; try to build your project from the CLI with swift build as is. (Don’t use Xcode for building yet, Mac users.) It will fail with an error which includes something like this:
ld: library not found for -lmysqlclient for architecture x86_64<unknown>:0: error: link command failed with exit code 1 (use -v to see invocation)
Aside from the header files, we also need to tell Kuery where to find the MySQL libraries themselves. If you are using Homebrew, this directory will always be /usr/local/lib. If you’re using MacPorts, the path will again vary depending on which type and version of MySQL you installed; it should be the same path you had to symlink as above, but with include swapped for lib; so /opt/local/lib/mariadb-10.0/mysql in my case. At any rate, now that you have this path, here’s how you pass them to the Swift compiler so your project builds:
swift build -Xlinker -L[the path found above]
So, for Homebrew users:

swift build -Xlinker -L/usr/local/lib
And for me, with my mariadb-10 variant of MySQL:
swift build -Xlinker -L/opt/local/lib/mariadb-10.0/mysql
What a pain! Fortunately, there’s a couple things you can do to make things easier. First, if you are using Xcode, you can pass those extra flags to swift package generate-xcodeproj too, and it will automatically add the magic pixie dust to the generated Xcode project so that it builds just by hitting that “Build” button. (If you generate an Xcode project with the extra flags omitted, your project will fail to build just as it will on the CLI.) So in my case, I do the following:
swift package generate-xcodeproj -Xlinker -L/opt/local/lib/mariadb-10.0/mysql
Just remember to include those flags when you generate a new Xcode project, for example after adding new packages.
If you still prefer to build from the CLI, you can create a shell script that includes all that junk in it and then just invoke that script instead of swift build:
echo "swift build -Xlinker -L/opt/local/lib/mariadb-10/mysql" > build.shchmod +x build.sh./build.sh
On Linux
Congratulations, Linux fans; life is easier for you in this case. Just install the libmysqlclient-dev package (you’ll need to install this in addition to the actual MySQL server), and the Swift toolchain will know where to find the libraries. swift build is still all you need.
Importing DataNow that we can build a project that includes Swift-Kuery-MySQL, start up your MySQL server and connect to it with either the mysql command line tool or a graphical database manager of some sort. Take note of whatever credentials and network hostnames and ports and so on you need to use, because we’re going to put them in our code later.
Let’s populate our database with some data we can work with in this and later chapters. For this purpose, we’re going to use the Chinook Database, a database populated with music and movie information originally sourced from an iTunes playlist. Clone the repository to your development machine. (Don’t make it a dependency of a Kitura project; just clone the repository by itself.)
The repository contains SQL dumps for various SQL systems in the ChinookDatabase/DataSources directory. Create a new database and import the Chinook_MySql.sql dump. Once you’ve got all the data imported, feel free to poke

around and familiarize yourself with what the schema of the tables look like and what sort of data is in them.
Once you’ve done that, let’s see about connecting to our database from Kuery.
Back to Kitura (Finally!)Now let’s connect to our MySQL server from our code. We are going to instantiate a MySQLConnection object. The init() function for this class has a lot of parameters, but they are all optional. Let’s see its signature:
public required init(host: String? = nil, user: String? = nil, password: String? = nil, database: String? = nil, port: Int? = nil, unixSocket: String? = nil, clientFlag: UInt = 0, characterSet: String? = nil, reconnect: Bool = true)
But here’s the thing; when instantiating, you should only pass the parameters necessary. In my case, my MySQL server is locally installed, and I want to connect with the standard root user, for whom I have not configured a password (I would never do such a stupid thing on a public server, and neither will you, right?). Also, I imported my data into a database called Chinook. So my instantiation looks like this:
let cxn = MySQLConnection(user: "root", database: "Chinook")
Now perhaps you’ve created a new user to connect to the database, and you’re hosting your MySQL instance on the non-standard port 63306 locally. Your instantiation might look like this:
let cxn = MySQLConnection(user: "chinookuser", password: "swordfish", database: "Chinook", port: 63306)
You get the idea. At any rate, in the following code, don’t forget to swap out my instantiation code with what is necessary for your server.
Now go back to your project, delete what’s in main.swift, and add the following. (Note we’re not instantiating an instance of Kitura yet.)
import SwiftKueryimport SwiftKueryMySQLimport Foundation
// Don't forget to change this!let cxn = MySQLConnection(user: "root", database: "Chinook")
cxn.connect() { error in if error != nil { print("Error connecting to database.") exit(1) } else { print("Success!")

}}
Did you see the “Success!” message? If not, tweak your MySQLConnection() call until your parameters are right - we’re not going to have much fun moving forward if things aren’t working so far.
There you areOkay, that’s it for the MySQL stuff. Go ahead and go back to the original chapter and start from the “Selecting data” section; the rest of the code should work just fine for you, so long as you remember to substitute import SwiftKueryMySQL for import SwiftKuerySQLite and MySQLConnection() for SQLiteConnection().